Page 50 of 69
Posted: Sun Jan 31, 2010 1:46 pm
by Harko
Apart from Scottys pic pn the previous page ,Page 44 was the last page I put any concepts that are photoshopped .
So your OK Tim

most of it is real

I know I cant believe it myself

Posted: Sun Jan 31, 2010 7:45 pm
by Harko
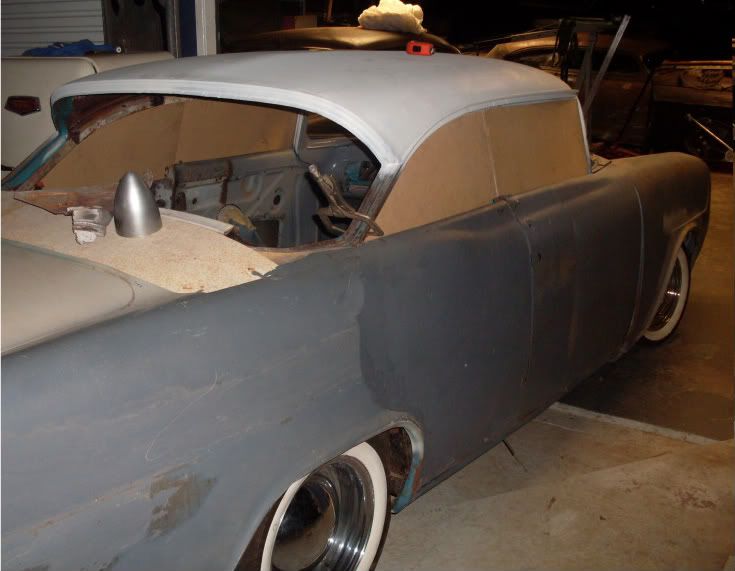
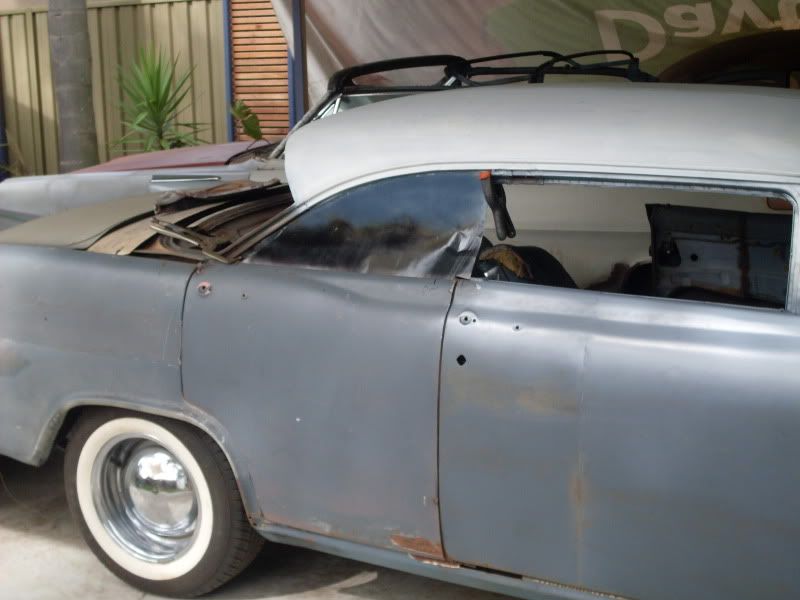
Heres some pictures for those who couldnt quite grasp how the window needs to roll .
Up position
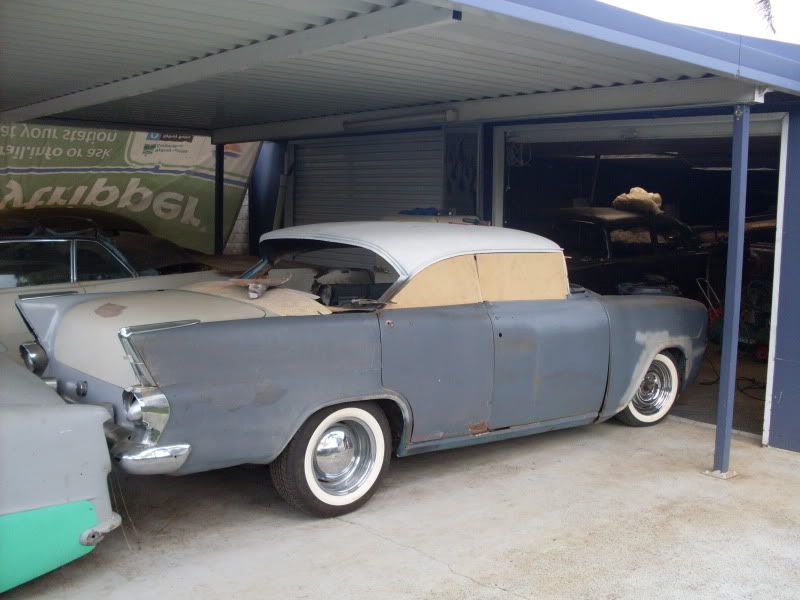
Heres the veiw as it drops but take away the quarter panel and the area needed becomes more apparent
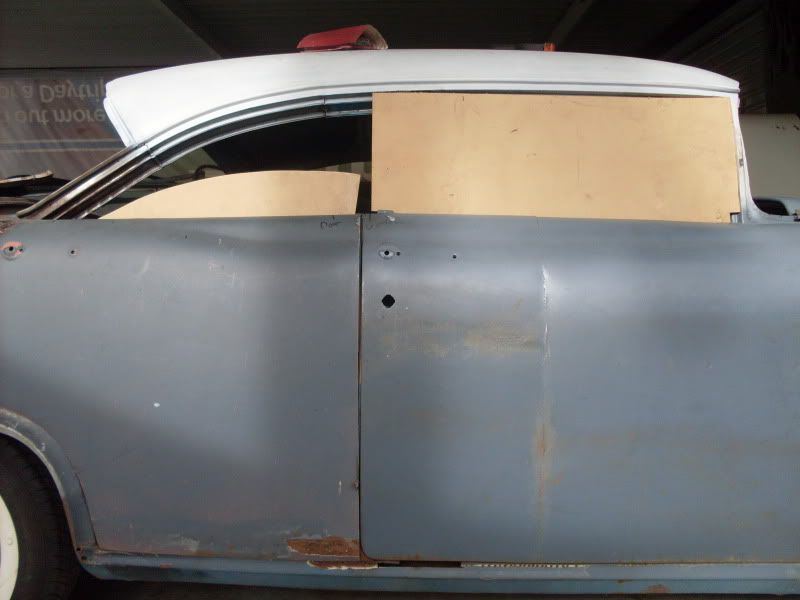
The window cant drop vertically due to the wheel arch
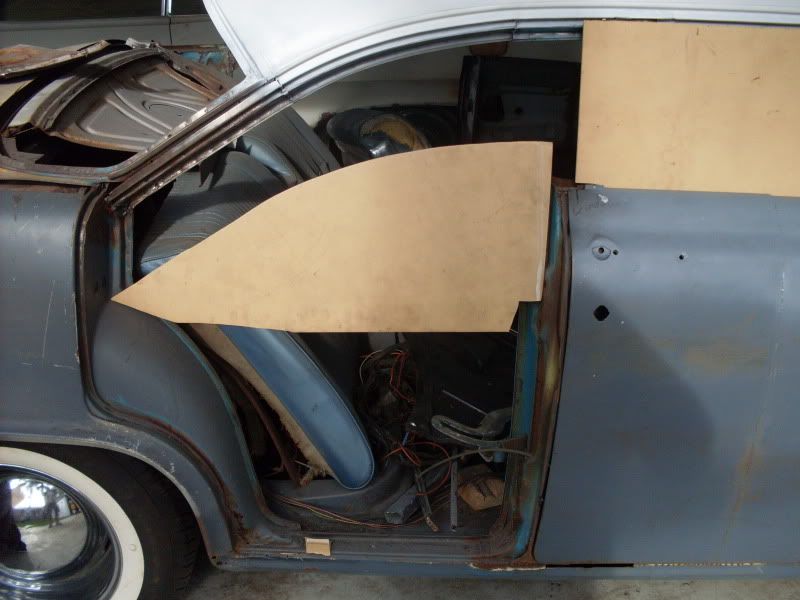
It will have to move to the rear into a cavity that needs to be created and the front will drop
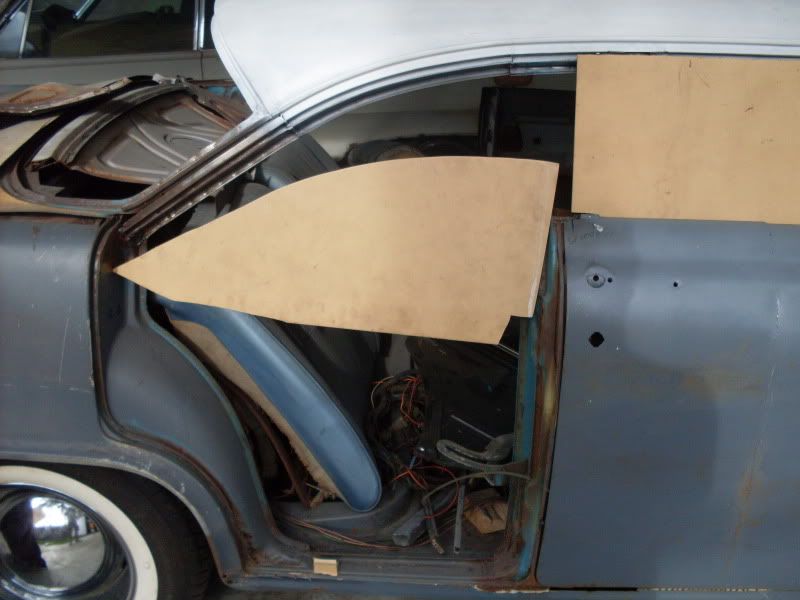
The window winder panels I have seem around 200mm too long so heaps of thought and no mistakes would be good

Posted: Sun Jan 31, 2010 9:51 pm
by element5au
Maybe add the triangle bit back in that you removed when you moved the rear roof forward

Posted: Sun Jan 31, 2010 9:59 pm
by oldnek
Harko,
You could add a slight infill to the rear corner of the back window. This will allow you to have the rear glass smaller than what you cut the card out from.

Then fab window reg runners at a slope, as in the orange line and pivot from position A and fan down off the rear B.
Then the rear window will drop down a little then pivot off to lowering position, without the worry of the rear wheel arch issue.
Try a few profiles to see if it works.
John
Posted: Sun Jan 31, 2010 10:19 pm
by Harko
Posted: Mon Feb 01, 2010 12:43 am
by minifb
Tek screw them shut..hehhehehe Oh thats why i cant build cars.......
Posted: Mon Feb 01, 2010 4:20 pm
by mrs ratbox
Posted: Mon Feb 01, 2010 9:22 pm
by oldnek
Yes there is..
Sikaflex sticks to your finger and shirt.
Tek Screws aren't a good feeling through the fingers
and 100mph tape good for ear muffing and keeping your eyes protected but you can't see anything.


HeyHarko
Posted: Sun Feb 07, 2010 12:15 am
by Woodie
Mate the cars really taking shape now. love it. been away for quite awhile now but nice to come back and see ya cars really taking shape mate. good luck. look forward to seeing the end result. cheers
Posted: Sun Feb 07, 2010 1:35 am
by Harko
Thanx mate , Its a big difference having some time to play again .
The plan for the rest of the car is all laid out ahead of me now so its just a matter of how long it will take to finish it ..
Posted: Tue Feb 09, 2010 9:06 pm
by Harko
Posted: Tue Feb 09, 2010 9:12 pm
by Mick Jagger
Yeah yeah yeah,phuckin yeah old skoll
Posted: Tue Feb 09, 2010 9:21 pm
by FB MAD
Posted: Tue Feb 09, 2010 9:41 pm
by Finny
Posted: Tue Feb 09, 2010 10:00 pm
by Devilrod
 most of it is real


