rewiring engine bay

Includes wiring and battery, generating system, starting system,
ignition system, windscreen wipers, lighting system and instruments and gauges.

Moderators: reidy, Blacky

mattymartin
Posts: 841
Joined: Fri Oct 06, 2006 12:49 pm
State: NOT ENTERED
Location: sydney

quick questions

Post by mattymartin »

hey team....

quick questions...

what is this...
Image
do they come smaller, better looking...
there are three wires attached to it, the red ones are from the starter motor, the brown one fuk knows & same with the black one on the right hand side underneath...
can anyone shed some light on what they are from & do ireally need this big ugly box...

these screw are very hard to turn,
Image
the one on the bottom wont budge... any tips on how to get it moving... so far i used strength & a lot of WD40, with still no movement, so i sprayed a shitload of WD40 ands left it for the time being... as you can see buy the groove in the screw i dont have too many many more chances before i ruin the screws head...

i have been advise to move inside the car on the reverse... using the same holes... BUT I CAN GET IT OFF...

is this pin all i need to remove
Image
to get gid of that ugly penis sticking out in my engine bay
Image

what this rubber for is this the hole that i could use to pass wires through from cockpit through to inside the gaurds...
Image

thanks
ps, when i'm finished i'll post my step by step

matty martin
go the wagons....
thropzed
Posts: 1160
Joined: Sat Jun 04, 2005 10:14 am
State: NOT ENTERED
Location: Brisbane

Post by thropzed »

Firstly Matty, The blue box is your regulator. You need this if you stay with a genarator or you can convert to an alternator with built in reg, That cleans up that part of your firewall(how to get it off is persaverance) Secondly, That is the pin to your penis lol It should come straight off. Thirdly, That rubber bung is the drain hole for your plendum chamber or something like that but thats where the water from the grill in front of the windscreen drains away, You should have a big hose that runs through this otherwise when it rains(Up here in brisvegas that is a rare thing) your foot will be covered in water. I ran my wires through here until the said hose deformed and let water run straight into the back of my kick plates and soaked my carpet, So I rerouted my wiring through three holes drilled through the side of the firewall above where the hose bung is. One hole on each side and one just on the passenger side of the hump, To go through to starter motor. I also ran my battery cable through this hole as I placed the battery in the boot. Oh by the way I did get some pics of the split system but as you'll see its pretty low and hard to get under, I'll post these in another post. Remember Matty all holes should be painted with rust converter and a rubber grommet placed in this hole so you don't wear through the wiring.
Cheers Theo Z....................
Watch for the early bird, He might be just getting home.

FB/EK Car Club of QLD.
mattymartin
Posts: 841
Joined: Fri Oct 06, 2006 12:49 pm
State: NOT ENTERED
Location: sydney

rust converter

Post by mattymartin »

where do i get rust converter from...

does it come in a spray-can with instructions

matty martin
go the wagons....
blue ute
Posts: 595
Joined: Mon Nov 14, 2005 11:27 pm
State: NOT ENTERED
Location: Perth

Post by blue ute »

There are many rust converters/preventives that have different processes/properties & you will get varying views one what is good & bad but I find Fertan to be very good, suggest you go to your auto store & have a look on the shelves to see whats available
parisian62
Posts: 3997
Joined: Wed May 11, 2005 2:19 pm
State: NSW
Location: Sydney
Contact:

Post by parisian62 »

try spraying the WD-40 on that screw/bolt from inside the car. Use the long plastic nozzle that should have come with your WD to 'force' the WD into where you are spraying. Spray the WD every day...give the WD time to penetrate...couple of days or more?

regards
Stewart
Feelin free in a '61 FB.
Member of FB-EK Holden Car Club Of NSW Inc.
Check out the Rebuild of Old Timer
FB Cruiser
Posts: 149
Joined: Thu Mar 15, 2007 10:40 am
State: NOT ENTERED
Location: Wonthaggi

rust converter

Post by FB Cruiser »

G'day matty, if you want rust converter try your auto parts shop, but I recomend you read the label to see what it contains. I alway get stuff that contains Phosferic acid, as this is the stuff that attacks the rust, also once it dry put some paint on the treated area as it will help keep rust out. Always remember all rust needs to grow is air and water so if you remove one or all this should keep it away, hope this helps cheers PAT :)
mattymartin
Posts: 841
Joined: Fri Oct 06, 2006 12:49 pm
State: NOT ENTERED
Location: sydney

killing rust

Post by mattymartin »

thanks team,

i'm on it, i'll go & get some over the weekend... rpco should have some, yeah... it should be alright till then, shouldn't it....

thoe z, thanks for the info... any pic of the engine bay ???
stewart, i've soaked it again yesterday from both sides with the WD40 & i'll give it another go on the weekend...

matty martin
go the wagons....
thropzed
Posts: 1160
Joined: Sat Jun 04, 2005 10:14 am
State: NOT ENTERED
Location: Brisbane

Post by thropzed »

Sorry Matty, I forgot to take pics of the engine bay(not really, It's looking a bit sad after my clutch cylinder leaked all down the firewall and lifted all the paint)But I did get you those shots of the split system, all be it, difficult to get under car shots as it sits too low
Image
Image
Image
Image
Image
Image
Image
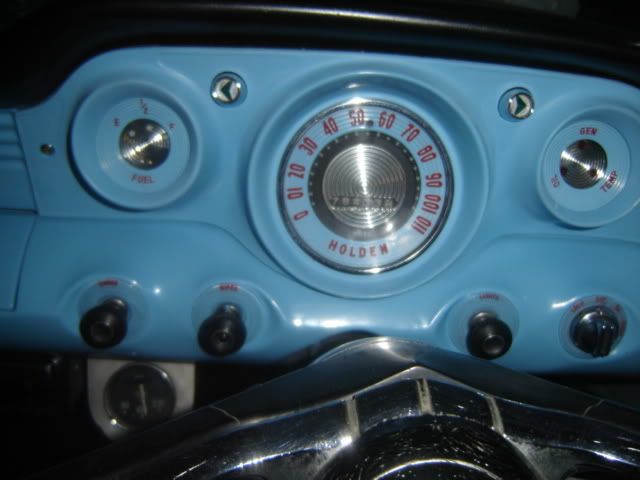
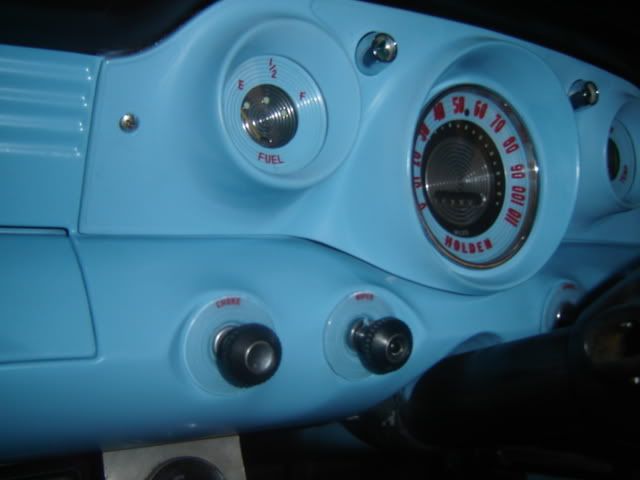
I hope this gives you an idea. I also took some shots of my custom dash in my P/Van that I painted using devilrods ideas about painting the gauges and I'll tell you it's heaps cheaper to do yourself than buy one from evilbay!
Image
Image
Cheers Theo Z...............
Watch for the early bird, He might be just getting home.

FB/EK Car Club of QLD.
mrs ratbox

Post by mrs ratbox »

hey theo you seem to have loose nuts :shock: :D :D
on yor exhaust strap
i'm gunna have to get a set of gauges and pull 'em apart and paint 'em that looks good
thropzed
Posts: 1160
Joined: Sat Jun 04, 2005 10:14 am
State: NOT ENTERED
Location: Brisbane

Post by thropzed »

Thanks Ratbox, I wondered why I had a rattle at the back. I'll have to tighten that up before I start draging the fishtail on the road! Cheap effective way to get flames lol lol
Cheers Theo Z.............
Oh Ratbox, Do you want me to send those vents for you?
Watch for the early bird, He might be just getting home.

FB/EK Car Club of QLD.
User avatar
Devilrod
Posts: 7394
Joined: Fri Apr 30, 2004 12:55 pm
State: VIC
Location: Beaconsfield, Vic

Post by Devilrod »

Awesome Theo!! I never thought to do the rest of the dash.
Speed and Style........... One day I'll get the speed bit.
mattymartin
Posts: 841
Joined: Fri Oct 06, 2006 12:49 pm
State: NOT ENTERED
Location: sydney

pic's

Post by mattymartin »

thanks theo

mate, do those exhaust hit the ground much... also those gauges look insane... you should send DevilRod a PM so he can see how he has help you..

mate those clear surrounds around the lights, choke, wipers look awesome... i gonna have to read that post re; customising dash...

do you remember what the post was called

thanks
matty martin
go the wagons....
smooth

Post by smooth »

Matty,

It is important that you use a screw driver that has a blade matched to that of the tight screw (Nice snug fit). You also can give the screw driver a good solid wack with a hammer whilst twisting in the undo direction.

Also worth trying is "tightening" first before trying to undo. This might be enough to crack the corrosion in the threads.

Regards, Smooth 8)
mattymartin
Posts: 841
Joined: Fri Oct 06, 2006 12:49 pm
State: NOT ENTERED
Location: sydney

cracking the nut

Post by mattymartin »

thanks smooth,

i'll have ago cracking the screw tomorrow... i'll let you know how i go.

thanks for the tips...

matty martin
go the wagons....
thropzed
Posts: 1160
Joined: Sat Jun 04, 2005 10:14 am
State: NOT ENTERED
Location: Brisbane

Post by thropzed »

Hey Matty, Those dash bezels(if thats what their called) aren't clear, Firstly I did like DR said sprayed them with oven cleaner for twenty minutes and used an old tooth brush to get all the paint from the letters, you'll find the chrome will disappear before the black. then I filled the letters with the colour paint you want to use and let it dry, Don't worry to much about getting paint outside thr letter because you just rub it off with thinners after . the Paint will stay in the letters. I then painted the backs the same as the dash. I tried the clear look but too hard to find bezels with no crazing in them . The wiper and choke bezels are FE/FC that I cut down to suit. The same process for the gauges, the irridesent paint that gives you the green tinge will be gone, I left mine clear and used zenion bulbs to give that bright white reflection through the lenses. Tell you what the red numbers look pretty crazy at night with the dash lights on. Now just have to find that open circuit on the fuel gauge and I'll be happy.
Cheers Theo Z.............
PS Matty the cars been sitting in the weeds for thr last couple of weeks so it looks lower than it really is.
Watch for the early bird, He might be just getting home.

FB/EK Car Club of QLD.
Post Reply