Page 1 of 1
what the hell has caused this?
Posted: Thu Sep 24, 2009 3:10 pm
by matches
hi guys (and ladies

) i just put some more high fill into my engine bay after smoothing it out and this has happened
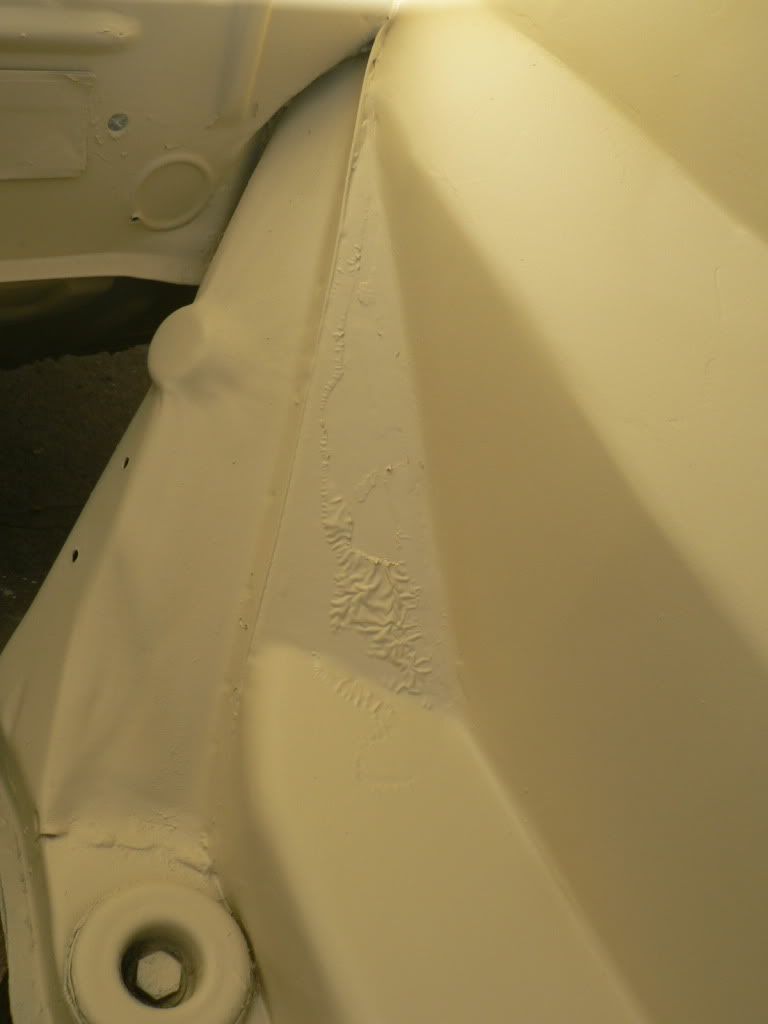
what could've caused this and how do i fix it?
Luke.
Posted: Thu Sep 24, 2009 3:11 pm
by NoMAD
had you used anything to clean or preap the surface?
Cheers
NoMAD
Posted: Thu Sep 24, 2009 3:18 pm
by matches
yep, i used prepwash and wiped it all off before it dried just like the destructions told me too. thats why i was shocked when this turned up after painting it, walking away to have a smoke, then coming back to find this

Posted: Thu Sep 24, 2009 3:28 pm
by Cal
Usually if it's a silicone problem you get seperation bubbles in the paint. I don't know what would cause the crows feet.

Posted: Thu Sep 24, 2009 3:30 pm
by matches
the whole paint has seperated and pulled up. could it be the paint underneath? what happens when acrylic is applied over enamel? i don't know, just asking.
wheres rosco when ya need him?


Posted: Thu Sep 24, 2009 4:40 pm
by robbyr
You can put enamel over acrylic, but not acrylic over enamel. Putting acrylic over enamel will caurse paint to fry up and seperate.

Posted: Thu Sep 24, 2009 5:40 pm
by Trev
matches wrote:just like the destructions told me too.
There is your problem, you read the destructions
, throw them out and get some instructions
Posted: Thu Sep 24, 2009 7:55 pm
by Harko
robbyr wrote:You can put enamel over acrylic, but not acrylic over enamel. Putting acrylic over enamel will caurse paint to fry up and seperate.
ditto
paint
Posted: Thu Sep 24, 2009 8:48 pm
by FB Cruiser
What looks to have happened is the solvent in the hifill has bled down and reacted with the subsrtate underneath. To fix you have to rub the affected area back to remove the fried paint, then feather the edges and re hifill, be carefull not to spray the hifill to wet, as the solvent won't evaporate before it reacts with the paint underneath, I hope this helps<cheers Pat

Posted: Thu Sep 24, 2009 10:36 pm
by matches
thanks heaps for the help, i knew someone here would be able to help me out
will let you know how i got on.
Luke.
Posted: Thu Sep 24, 2009 11:38 pm
by ekdave1962
yep looks like reaction with paint under primer ..
hmm i always thought acrylic cos go over anything but not the other way due to the fact that acrylic always moved (lost thinner over several years) ?
mind u i could be wrong .. AGAIN lol
Posted: Fri Sep 25, 2009 5:35 pm
by rosco
Sorry Luke,
haven't been on for a while.....
Yes - indeed - reaction issue - as best I can observe and judge by your post....
I had a little bit of this when I did mine... but feel my case may be entirely different to yours....
Mine, I believe - was reaction between nitro-cellulose and acrylic....
As you may recall - I found an FB sub-frame assembly for mine to replace the "spent" original.....
I do not know if this is the case - but I am assuming FB's may have had cellulose in the mix which found it's way onto sub-frames..... don't quote me... I do not really know - it's just my belief.....
What I can see of yours, however - is very similar to what I found when I attempted to spray those back panels in my luggage compartment a couple of years back.... reaction - I attempted to spray acrylic over enamel - and it "festered".....
As you have read above - you can spray enamel over acrylic - but not vice-versa....
and .....
as previously posted - a quality "isolator" will "insulate" the two - just ensure that you "key" the base sufficiently for the isolator to attach itself - or it will let go and result in "flaking".......
My suggestion - and I note that you have your bay in a very accessible state - would be to strip the bay to metal and start the acrylic process from bare steel...... however, this will void all filling work you have done.......
At the end of the day, Luke - and I hope others who are contemplating this refurb consider my opinion ..... if you want the comfort of security of a sound prep...... don't "patch"...... strip and work up the finish from the substrate...
A 1K etch applied to properly prepared and sound steel is a most beneficial foundation from which to build a finish......
Sorry for coming on board too late.....
frats,
Rosco