Hi all,
just another little project almost completed whilst in the luggage compartment.
I had a 12v fluro tube fitted for many years under the rear window - there is a really good space for sliding one of those in - can't be seen from the rear but lights up the boot very well....................I've just "found" something new to replace it with.
Whilst researching those LED's for someone a long time ago when I submitted the LED alarm in dash gauge post, I found strips of 30 super bright LEDs were available.
They are supplied in a very thin, narrow length of 30 and connect straight up to 12v.
They come supplied in an IC chip "tube" - for packaging and I have found this to be perfect to use as protection.
I have connect two of these 30 strips end to end and they just position almost perfectly under the flat lip immediately below the rear window base.
I am fabricating some stainless clips to hold them to the curvature of the window and they will point vertically down into the compartment.
Will post some pix up if I get my box brownie working again - it is having difficulty with the film winder - anyone know where I can get some 620 b&w roll film..............(joking, folk) - digital camera had flat batteries yesterday.......
frats,
Rosco
luggage compartment lighting - sedan
luggage compartment lighting - sedan
Last edited by rosco on Wed May 28, 2008 9:02 pm, edited 2 times in total.
pix
Spent today making up and fitting the two strips to the luggage compartment.
They come with connectors and a supply lead - they can be piggy backed to connect up as many in a line as you need. There is virtually no heat (or even warmth) from these LEDs - they are super efficient.
I found using the IC tubes they are packaged in very handy - both as protection and also the tube size is just about perfect for that ledge which is under the window and just in front of the rubber seal channel.
There is a very small recess where the metal is opened - I used this gap to fit clips made out of stainless strip and bent to form a "U" section.
Only two were need for each strip - I probably could have done a better job - made the inter-connection wires too short and this reduced the width of the spread.
I may pull them out again and make a slightly longer connection.
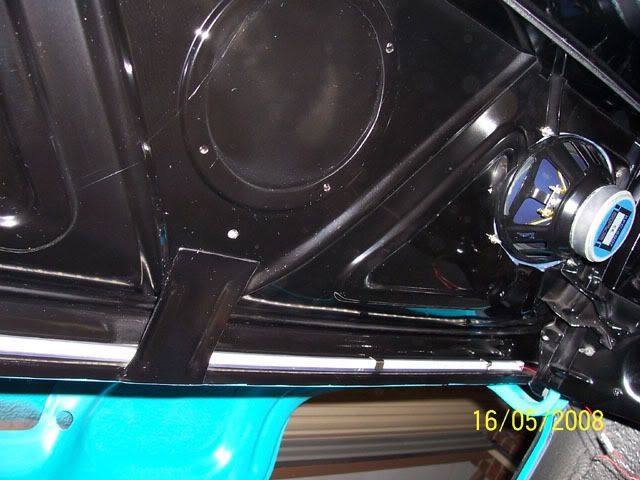
Pix below are a little dodgey - first one was taken using flash - unfortunately it flared on the IC tube and you can't see the LEDs inside.
They are very flat as opposed to what you may identify LEDs as - these would be no taller than 2 - 3 mm and about the same in diameter.
Please note, the acrylic black is "as sprayed" - I won't block down and polish until returning from Yamba - I want the paint to pull right down before doing this - you will see it as it came from the gun - with the exception of giving it a wipe over a few weeks later to get rid of overspray sitting on the surface.............. spraying in there was the hardest I have done yet - a very confined space where everything just goes to "fog" after a few seconds of paint flow.......................
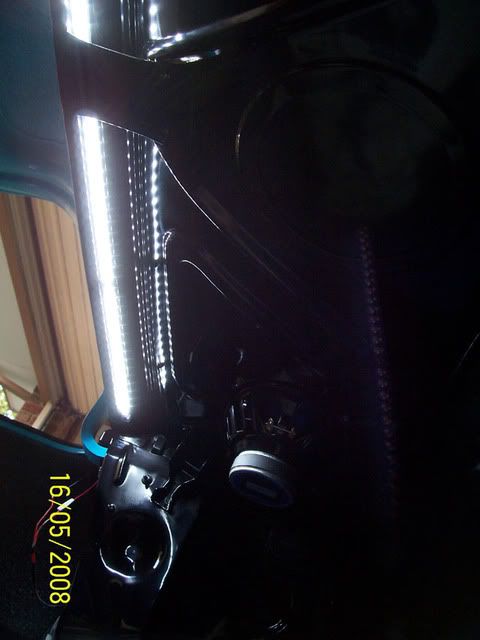
Second pic is of them on - following pix are taken without the camera flash - you can see that they are about as bright as the daylight outside.
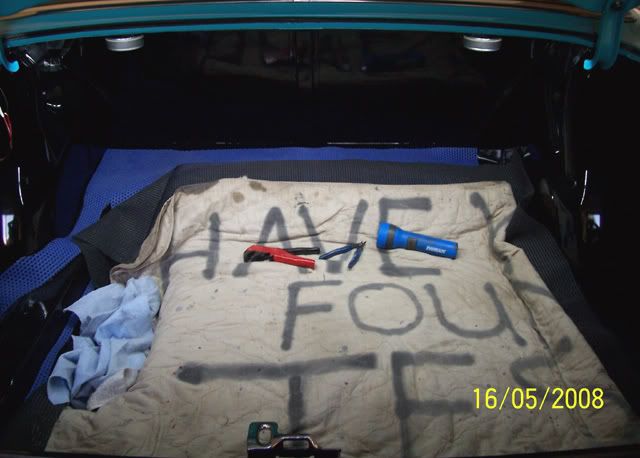
Third pic is the illumination from the two strips - there is enough light in there to easily read fine print under............. the position also gives very good illumination into the fender wells. It probably does not "throw" far enough rearwards to see into the cavity into the end panel clearly - but good enough to find stuff...............
Each strip draws 200 mA (about one fifth of an amp) for the 30 LEDs.
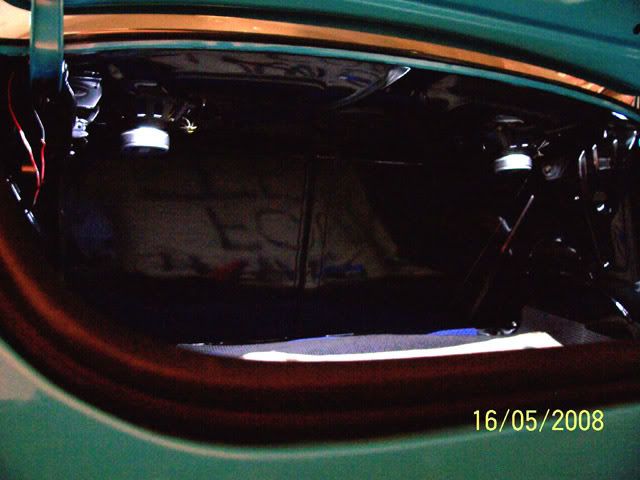
Final pic is how well hidden this location is - you can see from the camera position, that even at the lower opening of the end panel, the LED's cannot be seen...................
I have fitted mine to a power supply line and the earth does the switching.
I use a pressure switch connected to the hinge arm - this serves both as trigger for alarm and also through a diode the light contact - I have also fitted a toggle switch which permits switching off the light only if the luggage compartment is open for extended periods.
These LED strips are quite expensive, but have a projected lifespan of 10K hours...........in operation.
I purchased mine from Jaycar - category number ZD-0462 @ $49.95 each.
I intend to use two in the engine bay - just trying to find a suitable location to get illumination down both sides of the engine.
I will also make up and fit one on the lower centre edge of the rear window as a high level brake light - the unit is so small, I believe it will be almost inconspicuous except for a thin strip of red diffuser along the centre. I will need to fabricate some sort of fitting box - don't fear - it won't be any larger than the strip itself, but must provide both "purchase" for fitting to the rear window rubber and also to secure the correct angle.
Will post that up when completed - maybe not until after Yamba.
frats,
Rosco
They come with connectors and a supply lead - they can be piggy backed to connect up as many in a line as you need. There is virtually no heat (or even warmth) from these LEDs - they are super efficient.
I found using the IC tubes they are packaged in very handy - both as protection and also the tube size is just about perfect for that ledge which is under the window and just in front of the rubber seal channel.
There is a very small recess where the metal is opened - I used this gap to fit clips made out of stainless strip and bent to form a "U" section.
Only two were need for each strip - I probably could have done a better job - made the inter-connection wires too short and this reduced the width of the spread.
I may pull them out again and make a slightly longer connection.
Pix below are a little dodgey - first one was taken using flash - unfortunately it flared on the IC tube and you can't see the LEDs inside.
They are very flat as opposed to what you may identify LEDs as - these would be no taller than 2 - 3 mm and about the same in diameter.
Please note, the acrylic black is "as sprayed" - I won't block down and polish until returning from Yamba - I want the paint to pull right down before doing this - you will see it as it came from the gun - with the exception of giving it a wipe over a few weeks later to get rid of overspray sitting on the surface.............. spraying in there was the hardest I have done yet - a very confined space where everything just goes to "fog" after a few seconds of paint flow.......................
Second pic is of them on - following pix are taken without the camera flash - you can see that they are about as bright as the daylight outside.
Third pic is the illumination from the two strips - there is enough light in there to easily read fine print under............. the position also gives very good illumination into the fender wells. It probably does not "throw" far enough rearwards to see into the cavity into the end panel clearly - but good enough to find stuff...............
Each strip draws 200 mA (about one fifth of an amp) for the 30 LEDs.
Final pic is how well hidden this location is - you can see from the camera position, that even at the lower opening of the end panel, the LED's cannot be seen...................
I have fitted mine to a power supply line and the earth does the switching.
I use a pressure switch connected to the hinge arm - this serves both as trigger for alarm and also through a diode the light contact - I have also fitted a toggle switch which permits switching off the light only if the luggage compartment is open for extended periods.
These LED strips are quite expensive, but have a projected lifespan of 10K hours...........in operation.
I purchased mine from Jaycar - category number ZD-0462 @ $49.95 each.
I intend to use two in the engine bay - just trying to find a suitable location to get illumination down both sides of the engine.
I will also make up and fit one on the lower centre edge of the rear window as a high level brake light - the unit is so small, I believe it will be almost inconspicuous except for a thin strip of red diffuser along the centre. I will need to fabricate some sort of fitting box - don't fear - it won't be any larger than the strip itself, but must provide both "purchase" for fitting to the rear window rubber and also to secure the correct angle.
Will post that up when completed - maybe not until after Yamba.
frats,
Rosco

Very nicely exacuted Rosco 
I have plans for doing similar things to the panel van.
Although I'm building it to a 70's style,
there's all this enticing modern gadgetrey avaliable.
But it must be hidden so not as not to spoil the look.
You've done it beautifully, a well lit boot, but you cant see how
Thats just the tip of the iceberg for what can be done with a panel van.
Nice work
Cheers
Jeff
Thanks Jeff,
yes, I'm pretty happy with this one.
You may be able to fit a diffuser to hide the LEDs - they give off a very neutral light (almost daylight) and I feel you may be able to fool people with a fake "skylight" effect - without actually having one............. that's what a lot of the '70's were like for me - a bit disappointing when I sought cause and reason......
frats,
Rosco