Replacing rear shakle rubbers "How to"
Posted: Sat Mar 31, 2012 4:29 pm
G'day all...
Well it's that time again to get the 'ol EK up in the air and replace the rear shakle rubbers. So I thought for those who hav'nt done this themselves before to show just how easy (as opposed to lots of swearing & cursing) this can be done at home with very limited tools or space.
This "how to" is for the new folk to the FB/EK scene to show that some of the easier jobs can be done at home and will save you $'s.
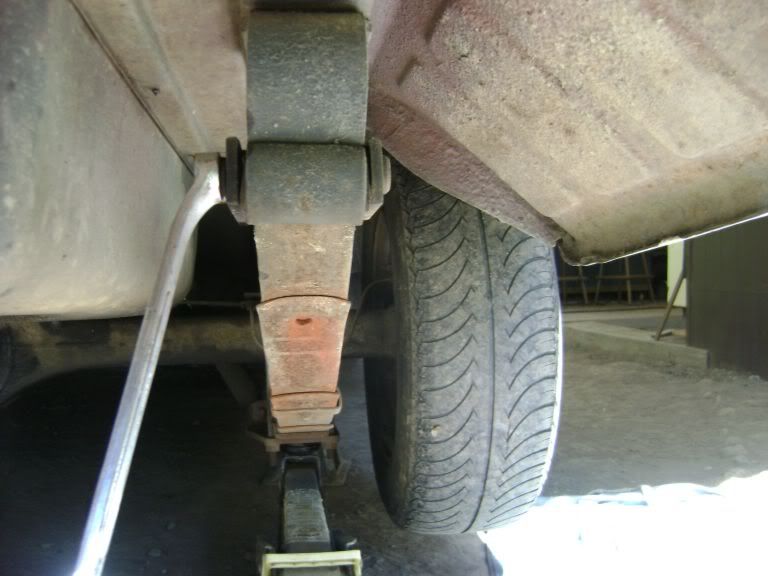
Firstly get the car up ub stands, I stick 'em just in front of the chassis infront of the front spring mount and get the wheels about 10-15 cm's in the air.
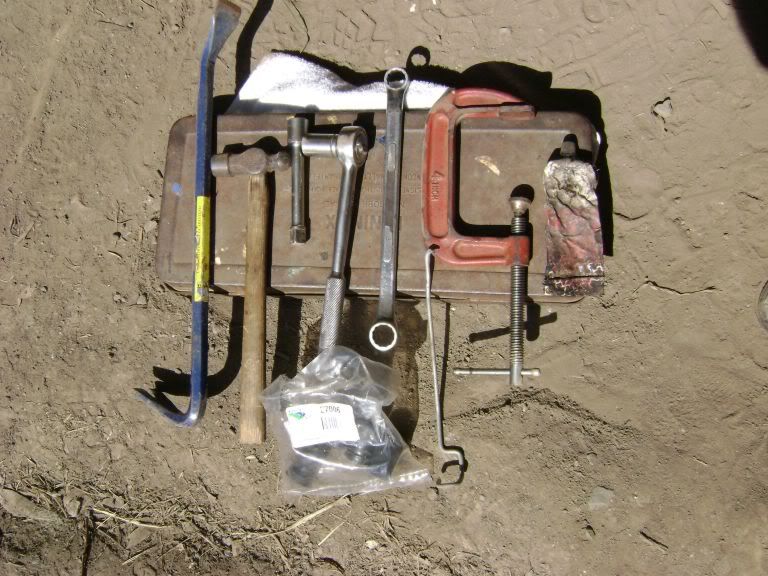
You only need a few tools to do this job: a small hammer, a large flat screwdriver (or similar..I use a small crowbar & screwdriver), A "G clamp" about a 4" one will do, an 11/16th ring spanner & scocket (I never use a ratchet to undo or tighten nuts or bolts..it stuffs your expensive ratchet!), a wire brush or one on a bench or angle grinder, rubber grease, a bit of sand paper or emery paper, one flat file & one rats tail file and of course new shakle rubbers.
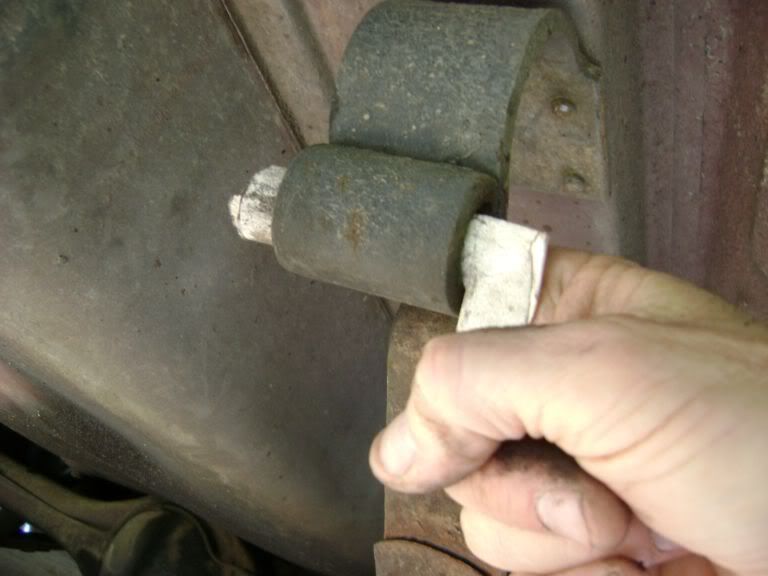
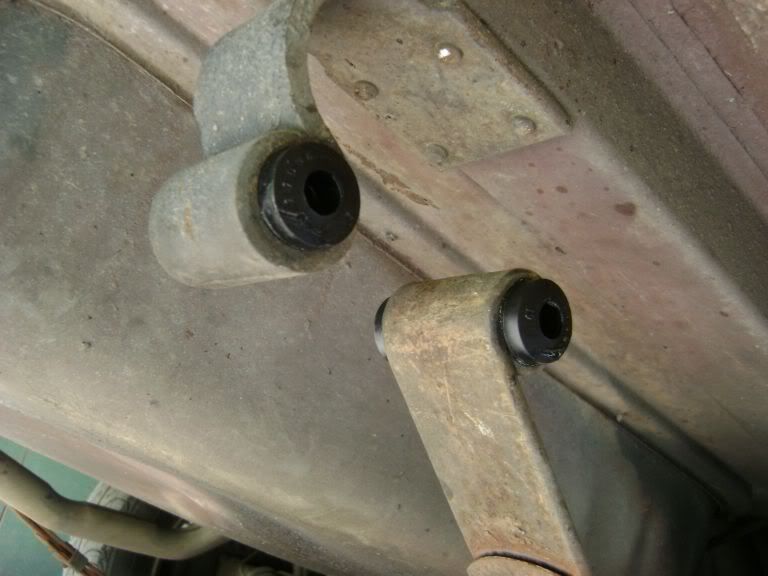
Atfer applying some WD40 to the nuts grab the 11/16th ring spanner and loosen the two nuts on the shakles. Note: these can be bloody tight, but persevre they'll loose the battle.
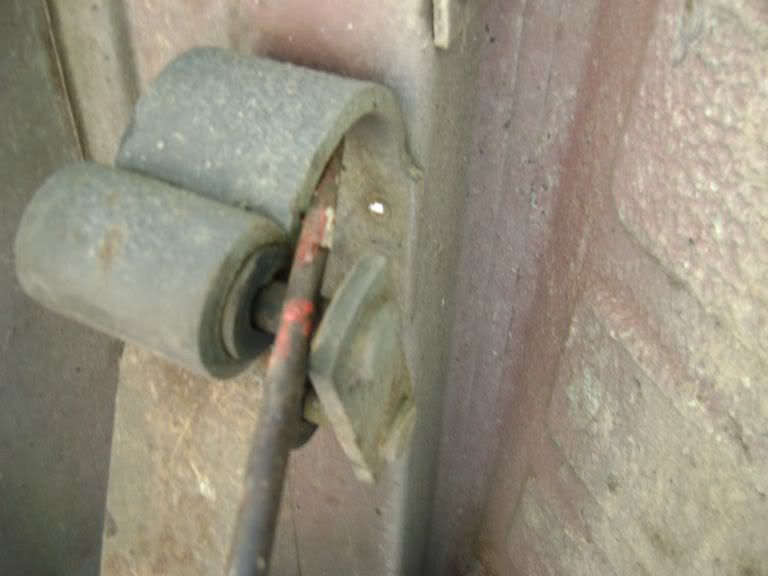
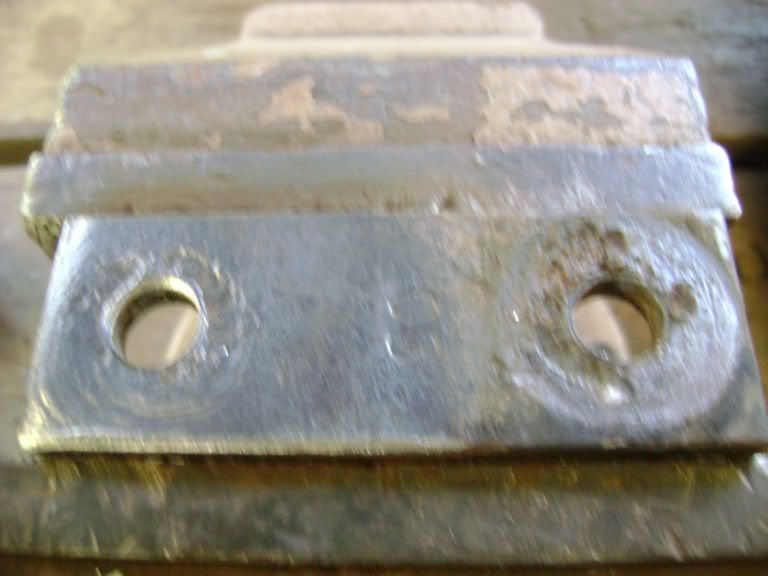
Once loose you may need (or not?) to undo the nuts with the trusy socket & ratchet, once these are off & the spring washes get the screwdriver & prise the flate plate off the treads (BE CAREFUL not to damage the threads!!!take your time)
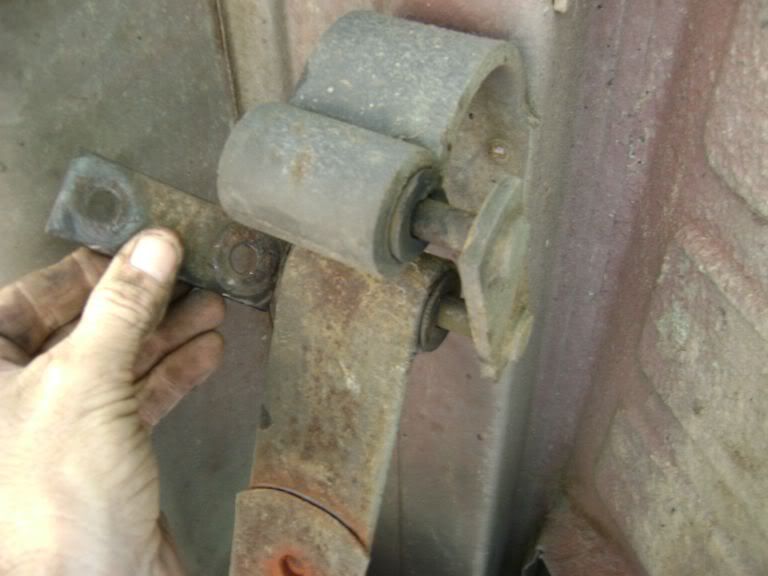
Once you've prised out the shakle (note: jack the diff up a bit as to make the removal easier..this lessens the gap between the 'eyes'), remove the parts over to the bench for inspection and cleaning.

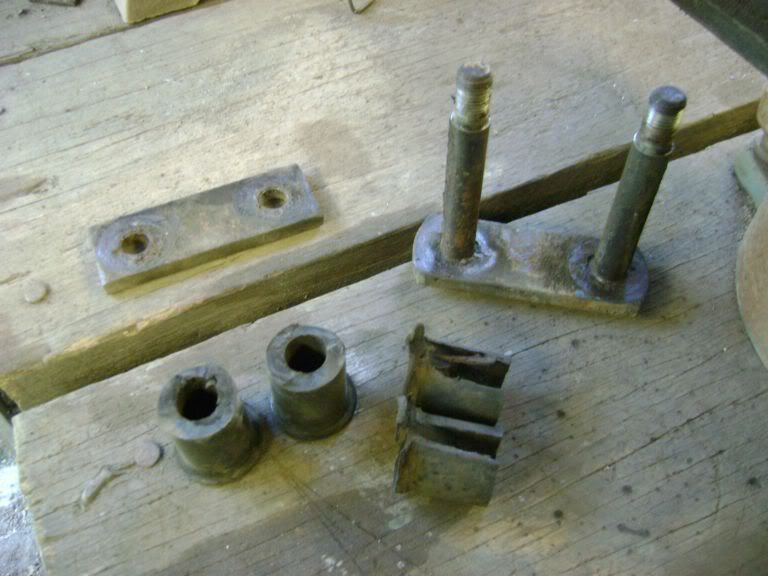
OOOHHH!! ICK!! Those rubbers are well past thier "due Date"!!

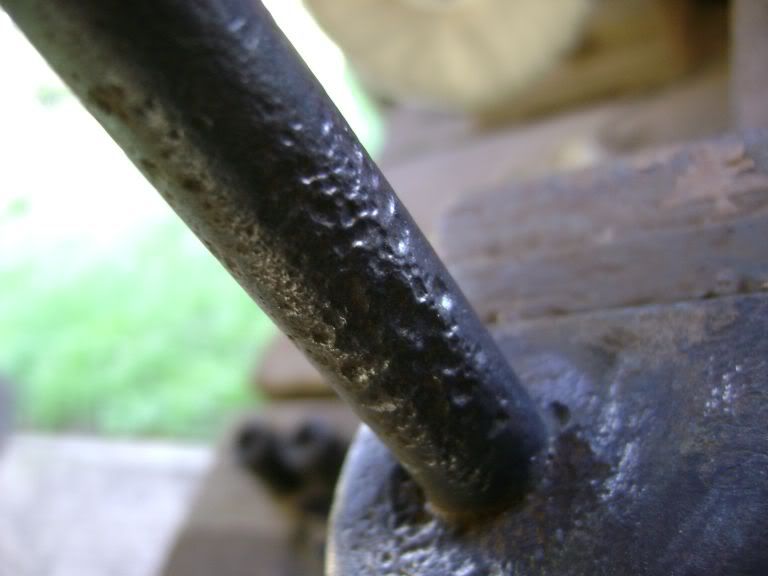
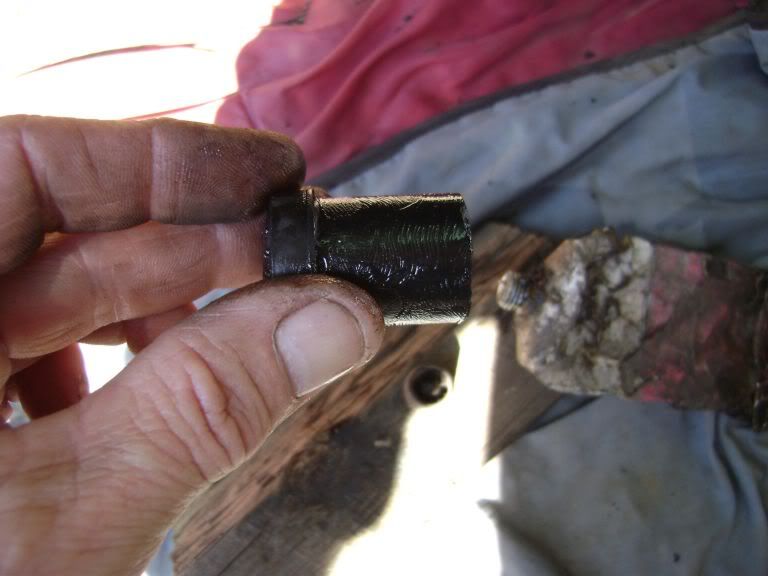
Here we clean all the rubber & crud off the bolts with a good wire brushing & sanding.
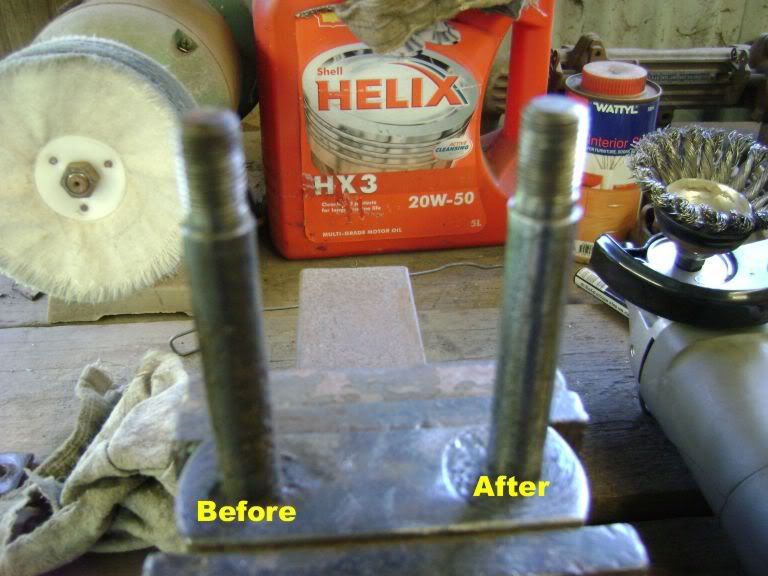
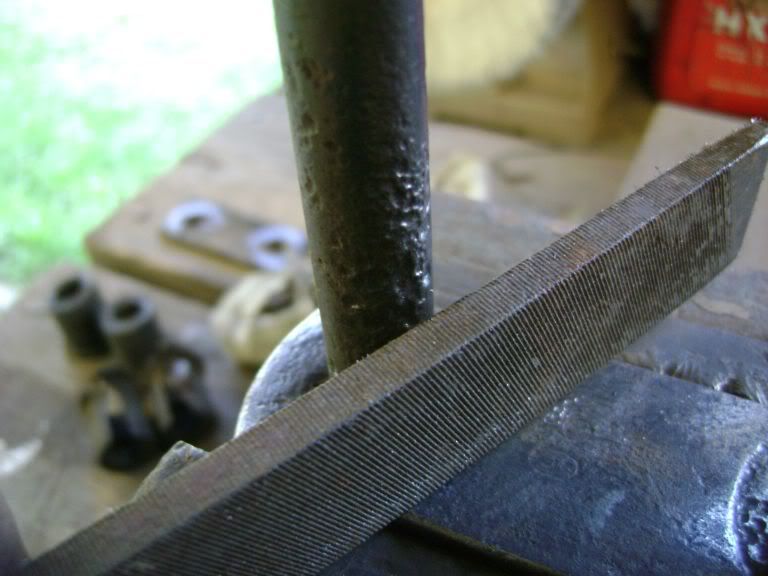
If there is some rust on the things check by feel to see if there are any "highspots"..if there are just file them smooth the clean up with sandpaper or emery. ( (I go so far as to wet sand them with 1000 and then polish them with Autosol...but I'm anal retentive ...I guess?). 

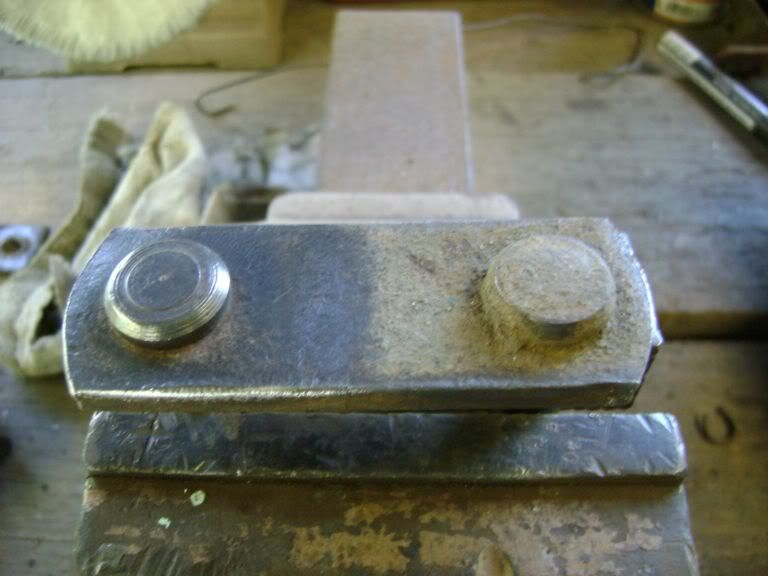
I even clean the backs & plate as well..plus I check on the bench for the fit of the shakle onto the plate..if it's too tight or you have to squeze the thing to make it fit just give it a light whack with a rubber or leather hammer until it fits easliy.
Now everything is clean & shiney it's back under the car for install. Take some sandpaper with you so you can clean the mounts out before you install the new rubbers.
Now apply a lot of rubber grease to the whole rubber (inside & out not forgetting the ends as well)..remember these move all over the place and the more rubber grease the better to stop further rusting.
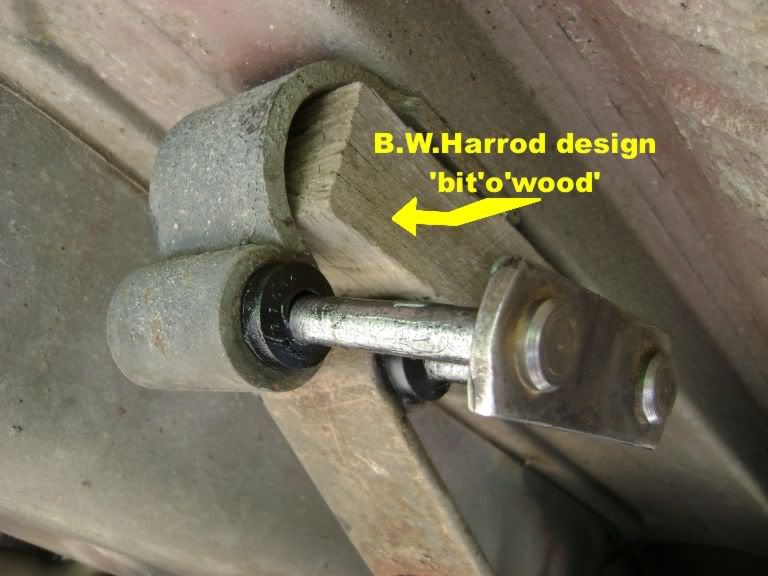
Once the rubbers are in place you should see that the holes wont allow the shakle to be installed as the gap is too far away!!
(this is where I've seen a lot of folks panic!).. but the answer is easy. My old Dad showed me 35ish years ago..all you need is a bit of wood that fits between the chassis and the springs 'eye' and then jack the diff up untill the rubbers are close enough together to push the shakle in (don't forget to apply more rubber grease to the shakle as well).
Now all you have to do is push the shakle right through and there should be enough thread sticking through to place the plate on the end. Once you've done this you can place the G clamp over the plate & shakle plate & tighten the clamp to allow the spring washers & nuts to go on.
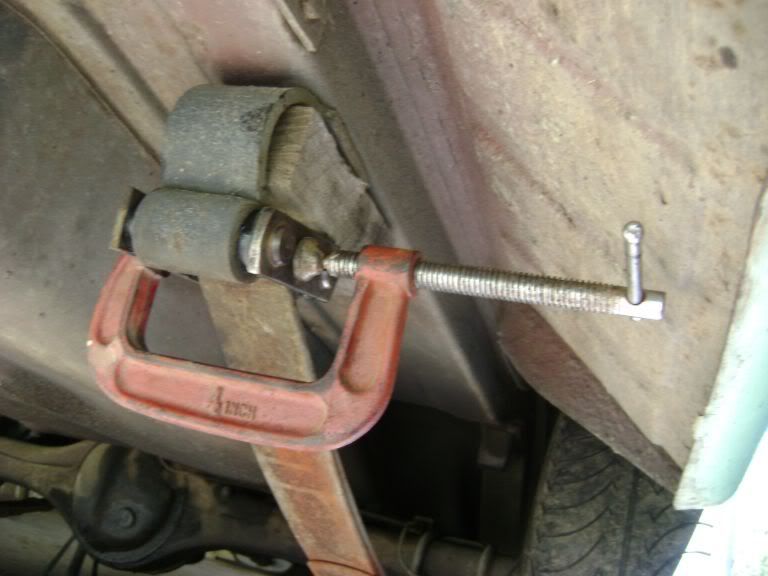
Tighten up the nuts then release the jack down to remove the "paitent Bit 'O' wood" then repeat on the other side.
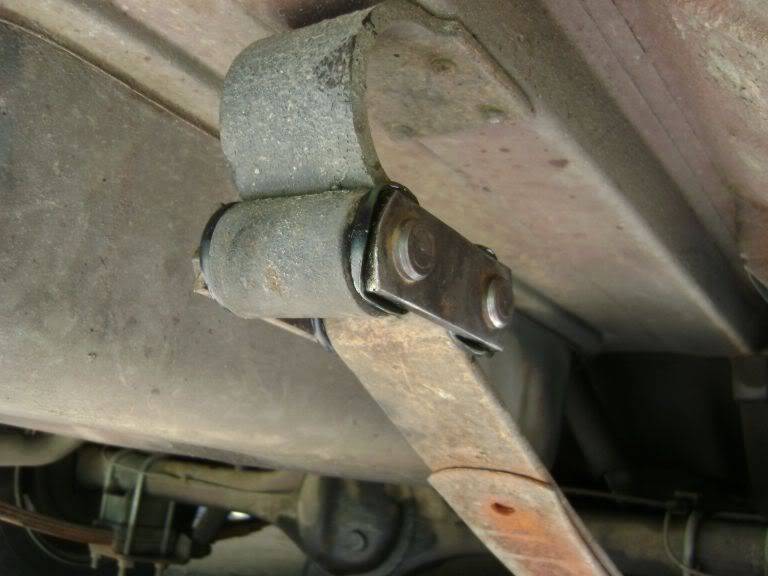
And there you have it..new shakle rubbers installed at home and you don't even have an engineering certificate!
Now go inside and get yourself a well earned beverage...you deserve it.
Scotty.
Well it's that time again to get the 'ol EK up in the air and replace the rear shakle rubbers. So I thought for those who hav'nt done this themselves before to show just how easy (as opposed to lots of swearing & cursing) this can be done at home with very limited tools or space.
This "how to" is for the new folk to the FB/EK scene to show that some of the easier jobs can be done at home and will save you $'s.
Firstly get the car up ub stands, I stick 'em just in front of the chassis infront of the front spring mount and get the wheels about 10-15 cm's in the air.
You only need a few tools to do this job: a small hammer, a large flat screwdriver (or similar..I use a small crowbar & screwdriver), A "G clamp" about a 4" one will do, an 11/16th ring spanner & scocket (I never use a ratchet to undo or tighten nuts or bolts..it stuffs your expensive ratchet!), a wire brush or one on a bench or angle grinder, rubber grease, a bit of sand paper or emery paper, one flat file & one rats tail file and of course new shakle rubbers.
Atfer applying some WD40 to the nuts grab the 11/16th ring spanner and loosen the two nuts on the shakles. Note: these can be bloody tight, but persevre they'll loose the battle.
Once loose you may need (or not?) to undo the nuts with the trusy socket & ratchet, once these are off & the spring washes get the screwdriver & prise the flate plate off the treads (BE CAREFUL not to damage the threads!!!take your time)
Once you've prised out the shakle (note: jack the diff up a bit as to make the removal easier..this lessens the gap between the 'eyes'), remove the parts over to the bench for inspection and cleaning.
OOOHHH!! ICK!! Those rubbers are well past thier "due Date"!!
Here we clean all the rubber & crud off the bolts with a good wire brushing & sanding.
If there is some rust on the things check by feel to see if there are any "highspots"..if there are just file them smooth the clean up with sandpaper or emery. ( (I go so far as to wet sand them with 1000 and then polish them with Autosol...but I'm anal retentive ...I guess?).
I even clean the backs & plate as well..plus I check on the bench for the fit of the shakle onto the plate..if it's too tight or you have to squeze the thing to make it fit just give it a light whack with a rubber or leather hammer until it fits easliy.
Now everything is clean & shiney it's back under the car for install. Take some sandpaper with you so you can clean the mounts out before you install the new rubbers.
Now apply a lot of rubber grease to the whole rubber (inside & out not forgetting the ends as well)..remember these move all over the place and the more rubber grease the better to stop further rusting.
Once the rubbers are in place you should see that the holes wont allow the shakle to be installed as the gap is too far away!!
(this is where I've seen a lot of folks panic!).. but the answer is easy. My old Dad showed me 35ish years ago..all you need is a bit of wood that fits between the chassis and the springs 'eye' and then jack the diff up untill the rubbers are close enough together to push the shakle in (don't forget to apply more rubber grease to the shakle as well).
Now all you have to do is push the shakle right through and there should be enough thread sticking through to place the plate on the end. Once you've done this you can place the G clamp over the plate & shakle plate & tighten the clamp to allow the spring washers & nuts to go on.
Tighten up the nuts then release the jack down to remove the "paitent Bit 'O' wood" then repeat on the other side.
And there you have it..new shakle rubbers installed at home and you don't even have an engineering certificate!
Now go inside and get yourself a well earned beverage...you deserve it.
Scotty.