Page 46 of 51
Re: Ol' Rusty - FB/EK Sedan
Posted: Fri Sep 26, 2025 8:18 pm
by funkyscooter
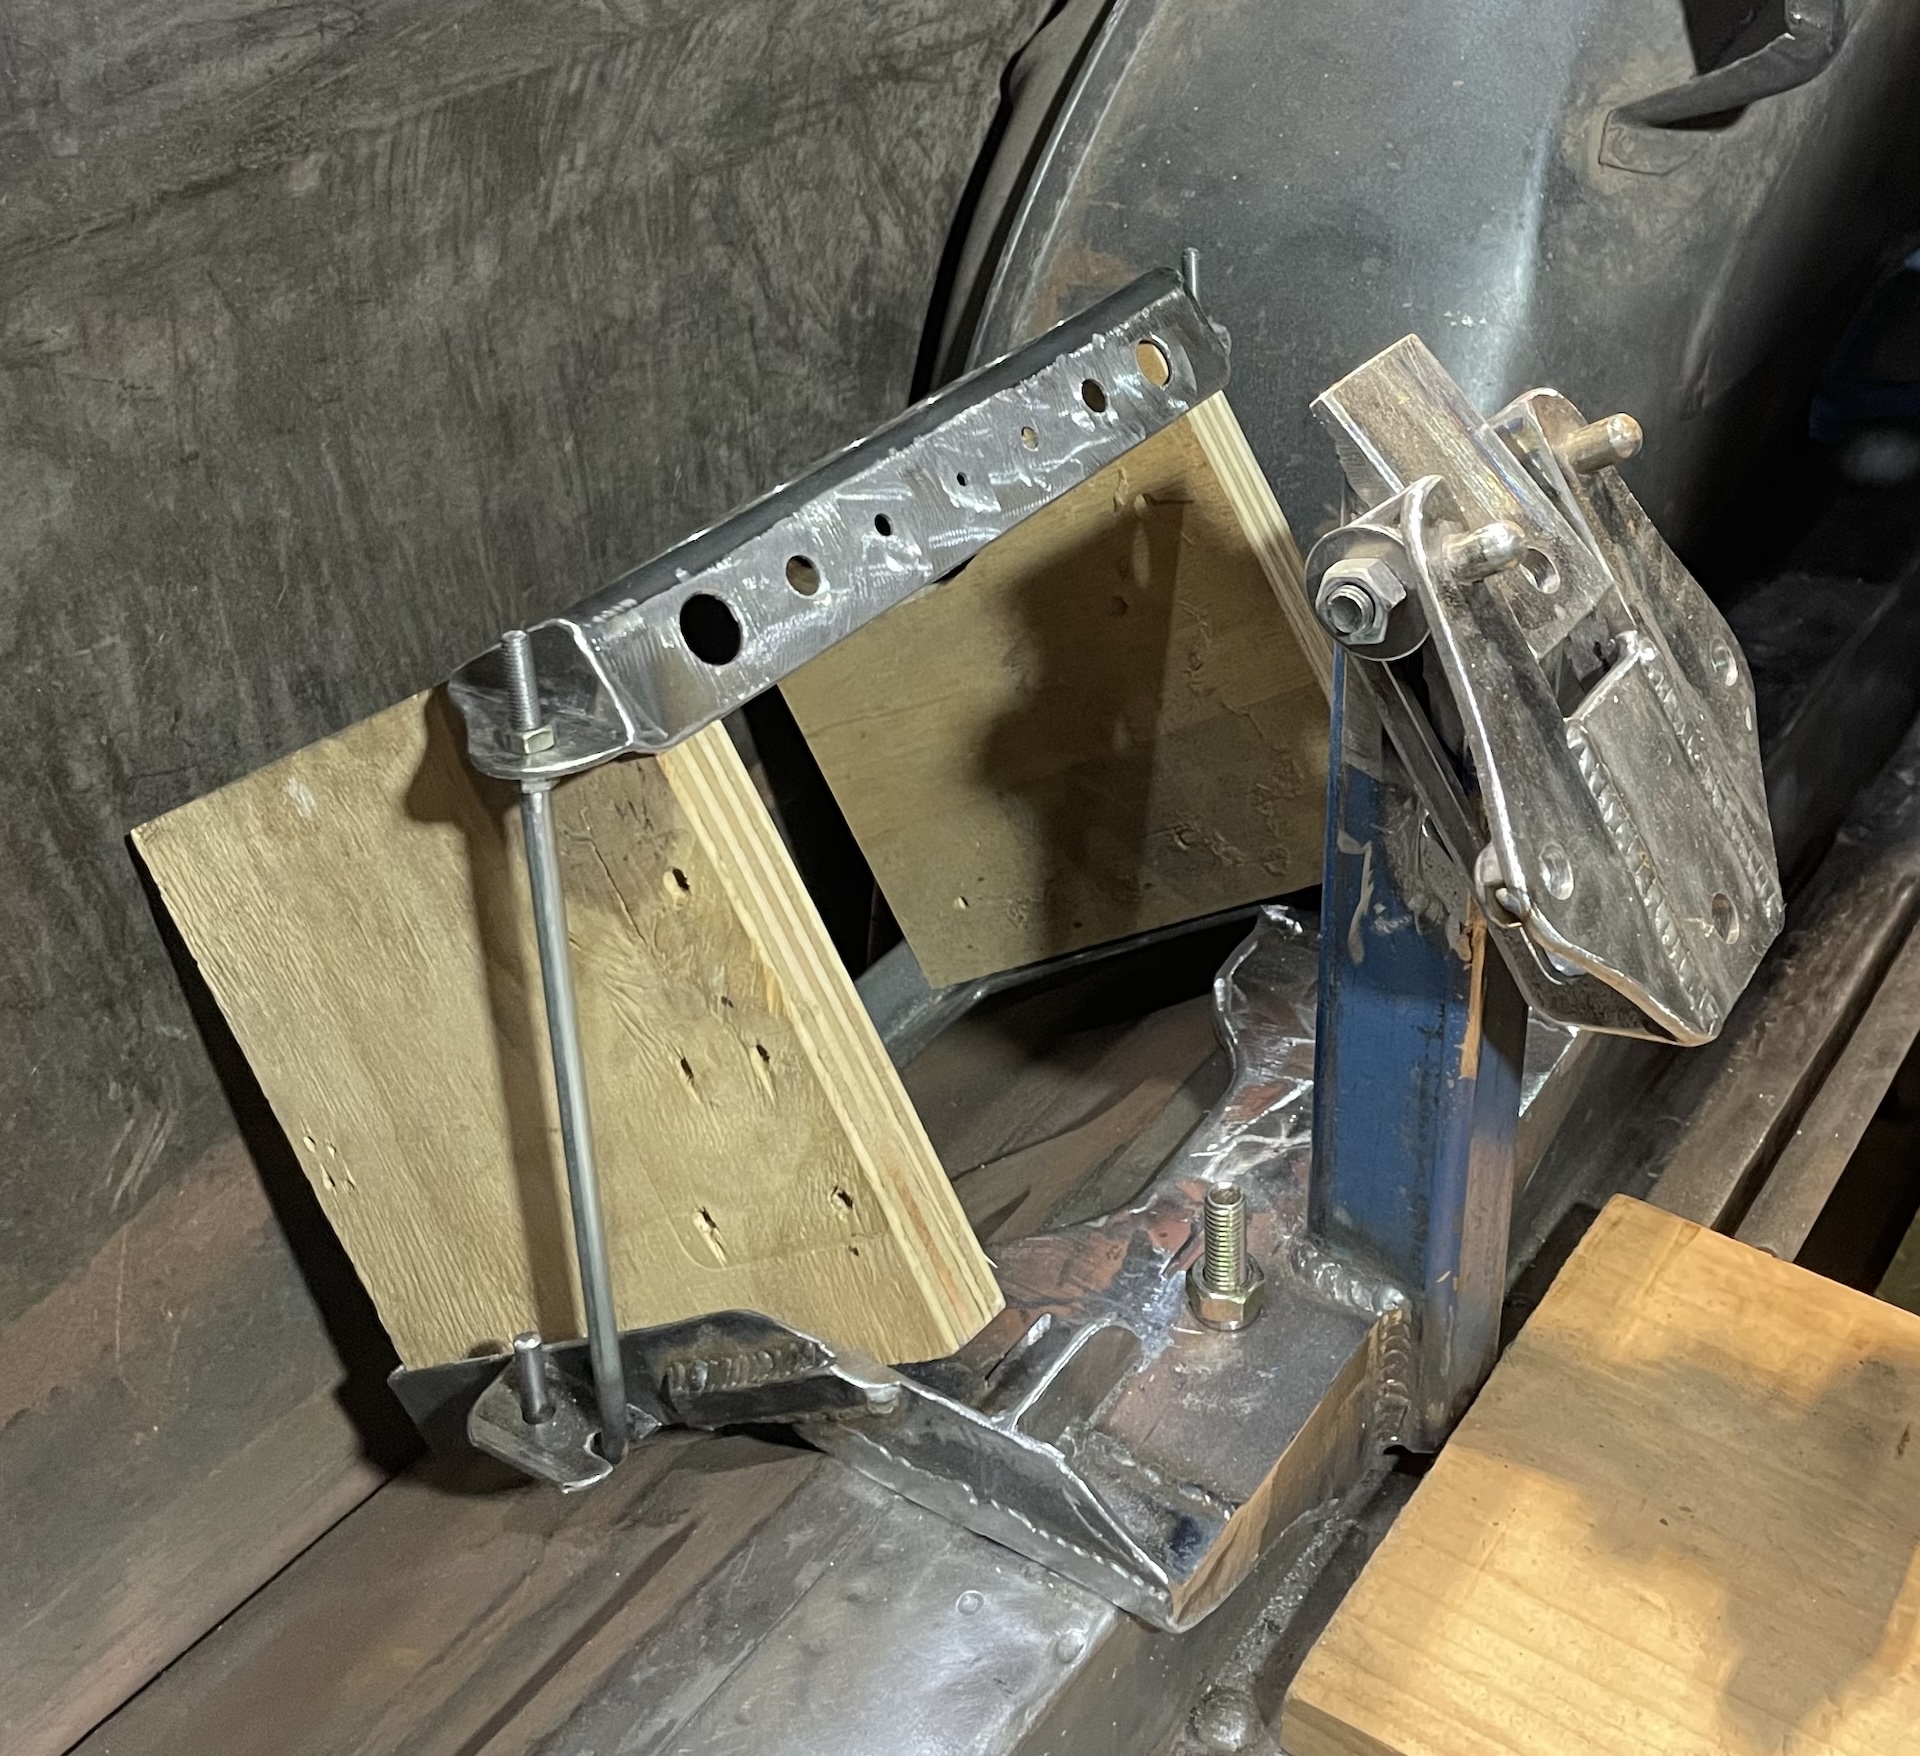
And after much grinding and cutting to try and shed some weight - and make it look a little less agricultural - here it is, with mock battery in place.
- IMG_7897.jpeg (1014.66 KiB) Viewed 6955 times
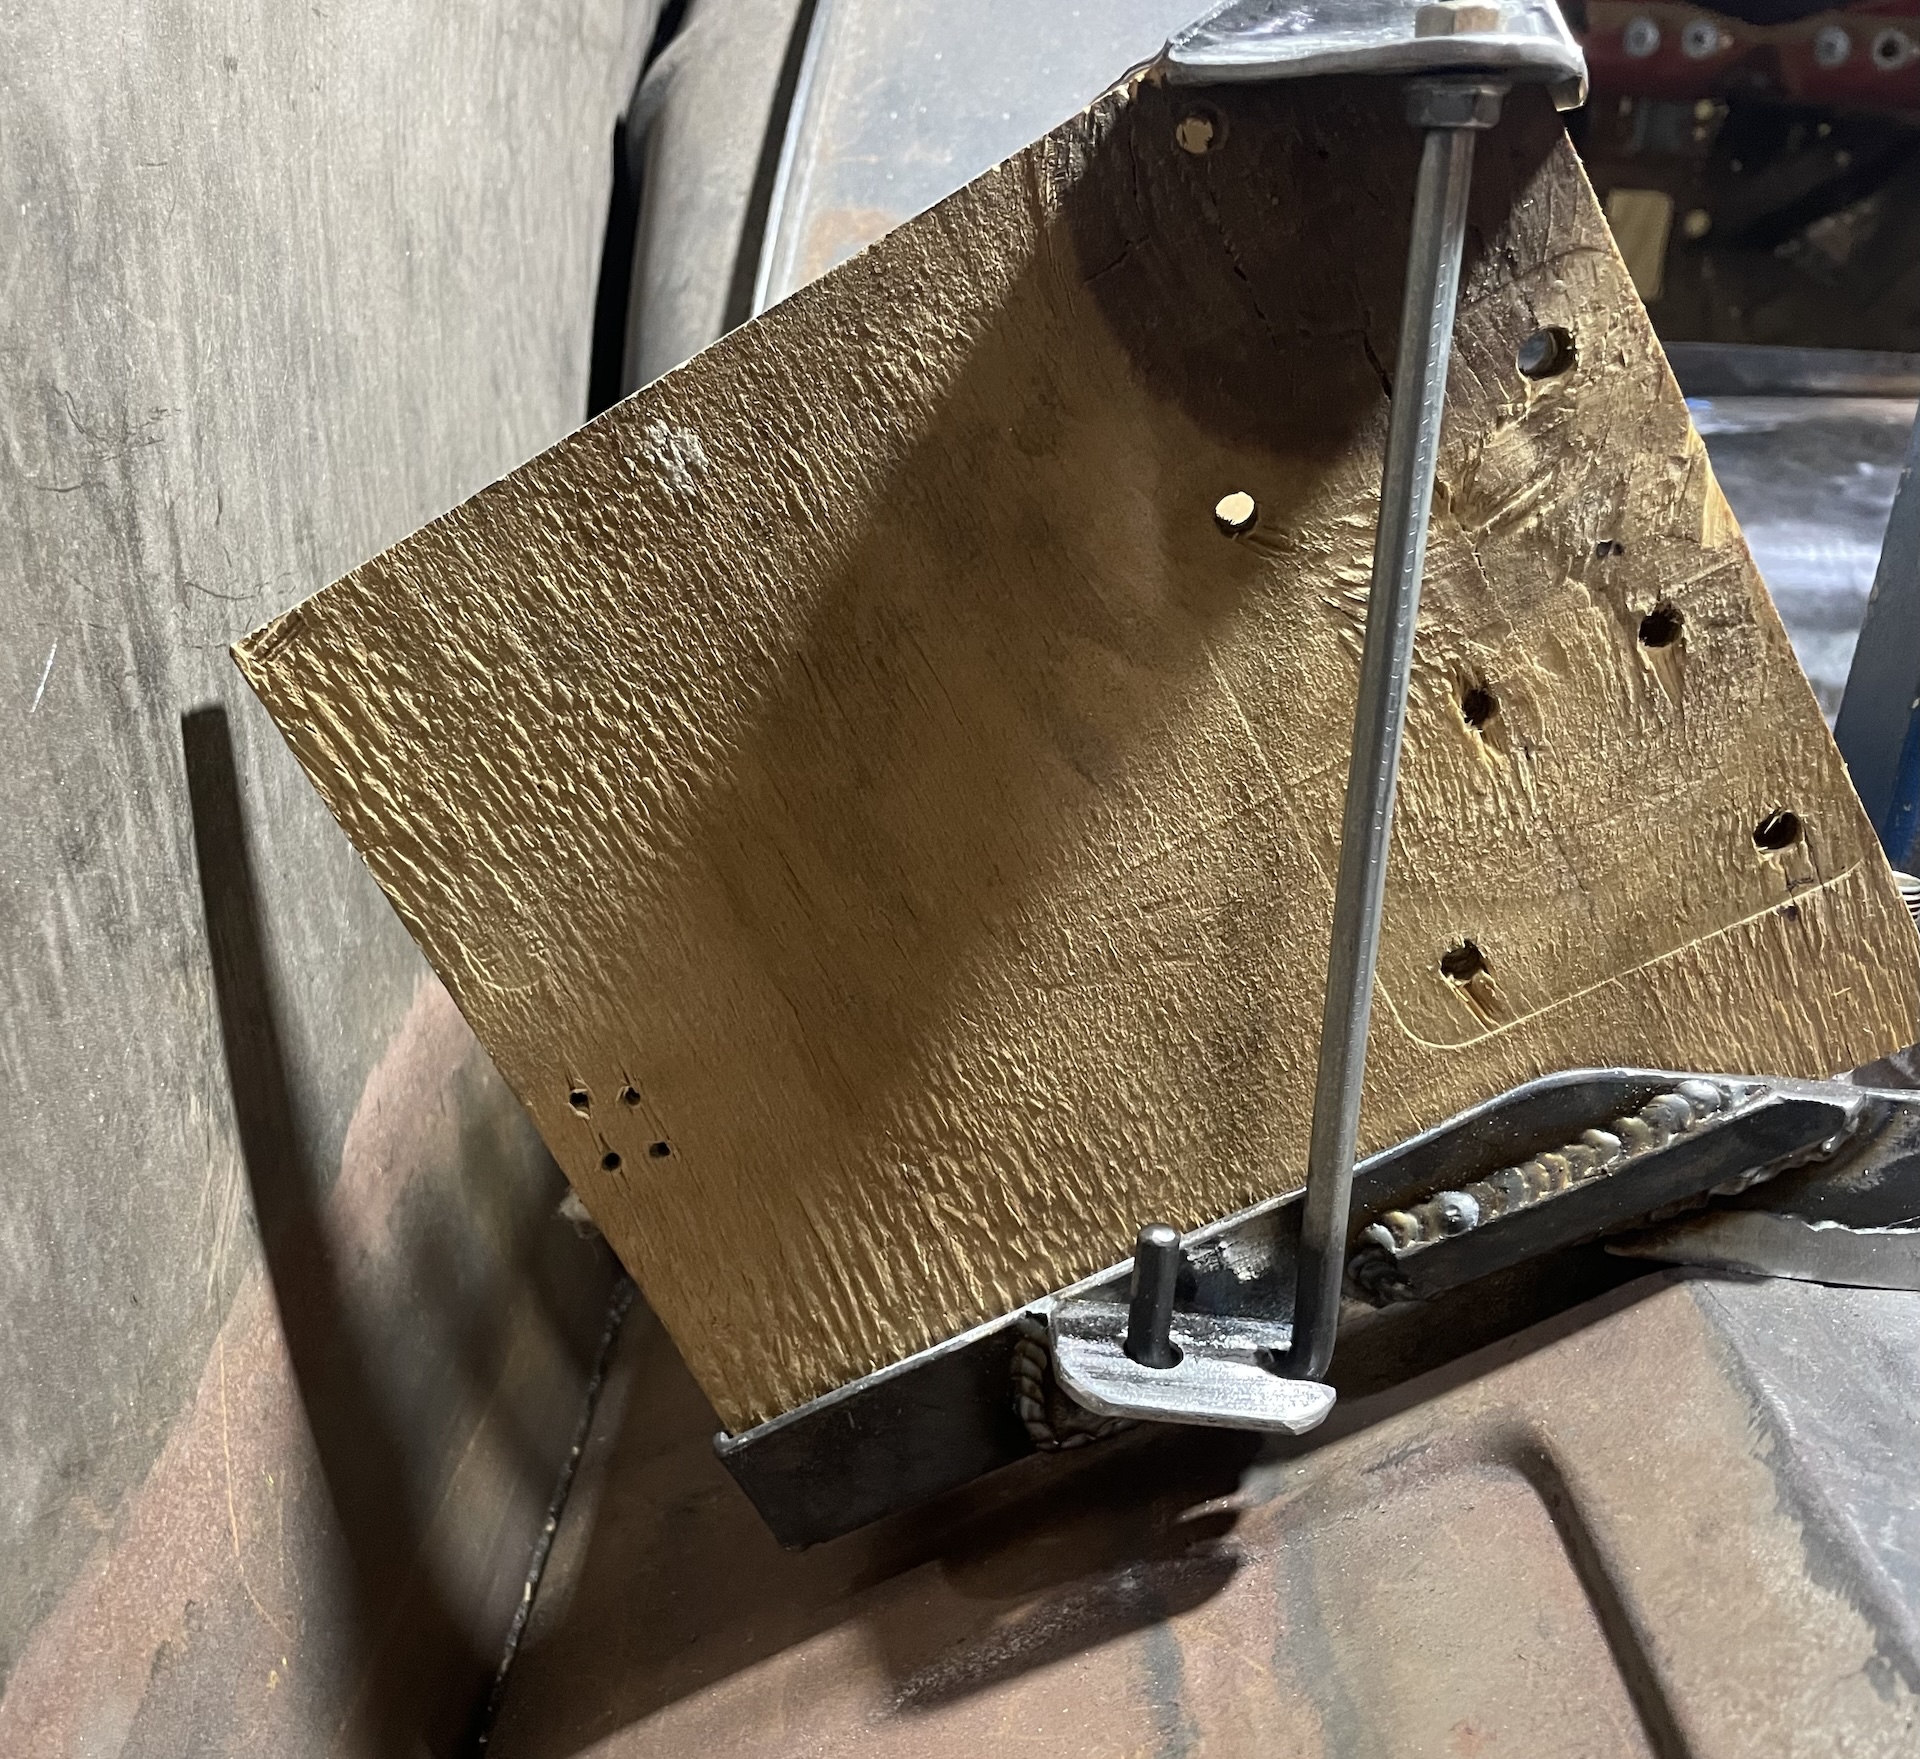
Two locating pins at the top accept the wheel as you tip it over, and the sliding tilting base flips up against to back of the rim. Install 2 bolts to fix the rim to the base. Then brute force to slide it up and drop the bottom bolt in and tighten to lock everything in place.

- IMG_7907.jpeg (922.32 KiB) Viewed 6955 times
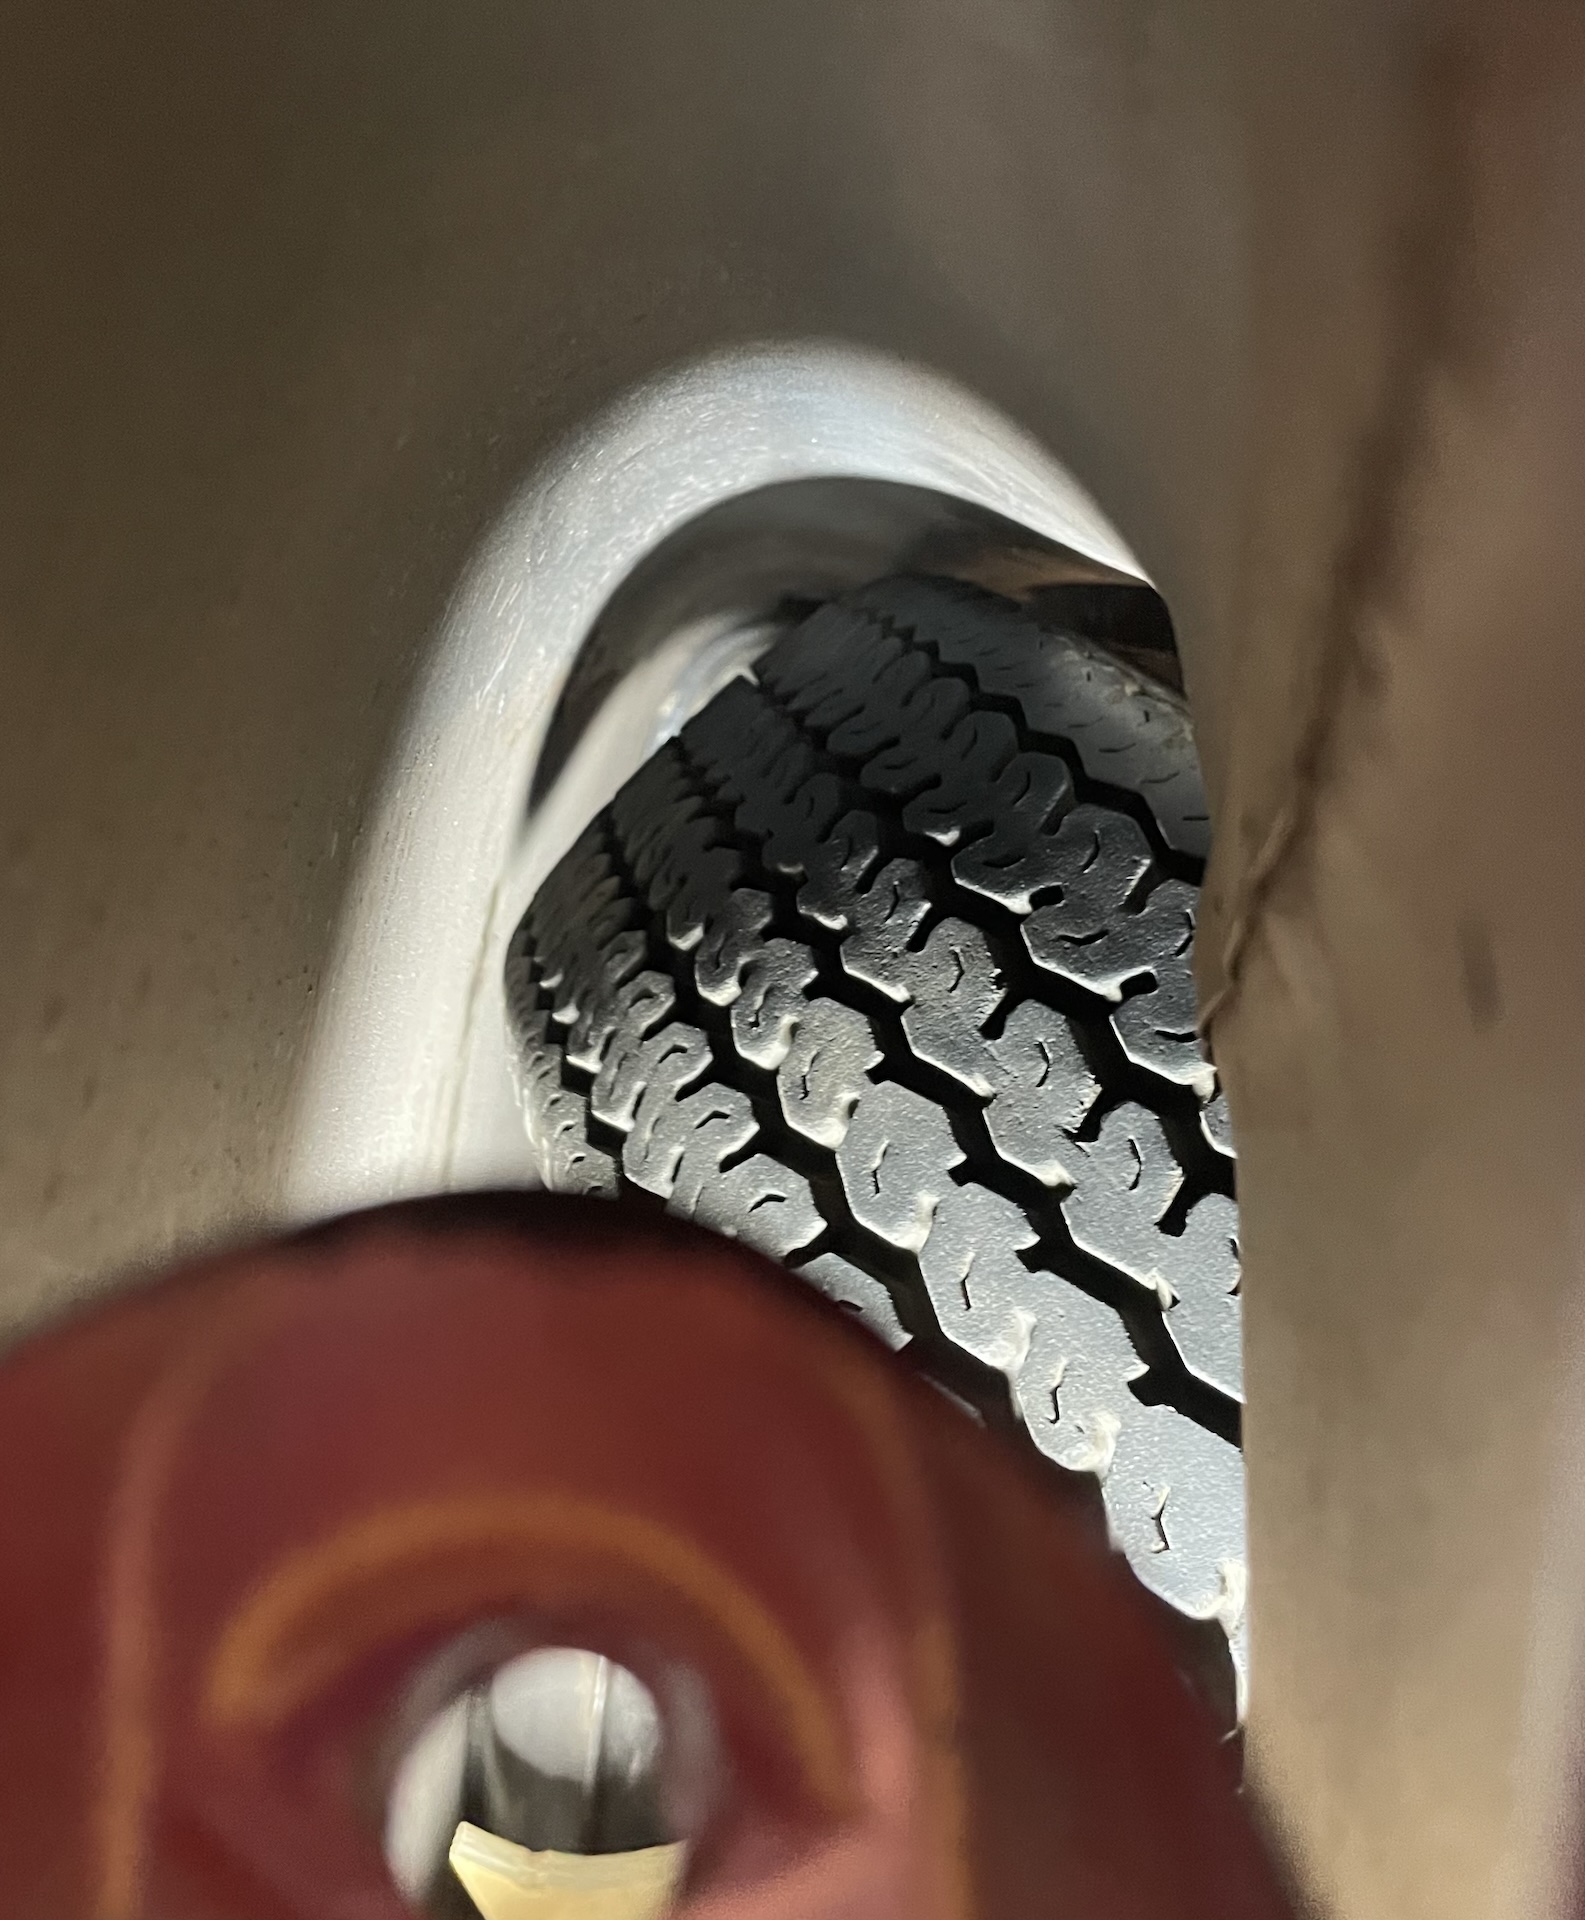
Do we have clearance Clarence? Just - roughly 10mm all round.
- IMG_7898.jpeg (1.32 MiB) Viewed 6955 times
- IMG_7905.jpeg (709.23 KiB) Viewed 6955 times
And what about with the boot closed? Well that’s even less.
- IMG_7910.jpeg (1.04 MiB) Viewed 6955 times

- IMG_7911.jpeg (1.03 MiB) Viewed 6955 times
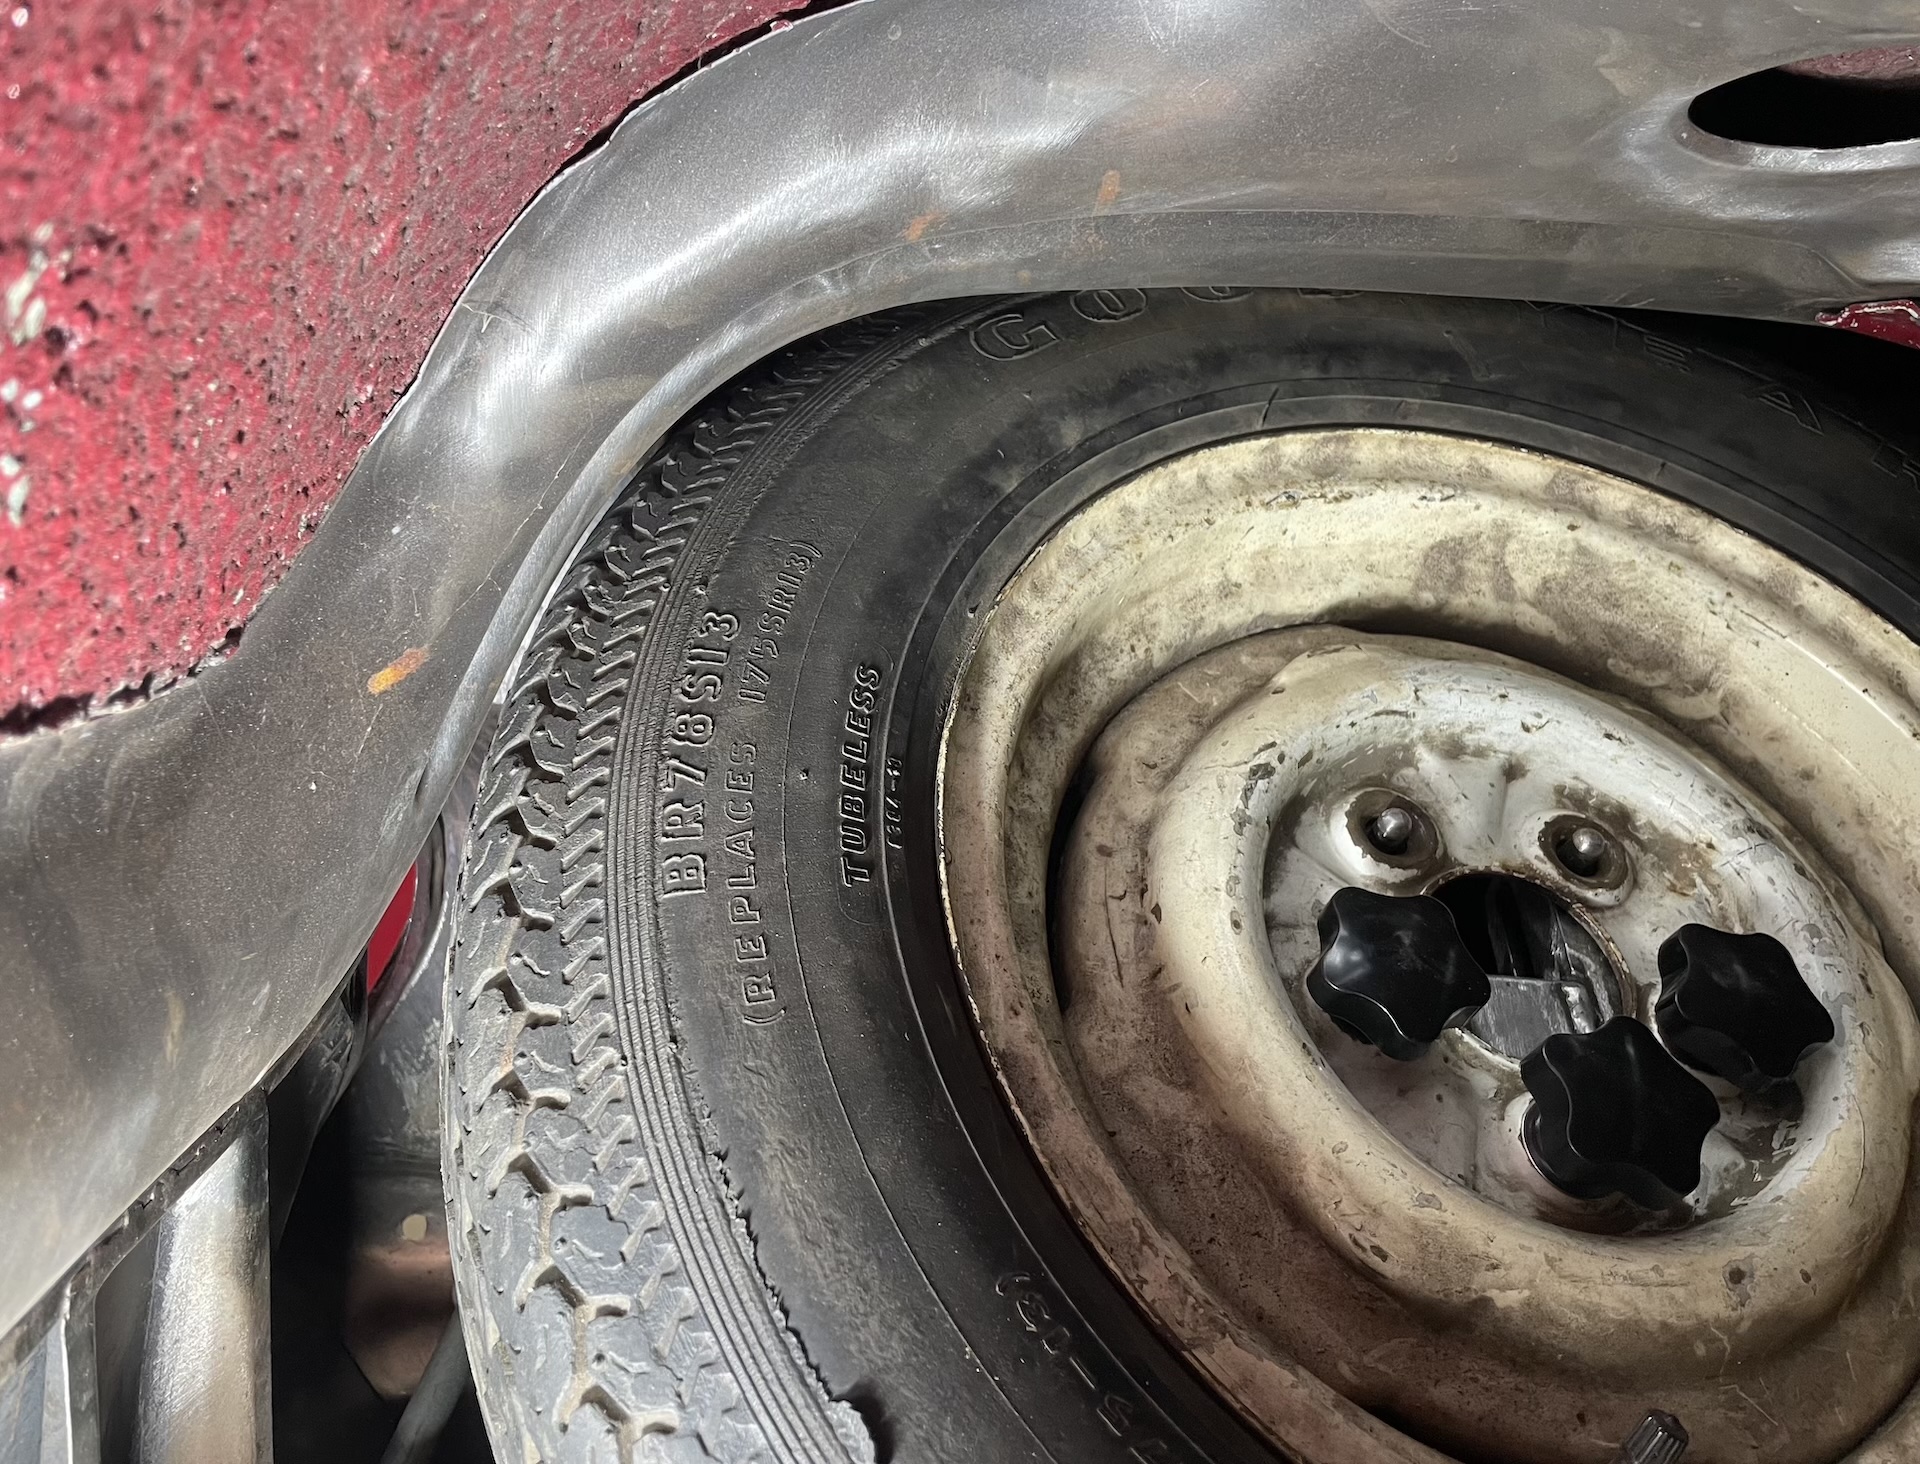
Ended up wth the most space under the tyre.
- IMG_7912.jpeg (506.05 KiB) Viewed 6955 times
Was not expecting the fit to be that tight, and happy to get away with it. Mind you, it has taken me a good part of a week to get it sorted, with lots of unexpected tweaks along the way. If I didn’t have the time I would have definitely just welded a few lugs to the floor for some straps and bolt the old battery box down.
Re: Ol' Rusty - FB/EK Sedan
Posted: Fri Sep 26, 2025 8:56 pm
by Blacky
Re: Ol' Rusty - FB/EK Sedan
Posted: Sat Sep 27, 2025 7:23 am
by Harv
Thats some Tetris level space usage - looks good.
Cheers,
Harv
Re: Ol' Rusty - FB/EK Sedan
Posted: Sat Sep 27, 2025 7:23 am
by EK283
Good work,
Would be fun to see how many revolutions the old tyre can do before it lets go !!!
Greg
Re: Ol' Rusty - FB/EK Sedan
Posted: Sat Sep 27, 2025 7:33 am
by funkyscooter
EK283 wrote: Sat Sep 27, 2025 7:23 am
Good work,
Would be fun to see how many revolutions the old tyre can do before it lets go !!!
Greg
Ha yeah that thing is as hard as a rock - last put air in it 25 years ago and still holding.
Not sure what size the tyre is - its stamped BR178/13R (replaces 175/13). Going to try for a 165/60/13 so should give it a bit of extra space.
Re: Ol' Rusty - FB/EK Sedan
Posted: Thu Oct 23, 2025 9:59 am
by funkyscooter
Re: Ol' Rusty - FB/EK Sedan
Posted: Thu Oct 23, 2025 10:14 am
by funkyscooter
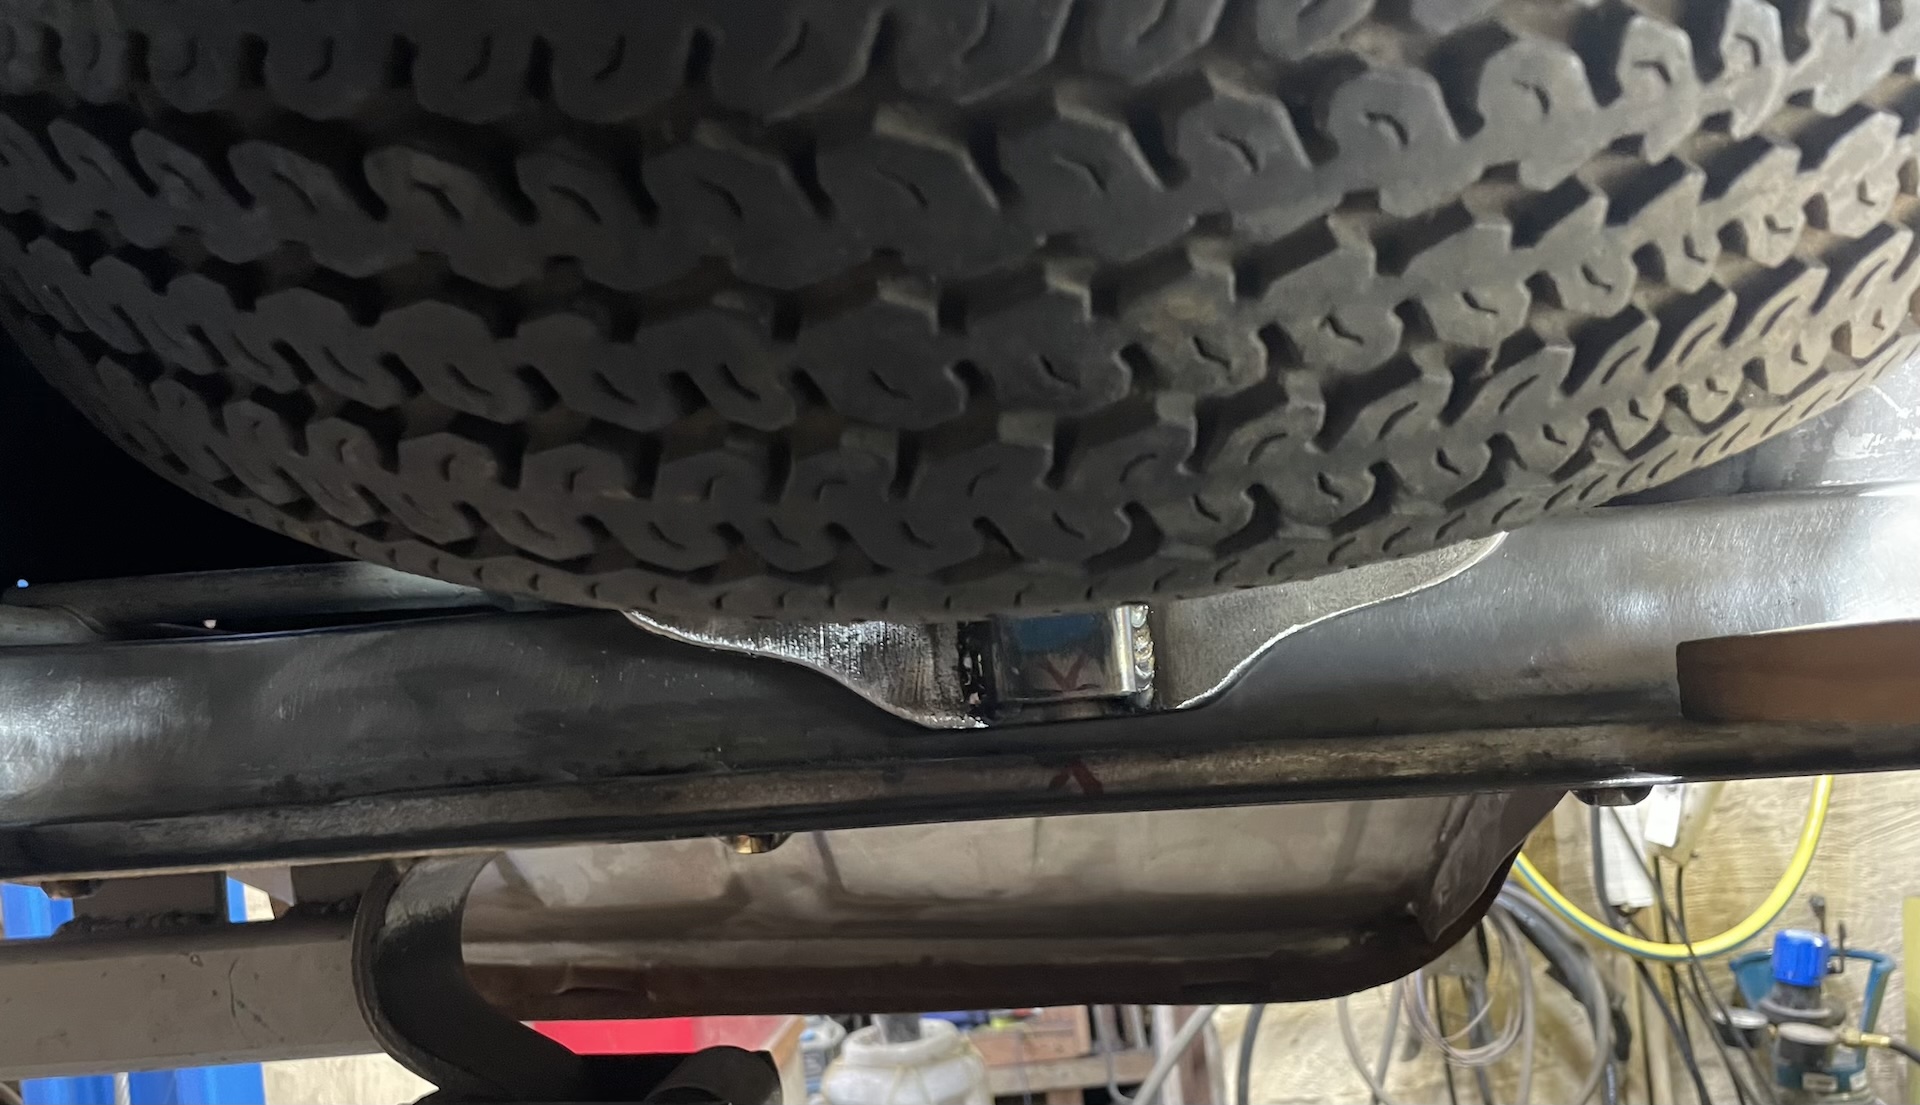
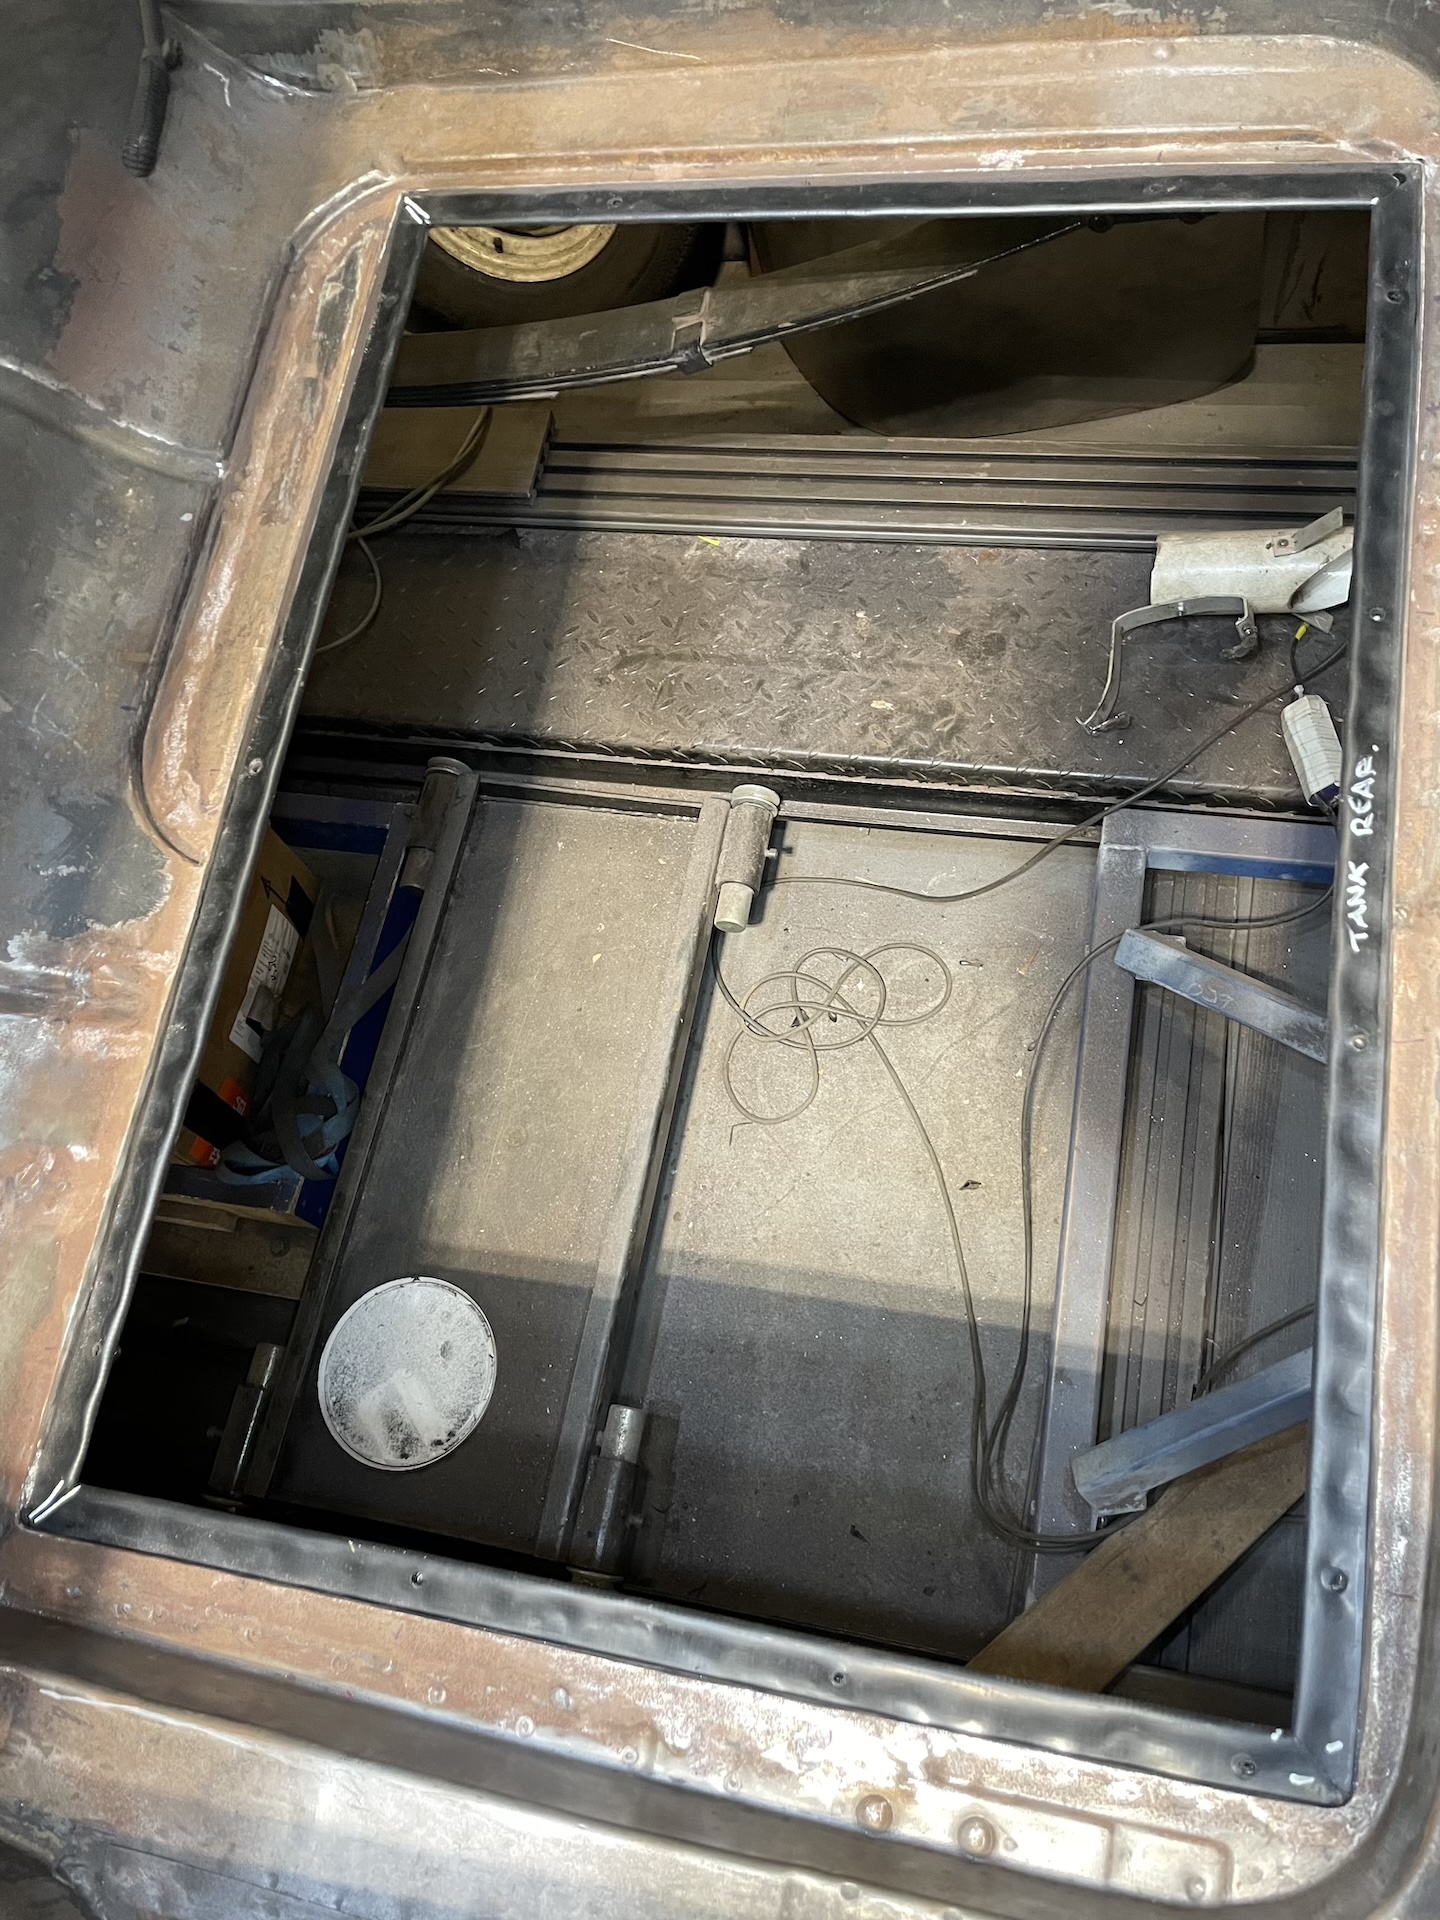
Finished off the Fuel tank as well.
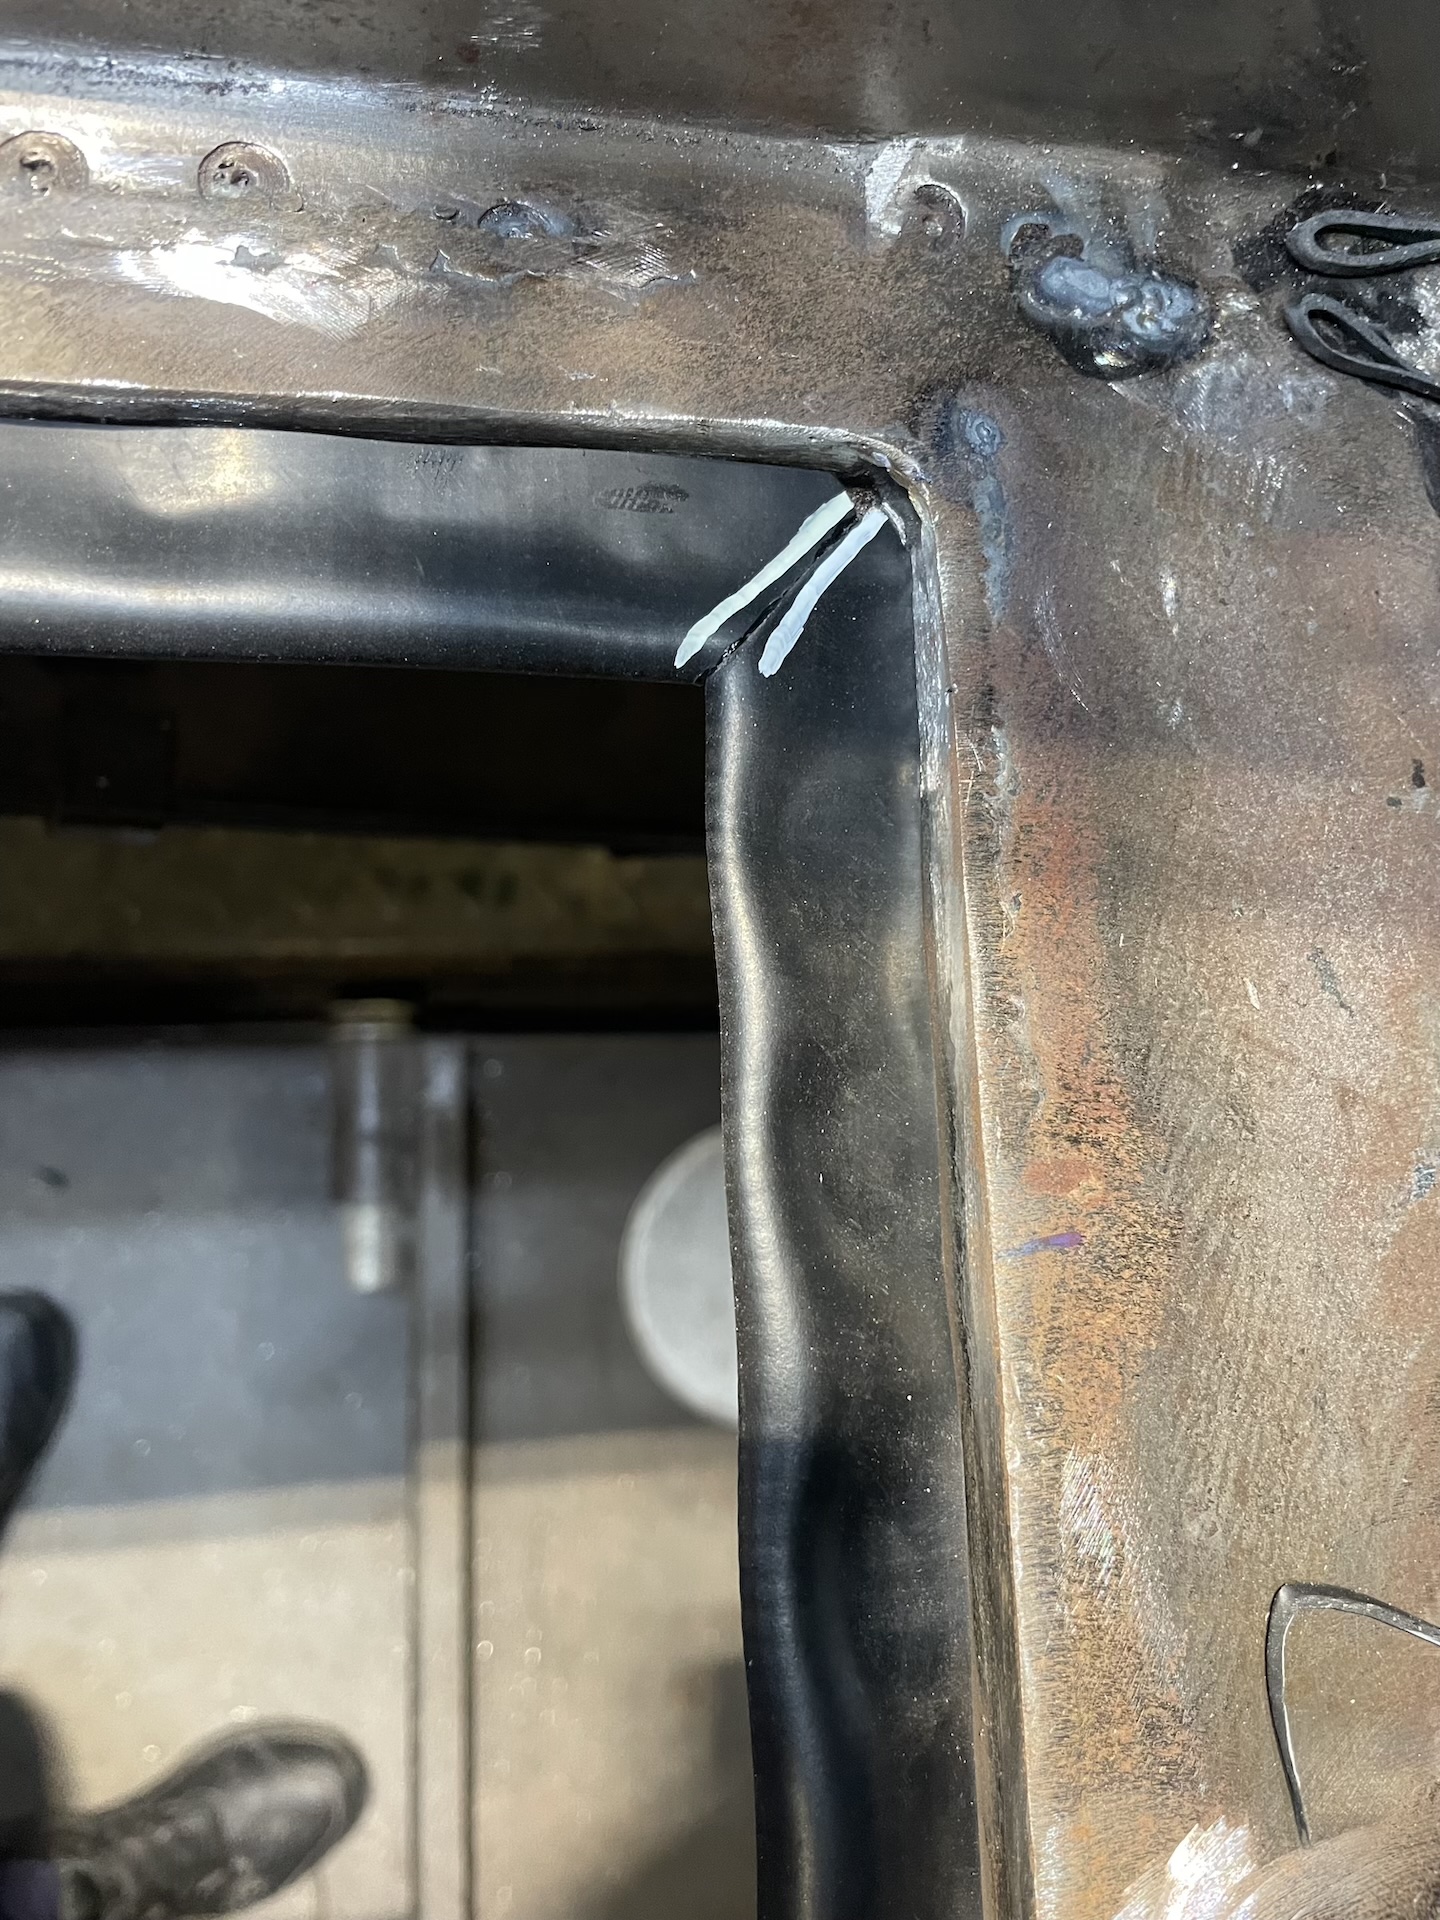
Made a rubber strip for around the edge of the tank to help seal the boot area. Folded some thin rubber sheet in half and tacked it together with superglue.

- IMG_7004.jpeg (753.49 KiB) Viewed 4480 times
Butt welded the corners with some more superglue. The ‘seal’ is sandwiched between the tank and the frame.
- IMG_6989.jpeg (966.79 KiB) Viewed 4480 times
- IMG_7661.jpeg (911.03 KiB) Viewed 4480 times

- IMG_6998.jpeg (674.25 KiB) Viewed 4480 times
Final job - weld the stainless nuts to the steel frame. Could have used steel nuts, but why make life easy. Requires 309 LSi wire which allows you to mig stainless to steel.

- IMG_7664.jpeg (799.25 KiB) Viewed 4480 times

- IMG_7663.jpeg (861.95 KiB) Viewed 4480 times
Re: Ol' Rusty - FB/EK Sedan
Posted: Thu Oct 23, 2025 10:36 am
by Blacky
Why stainless nuts mate ? Using stainless bolts as well ? I used stainless fasteners on my Monaro , need to never seize everything or the bastards gall up and seize

Re: Ol' Rusty - FB/EK Sedan
Posted: Thu Oct 23, 2025 11:30 am
by funkyscooter
Ha, used stainless so they wouldn't rust! I'll dab a bit of never seize on in final fitment. Only other reason to go stainless was stainless tank, stainless bolts, so stainless nuts. Didn't really consider compatibility with welding stainless to steel at the time I bought the nuts and bolts. Figured I'd try the 309 instead of changing bolts/nuts to steel as a bit of a learning exercise as well.
Re: Ol' Rusty - FB/EK Sedan
Posted: Thu Oct 23, 2025 2:39 pm
by Errol62
Nice work as ever mate. Regarding welding stainless, I’ve been using the same wire I use on steel to weld mild rod to stainless exhaust with no apparent issue.
Sent from my iPhone using Tapatalk
Re: Ol' Rusty - FB/EK Sedan
Posted: Thu Oct 23, 2025 10:49 pm
by Harv
funkyscooter wrote: Thu Oct 23, 2025 11:30 am
Ha, used stainless so they wouldn't rust! I'll dab a bit of never seize on in final fitment.
It's frightening how unforgiving stainless can be. We got turbo piping done for Number One Son's VL a few months back (suspect it is 304), and have been slowly piecing it together. Got them to put a few spare tappings into the piping as there is some stuff that still has plumbing options (like the heater control vacuum lines). Went to temporarily put a 1/8-NPT plug into one of the spare tapping points, not much beyond finger tight, and it galled solid. Said bad words, was grateful there are some more spare tappings. Antisieze-in-a-stick is a great thing.
Cheers,
Harv
Re: Ol' Rusty - FB/EK Sedan
Posted: Fri Oct 24, 2025 8:01 am
by funkyscooter
Errol62 wrote: Thu Oct 23, 2025 2:39 pm
Nice work as ever mate. Regarding welding stainless, I’ve been using the same wire I use on steel to weld mild rod to stainless exhaust with no apparent issue.
I did some tests welding mild steel to stainless initially and yes it sticks. It was only on the day I was going to weld the nuts on that I thought I better ask the question to my sometimes hallucinogenic, always ready to help online assistant, google Gemini. I asked if it is possible to weld mild steel to stainless with regular wire - answer is yes, but it is prone to rust and the weld is brittle.
BTW - Gemini in a Google search (AI overview - at the top of the search result) is not as helpful or detailed as using gemini.google.com
In Gemini there are no ads, just information. Sometimes it gets it wrong, but it is a good starting point for further research. And you can ask follow up questions like a conversation without having to enter all the information of the first question along with the new information you require.
Re: Ol' Rusty - FB/EK Sedan
Posted: Fri Oct 24, 2025 9:40 am
by funkyscooter
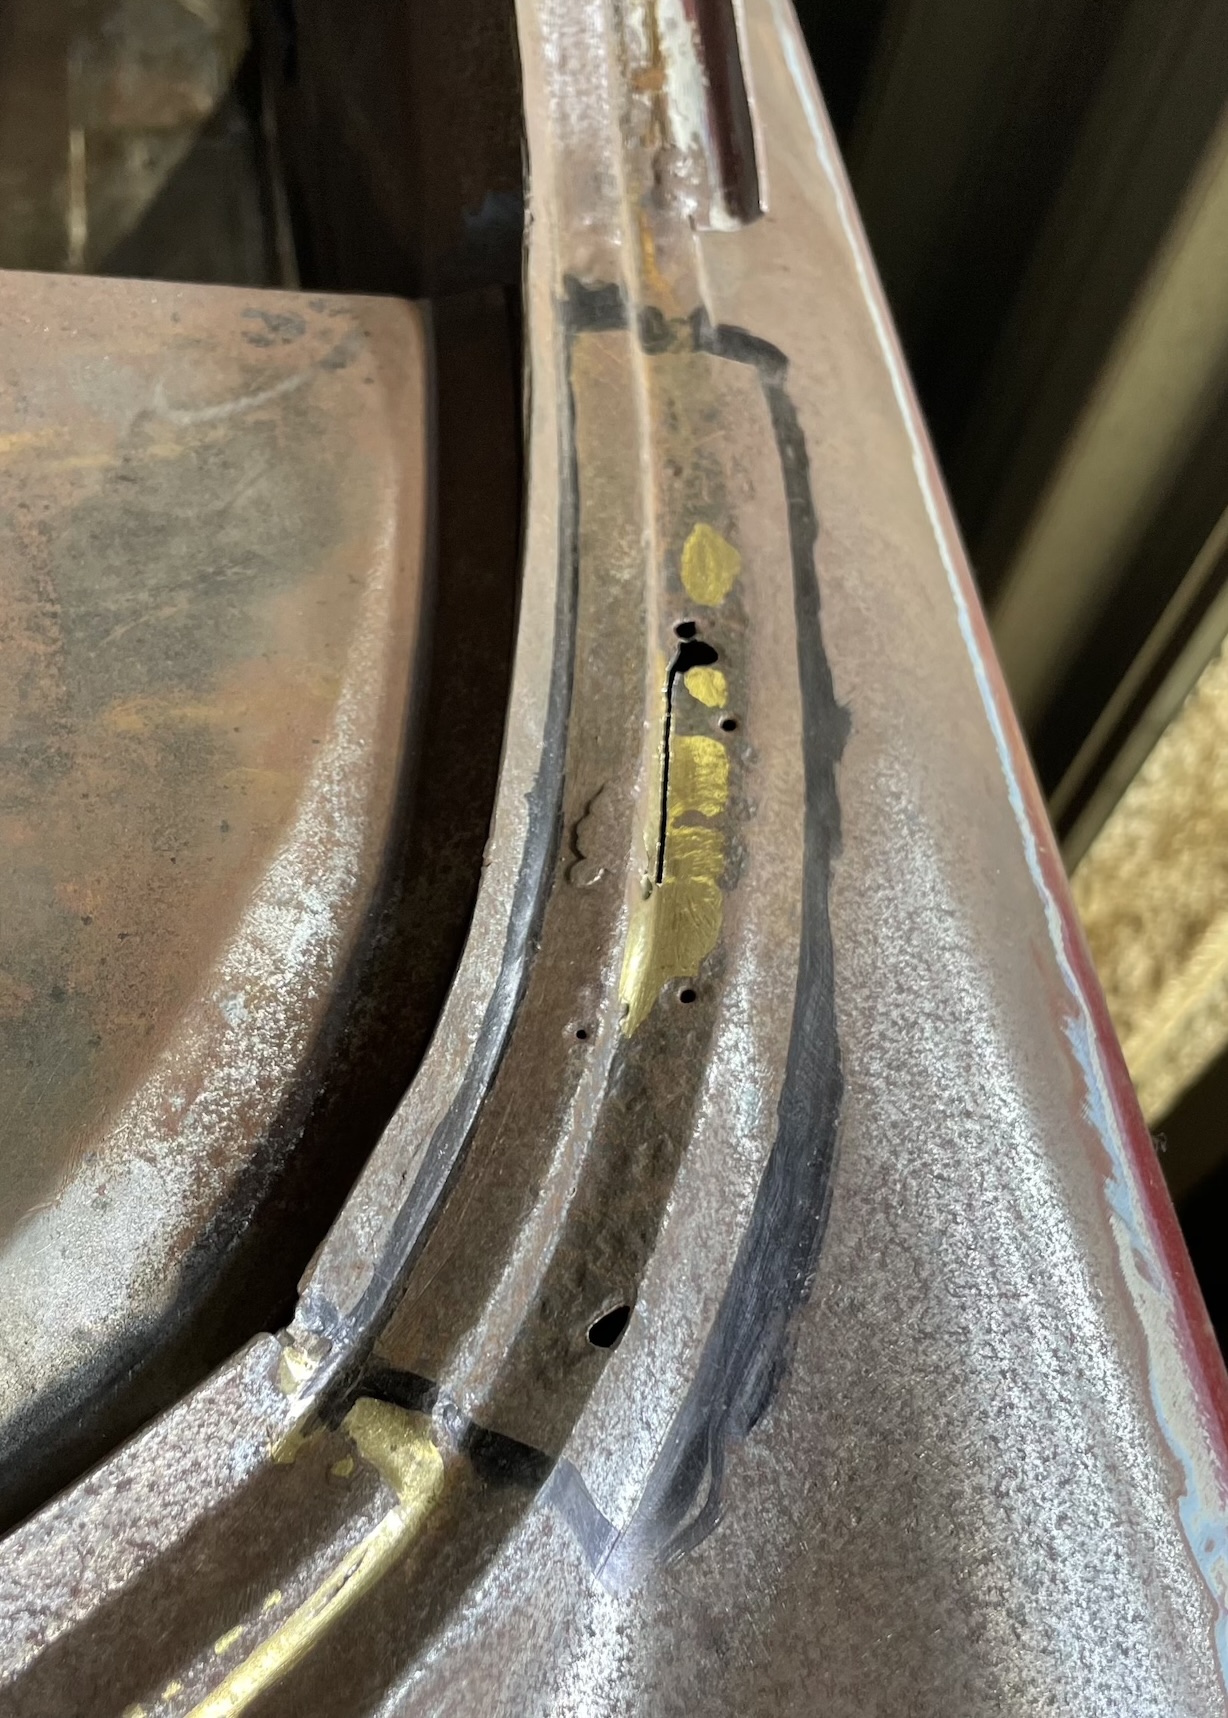
While I’m dumping pictures off my phone, here is a new repair (to a very old repair) I recently finished on the bottom of the rear window.
- IMG_7769.jpeg (697.77 KiB) Viewed 4344 times
Kept the edge of the frame as there was no rust and it’s a good guide. Shrink a curve into a new bit of angle, kept the bottom over length to grind off later.

- IMG_7770.jpeg (780.06 KiB) Viewed 4344 times
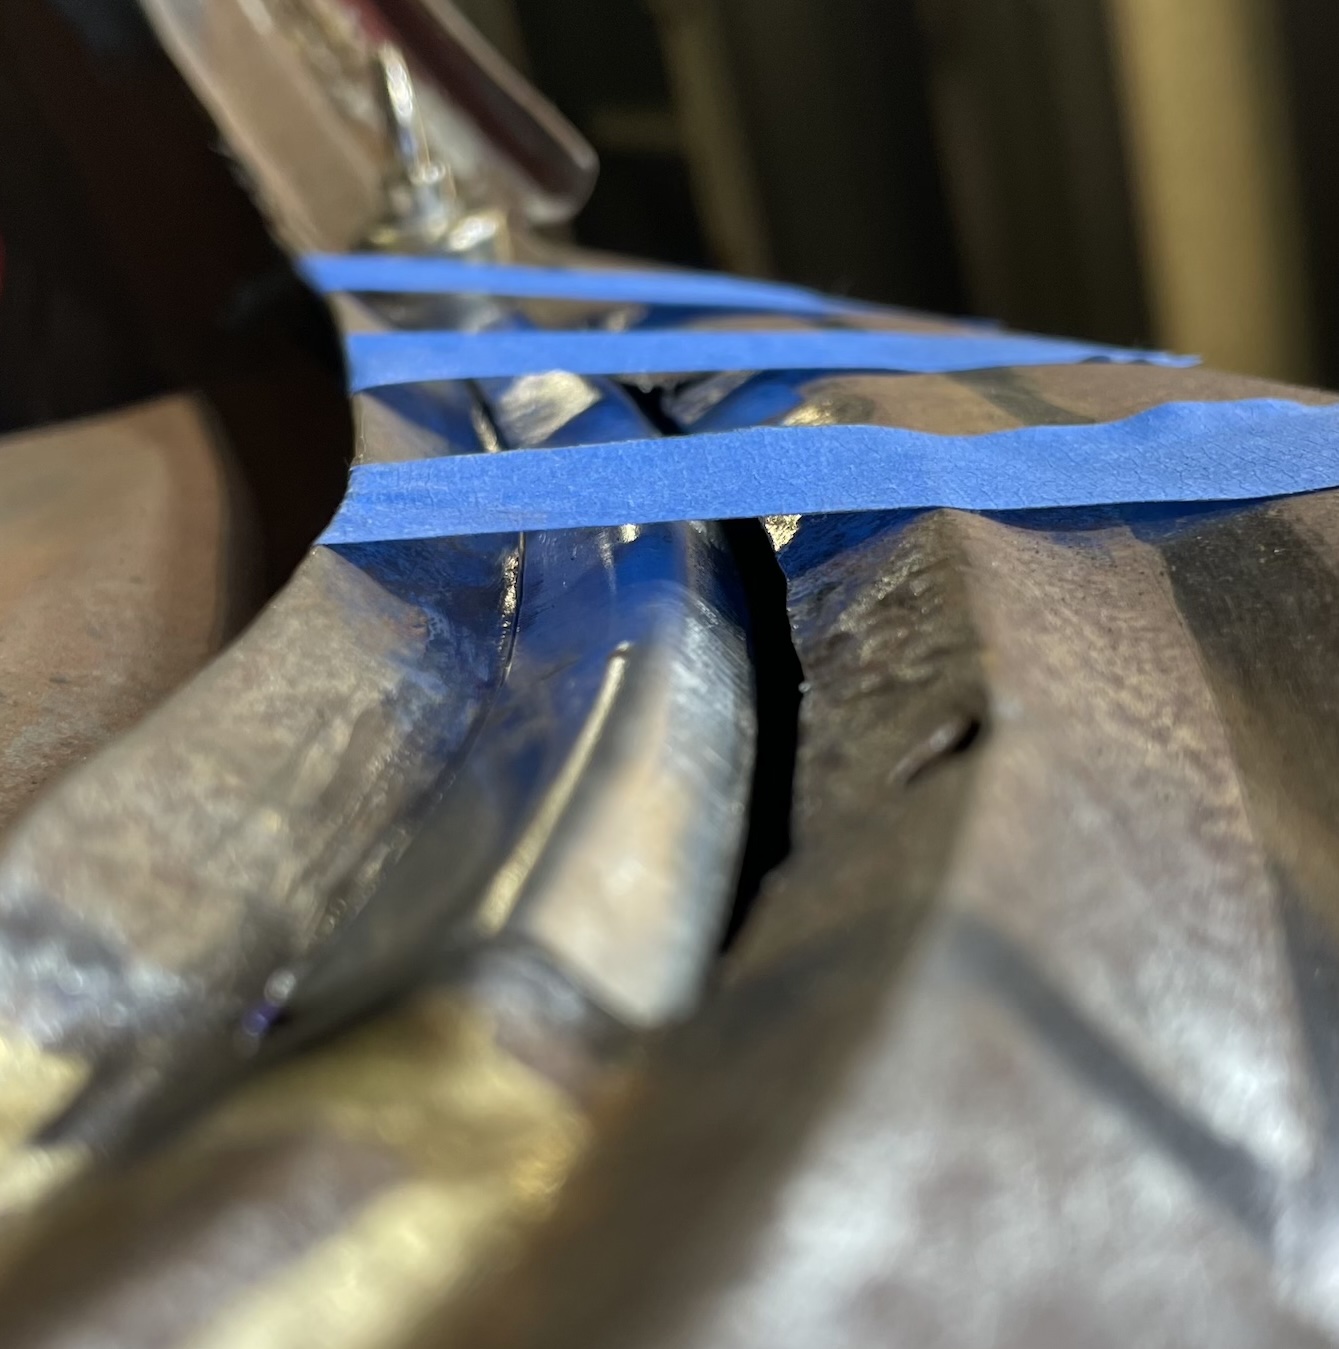
Final test fit after cut/grind/powerfile to fit. Tape was there as a guide to help maintain the slight curve I stretched into the vertical angle.
- IMG_7771.jpeg (312.17 KiB) Viewed 4344 times
Weld/grind.

- IMG_7772.jpeg (796.99 KiB) Viewed 4344 times
Mark and cut out the rest. Plan A was to make this in one go, after 2 failed attempts I decided to do it in two pieces. It was hard enough to get this subtle reverse curve to flow into the existing panel.

- IMG_7776.jpeg (734.72 KiB) Viewed 4344 times
Even the simple flat top was not straight forward as I was trying to get the metal to roll over the edge rather than filling it with weld and grinding a radius on to it.

- IMG_7789.jpeg (771.27 KiB) Viewed 4344 times
Much welding and grinding and sanding later

- IMG_7790.jpeg (580.36 KiB) Viewed 4344 times
Re: Ol' Rusty - FB/EK Sedan
Posted: Fri Oct 24, 2025 10:16 am
by funkyscooter
Stainless Grill refresh.
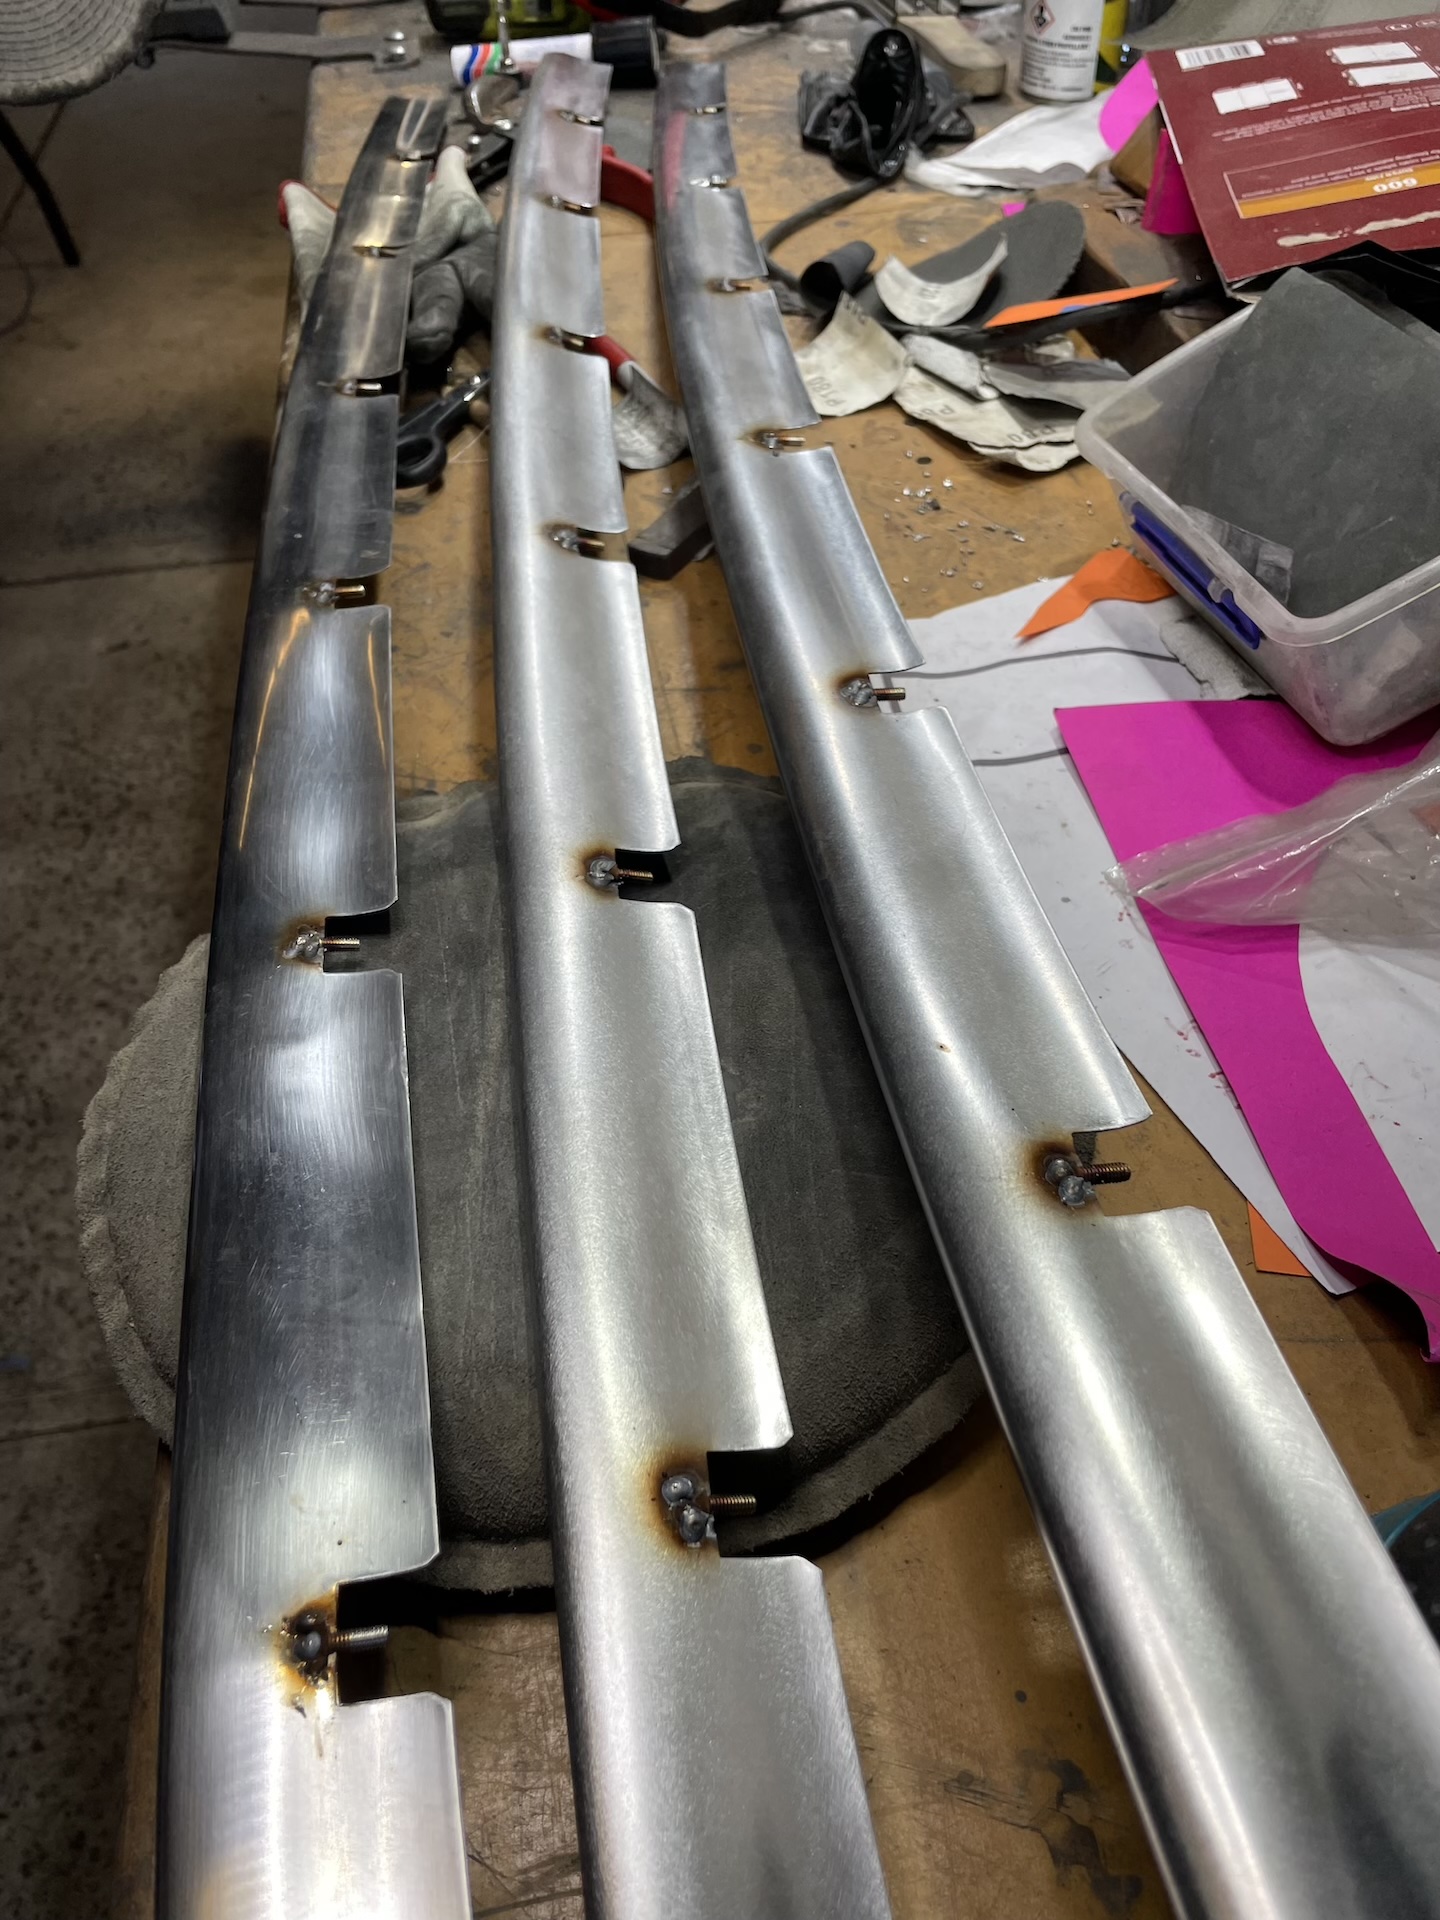
Picked up a set of FB stainless grill bars from Brett a while back. These are in pretty good condition but most tabs that hold them on to the vertical supports are missing. Anyway these 3 and in a better state than mine.

- IMG_7188.jpeg (1.76 MiB) Viewed 4341 times
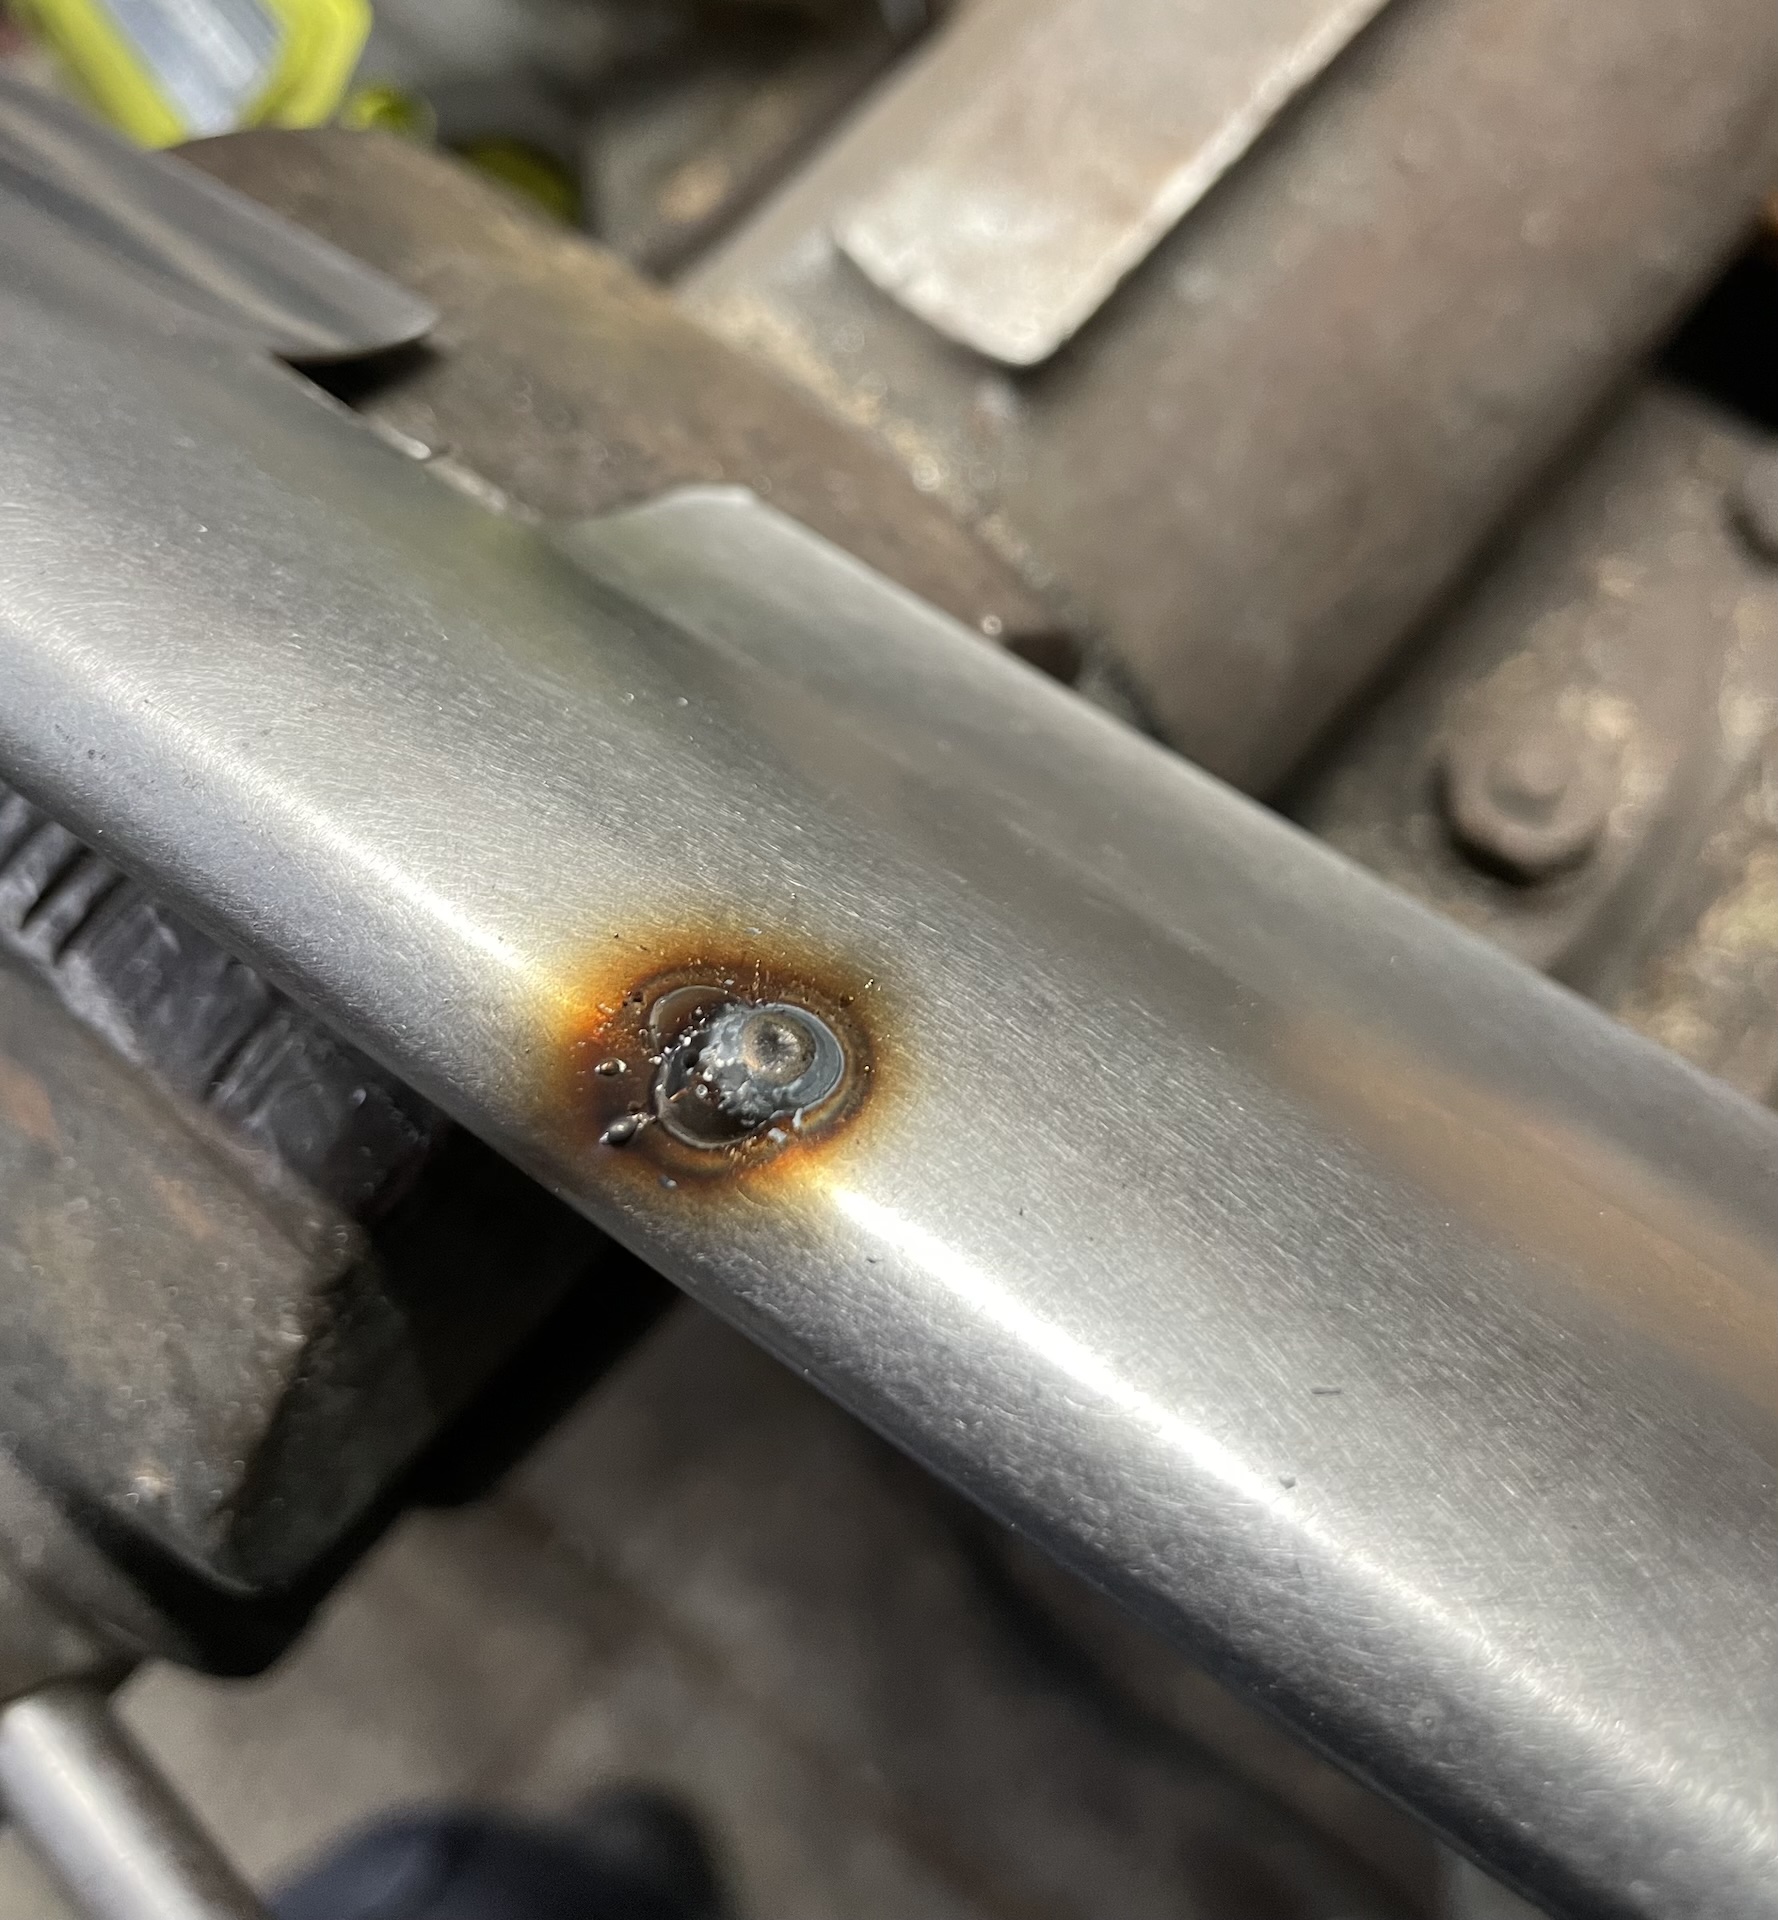
Only one major issue of the 3 is this mark which after a quick sand, looks like a grinder has gone through it.

- IMG_7305.jpeg (910.58 KiB) Viewed 4341 times
Out with the 316 mig wire for a quick repair. Note this was before I got the 309 which might have been a better match. The internet tells me that the original is most likely 430 stainless. Should have probably done my research before this.
- IMG_7311.jpeg (859.08 KiB) Viewed 4341 times
Much grinding and filing and sanding later, it looks okay from most angles, and a bit like a water stain from others like in this picture.

- IMG_7345.jpeg (963.31 KiB) Viewed 4341 times
Next got some 4mm 316 stainless steel screws, cut slots in the heads and ground most of the rest off. 18 of those was not fun.

- IMG_7353.jpeg (618.14 KiB) Viewed 4341 times
Held the screw in place with a bit of flat bar to keep everything ‘square’. Welded both sides.
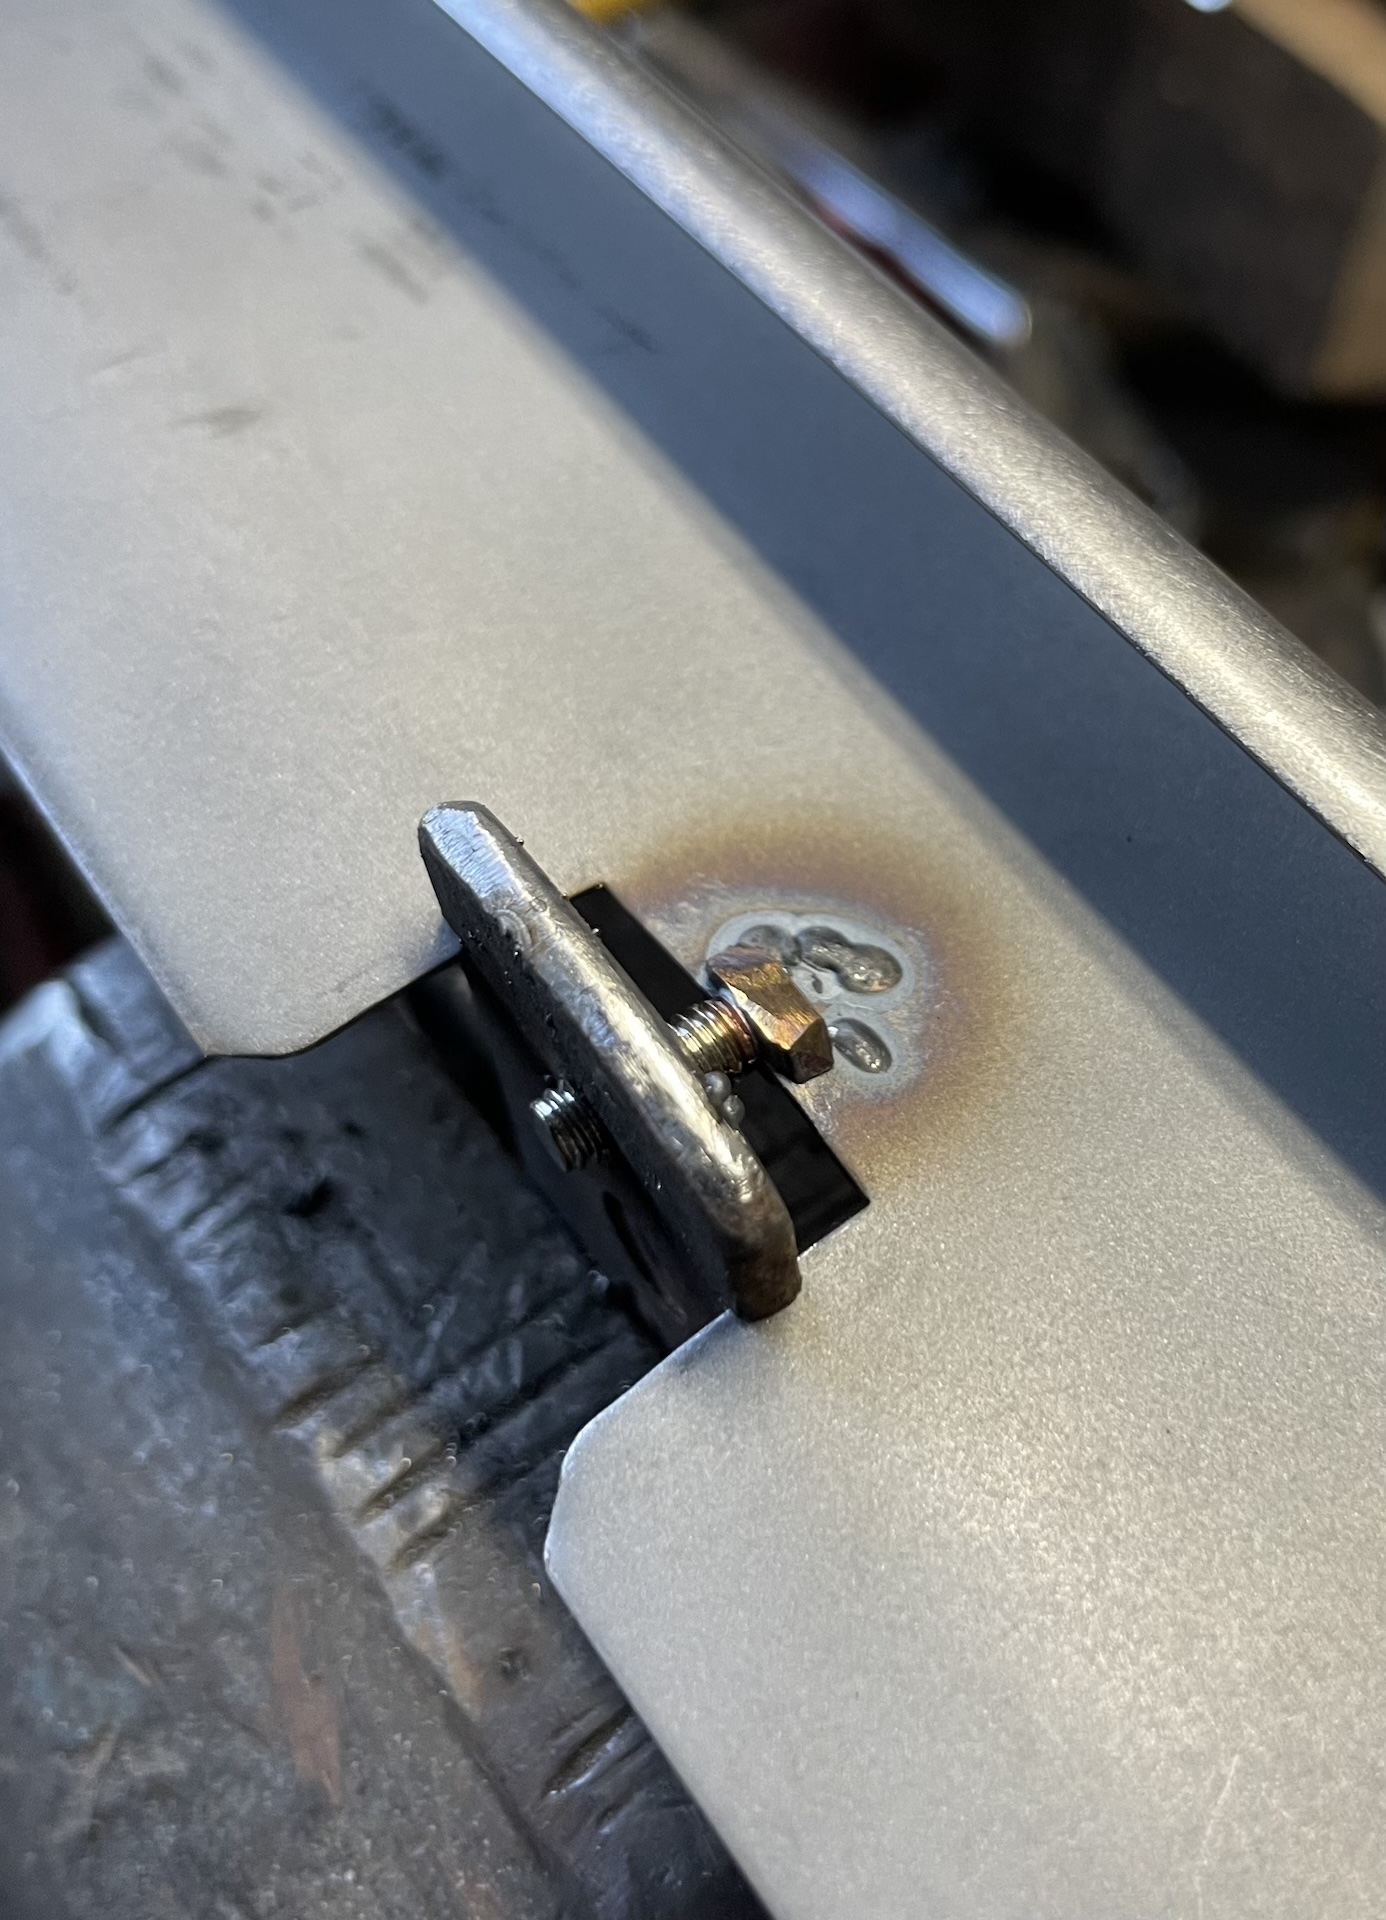
- IMG_7359.jpeg (635.56 KiB) Viewed 4341 times
- IMG_7360.jpeg (689.64 KiB) Viewed 4341 times
Drilled out the slots in the vertical supports for the 4mm bolts. Used nyloc nuts to hold them on. Had to bend the bolts to get it lined up better, but and as you can see, the bottom bar is not up flush with vertical grill pieces. Close enough, and hardly visible when look at it from a normal angle.

- IMG_7534.jpeg (1006.87 KiB) Viewed 4341 times
Now I can remove the grill more easily if I want to replace/modify the vertical grill pieces in the future.
Re: Ol' Rusty - FB/EK Sedan
Posted: Fri Oct 24, 2025 10:27 am
by Blacky
Very thorough and top quality work as always, I gotta ask , whats with the dust collector looking bizzo mounted on the office chair base ???