Page 41 of 49
Re: Ol' Rusty - FB/EK Sedan
Posted: Sun Feb 25, 2024 11:35 pm
by Blacky
............. or you could cut a 1/4" length of round bar off a manky handle and weld it to a new one ??? Save fiddle farting around with spacers ????
Re: Ol' Rusty - FB/EK Sedan
Posted: Mon Feb 26, 2024 6:42 am
by funkyscooter
Errol62 wrote: Sun Feb 25, 2024 9:35 pm
Love your lateral thinking Scotty. Yes, the pin length is the only difference. Maybe a front knob could be used from a manky front handle, in a good rear handle?
Unfortunately all knobs have lost there chrome so button would stand out like a sore thumb
Blacky wrote: Sun Feb 25, 2024 11:35 pm
............. or you could cut a 1/4" length of round bar off a manky handle and weld it to a new one ??? Save fiddle farting around with spacers ????
That's plan A Blacky!
Re: Ol' Rusty - FB/EK Sedan
Posted: Mon Feb 26, 2024 8:19 pm
by funkyscooter
Small victory day today.
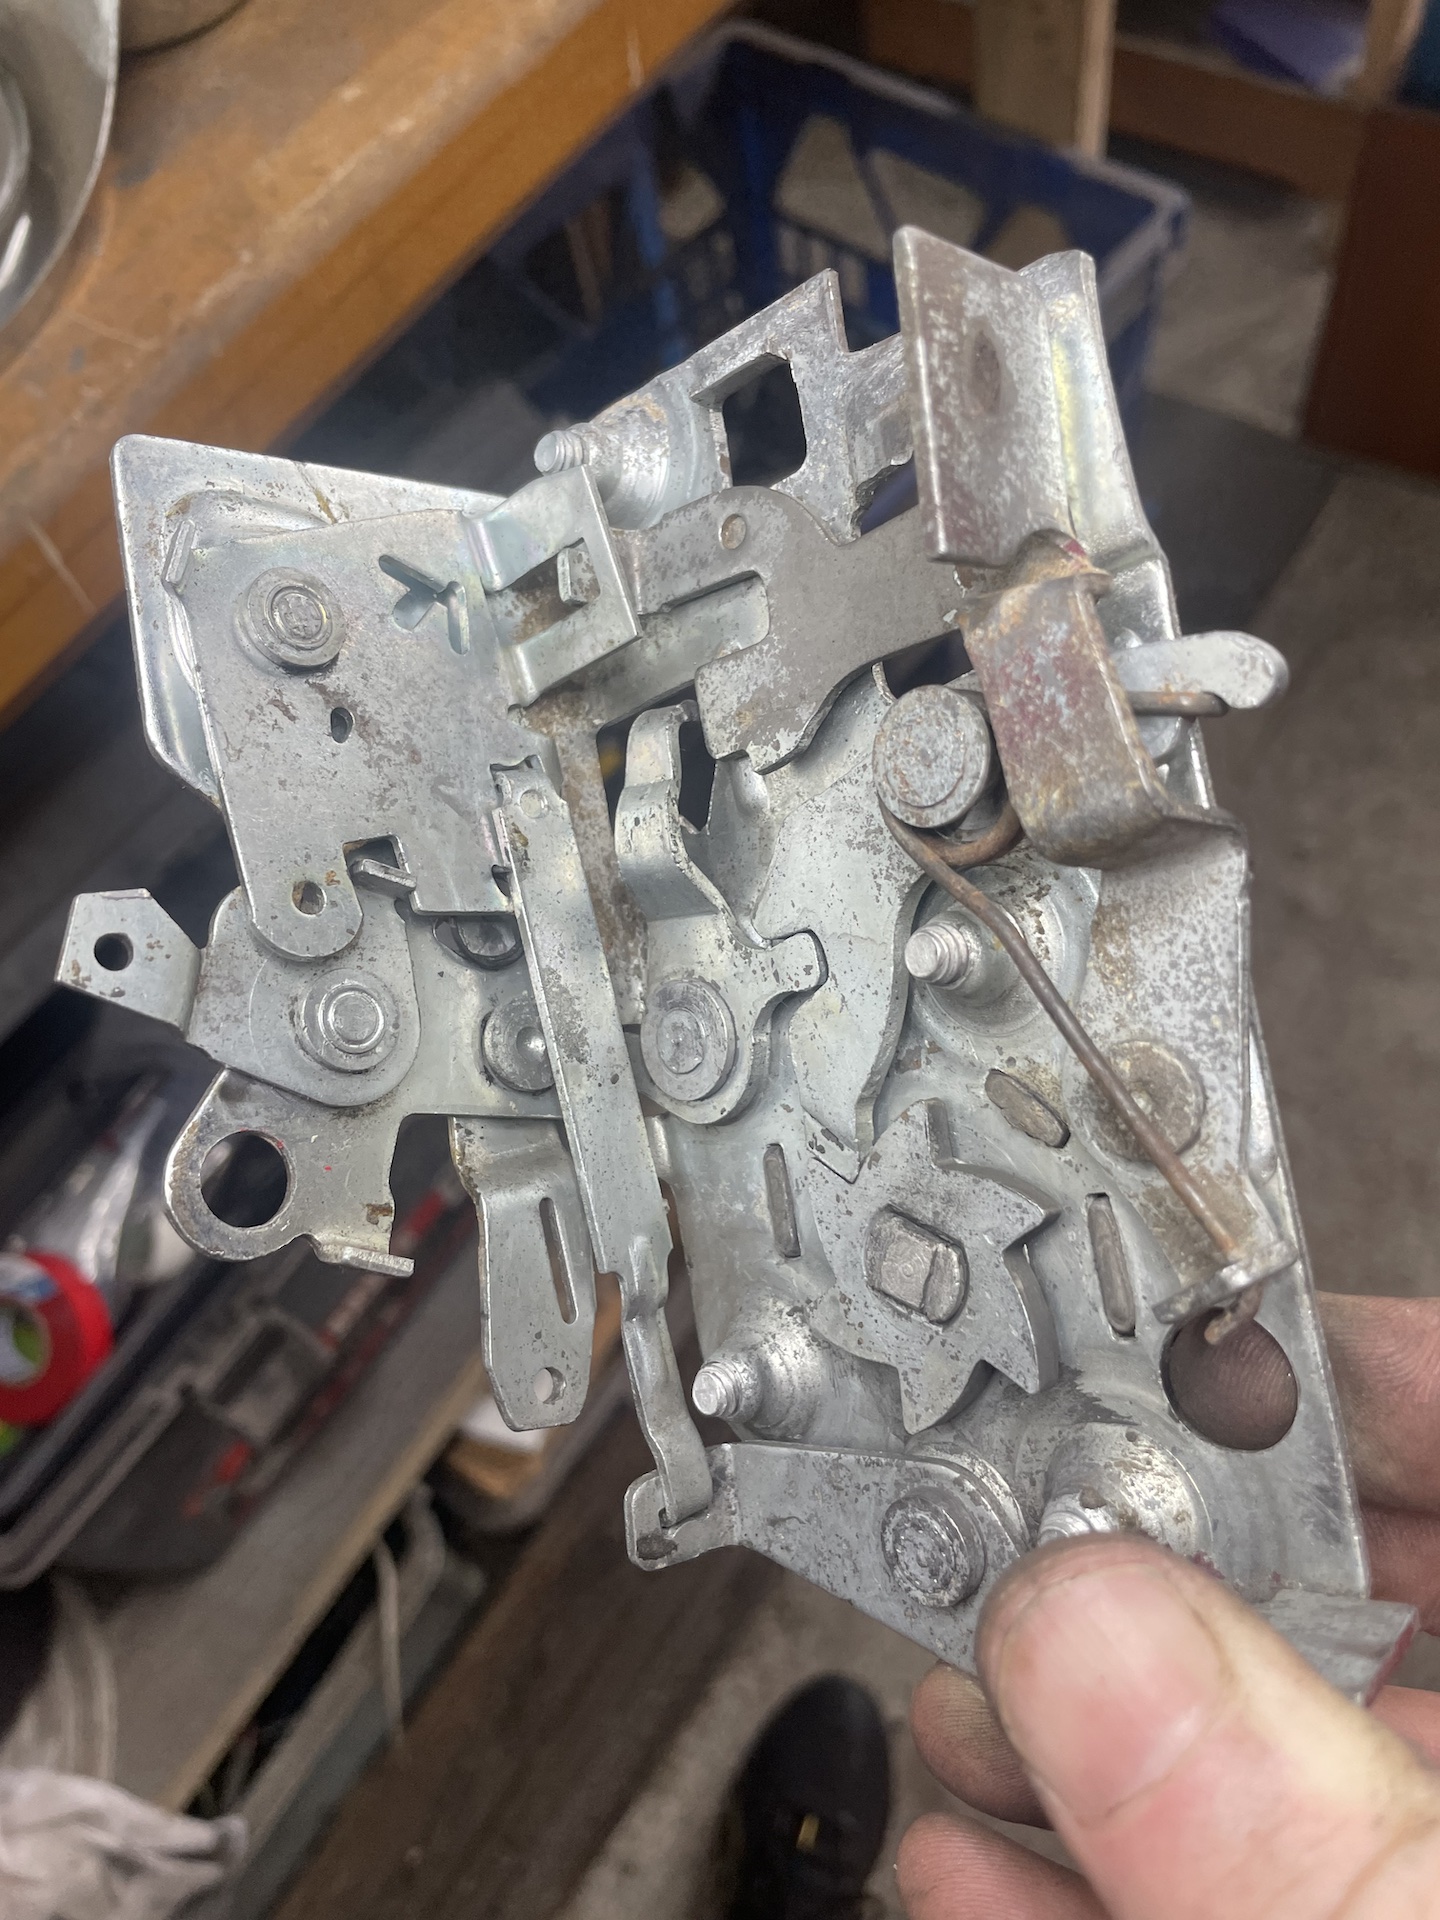
Removed 60 years of hardened grease and dirt off the door latch mechanisms.
- IMG_3430.jpeg (822.53 KiB) Viewed 5749 times
Noticed that there is a spring missing on the drivers latch that gives the lock its satisfying pop when you raise or lower it.
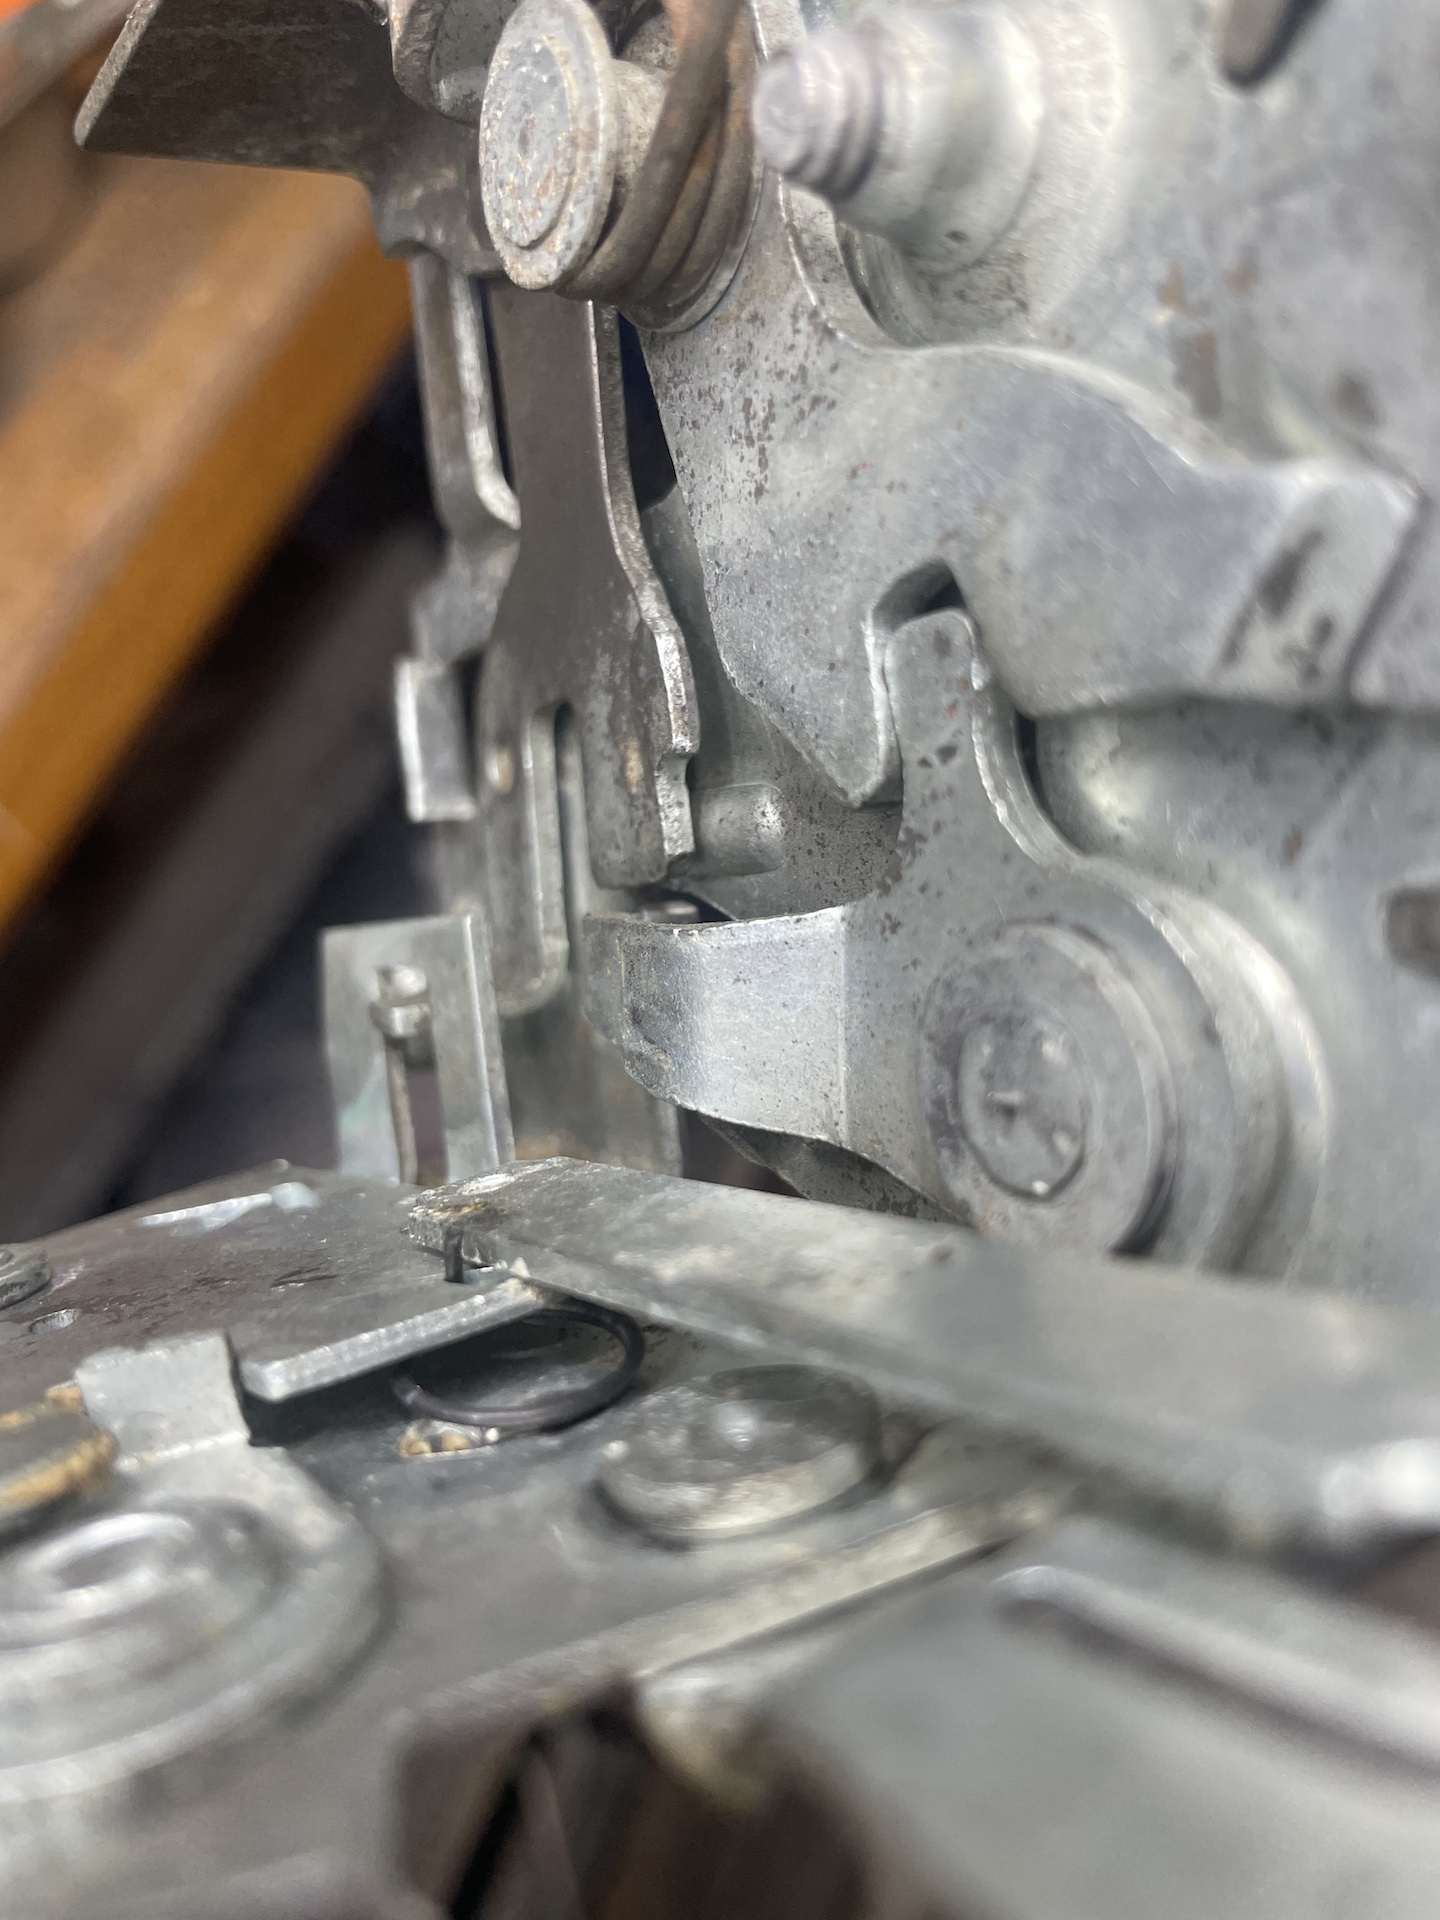
Here is the passenger side with the spring fitted. It's about 10mm diameter, 1 and a half turns in a clockwise direction, with legs at right angles poking through slots into the brackets.
- IMG_3429.jpeg (624.92 KiB) Viewed 5749 times
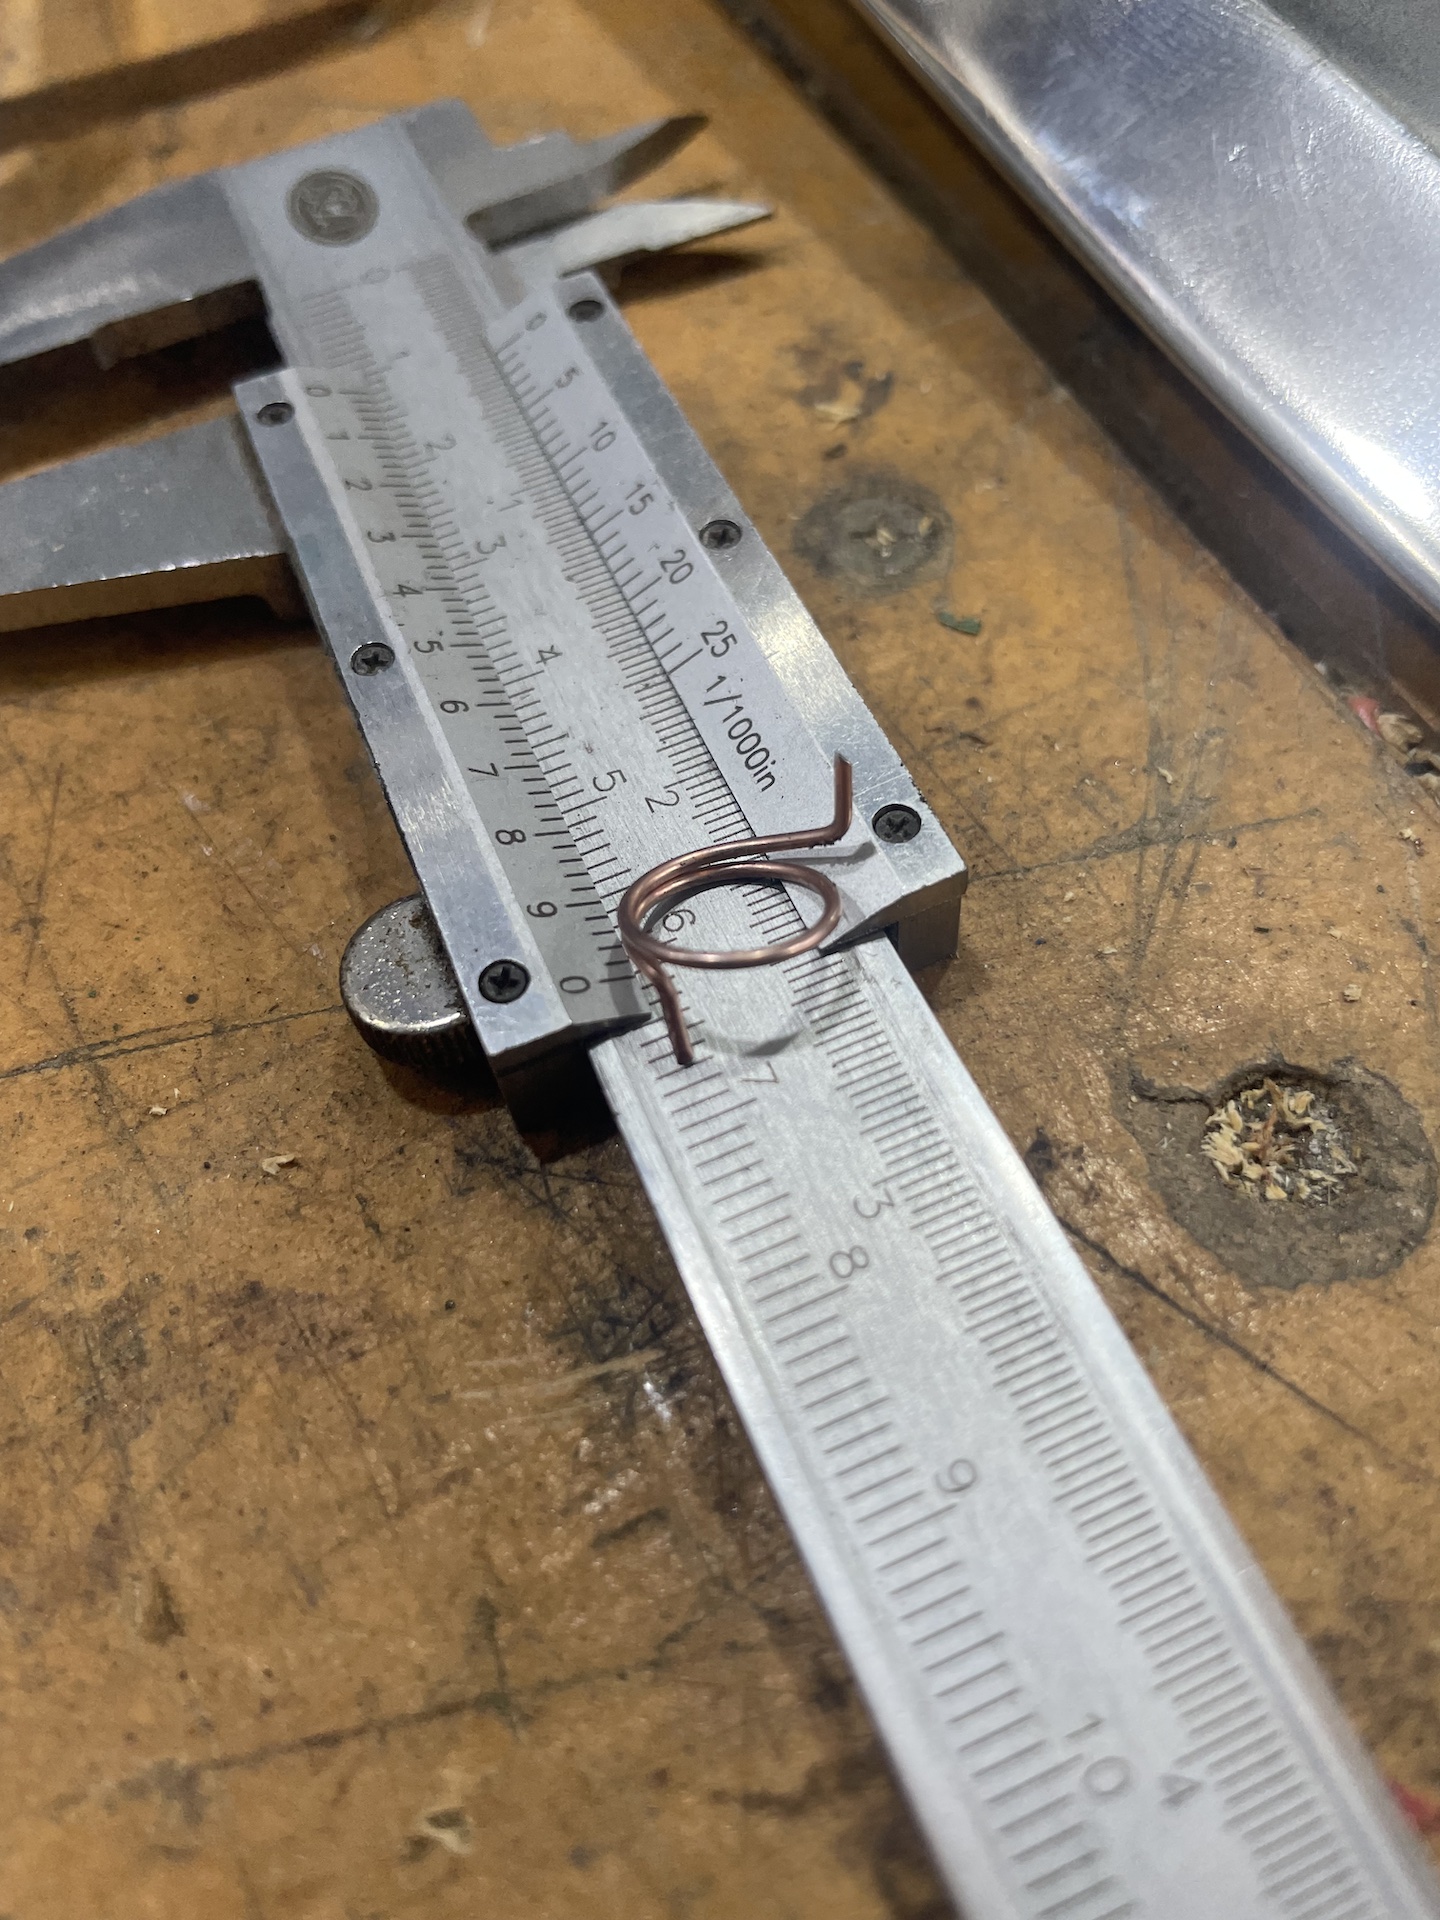
With some trusty 0.8mm MIG wire and, through some trial and error, an 8mm drill bit, I bent up a new 10mm spring. Even thought ahead and wound it in an anti clockwise direction to mirror the passenger one.
- IMG_3431.jpeg (857.75 KiB) Viewed 5749 times
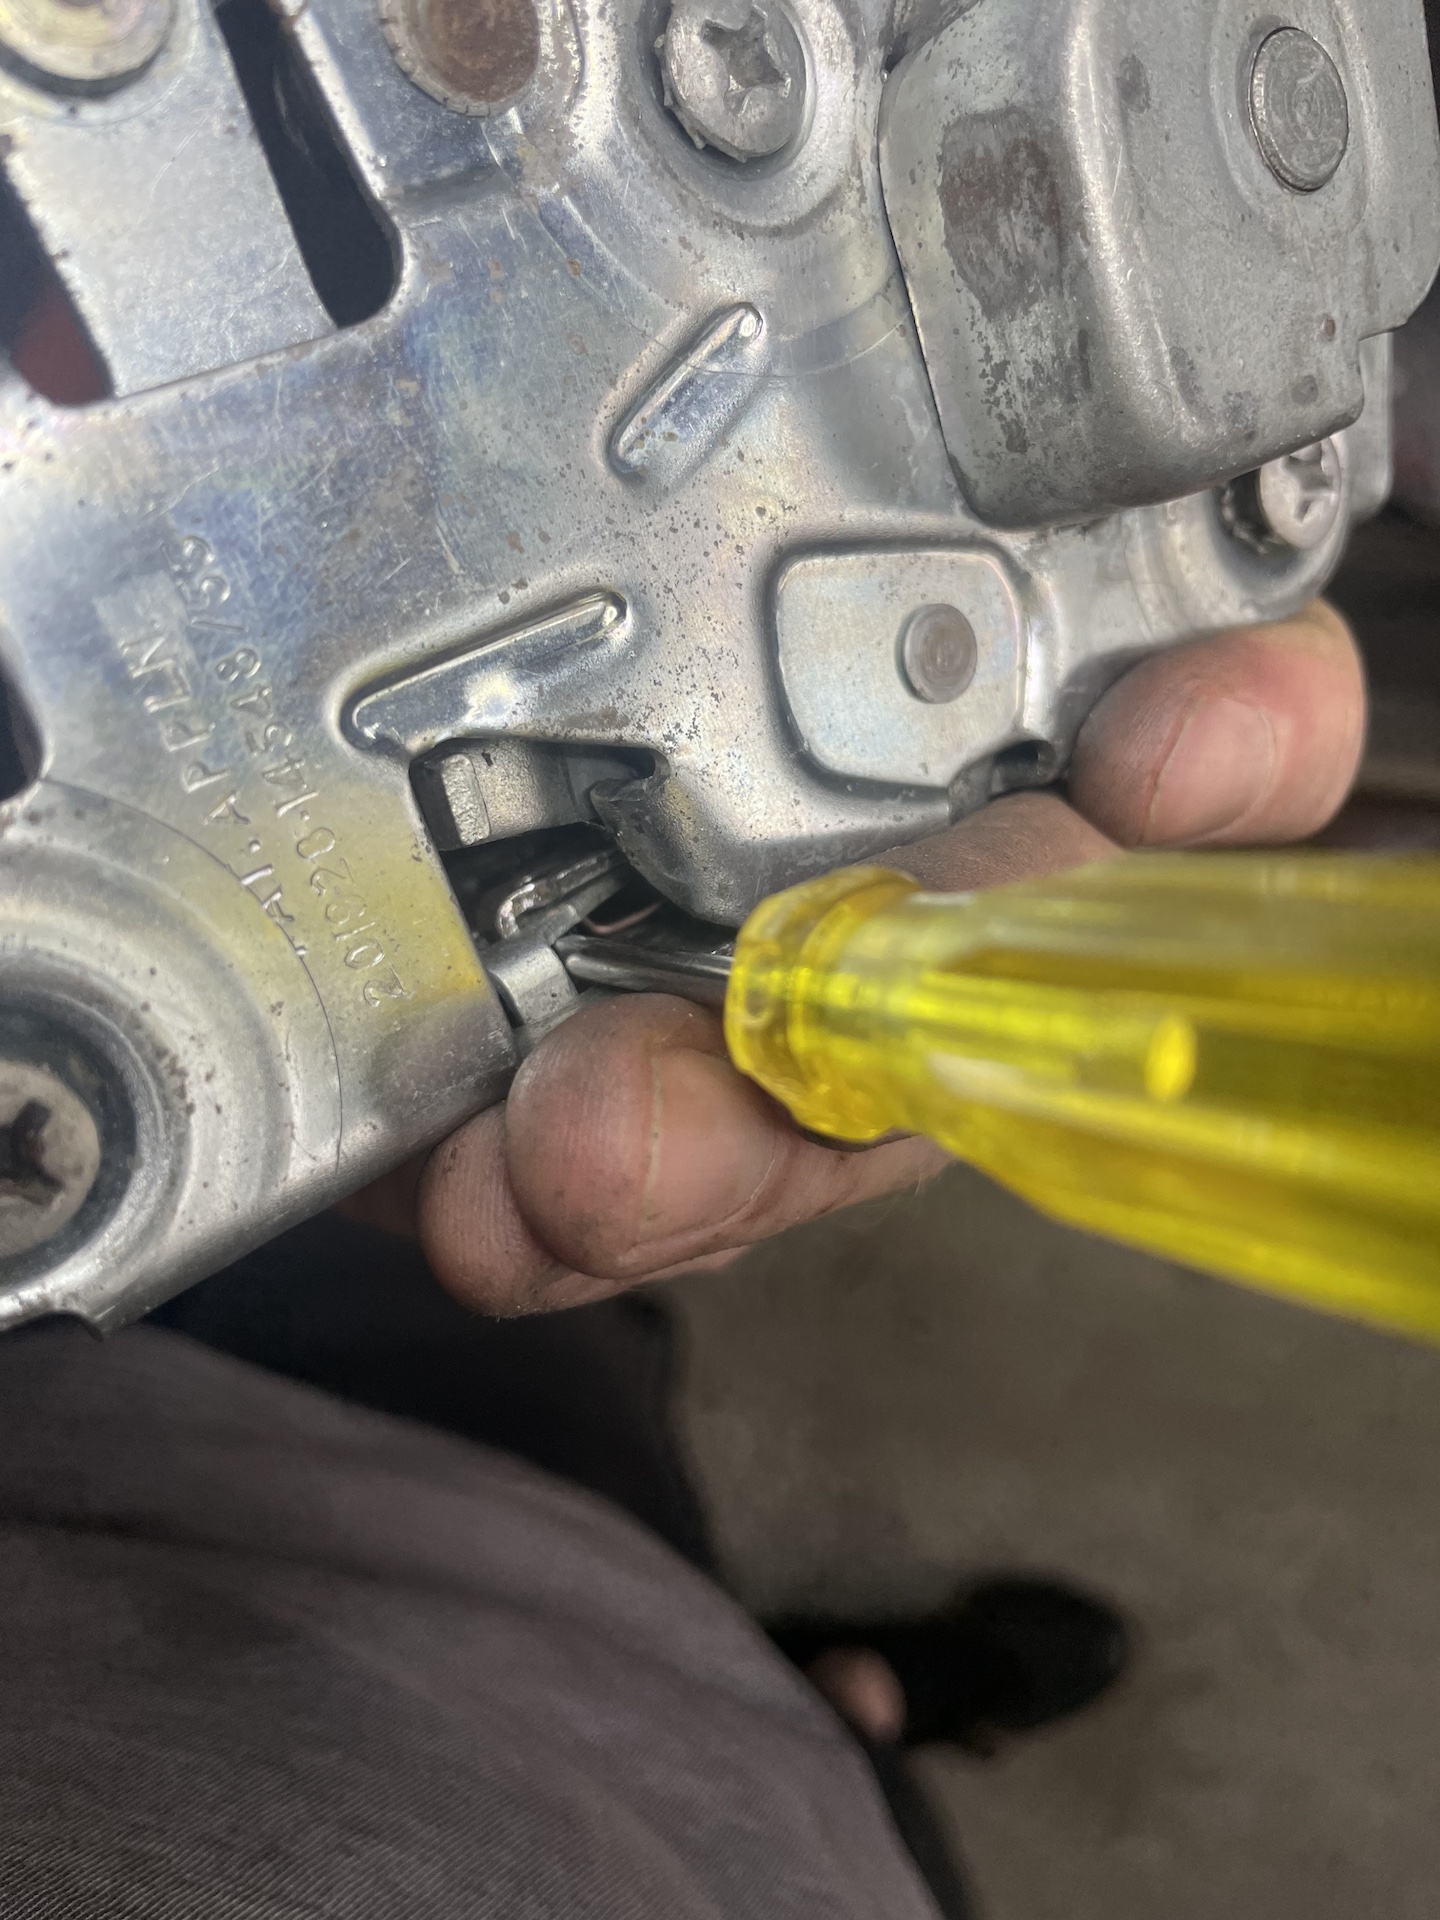
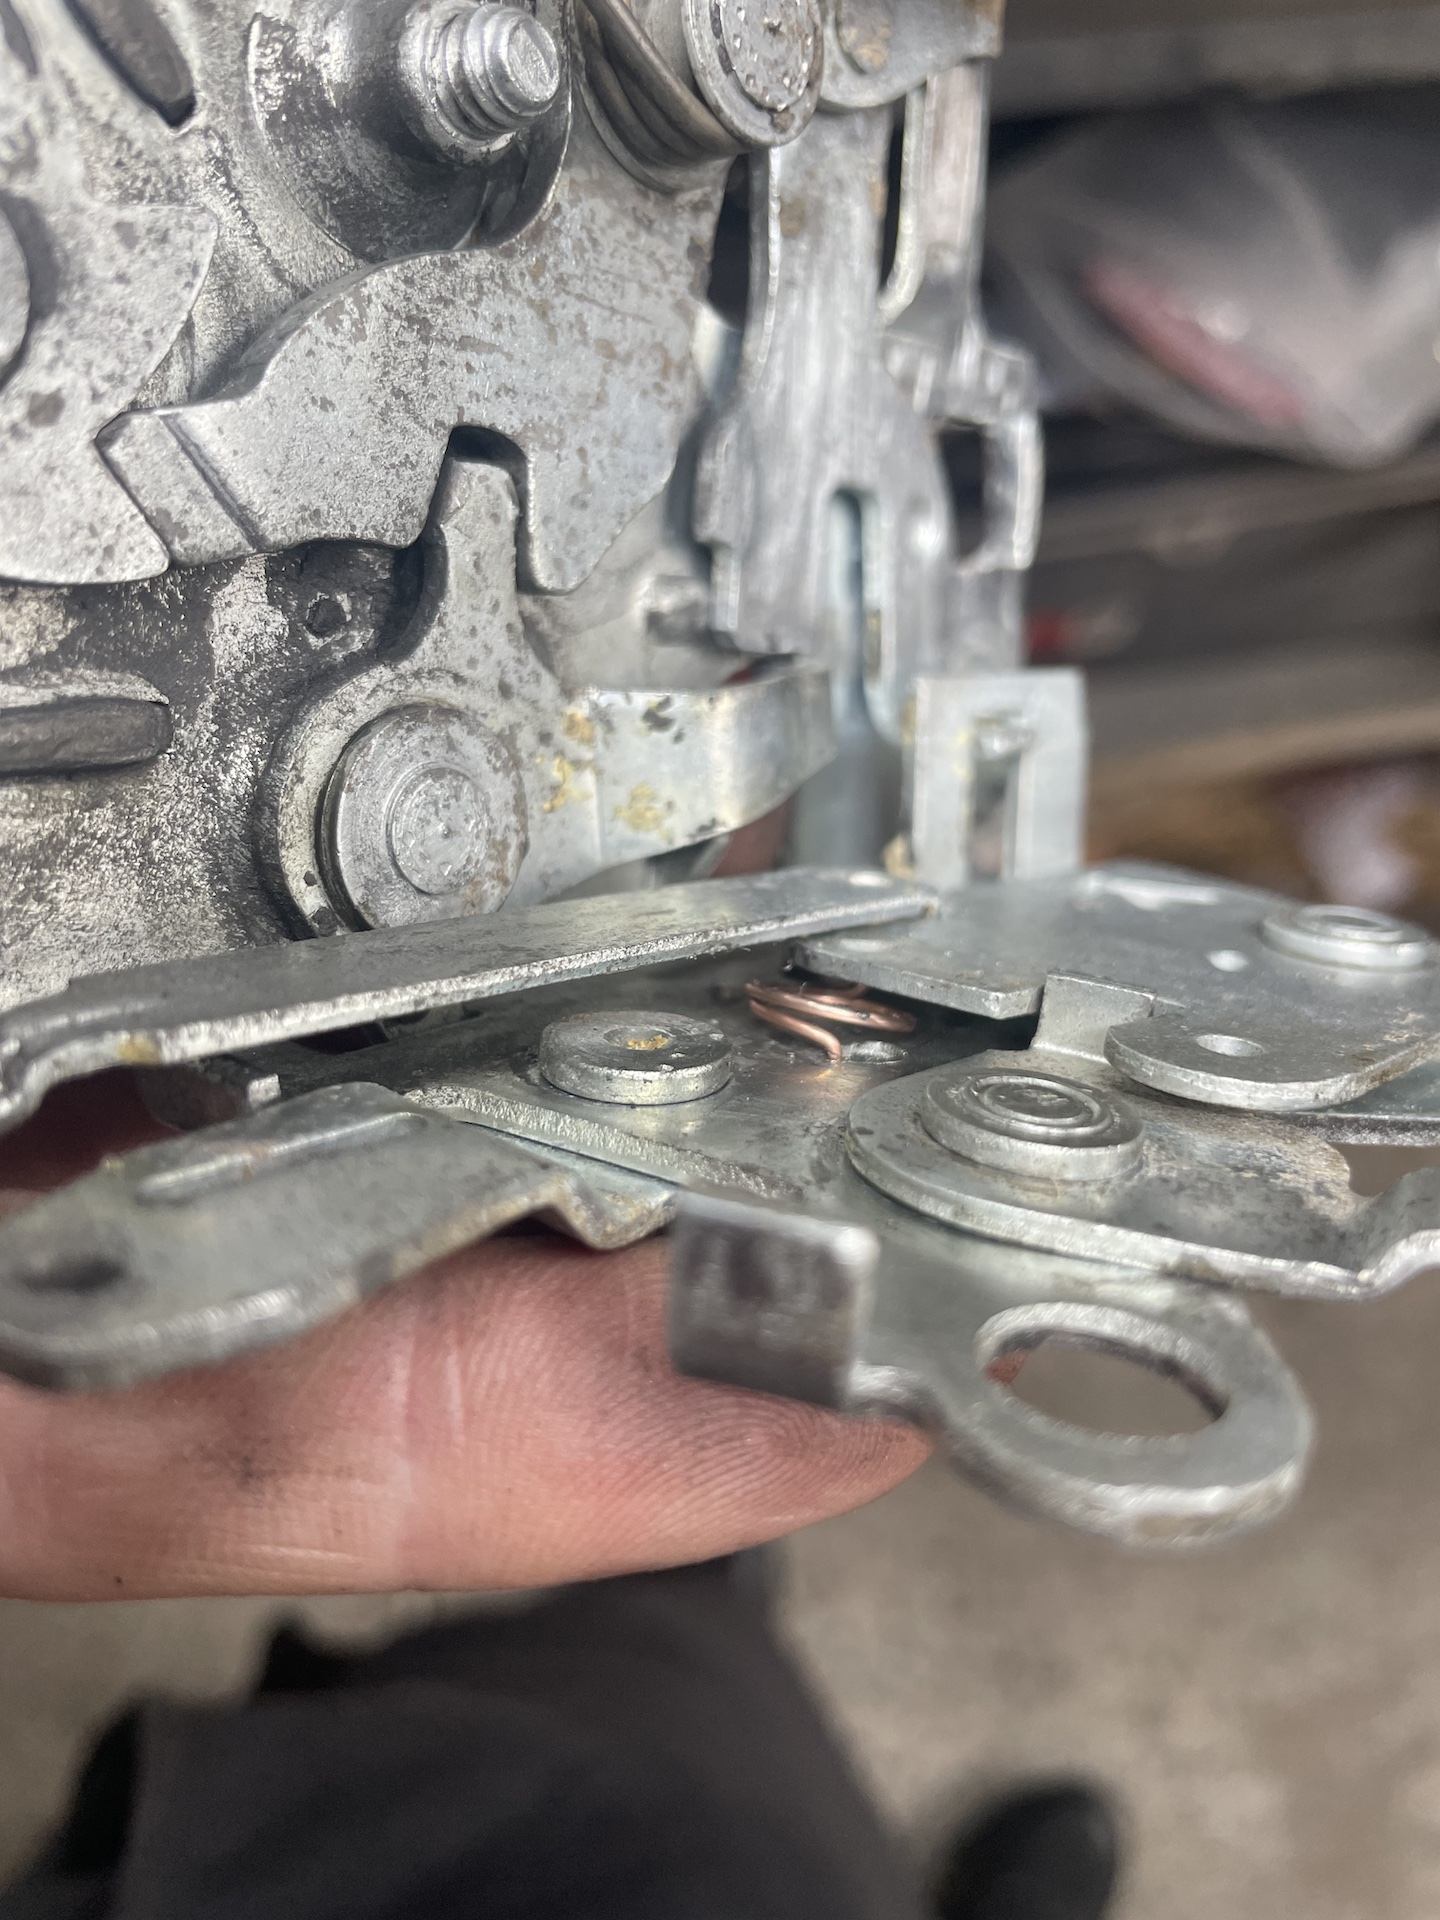
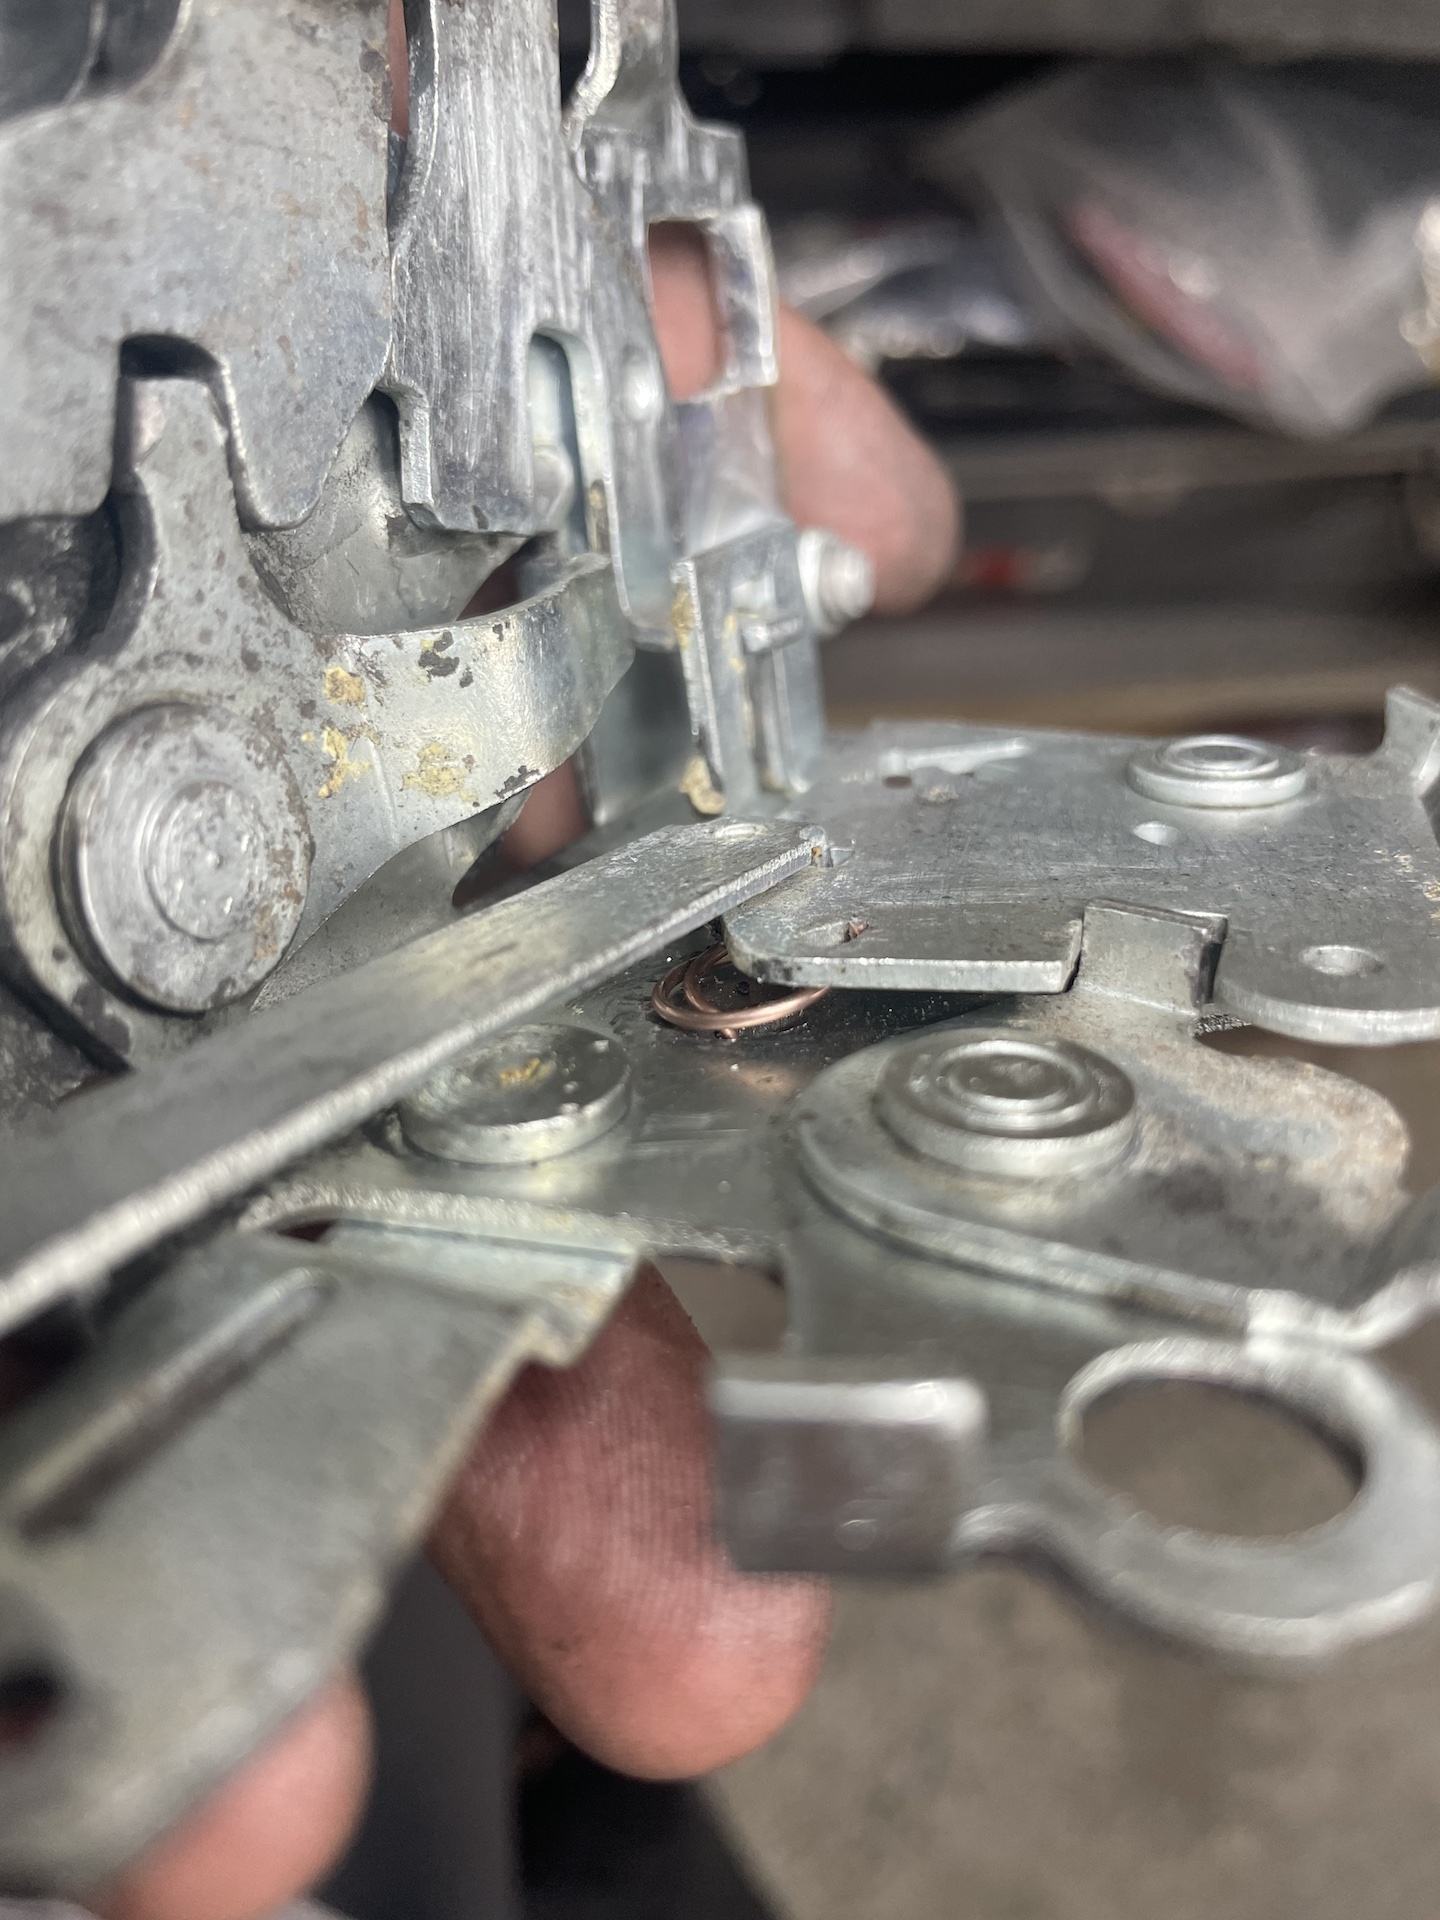
Fitting was not as hard as I thought. Popped one leg in its slot then forced the other leg under the top plate. From there I held the spring in place with a flat blade screwdriver, and used another through a small gap, to locate the other leg in its hole.
- IMG_3432.jpeg (715.31 KiB) Viewed 5749 times
Success. Unlocked.
- IMG_3433.jpeg (765.38 KiB) Viewed 5749 times
Locked.
- IMG_3434.jpeg (682.13 KiB) Viewed 5749 times
Force required to push the lock is slightly higher than the original spring (1.4kg vs 1.2kg). Not sure how this wire will fatigue over time. Engaged the lock about 50 times quickly and it didn't break so there's that.
It will be better than nothing until it's nothing again when it breaks or pops off.
Re: Ol' Rusty - FB/EK Sedan
Posted: Mon Feb 26, 2024 11:00 pm
by Errol62
Handy advice.
FB ute fixer upper, EK van on rotisserie
Re: Ol' Rusty - FB/EK Sedan
Posted: Fri Mar 01, 2024 5:16 pm
by funkyscooter
Got the handles. Look decent enough although one did not have its protective wrap on the chrome. Used it for my prototype.
As I don’t have access to a lathe, decided to print some caps to extend the shafts by 6.25mm.

It’s PETG which is strong, but not sure on abrasive wear and tear. Probably change it to a metal cap at a later stage. For now they are going on a shelf but at least this will remind me what I have to do when I unwrap them in the future!
Sent from my iPhone using Tapatalk
Re: Ol' Rusty - FB/EK Sedan
Posted: Fri Mar 01, 2024 5:45 pm
by Blacky
Seeing as they are under compression I would think that provided they don't split they should last a good while ???
Re: Ol' Rusty - FB/EK Sedan
Posted: Fri Mar 01, 2024 6:33 pm
by Errol62
That is a great idea mate!
Sent from my SM-G781B using Tapatalk
Re: Ol' Rusty - FB/EK Sedan
Posted: Fri Mar 01, 2024 7:11 pm
by funkyscooter
Bit better than my other solution which was a little more agricultural. Off cut of rubber hose with an ID of 1/4'' slipped over the shaft, with a short bit of steel rod stuffed down the end of it.

Re: Ol' Rusty - FB/EK Sedan
Posted: Fri Mar 01, 2024 7:29 pm
by Errol62
Nothing g wrong with that. It's what I'd probably do.
Sent from my SM-G781B using Tapatalk
Re: Ol' Rusty - FB/EK Sedan
Posted: Thu Apr 04, 2024 9:31 am
by funkyscooter
As seems to be the way I work at the moment, I jumped back on to the front doors to add some recessed holes for puddle lights.
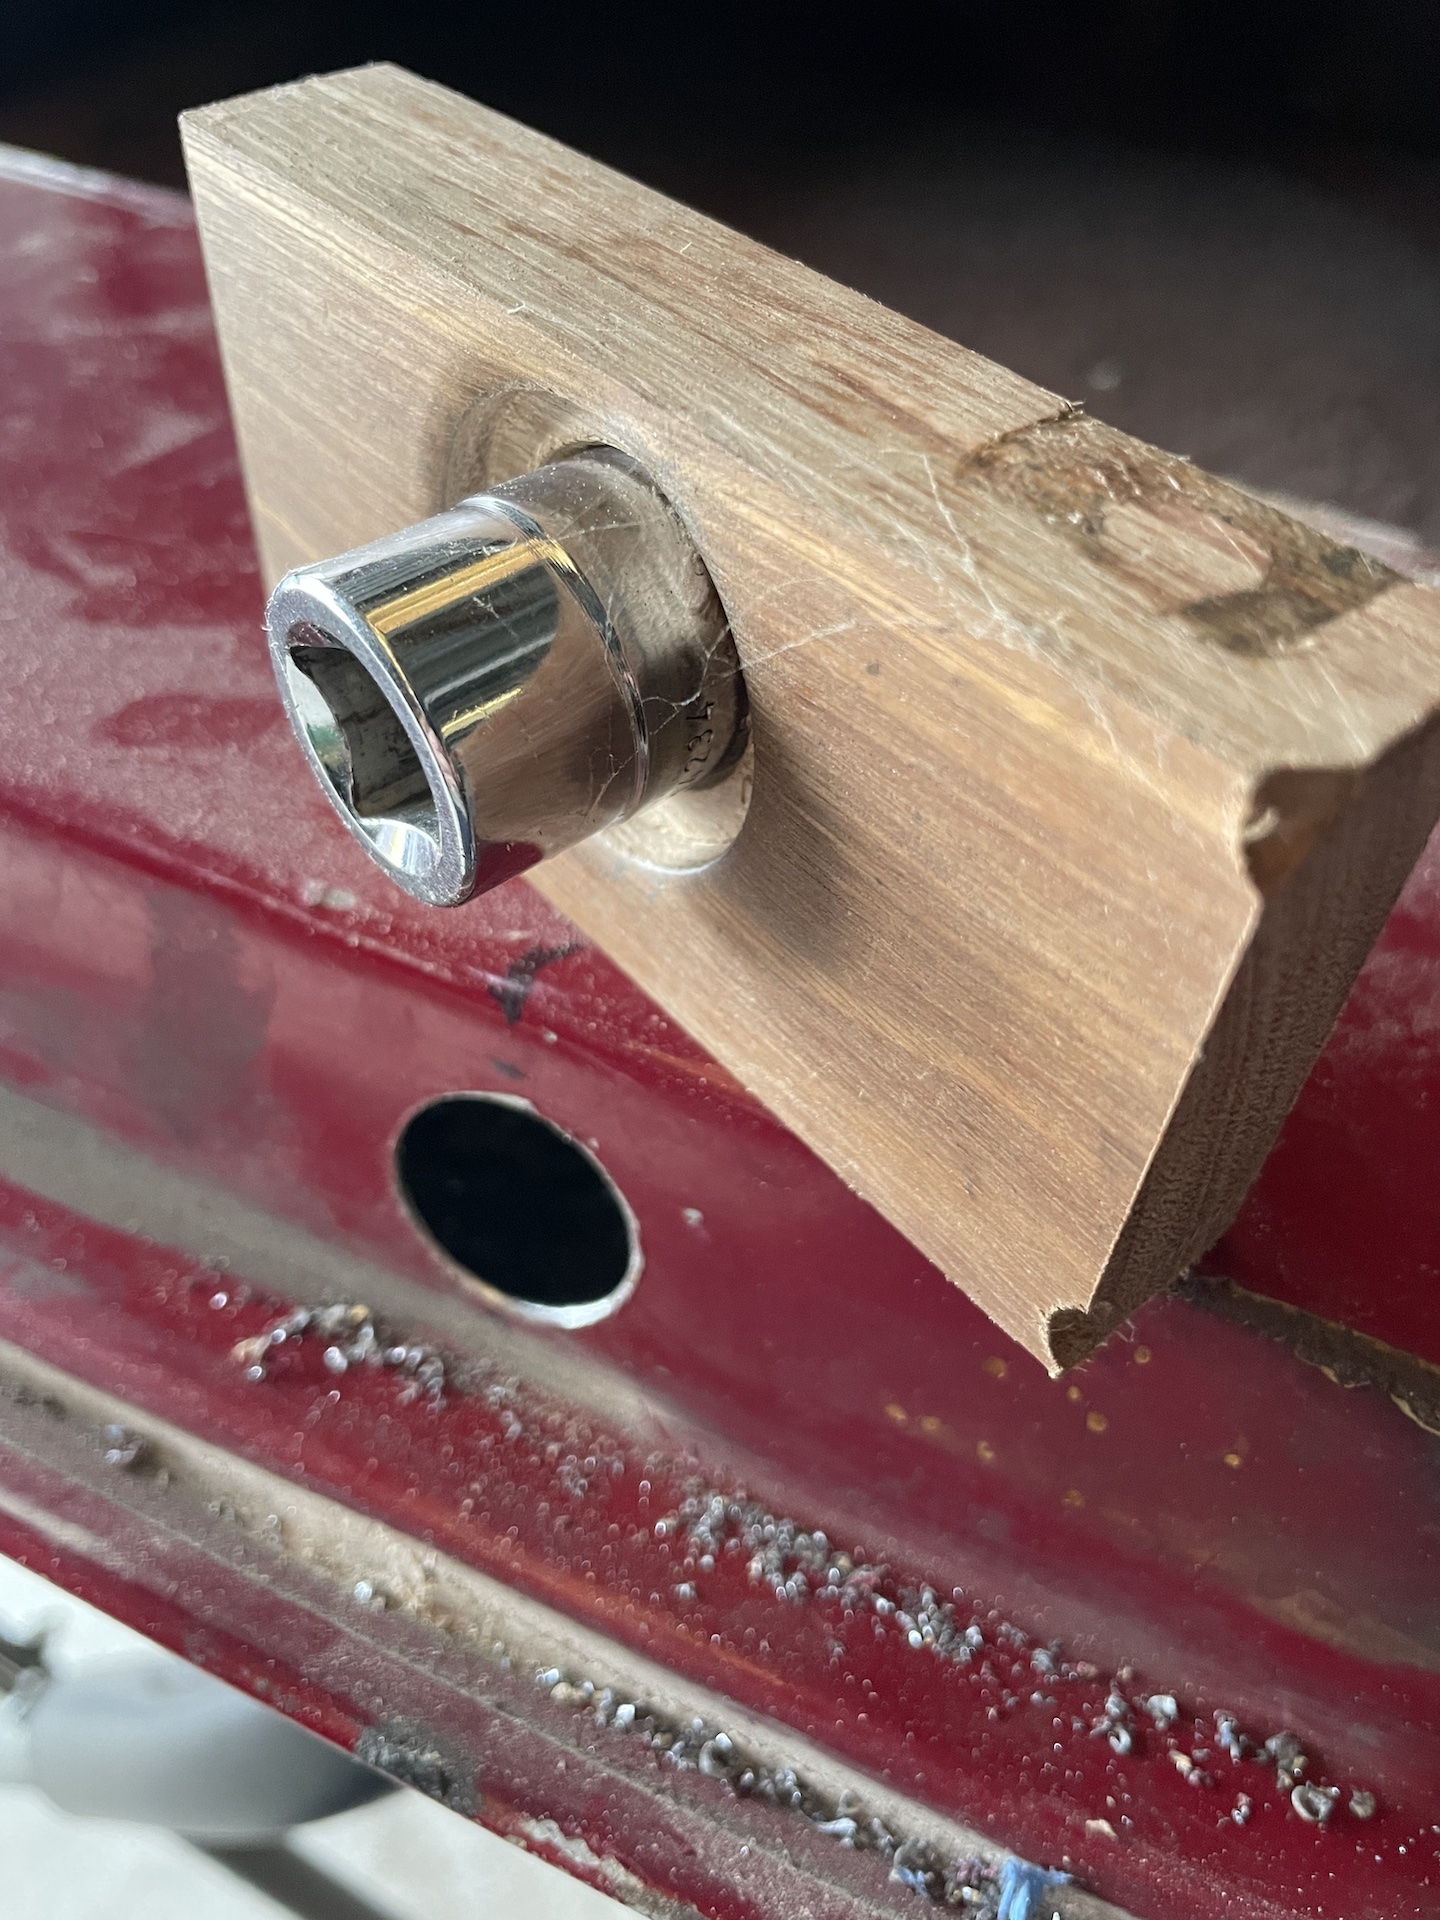
First up, out with yet another piece of unused hardwood decking, drilled a 35mm hole with one of those drill bits that are used to recess cabinet hinges to a depth of 5mm. Then drilled through the rest of the way with a 24mm bit which is the perfect size for a guide socket to keep the wood centred. Looking at the wood you can see I have already mashed the hole edge quite a bit doing tests on scrap.
With a step bit I drilled a 24mm hole through the bottom of the door. No going back now.
- IMG_3747_2.jpeg (881.64 KiB) Viewed 5611 times
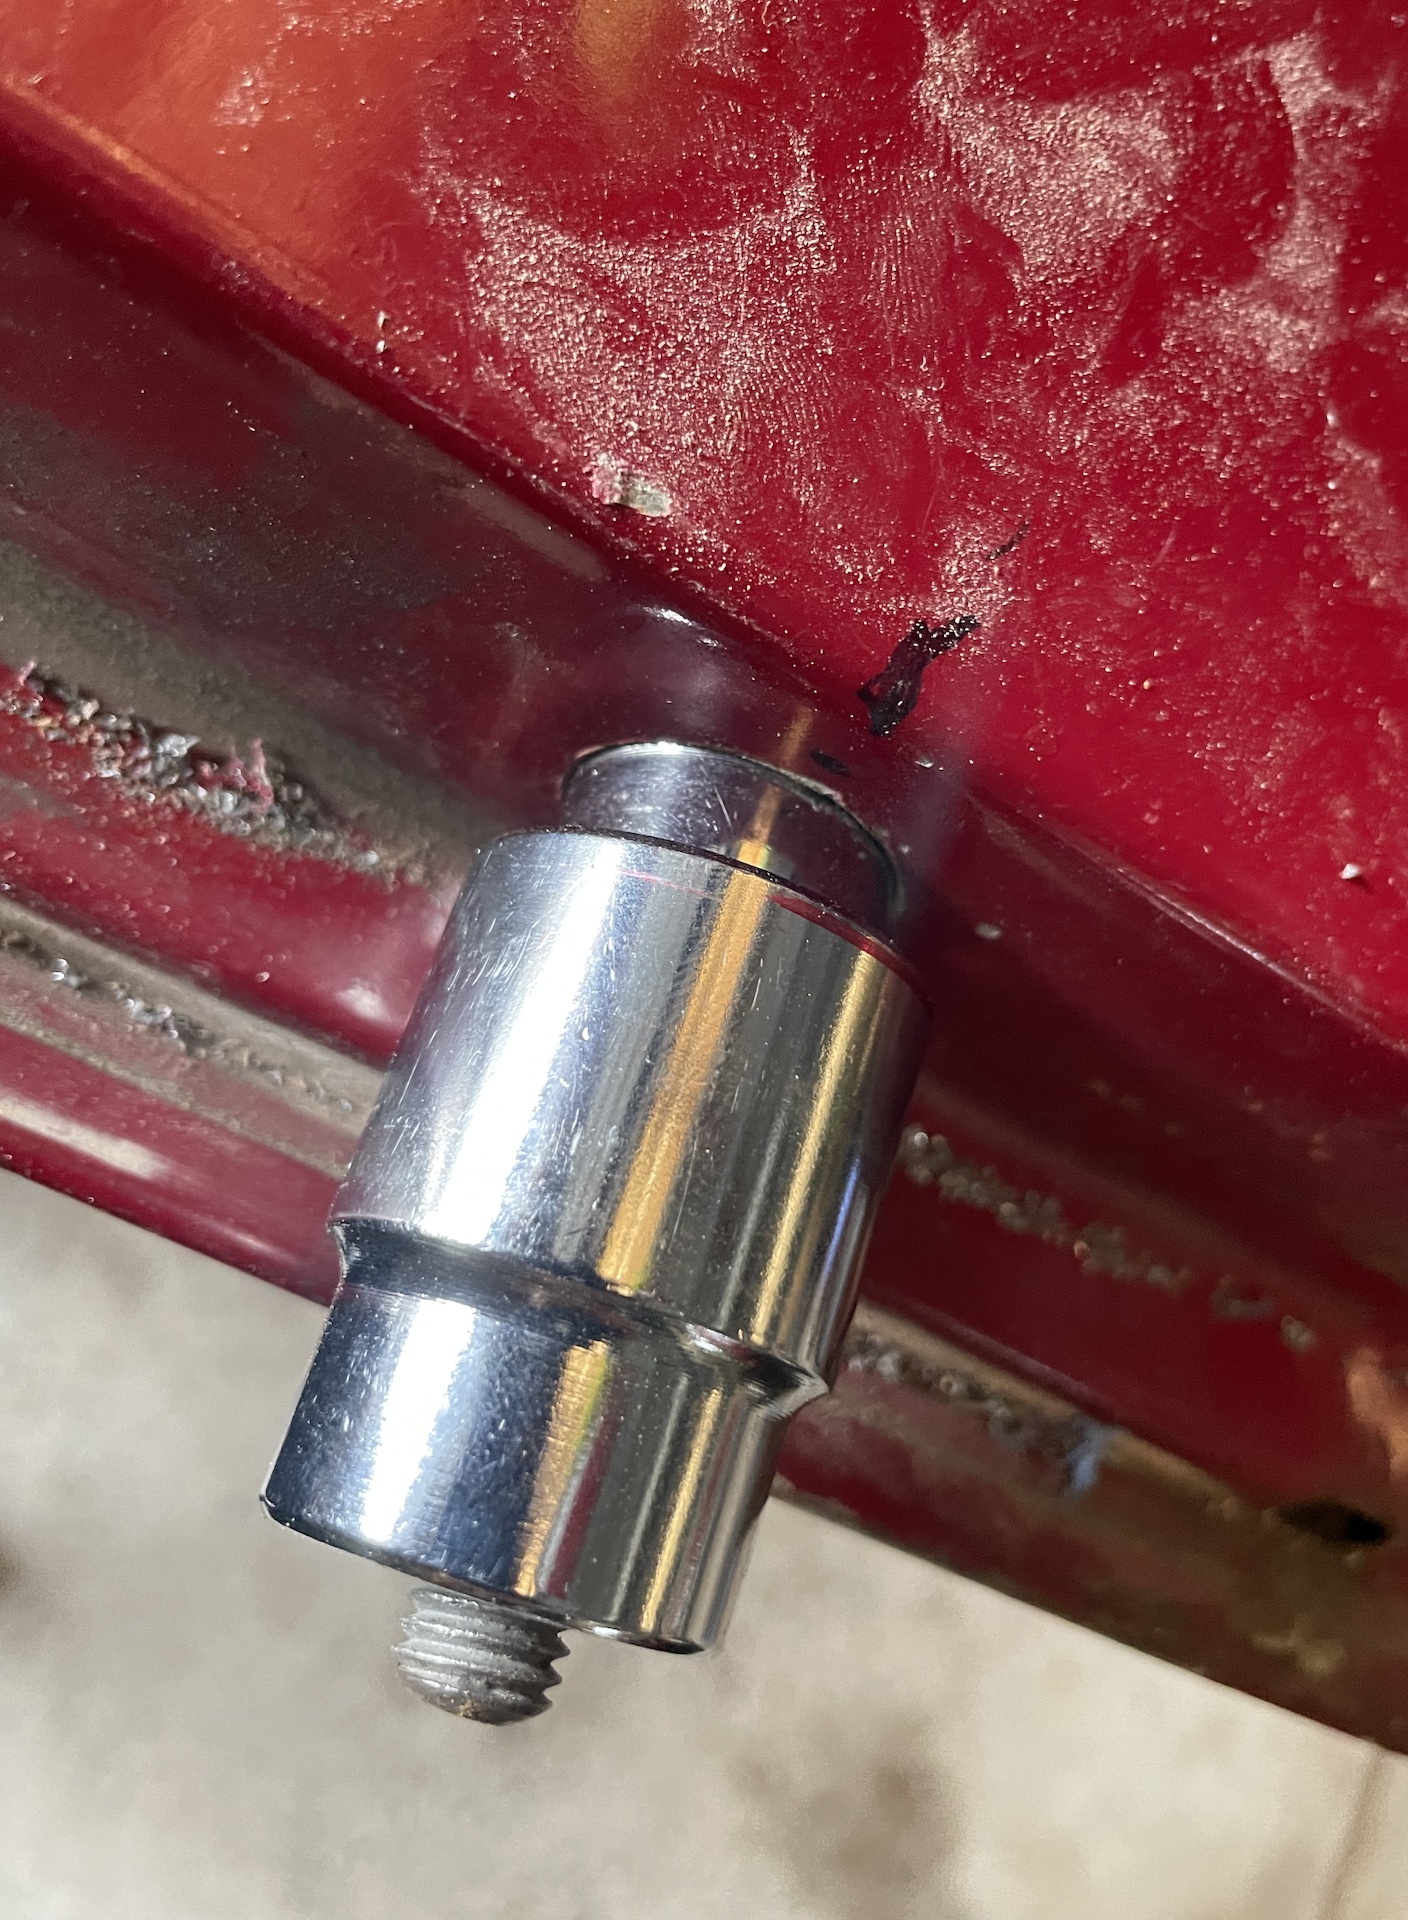
Hardwood/socket on the inside of the door, socket poked through hole as guide, and a larger socket on the outside (OD 30mm), all held in place with threaded rod.
- IMG_3748_2.jpeg (939.99 KiB) Viewed 5611 times
Tighten until - 1/ Wood splits, 2/ strip threaded rod, 3/ add dimple to door
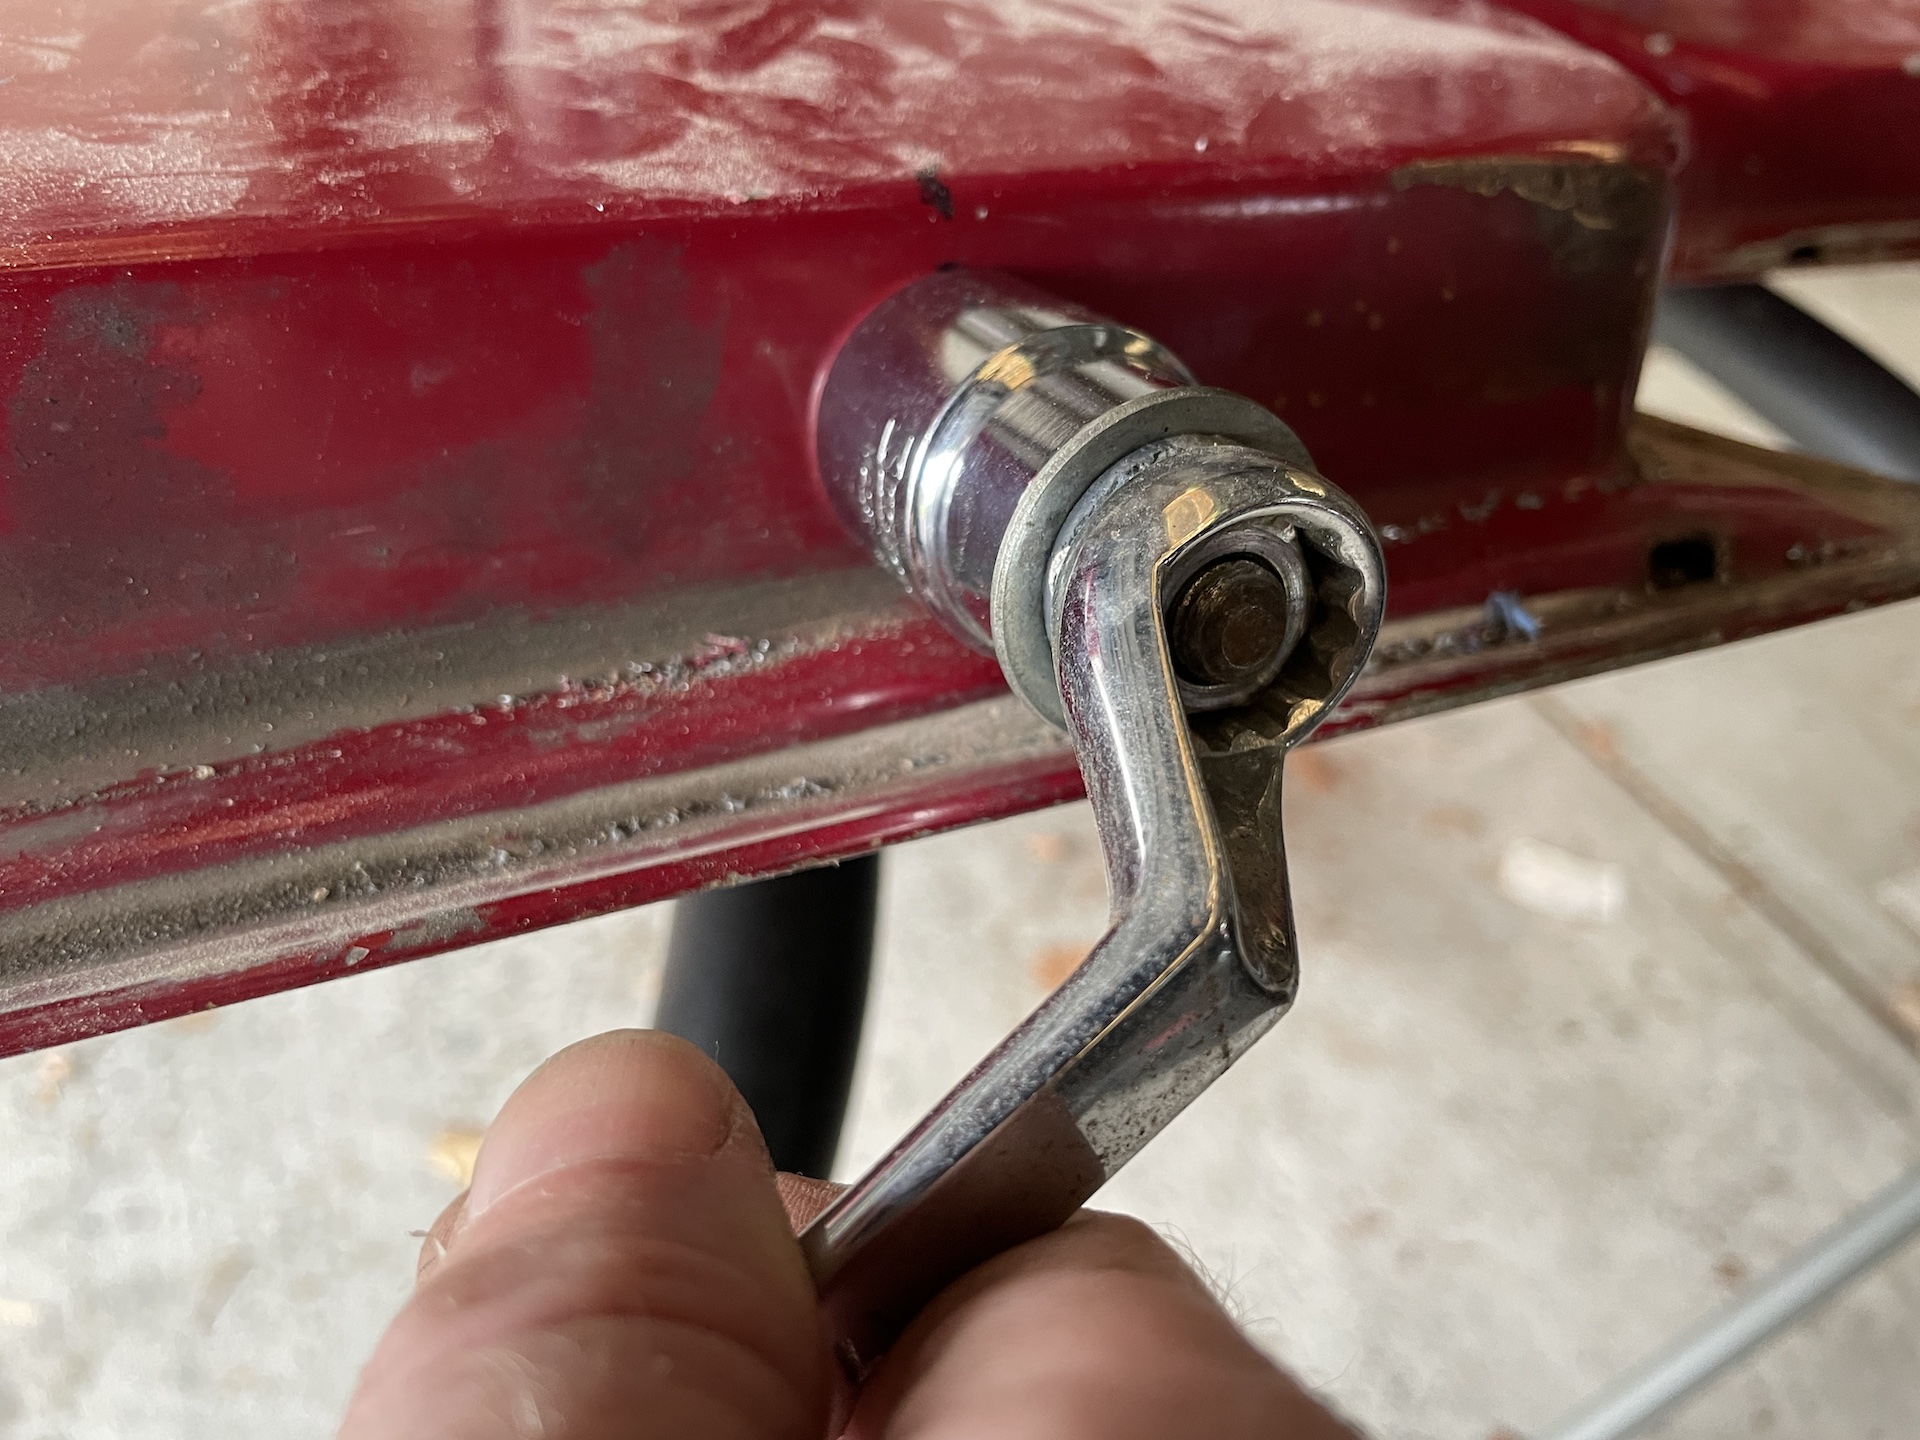
- IMG_3749.jpeg (772.2 KiB) Viewed 5611 times
Success (with a bit of tweaking with a hammer and socket dolly)
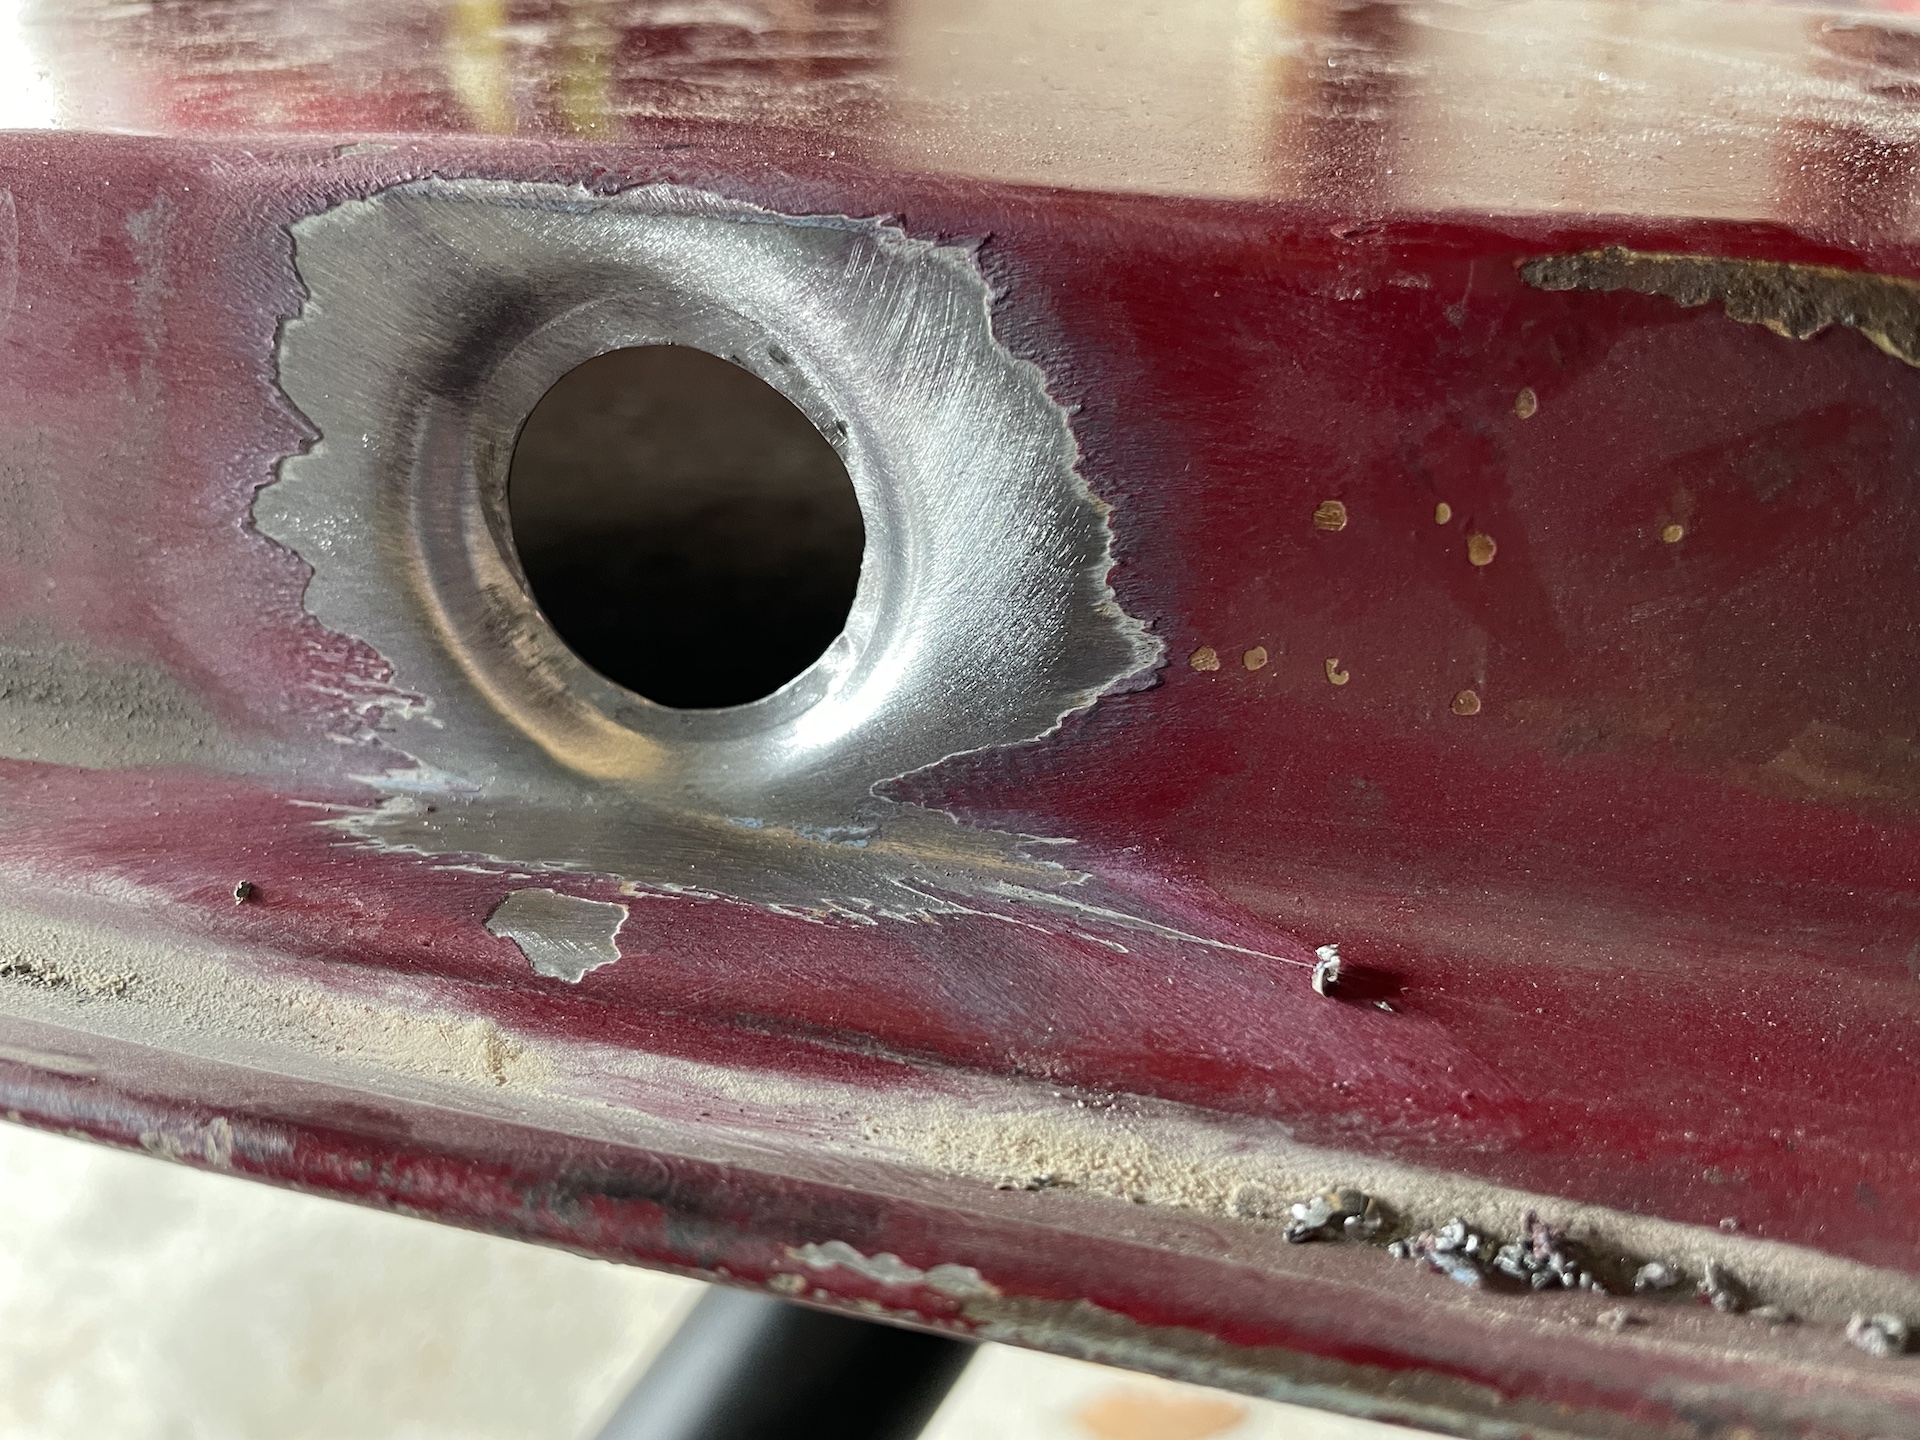
- IMG_3753.jpeg (1.03 MiB) Viewed 5611 times
3D printed up a 30mm lens for an as yet to be created 3D printed LED puddle light, to use for a test fit/proof of concept.
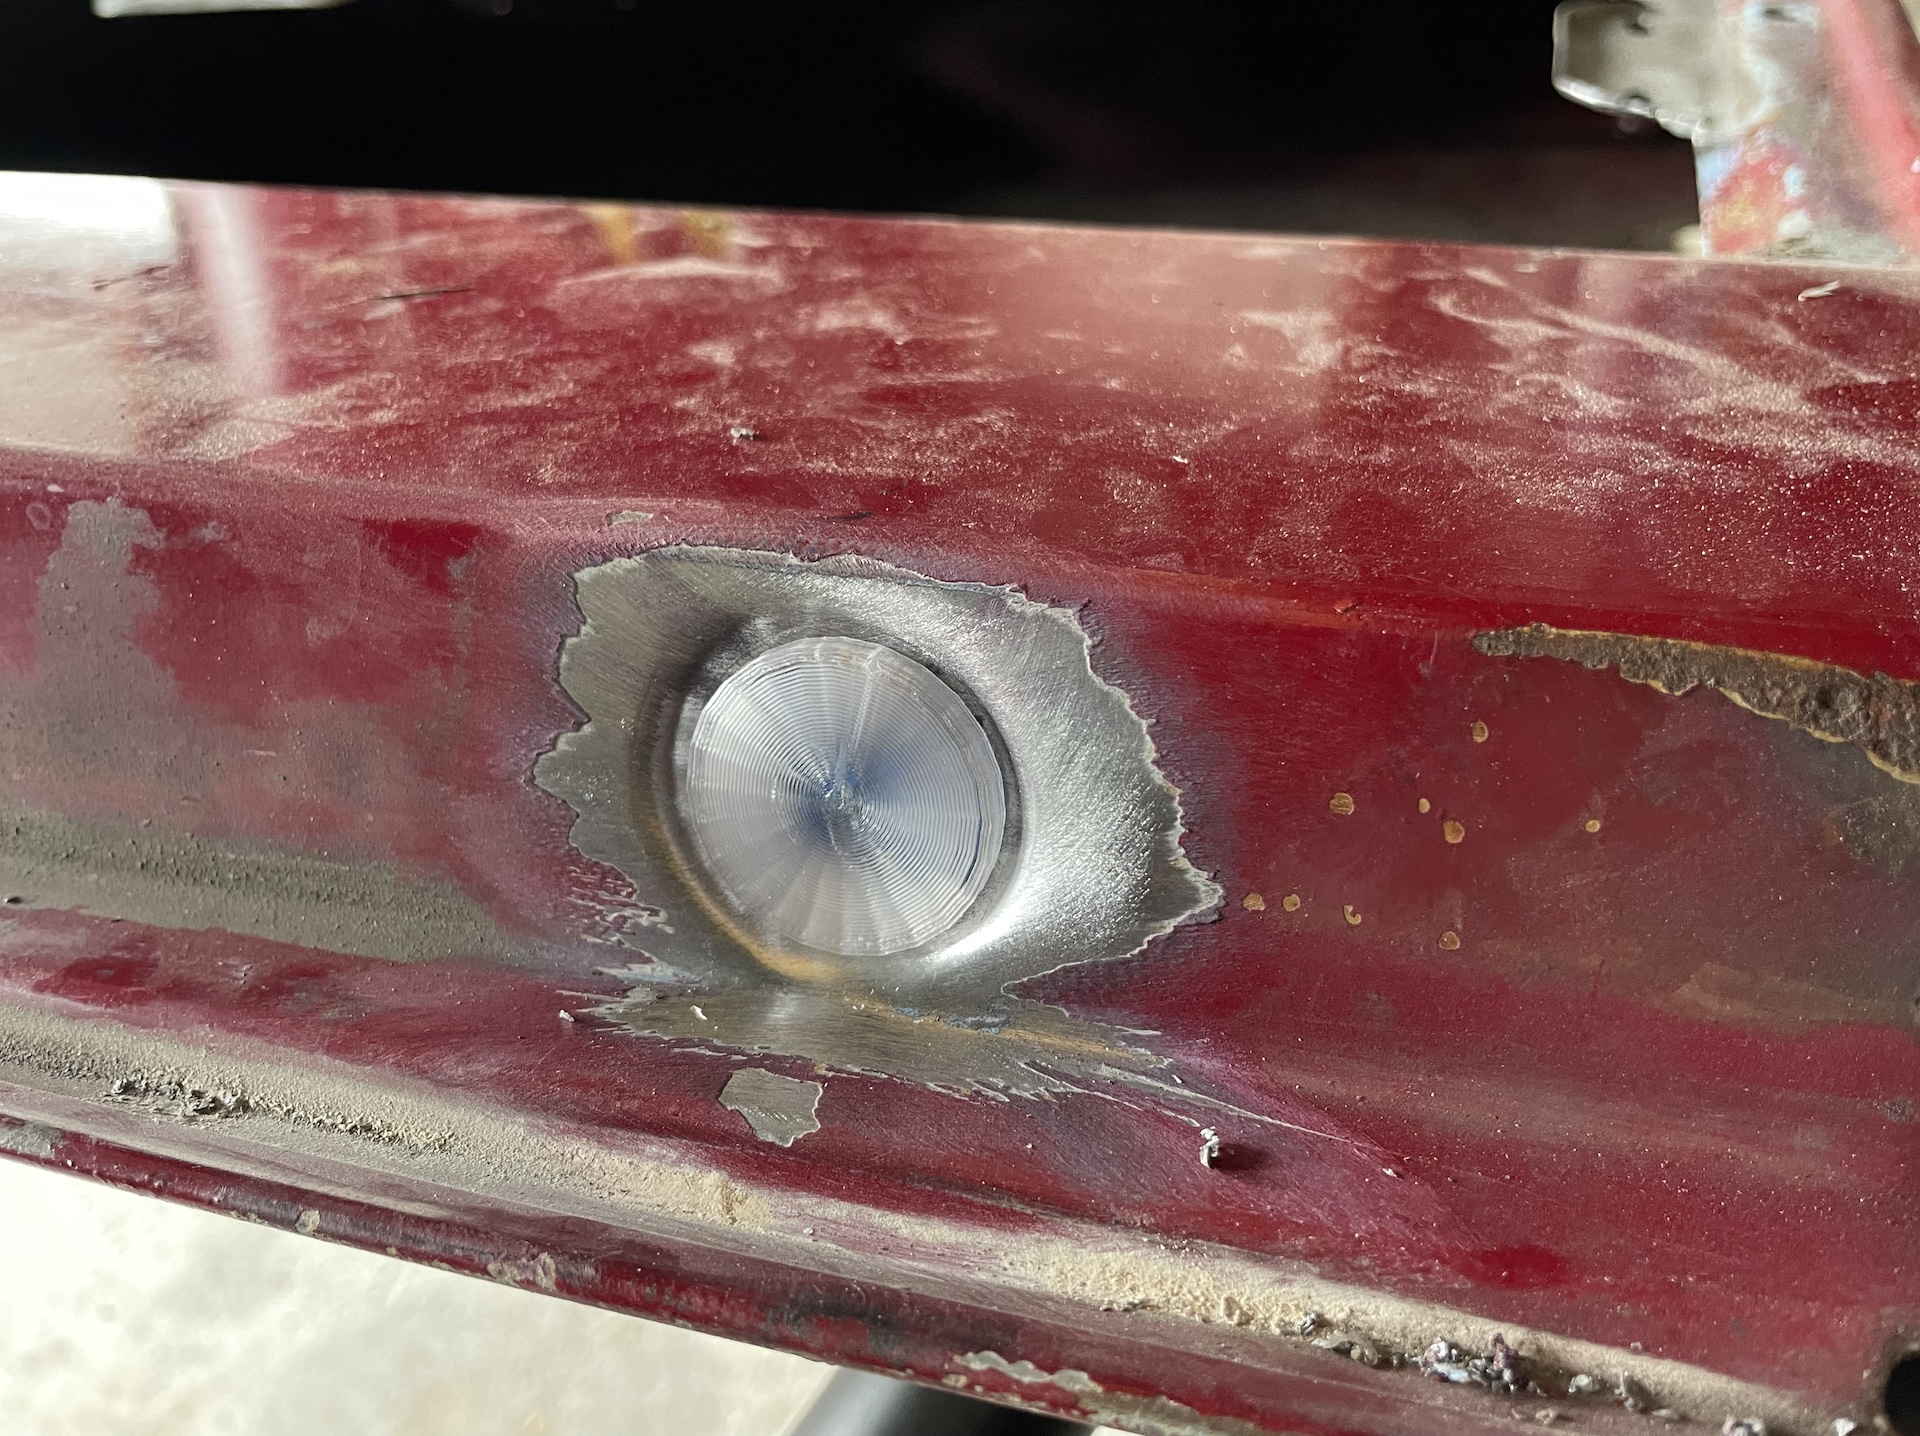
- IMG_3754.jpeg (1.04 MiB) Viewed 5611 times
Sitting flush with the bottom of the door, and managed not to deform the line of the door much.

- IMG_3756.jpeg (591.87 KiB) Viewed 5611 times
Re: Ol' Rusty - FB/EK Sedan
Posted: Thu Apr 04, 2024 1:27 pm
by Brett027
The indent tool is very clever Scott. That you just print your parts is pretty special too.

B
Re: Ol' Rusty - FB/EK Sedan
Posted: Thu Apr 04, 2024 1:36 pm
by Errol62
Clever indeed mate!
FB ute fixer upper, EK van on rotisserie
Re: Ol' Rusty - FB/EK Sedan
Posted: Thu Apr 04, 2024 7:39 pm
by funkyscooter
Thanks! 3D printing is equal part fun and frustration. It is good to realise your ideas, but it takes a lot of time which is probably better spent actually getting the car done.
Today sidetrack....
Repo EK trim clips.
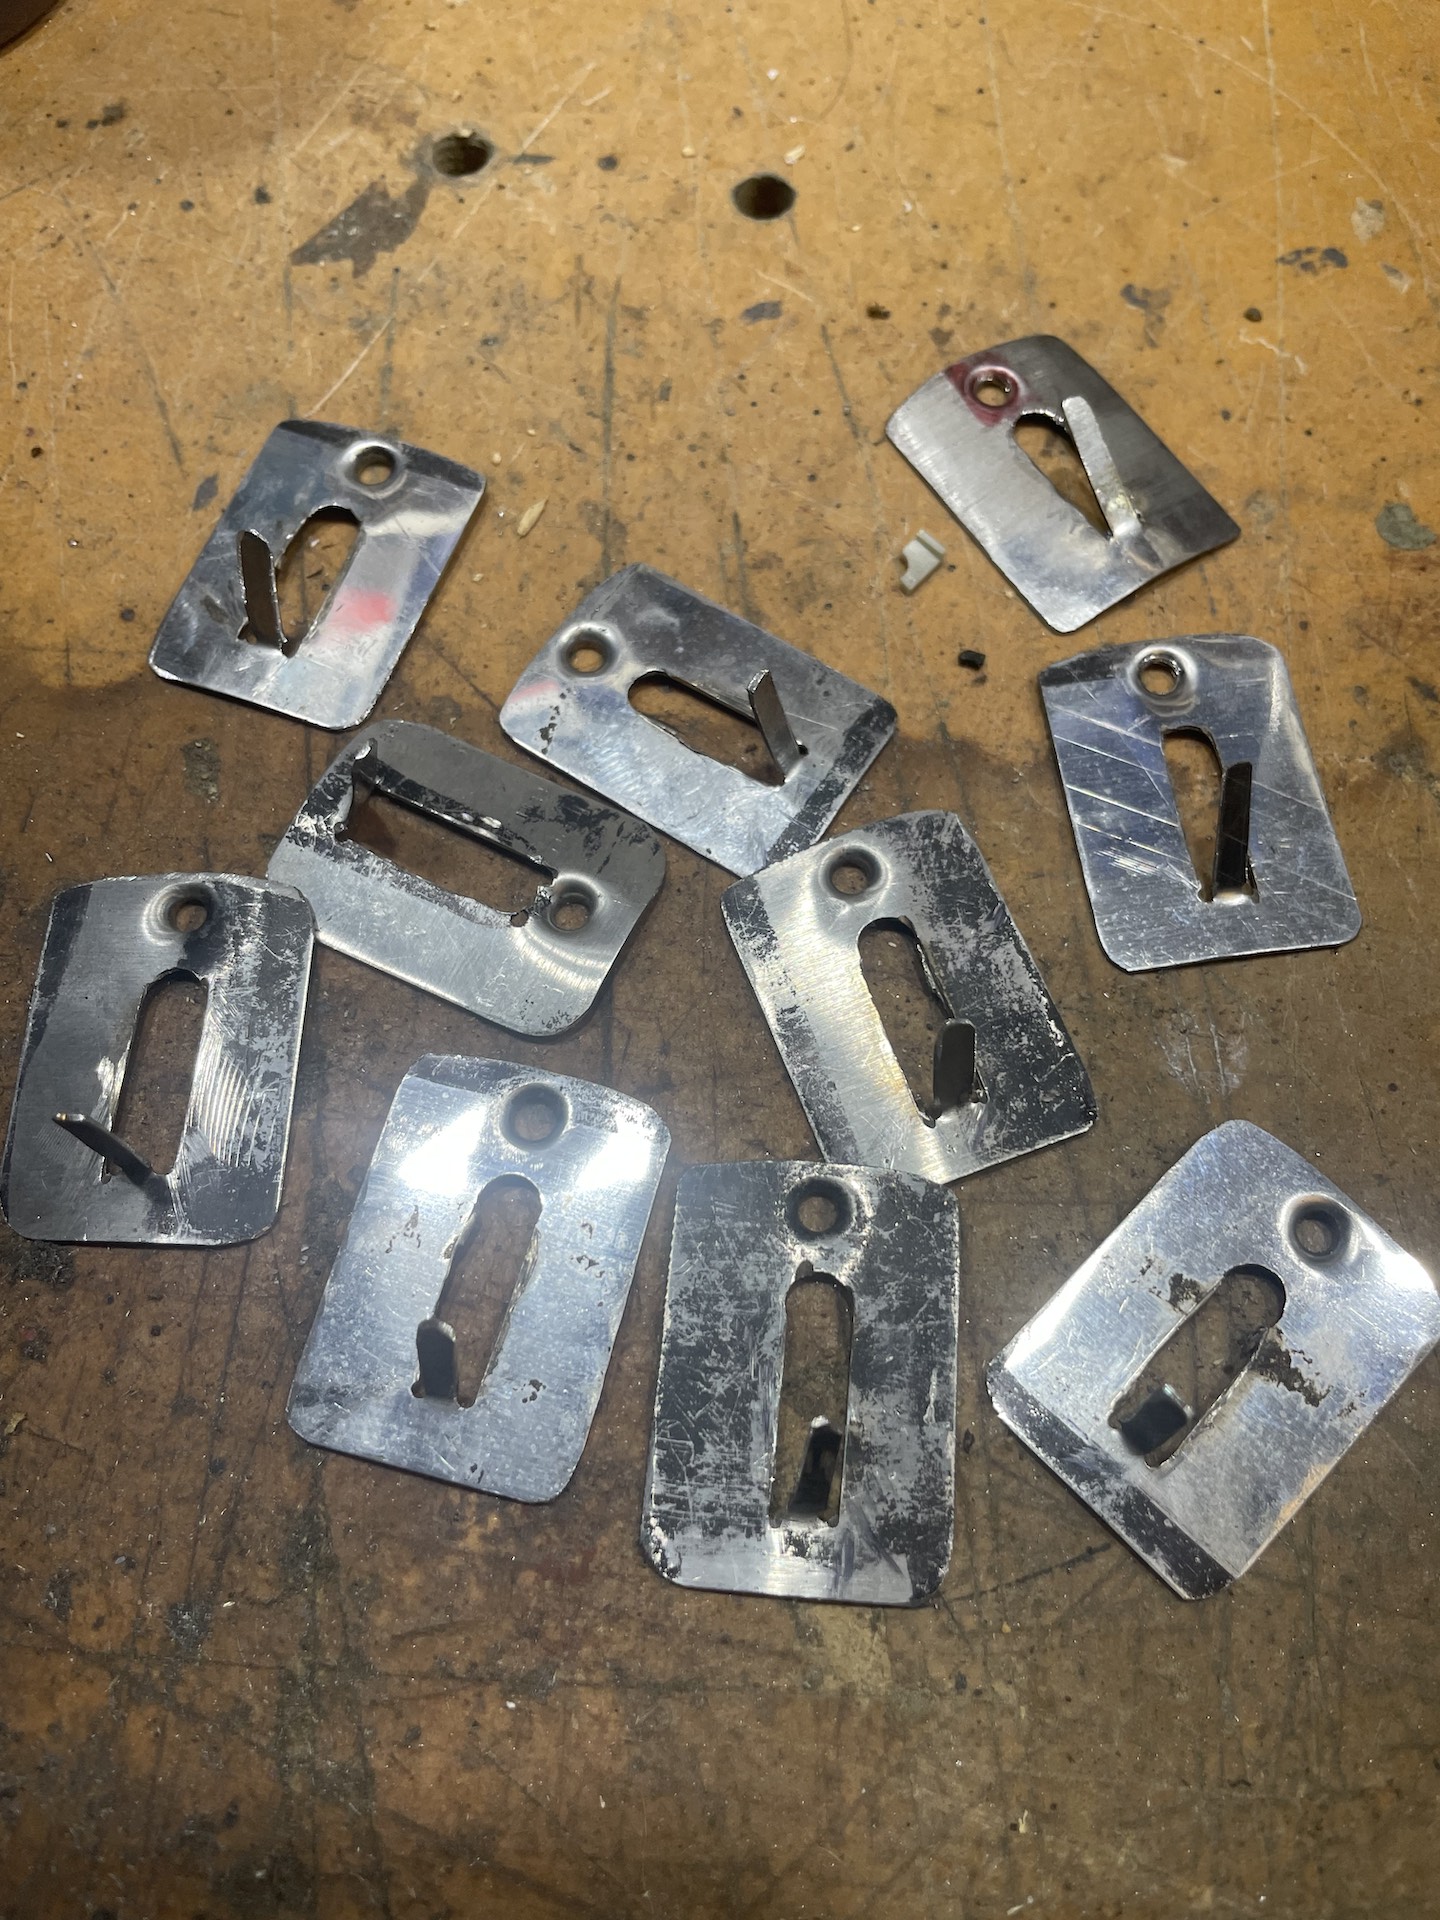
6 of the 8 trim clips that I removed from the ends of the long sections of EK bling were not up to snuff so thought I would have a go at remaking them in stainless. Found an old piece off a range hood to use.
One of my good original clips on the right, and the makings of a new one on the left.
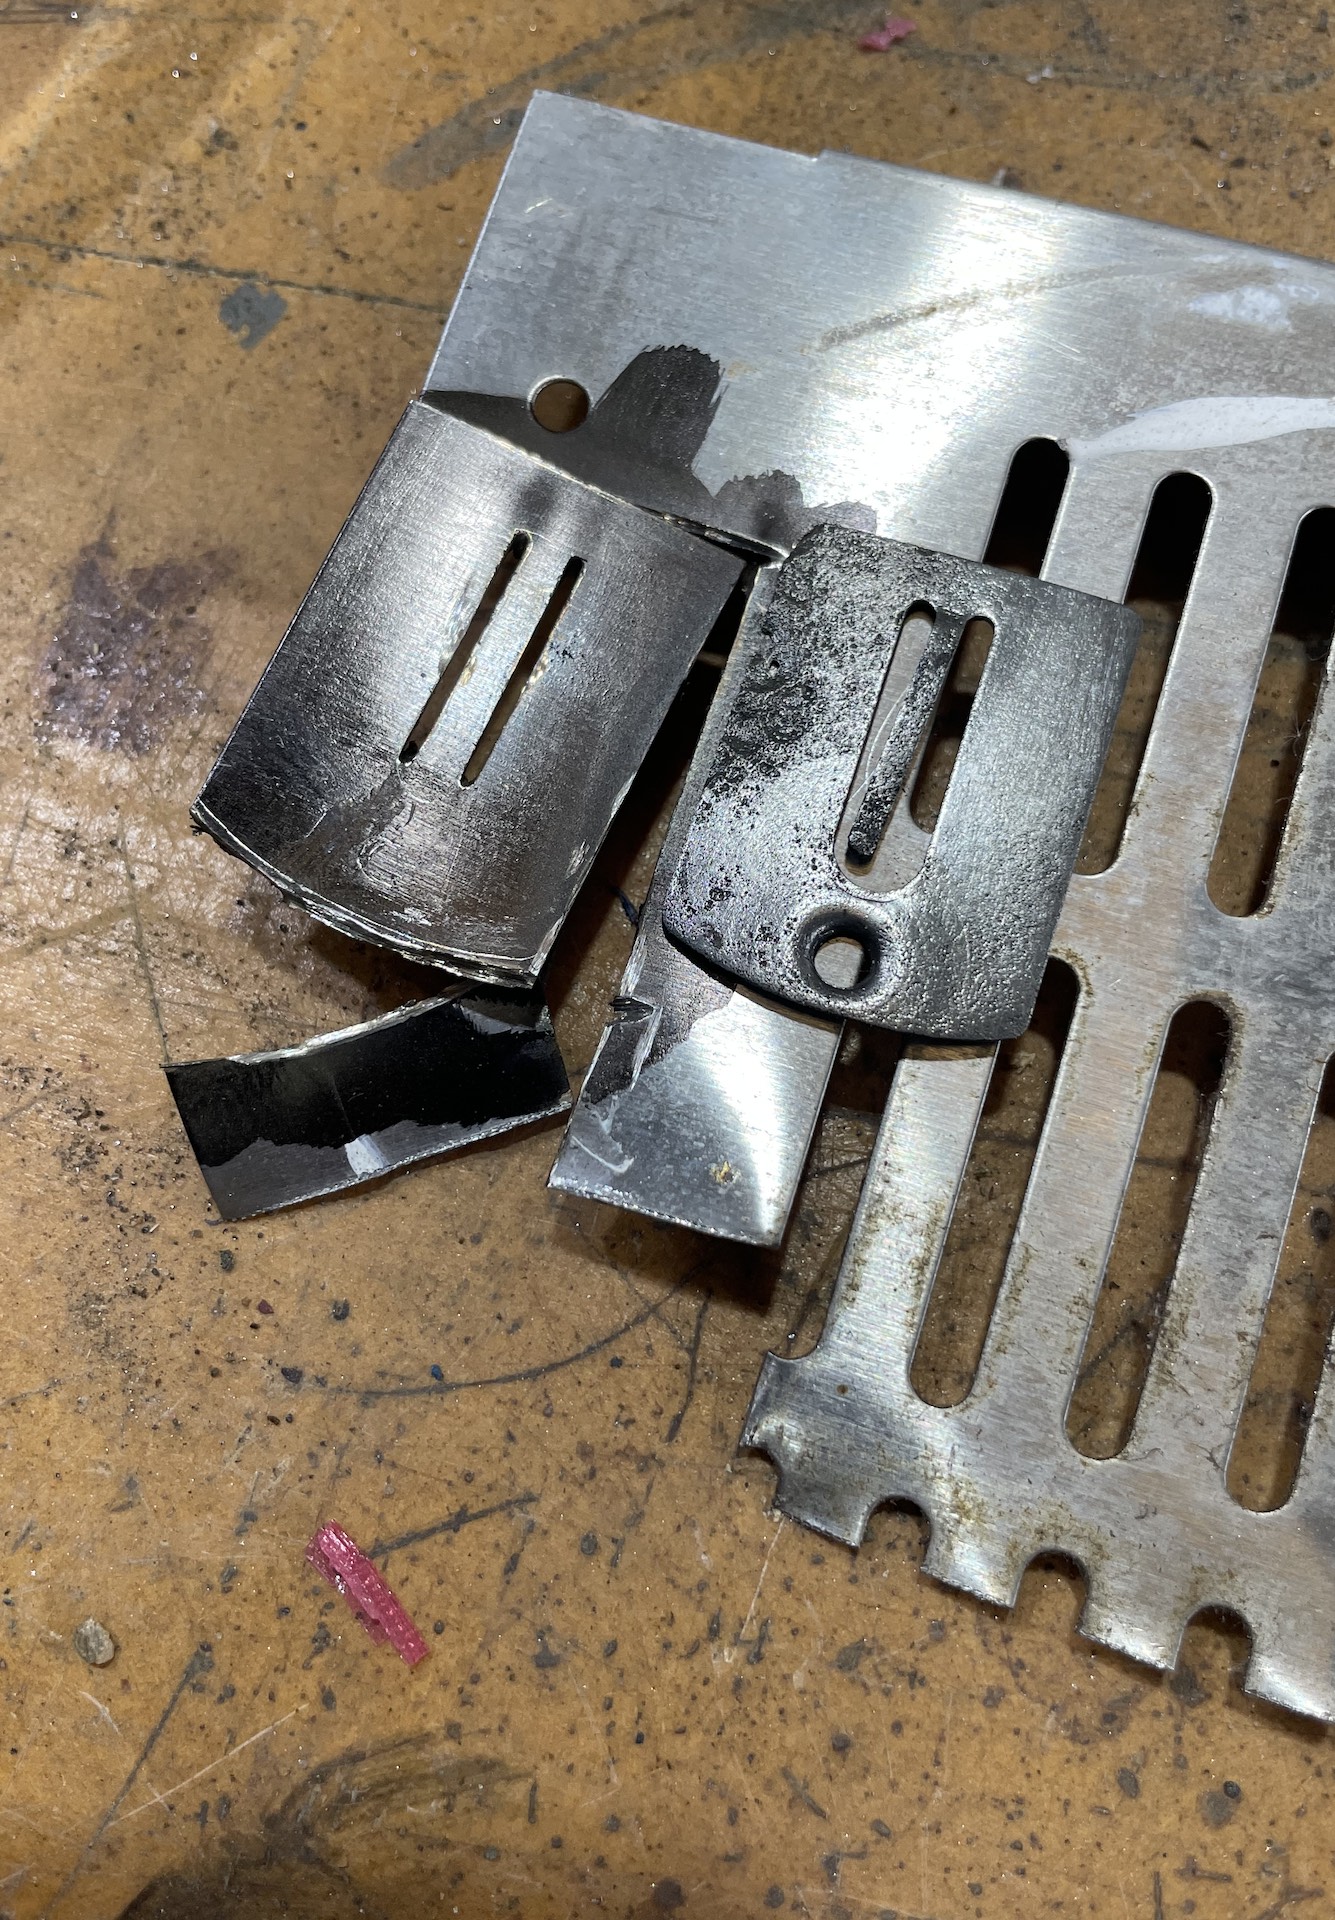
- IMG_3534.jpeg (779.18 KiB) Viewed 5568 times
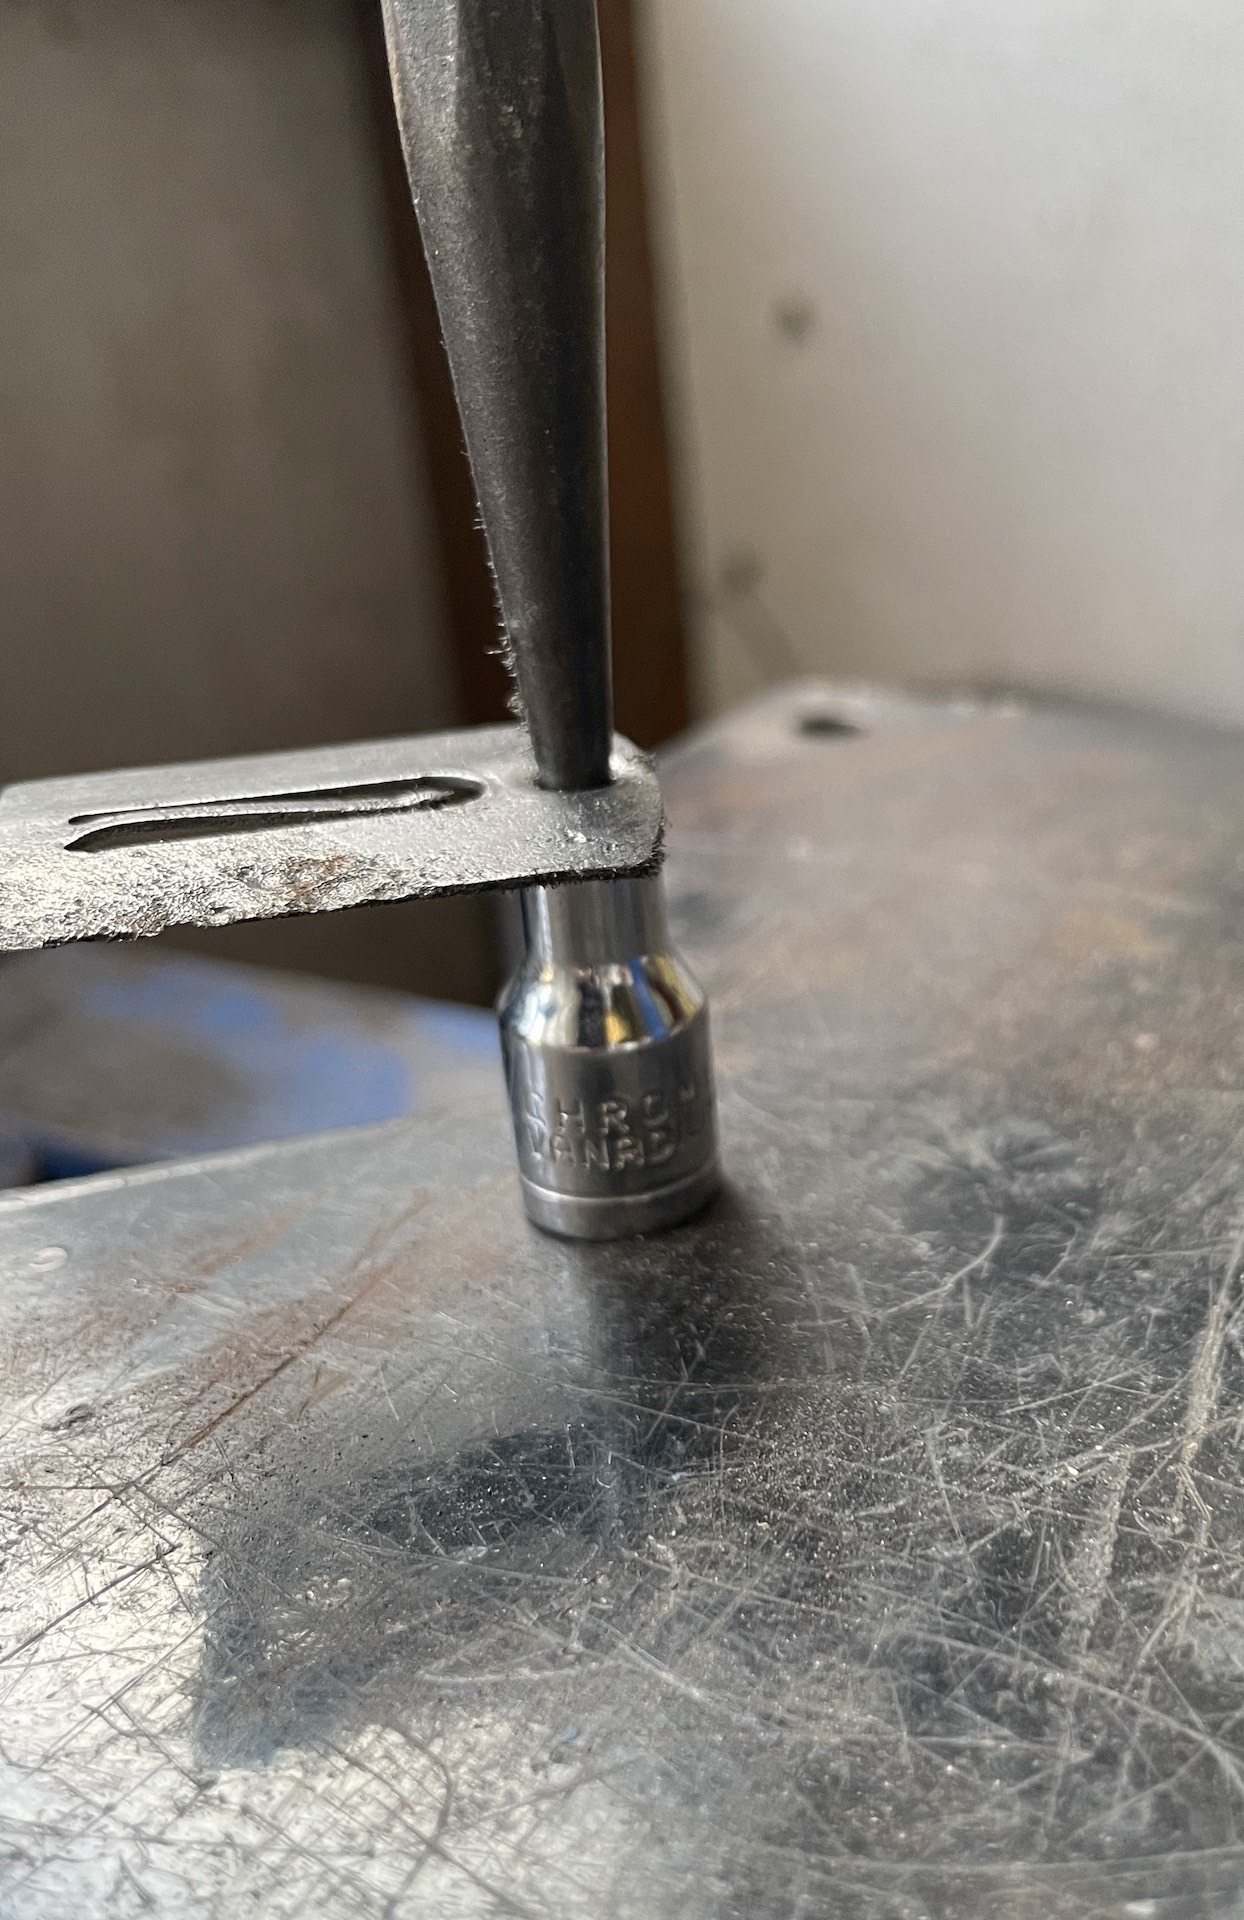
Drill a 3mm hole near the top and used a dremel to cut the slots, leaving a 'spring/retainer' in the centre. The spring is not quite as strong as the original, but it just has to hold the clip from sliding down the trim. Formed the clip over a hole saw to add the curve. Drilled a 2mm hole, and with a centre punch, socket and hammer, formed the area to thread. This was me testing the idea with the original one.
- IMG_3536.jpeg (477.51 KiB) Viewed 5568 times
The finished product.

- IMG_3537.jpeg (464.99 KiB) Viewed 5568 times
Many finished products.
- IMG_3558.jpeg (649.66 KiB) Viewed 5568 times
Don't know how long they will last as they are probably pretty low grade stainless. Before I started I did have a look to see if there was a trim clip set that included these. Couldn't find anything that looked the same. Already got all the other clips that go in between, just not these ones.
Re: Ol' Rusty - FB/EK Sedan
Posted: Thu Apr 04, 2024 7:53 pm
by funkyscooter
Re: Ol' Rusty - FB/EK Sedan
Posted: Thu Apr 04, 2024 8:53 pm
by Errol62
You've really got the hang of the steel sculpting Scotty. Going to be a ripper.
Sent from my SM-G781B using Tapatalk
