Page 5 of 83
Posted: Fri Jan 05, 2007 6:57 pm
by EK283
Hey Rowan,
Seriously you have to put big effort into something like this, taking your time can achieve good results but believe me you can loose interest real quick as well. I do 2 hours a day after work and after 5 days you have totalled 10 hours. Then I normally do a full day Saturday and have sunday off. Every spare minute goes into the old girl, its been sitting for over 10 years cause I wanted to take my time. My advise if you can is knuckle into it and hopefully within a year or so you will be driving with a goddamn big smile!

Regards Greg
Posted: Sat Jan 27, 2007 8:45 am
by EK283
Guys,
Not a great deal has happened since last time just been tinkering but will get into full swing this weekend
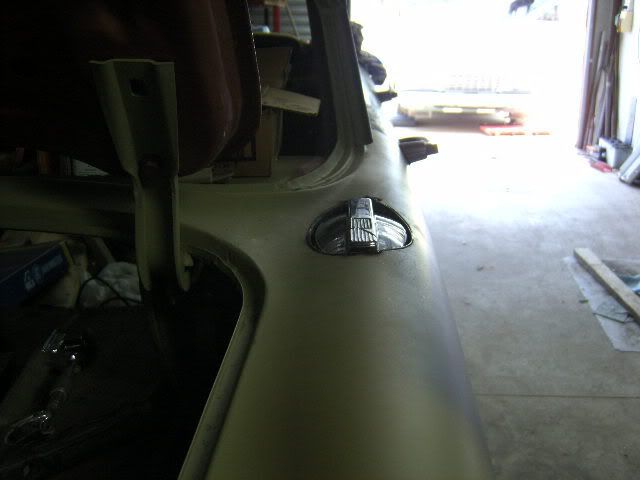
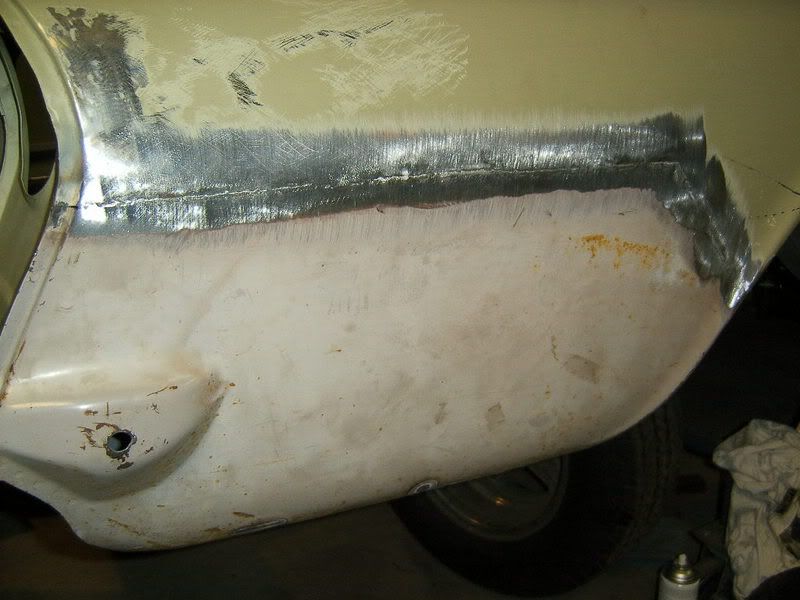
Have done the Jag filler cap trick semi frenched on top of the guard
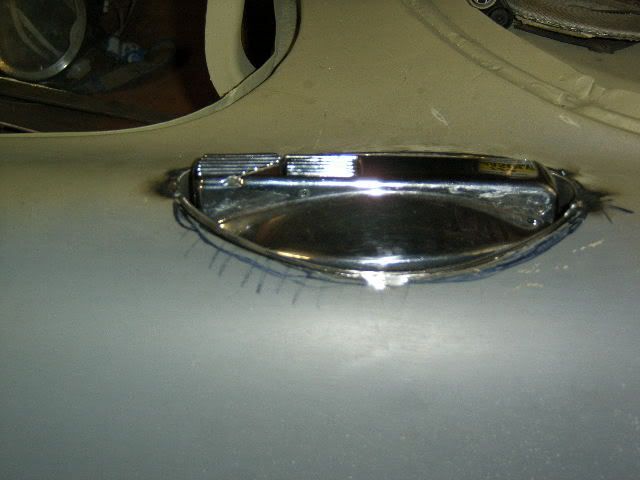
The door gap now the filler strip is gone.

Started on the last bit of rust on the drivers side. It wasnt through just pitted so the whole lot came out. Tacked with mig then will be hammer welded with the oxy.
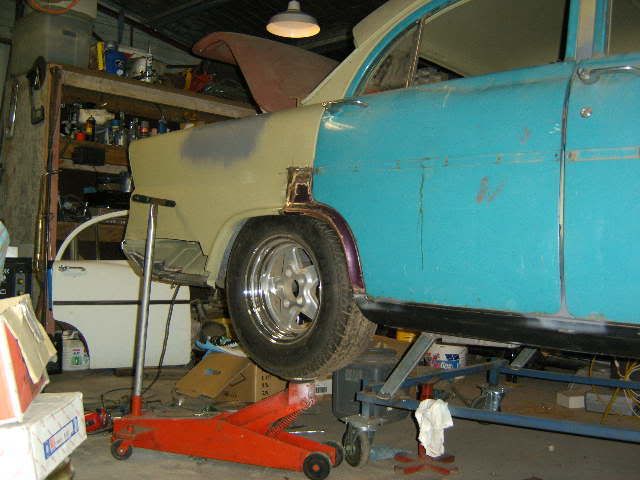
Malcolm a shot for you! Just love the big tyre look.
Has anyone got a lower 1/4 patch panel they dont need?
Regards Greg
Posted: Sat Jan 27, 2007 6:41 pm
by Devilrod
EK283 wrote:Hey Rowan,
I do 2 hours a day after work and after 5 days you have totalled 10 hours. Then I normally do a full day Saturday and have sunday off. eg
Thats pretty much how I did mine for the last 2 years, it makes a difference...
chev ek
Posted: Sat Jan 27, 2007 7:41 pm
by Malcolm
Greg,
I may have a lower guard section on my parts wagon, I'll have a look in the morning when I'm not so drunk.
The wheel picture looks good, just too much tyre and not enough rim.
Mal
Posted: Mon Feb 12, 2007 7:58 pm
by EK283
Hey Mal,
Thanks heaps for the guard section, Im still stunned that it had no rust! What was the rest of the car like?
Anyway ive welded it in last night and its looking like a car again.
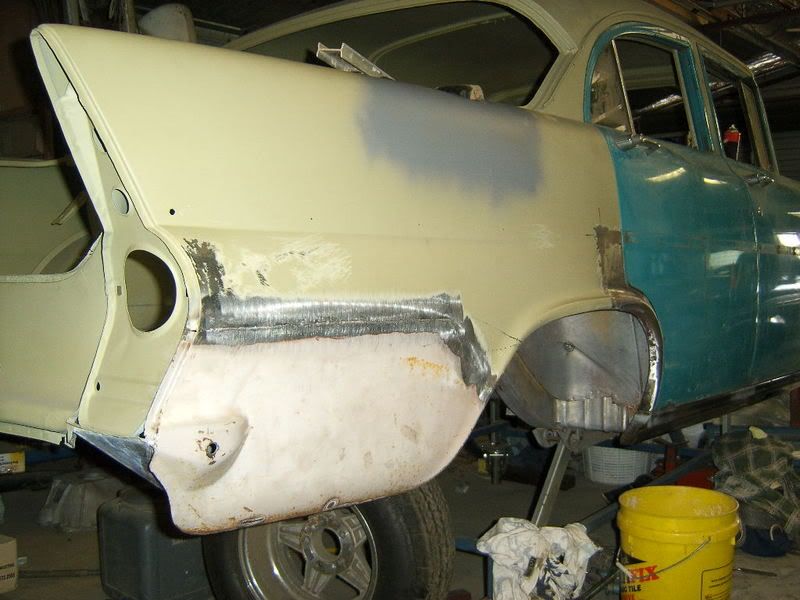
I got fed up with the mig and bit the bullet with the oxy only cause I can get at it to beat. Some distortion but nothing a couple hours of dolly work wont fix. Oxy welding actually stays soft unlike the mig and I will file finish this section on the weekend.
Not too far now starting to see the light at the end of the tunnel so to speak.
Till later
Greg
Posted: Mon Feb 12, 2007 8:53 pm
by FATBOY
orsamw work love watching the build shots makes me want to go to the shed and start finishing the ute so i can start back on the van again
cheers fatboy
chev ek
Posted: Mon Feb 12, 2007 11:32 pm
by Malcolm
Hey Greg,
That repair looks really good. My parts car was a one owner FB wagon that had been rolled onto its side by the 70 year old woman that owned it when she swerved to miss a cow on her property, it had very little rust in the whole car, but where it did have rust was in strange places. I used 3 of the 4 doors and 1 front guard on my sedan. The panels had practically no rust at all. It probably would have been a good car to do up, but I don't like wagons.
I'm slowly getting the wiring done on mine, another day tomorrow and I should have it by the balls, so to speak.
Keep up the good work.
Mal
Posted: Thu Feb 15, 2007 1:30 pm
by oldnek
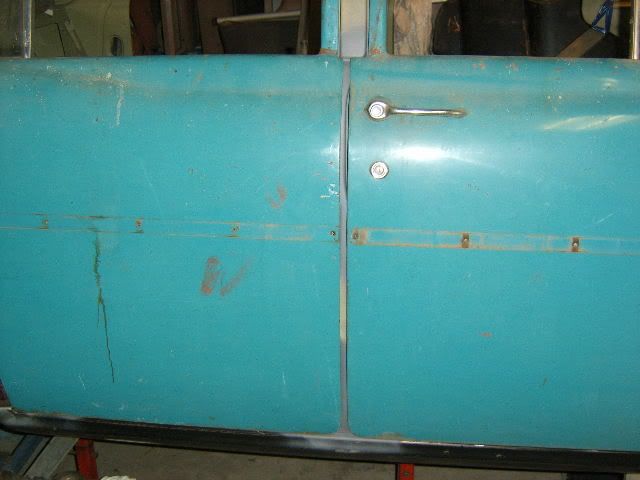
Great looking work there Greg.
Can't wait to see her in the flesh, looks like you've got the door gaps pretty good from what I can see there.
Regards John
Posted: Tue Mar 13, 2007 10:14 pm
by EK283
The Continuing saga!
The progress has been slow but Ive been busy if you know what I mean.
Finaly got hold of a rotisserie that Ive been wanting for years phew!
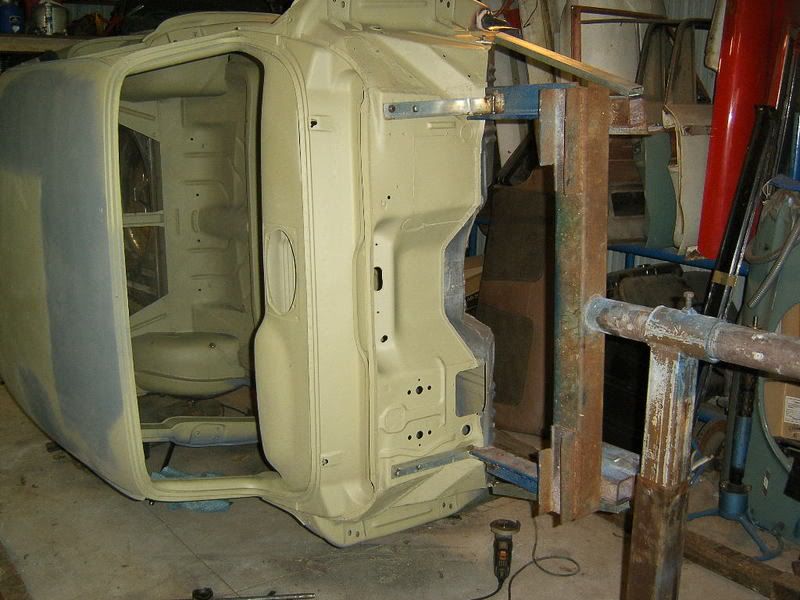
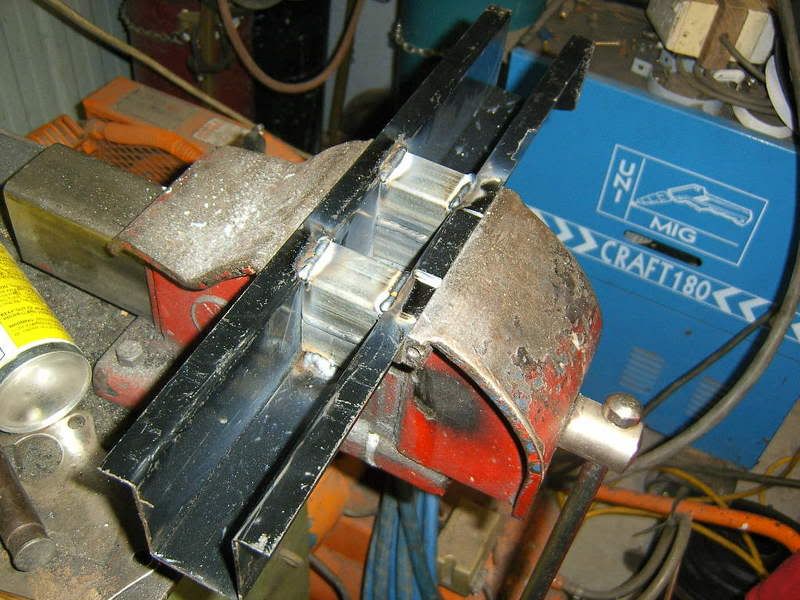
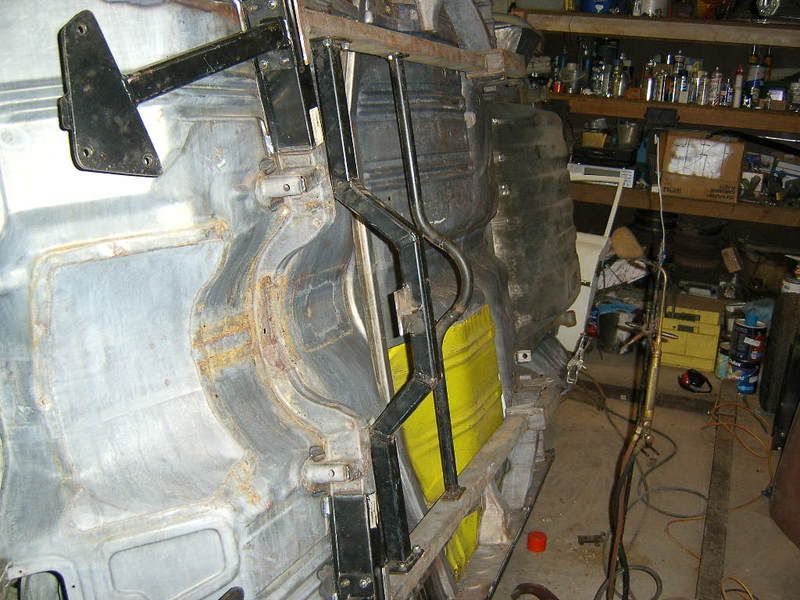
Started on the front floor braces and chassis kit.
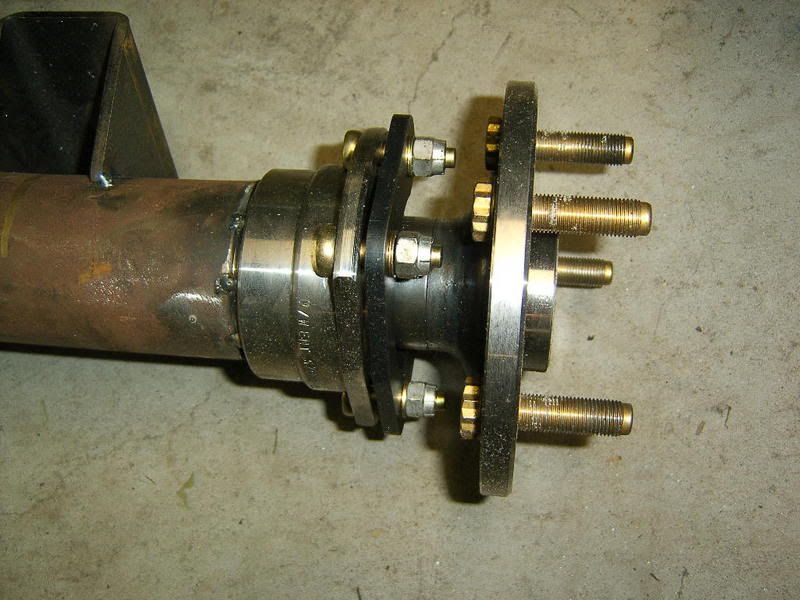
And also started the diff . It is a 9 inch with Mark Williams 31 spline axles and bearing ends.
With the combo Im running it should be unbreakable.

Im running slightly behind schedule because of work but I suppose Rome wasn't built in a day!
Regards to all Greg
chev ek
Posted: Tue Mar 13, 2007 10:33 pm
by Malcolm
Hi Greg,
Your killing me, your going to have to slow down, let me catch up. I'm still playing in my engine bay trying to make things fit in places they weren't ment to go. Finally got the wiper motor fitted and all working, its been a long time since I've done a wiper conversion and had forgotten what a prick of a job it can be.
Mate your car is looking great, can't wait to see it finished.
Cheers
Mal
Posted: Wed Mar 14, 2007 3:57 pm
by Sammy
i agree, moving at a good pace! the diff sure looks pretty solid
Posted: Mon Mar 19, 2007 9:21 pm
by EK283
Guys and Gals,
Iv'e got to say this site has definately promoted my motivation. There are so many ideas hints and hard working people eager to help each other out, hats off to all of ya!
Busting a nut comes to mind to describe my last weekend but I achieved what I wanted and also watched the Grand Prix!

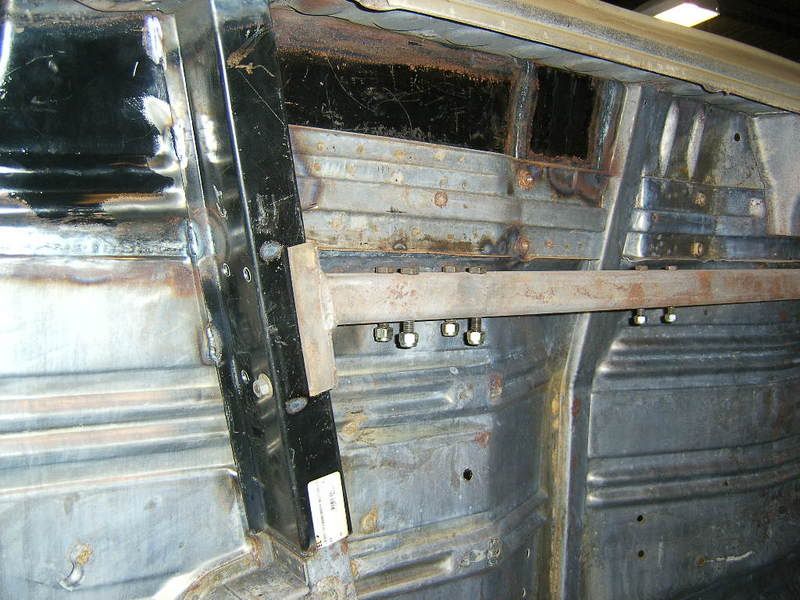
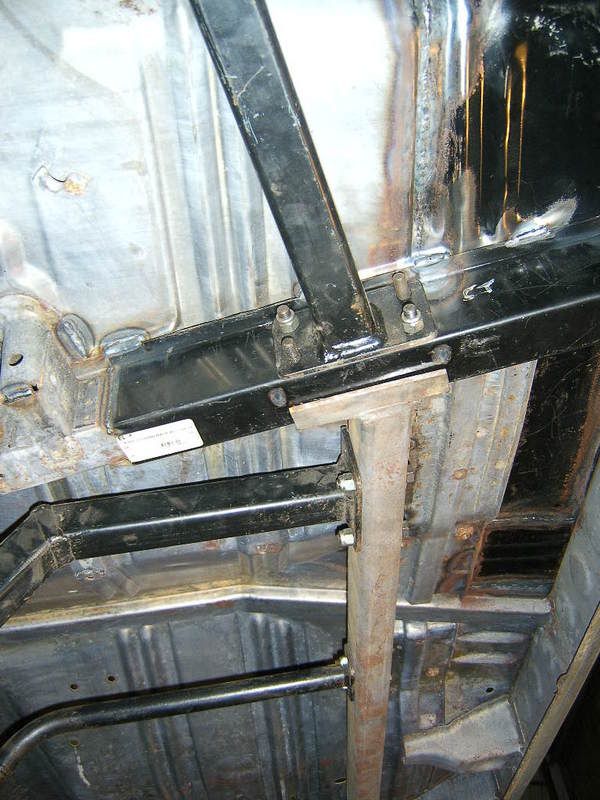
Got the floor braces in and the chassis kit in and when I measured everything I was only 1 mm out of square, I think it was sheer luck rather than good planning!
By the way if anybody decides to measure how square their cars are they may be in for a surprise ( not real good from the factory!)

Anyway back in the shed I go, got the rear floor to finish then prep for body sealer and deadener.
Actually what are most of you guys using underneath your cars?
Till next time regards Greg
Chevy K
Posted: Mon Mar 19, 2007 9:57 pm
by NoMAD
looks great as always mate,
always annoying to see someone ahead of where you are, but great inspiration keep it coming mate,
i know this is going to look sweet whens it done, and can't wait - probably no where as much as you though!
Cheers
NoMAD
Posted: Mon Mar 19, 2007 11:22 pm
by Blacky
I use 3M body schutz under my cars, sticks like shit to a blanket and is as tough as nails. Kinda looks like that stoneguard they put on lower sills - is a rough finish .
Posted: Mon Mar 19, 2007 11:32 pm
by Thommo
I've used a cheap Septone brand body shutz.
Its been there for a few years now, and has done the job.