next
Posted: Sun Jan 04, 2009 7:17 pm
Yeah - OK - thought it time to start on this...... didn't want to but the opportunity is here and the weather window is "open"......
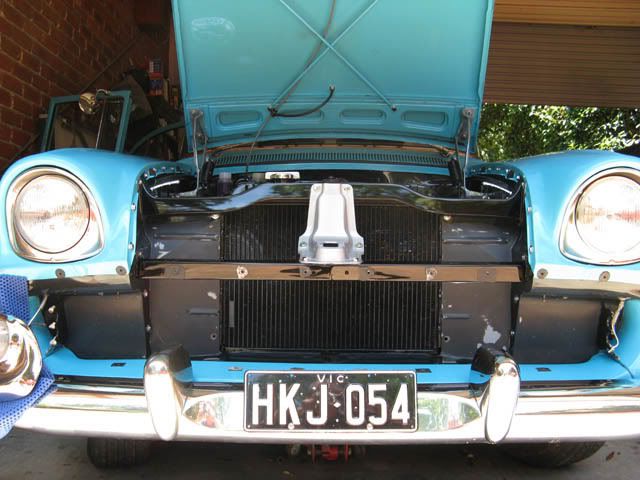
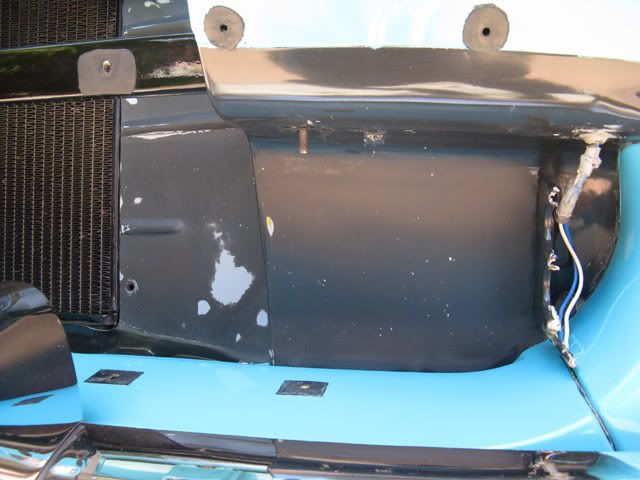
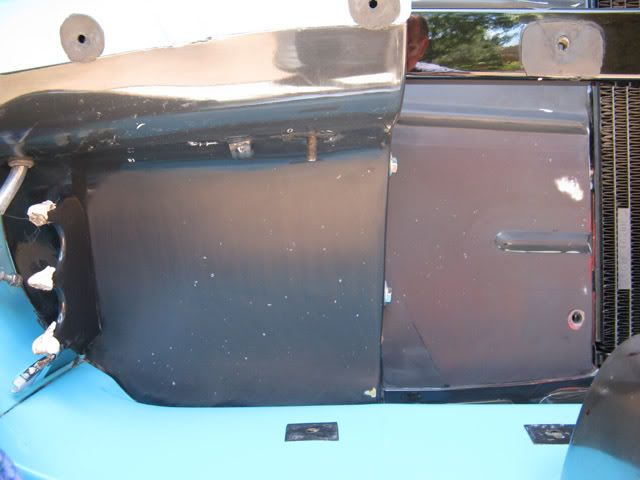
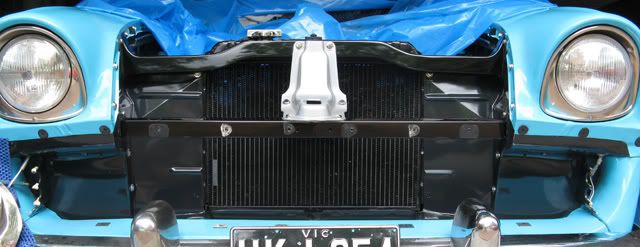
I went to a lot of trouble getting a good finish on the radiator baffle (each side of the radiator) when I did the front welding/filling painting refurb to this area a few years back......only to have it chipped and stone blasted in the rain for the Tenterfield nats....... was pretty much annoyed with road traffic - but these are the true "trophies"....... stone chips...
Have since fabricated some powder coated fine stainless mesh screens to sit in behind the grille which will afford some protection from damage.....
Have the grille and some of the front of my old bus out again and made the corporate decision to freshen it up a bit....... was just going to "daub" a number of "matcheads" drops of paint on the chips..... but it just isn't me.... and wouldn't have been "happy"......
so.... guess this is the repair section of my thread.......
I think the biggest mistake most make when about to start on this is to sand straight away after wiping down with a wet/damp cloth.......
You have spent some considerable amount of coupons on various waxes, silicones and polishes over the years..... each of them has found it's way deep into your paint - some of it right down to bare metal, exposed by these dastardly stone chips.........
You SHOULD remove that BEFORE any sanding - or you will just "grind" silicone into anything you wish to top-coat again......
I usually water rinse, dry and then wipe down thoroughly with a prepwash and dry it off immediately.....
Then you can sand......
Depending on how deep or how much damage exists determines which grade of paper I use..... for a "quick" top coat - probably 600/800 to "key" up the surface.
For anything which exposes bare metal - I don't muck around - back in with anything from 400 down to 240 until I get a sound base - if filler (I have become an advocate for plastic - I don't like stop putties, which are basically thick paint) is needed, I tend to roughen up the surface to get a sound bond..... if any bare steel is exposed - I again go back to basics and hit it with de-oxidine then 1K etch, primer etc etc until I get a flat finish......
If I have any areas where the top coat is sound and for some reason or other I just want to fill some "local" spots - I "feather" the damaged spots - that is work radially from the centre outwards creating a "dished" repair section - as I get further out, I use a finer paper - probably 600 and work into the sound surrounding area...... this is to effect as good a undetectable finish as possible after applying top coats......
Another little "trick" I have learned over the years is not to mask "sharp" but to apply masking tape around the area and "roll" it up and back over itself - when the top coat is applied, peel it back a bit more over the feathered edge until all of the repair is covered - this, I find - has given me the best results......
I also use a pretty "hot" thinner - the existing paint is probably well cured out and it will take something with a bit of "bite" to penetrate the surface......once you get that "fusion" again.. you can drop down to a more "general purpose" thinner in your mix........
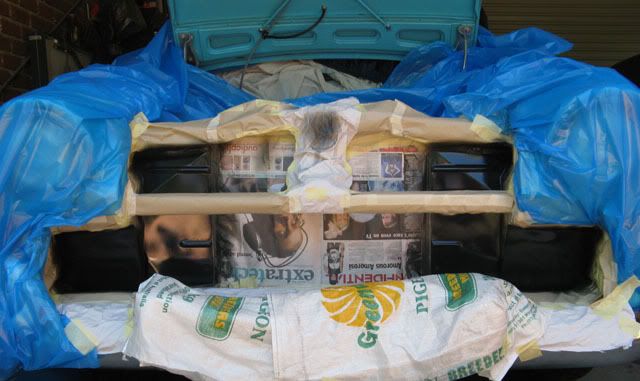
And (edited) - depending on how big the repair - determines the size of the gun ..... for this baffle refresh I will be using the little "Bunnings" touch up gun previously mentioned somewhere in the bosom of this thread........
It will be a "panel" re-spray - which will be best suited to that gun.....
more later as I get it all ready to go.......
None of this is gospel.... but it's what has worked for me over the years....
and .....
this is for acrylic only - I have no experience with repairing 2K or enamel....
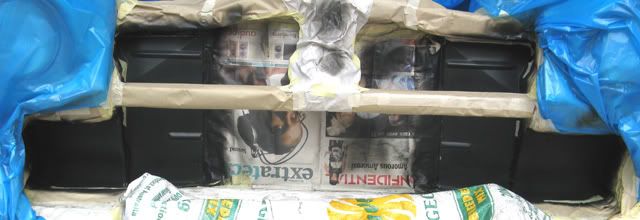
I am at present at the masking up stage of my baffle repair - pics soon ..... probably tomorrow.....
frats,
Rosco
I went to a lot of trouble getting a good finish on the radiator baffle (each side of the radiator) when I did the front welding/filling painting refurb to this area a few years back......only to have it chipped and stone blasted in the rain for the Tenterfield nats....... was pretty much annoyed with road traffic - but these are the true "trophies"....... stone chips...
Have since fabricated some powder coated fine stainless mesh screens to sit in behind the grille which will afford some protection from damage.....
Have the grille and some of the front of my old bus out again and made the corporate decision to freshen it up a bit....... was just going to "daub" a number of "matcheads" drops of paint on the chips..... but it just isn't me.... and wouldn't have been "happy"......
so.... guess this is the repair section of my thread.......
I think the biggest mistake most make when about to start on this is to sand straight away after wiping down with a wet/damp cloth.......
You have spent some considerable amount of coupons on various waxes, silicones and polishes over the years..... each of them has found it's way deep into your paint - some of it right down to bare metal, exposed by these dastardly stone chips.........
You SHOULD remove that BEFORE any sanding - or you will just "grind" silicone into anything you wish to top-coat again......
I usually water rinse, dry and then wipe down thoroughly with a prepwash and dry it off immediately.....
Then you can sand......
Depending on how deep or how much damage exists determines which grade of paper I use..... for a "quick" top coat - probably 600/800 to "key" up the surface.
For anything which exposes bare metal - I don't muck around - back in with anything from 400 down to 240 until I get a sound base - if filler (I have become an advocate for plastic - I don't like stop putties, which are basically thick paint) is needed, I tend to roughen up the surface to get a sound bond..... if any bare steel is exposed - I again go back to basics and hit it with de-oxidine then 1K etch, primer etc etc until I get a flat finish......
If I have any areas where the top coat is sound and for some reason or other I just want to fill some "local" spots - I "feather" the damaged spots - that is work radially from the centre outwards creating a "dished" repair section - as I get further out, I use a finer paper - probably 600 and work into the sound surrounding area...... this is to effect as good a undetectable finish as possible after applying top coats......
Another little "trick" I have learned over the years is not to mask "sharp" but to apply masking tape around the area and "roll" it up and back over itself - when the top coat is applied, peel it back a bit more over the feathered edge until all of the repair is covered - this, I find - has given me the best results......
I also use a pretty "hot" thinner - the existing paint is probably well cured out and it will take something with a bit of "bite" to penetrate the surface......once you get that "fusion" again.. you can drop down to a more "general purpose" thinner in your mix........
And (edited) - depending on how big the repair - determines the size of the gun ..... for this baffle refresh I will be using the little "Bunnings" touch up gun previously mentioned somewhere in the bosom of this thread........
It will be a "panel" re-spray - which will be best suited to that gun.....
more later as I get it all ready to go.......
None of this is gospel.... but it's what has worked for me over the years....
and .....
this is for acrylic only - I have no experience with repairing 2K or enamel....
I am at present at the masking up stage of my baffle repair - pics soon ..... probably tomorrow.....
frats,
Rosco