'62 Wagon ... "The Smurf"
Re: '62 Wagon ... "The Smurf"
Very nice engine , like the 1UZ smooth and powerful, what do you have in mind for the tricky bits , like speedo and correct gear changes etc?
Re: '62 Wagon ... "The Smurf"
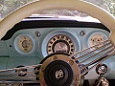
I'm currently running a GPS speedo sender but the ECU has a speed output, so I'll most likely connect that up instead so I have a speedo that works in the tunnels around Brisbane. The Dakota Digital speedo is adjustable. As long as I have a signal I can calibrate it. I actually have it set at the moment so that 60 mph on the speedo is 60 km/hr in real life.ek amigo wrote:Very nice engine , like the 1UZ smooth and powerful, what do you have in mind for the tricky bits , like speedo and correct gear changes etc?
I'm using the stock Toyota gearbox which is an electronic 4 speed. The ECU controls the shift points.
Re: '62 Wagon ... "The Smurf"
Sounds like you've got it sussed, it took heaps of mucking around to get the 1UZ working properly, the ecu doesn't control the shift points so it was quite tricky, goes like a rocket now.
Re: '62 Wagon ... "The Smurf"
Another update....
Engine mounts are done.


I've got the engine back in and the next job will be the gearbox crossmember. I dummied up the radiator and grill and it looks like I just have enough room to squeeze a pair of thermo fans behind it.

Engine mounts are done.
I've got the engine back in and the next job will be the gearbox crossmember. I dummied up the radiator and grill and it looks like I just have enough room to squeeze a pair of thermo fans behind it.
Re: '62 Wagon ... "The Smurf"
You do nice work cobber 
I started with nothing and still have most of it left.
Foundation member #61 of FB/EK Holden club of W.A.
Foundation member #61 of FB/EK Holden club of W.A.
Re: '62 Wagon ... "The Smurf"
I'm actually a bit of a muppet when it comes to this stuff but I'm lucky my best mate is a mechanical engineer and his head fabricator (who builds hot rods as a side business) has taken me under his wing.Blacky wrote:You do nice work cobber
Re: '62 Wagon ... "The Smurf"
Time for an update...
I've finally got the brakes under control. I ended up making a custom plate for the firewall that repositioned the 7" double diaphragm booster I bought to just clear the bonnet hinge, and still left enough room for a 1" VN master cylinder. I've mounted this to a VN auto pedal box.

There's actually more space than the photo suggests but it was a pain in the arse finding the right combination of bits to make it all work.

I want to run AC eventually, and as I've had to space the radiator forward, there was no way I was going to fit an air-air intercooler and AC condenser in there. In the end I made a custom radiator support that let me mount the MR2 radiator and twin thermos, but still leave enough room in front for a condenser. I've had to do some pretty serious surgery on the bonnet catch on the grill and the under-side of the bonnet.
I now have a water-air intercooler kit. The heat exchanger will mount where you see it in the photo. It makes the intercooler piping pretty straight forward and quite short, so there shouldn't be any lag. The radiator and fan will mount inside the left guard up behind the headlight with some ducting running up to it. I have a Bosch Cobra water pump that will end up behind the bumper to circulate the water through the heat exchanger and the radiator under the guard. The goal is to not have any performance parts visible at all from the outside.

I've finally got the brakes under control. I ended up making a custom plate for the firewall that repositioned the 7" double diaphragm booster I bought to just clear the bonnet hinge, and still left enough room for a 1" VN master cylinder. I've mounted this to a VN auto pedal box.
There's actually more space than the photo suggests but it was a pain in the arse finding the right combination of bits to make it all work.
I want to run AC eventually, and as I've had to space the radiator forward, there was no way I was going to fit an air-air intercooler and AC condenser in there. In the end I made a custom radiator support that let me mount the MR2 radiator and twin thermos, but still leave enough room in front for a condenser. I've had to do some pretty serious surgery on the bonnet catch on the grill and the under-side of the bonnet.
I now have a water-air intercooler kit. The heat exchanger will mount where you see it in the photo. It makes the intercooler piping pretty straight forward and quite short, so there shouldn't be any lag. The radiator and fan will mount inside the left guard up behind the headlight with some ducting running up to it. I have a Bosch Cobra water pump that will end up behind the bumper to circulate the water through the heat exchanger and the radiator under the guard. The goal is to not have any performance parts visible at all from the outside.
-
MyEKisdriven
- Posts: 243
- Joined: Wed Oct 05, 2011 7:52 pm
- State: WA
- Location: Mandurah WA
Re: '62 Wagon ... "The Smurf"
is this still going to be the wife's daily ? 
Foundation member #6 FB/EK Club WA
Sydney to Perth in an EK ute ? no problem.
0424 364 840
Sydney to Perth in an EK ute ? no problem.
0424 364 840
Re: '62 Wagon ... "The Smurf"
I don't think it will be very wife-friendly somehow.....MyEKisdriven wrote:is this still going to be the wife's daily ?
Re: '62 Wagon ... "The Smurf"
I had a productive day ...
Be gone traction control!

Intercooler piping is done. I think it came up really well, and its quite short so I can't imagine that there will be much lag.


I made up the mother of all brackets that mounts the water-air intercooler radiator, transmission cooler and thermo fan all into one unit. The sides are closed in with rubber so the fan only draws through the IC radiator.

It mounts up inside the left hand front guard behind the headlight. I've cut an opening in behind the grill that will feed fresh air to it via a duct.

I'll get a photo of it in place once I've bolted it in place. It's all apart at the moment as I had to paint the steel brackets.
The tailshaft arrived and is in place. I need to extend the cut in the tunnel a bit more to give it some more clearance. We've already made up a new tunnel that will be trimmed to suit and welded in next Friday. The brake line guy arrives next week to sort out the new lines for the brakes and fuel system.
Fingers crossed this will be ready to drive in a few weeks time.
Be gone traction control!
Intercooler piping is done. I think it came up really well, and its quite short so I can't imagine that there will be much lag.
I made up the mother of all brackets that mounts the water-air intercooler radiator, transmission cooler and thermo fan all into one unit. The sides are closed in with rubber so the fan only draws through the IC radiator.
It mounts up inside the left hand front guard behind the headlight. I've cut an opening in behind the grill that will feed fresh air to it via a duct.
I'll get a photo of it in place once I've bolted it in place. It's all apart at the moment as I had to paint the steel brackets.
The tailshaft arrived and is in place. I need to extend the cut in the tunnel a bit more to give it some more clearance. We've already made up a new tunnel that will be trimmed to suit and welded in next Friday. The brake line guy arrives next week to sort out the new lines for the brakes and fuel system.
Fingers crossed this will be ready to drive in a few weeks time.
Re: '62 Wagon ... "The Smurf"
Looking good Rooster, very interesting build 
I started with nothing and still have most of it left.
Foundation member #61 of FB/EK Holden club of W.A.
Foundation member #61 of FB/EK Holden club of W.A.
Re: '62 Wagon ... "The Smurf"
I know they are crap photos but I finished off the ducting for the intercooler radiator. I'm pretty happy with how it turned out as you can't see any of it.
The radiator mounted inside the guard behind the head light.

This is with the duct in place. I've since finished the welding on the mounting tags and painted it black.

I had a prick of a day today too. I'd planned to get the diff sorted and instead got a good lesson in measure shit first! The bearings were shot in the Volvo diff so I ordered a replacement set but neglected to measure the diameter of the retaining/lock ring that presses on after the bearing.... The supplied replacement was 4 mm larger in diameter. I ended up wasting half the day redoing it and it $*#@ the inner seal so I had to order new ones also.
Anyway, I got the inlet tract and air box roughed out. I just used some pipe that was laying around the workshop (I'll be getting rid of the purple!), and used a VN Commodore air box inside the front right guard. I still need to cut an opening in the front like I did for the intercooler radiator and make a duct and bracket up but it all sits in place nicely.
Crap iPhone photos again...

I repositioned the flexible rubber joint so that it sits in the opening in the inner guard after I took the this photo. You can see it better in the first image.

The radiator mounted inside the guard behind the head light.
This is with the duct in place. I've since finished the welding on the mounting tags and painted it black.
I had a prick of a day today too. I'd planned to get the diff sorted and instead got a good lesson in measure shit first! The bearings were shot in the Volvo diff so I ordered a replacement set but neglected to measure the diameter of the retaining/lock ring that presses on after the bearing.... The supplied replacement was 4 mm larger in diameter. I ended up wasting half the day redoing it and it $*#@ the inner seal so I had to order new ones also.
Anyway, I got the inlet tract and air box roughed out. I just used some pipe that was laying around the workshop (I'll be getting rid of the purple!), and used a VN Commodore air box inside the front right guard. I still need to cut an opening in the front like I did for the intercooler radiator and make a duct and bracket up but it all sits in place nicely.
Crap iPhone photos again...
I repositioned the flexible rubber joint so that it sits in the opening in the inner guard after I took the this photo. You can see it better in the first image.
Re: '62 Wagon ... "The Smurf"
I finished off the plumbing for the water-air intercooler today. It's turned out pretty well. The inline radiator cap can be unbolted from underneath and then raised to allow the system to be filled and bled


The pump is a Bosch Cobra Pump. I was able to mount it up behind the bumper.

I also arranged for a brake guy to come and sort out the brake and fuel system. He ran all new lines from the new master cylinder, made braided hoses to suit the new brakes, and also ran a new fuel feed line and then plumbed the old feed line as a return. It's come up really well but I couldn't seem to get a half decent photo of any of it with my crappy iPhone.
The pump is a Bosch Cobra Pump. I was able to mount it up behind the bumper.
I also arranged for a brake guy to come and sort out the brake and fuel system. He ran all new lines from the new master cylinder, made braided hoses to suit the new brakes, and also ran a new fuel feed line and then plumbed the old feed line as a return. It's come up really well but I couldn't seem to get a half decent photo of any of it with my crappy iPhone.
Re: '62 Wagon ... "The Smurf"
Keep the crappy photos coming Cogburn
I started with nothing and still have most of it left.
Foundation member #61 of FB/EK Holden club of W.A.
Foundation member #61 of FB/EK Holden club of W.A.
Re: '62 Wagon ... "The Smurf"
A little update...
Baby Moons arrived

15 x 6 Wheel Vintique Solids powdercoated black

First time on the ground in 9 months! I'd like to drop the ride height by 50 mm or so. The rear spats still fit which I'm really happy about. I'm not sure if the 195's will be up to the engine though.

I finished off the bracket for the ugly air box...

And then made a duct to direct fresh air to it.

The opening for the duct. The duct will be painted black to make it blend in.

And I also finished off the tunnel. I had to raise the rear of previous tunnel modification as the tail of the gearbox was too close to the floor.

That's pretty much all of the major fabrication done. I'll most likely pull the engine and gearbox out next week so I can finish off t he engine bay and then put it all back together.
It's getting there bit by bit.
Baby Moons arrived
15 x 6 Wheel Vintique Solids powdercoated black
First time on the ground in 9 months! I'd like to drop the ride height by 50 mm or so. The rear spats still fit which I'm really happy about. I'm not sure if the 195's will be up to the engine though.
I finished off the bracket for the ugly air box...
And then made a duct to direct fresh air to it.
The opening for the duct. The duct will be painted black to make it blend in.
And I also finished off the tunnel. I had to raise the rear of previous tunnel modification as the tail of the gearbox was too close to the floor.
That's pretty much all of the major fabrication done. I'll most likely pull the engine and gearbox out next week so I can finish off t he engine bay and then put it all back together.
It's getting there bit by bit.