Page 14 of 51
Re: Ol' Rusty - FB/EK Sedan
Posted: Wed May 19, 2021 8:18 pm
by funkyscooter
Thanks guys. Still catching up. Got out the trusty yellow paper and started making templates to fill in the hole in the firewall. There are two pieces. One inner that runs across from the a pillar to the bonnet hinge.

This was pretty easy. Just had to cut around the tabs I left for the bolts.
Next the outer skin. A few tricky bends will be needed here. There is a little bit at the top where the plenum meets the grill. Going to have to do this as two parts.

Yellow paper and blue tape is much easier to deal with than metal and welding. Worth spending the time making things up.
Scott
Re: Ol' Rusty - FB/EK Sedan
Posted: Wed May 19, 2021 8:27 pm
by funkyscooter
So inner panel first

Only needs a small radius bend on each end. Final trim and fit was a combo of tin snips and power file.

Had to weld from inside to keep the face where the two pieces are sandwiched together on the firewall side clean and lump free. Welding looking up. Now there’s a fun job. Welding jacket and fireproof blanket over my legs kept me toasty warm

Scott
Re: Ol' Rusty - FB/EK Sedan
Posted: Wed May 19, 2021 8:38 pm
by funkyscooter
Outer skin. Quite a few little subtle bends and radius’s to get to to all line up with what remains of the firewall.


Paper template saved the day and my sanity. Little top bit sitting in place. That took the longest- this one was a second attempt. Here’s the two parts welded together.

Holes drilled for plug welds. Screwed it in place to pull the two pieces together and started welding.
And run out of gas.
C size bottles just shouldn’t be available to tight arses like me. Had to go the cheapest option.
Anyway ended today with a trip to the hardware for more gas and managed to get the first round of welding in. Woot!

Bit of weld/ grind on the weekend and think I can tick this off.
Scott
Re: Ol' Rusty - FB/EK Sedan
Posted: Wed May 19, 2021 9:16 pm
by Brett027
Looking good Scott. You are doing a top job there.
Re: Ol' Rusty - FB/EK Sedan
Posted: Wed May 19, 2021 9:41 pm
by Blacky
Yep - really enjoy your posts , I recall doing a similar job on our supposedly rust free EK about a dozen years ago .....
Re: Ol' Rusty - FB/EK Sedan
Posted: Wed May 19, 2021 9:47 pm
by Errol62
Ditto on the van. I had to patch the patch front cut firewall. Maintaining correct geometry for the bolt holes is crucial.
FB ute driver, EK van project
Re: Ol' Rusty - FB/EK Sedan
Posted: Sat May 29, 2021 7:28 pm
by funkyscooter
One last firewall shot - for now. More work to come. Finished up looking pretty good.
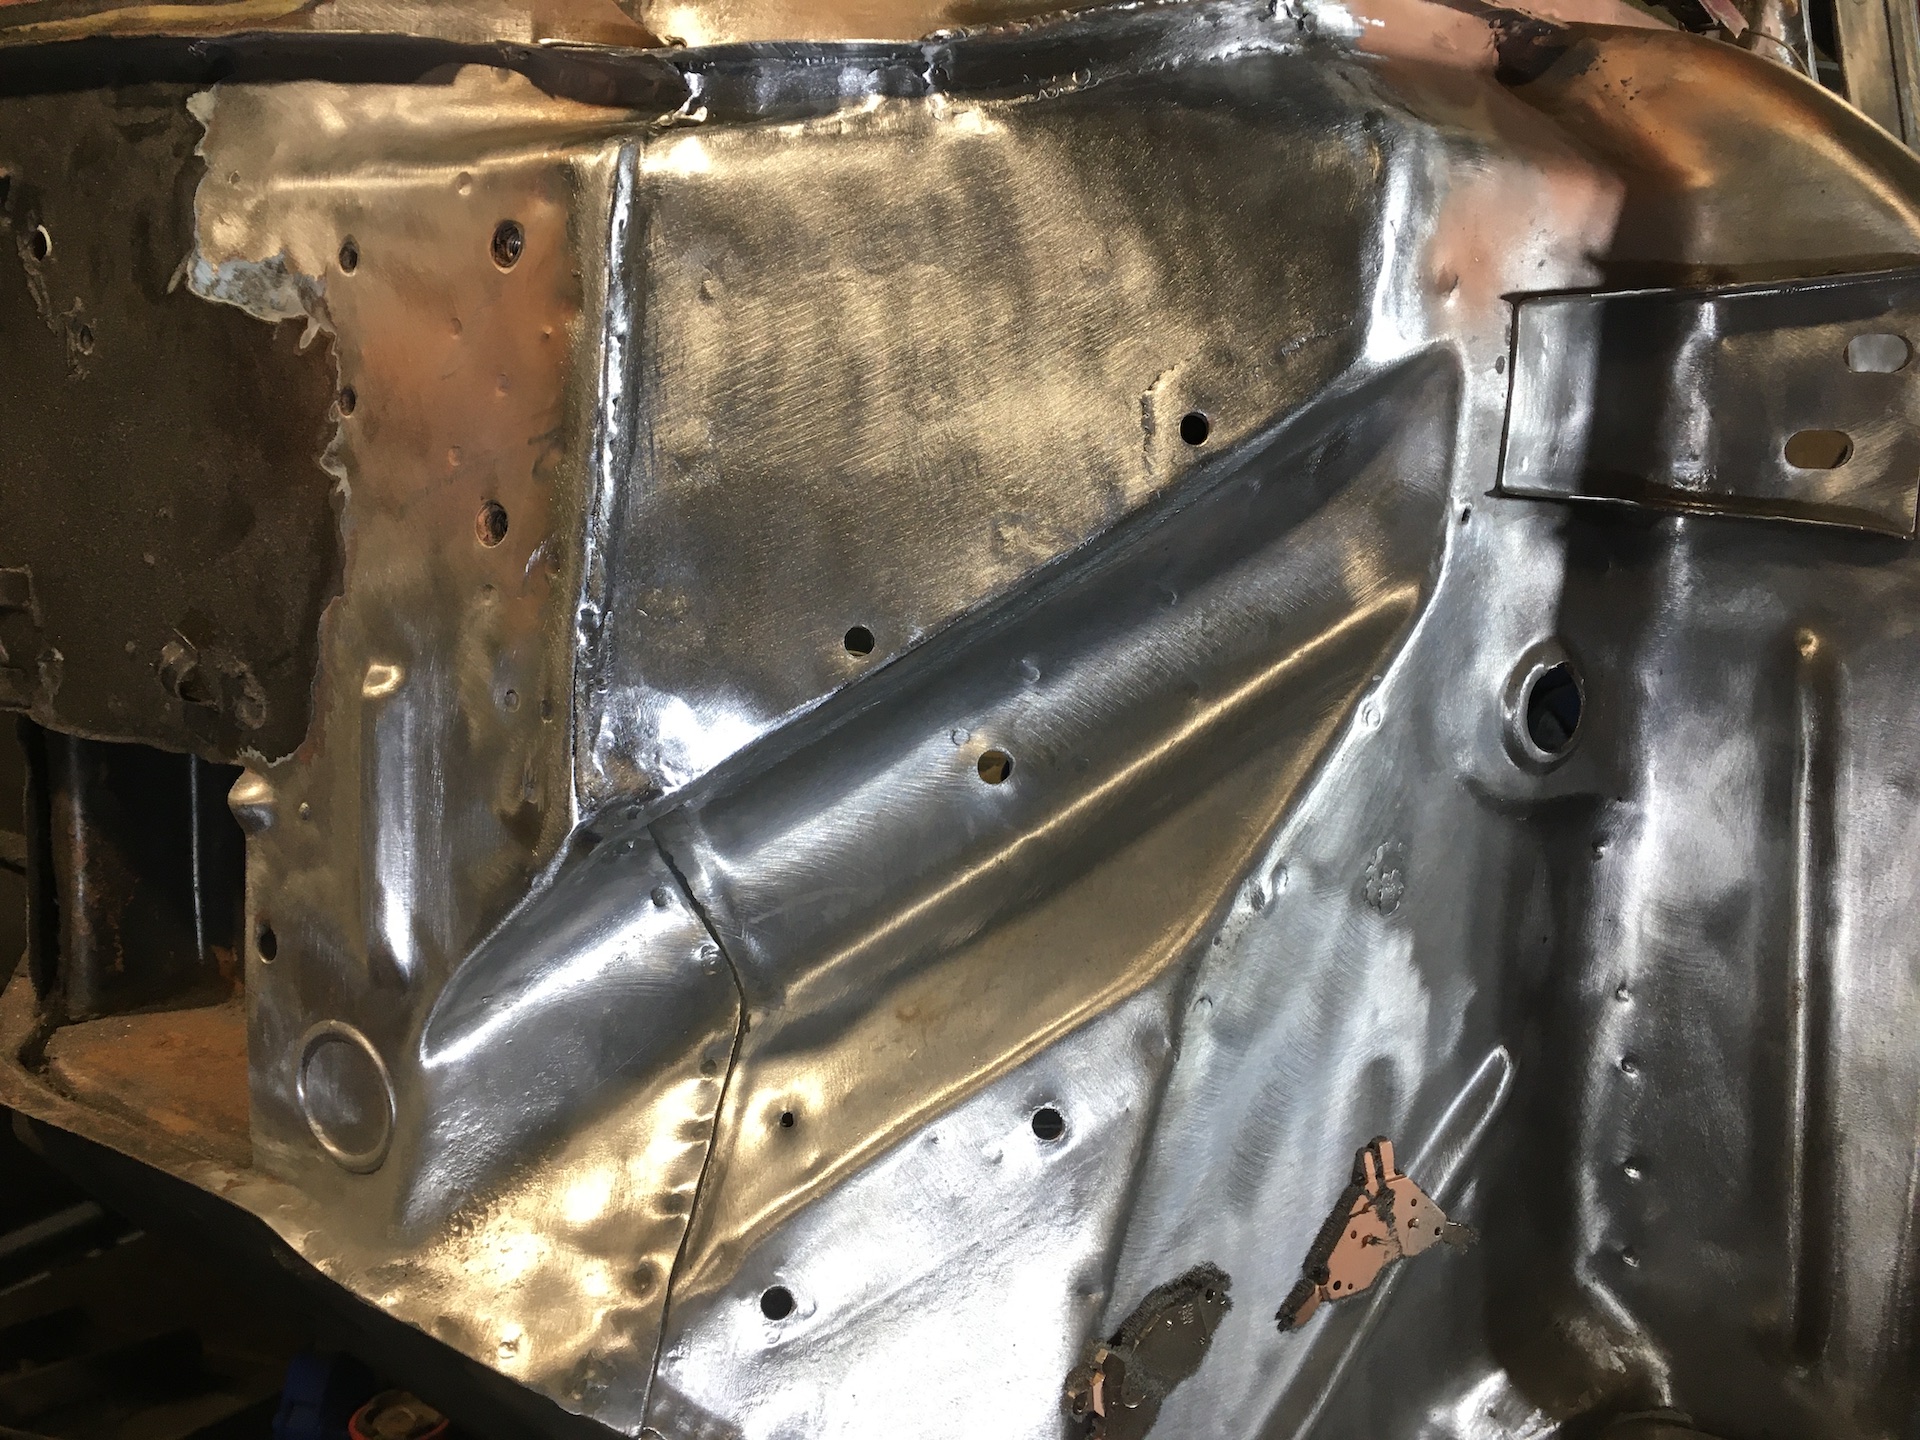
- IMG_8306.jpg (907.32 KiB) Viewed 920 times
Re: Ol' Rusty - FB/EK Sedan
Posted: Sat May 29, 2021 7:41 pm
by funkyscooter
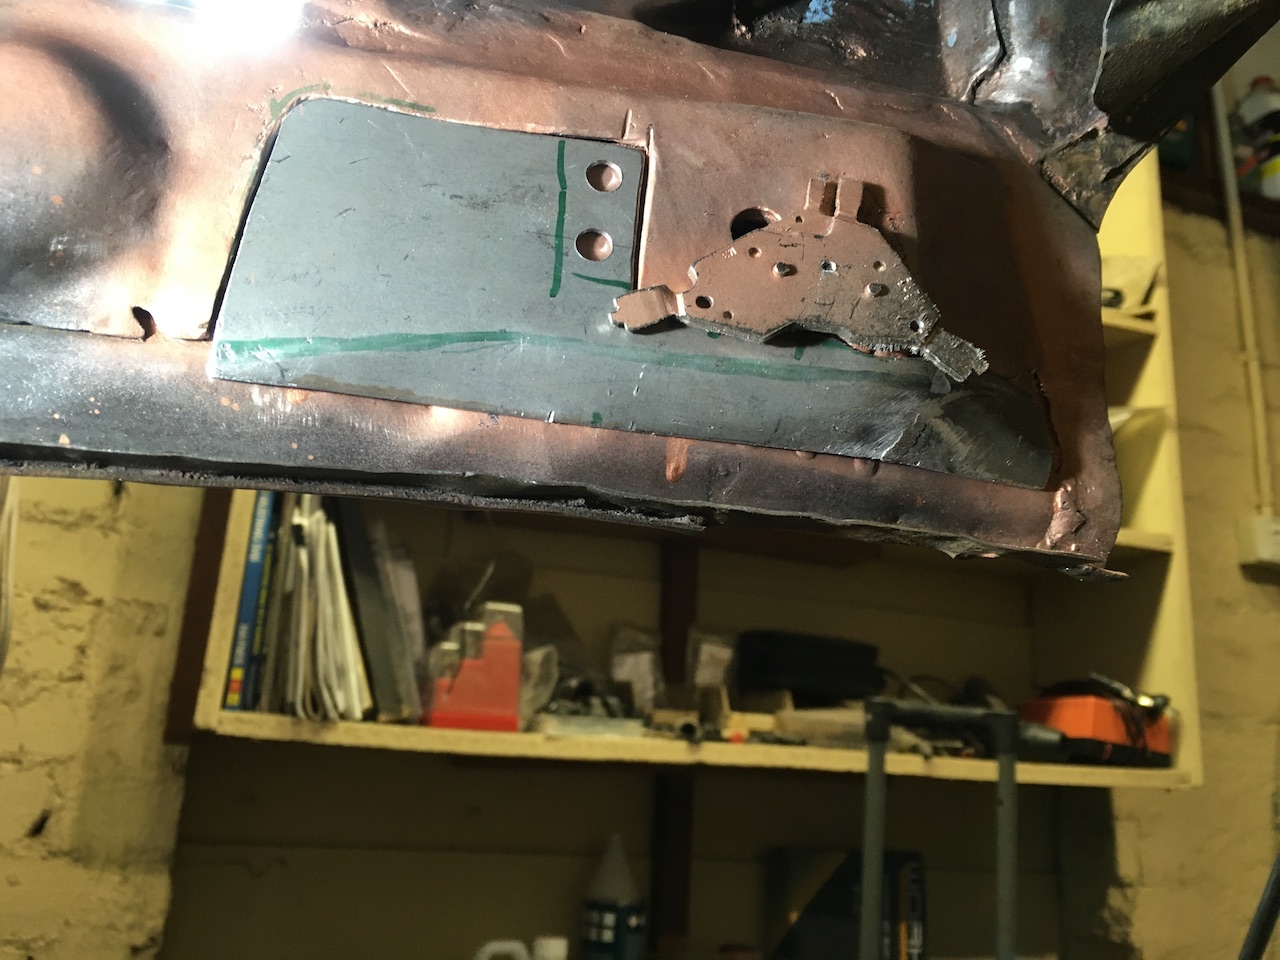
Now back to the sill where the subframe meets. This looks like it has had a rust repair in the past. Missing some metal. Missing even more once I gave it a cut and grind.

- IMG_8322.JPG (282.9 KiB) Viewed 914 times
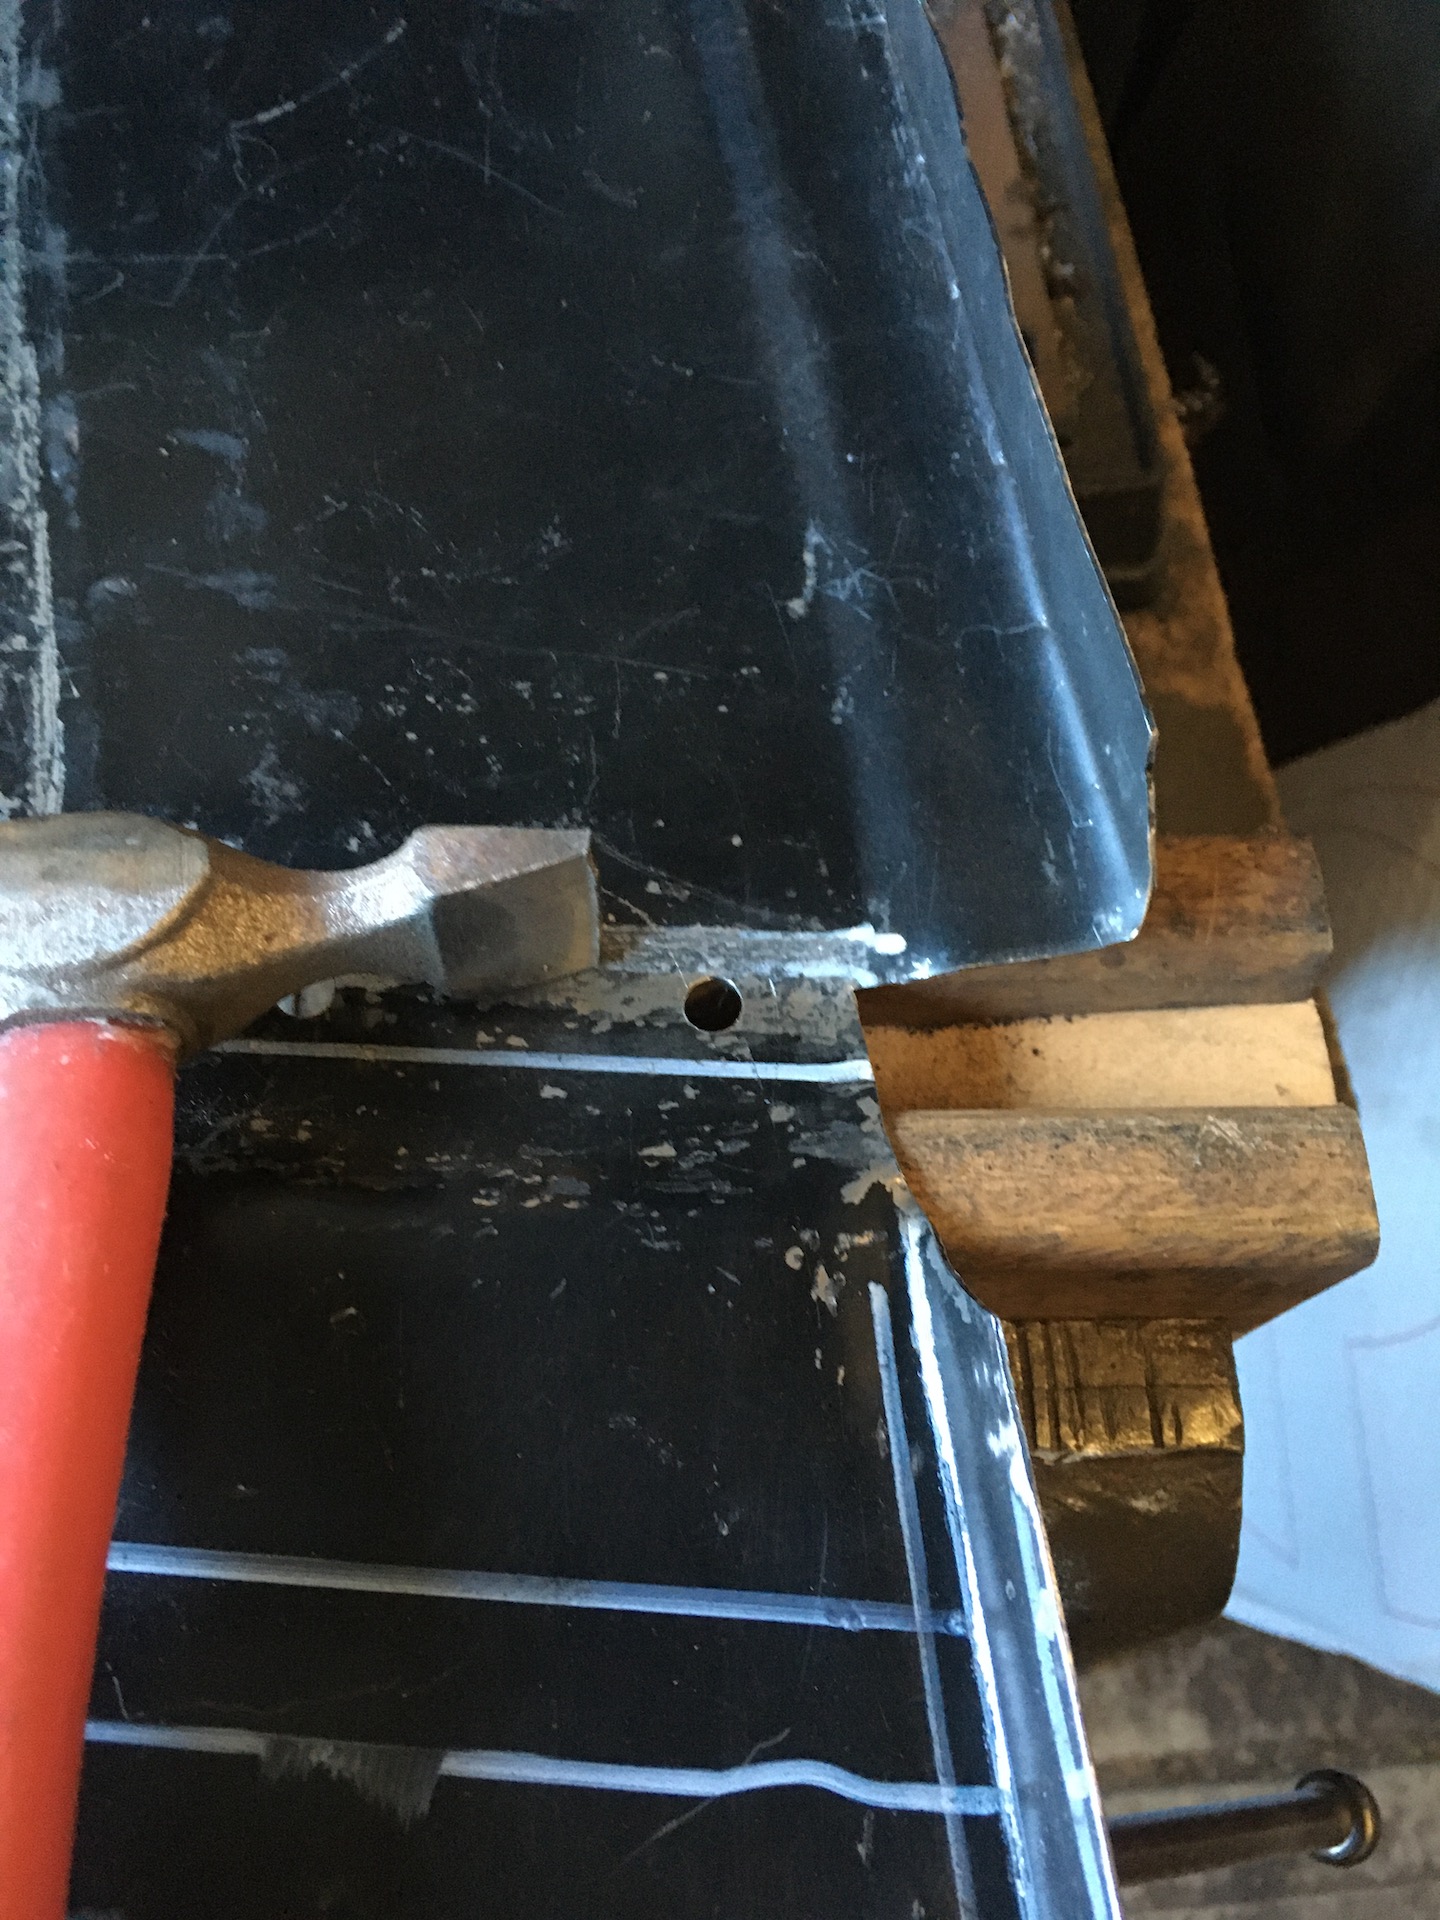
Now time to bend some metal. I have a new bracket for the RHS already so used this as a guide. Its 1.5mm thick. Bit of hammering with a piece of hardwood.
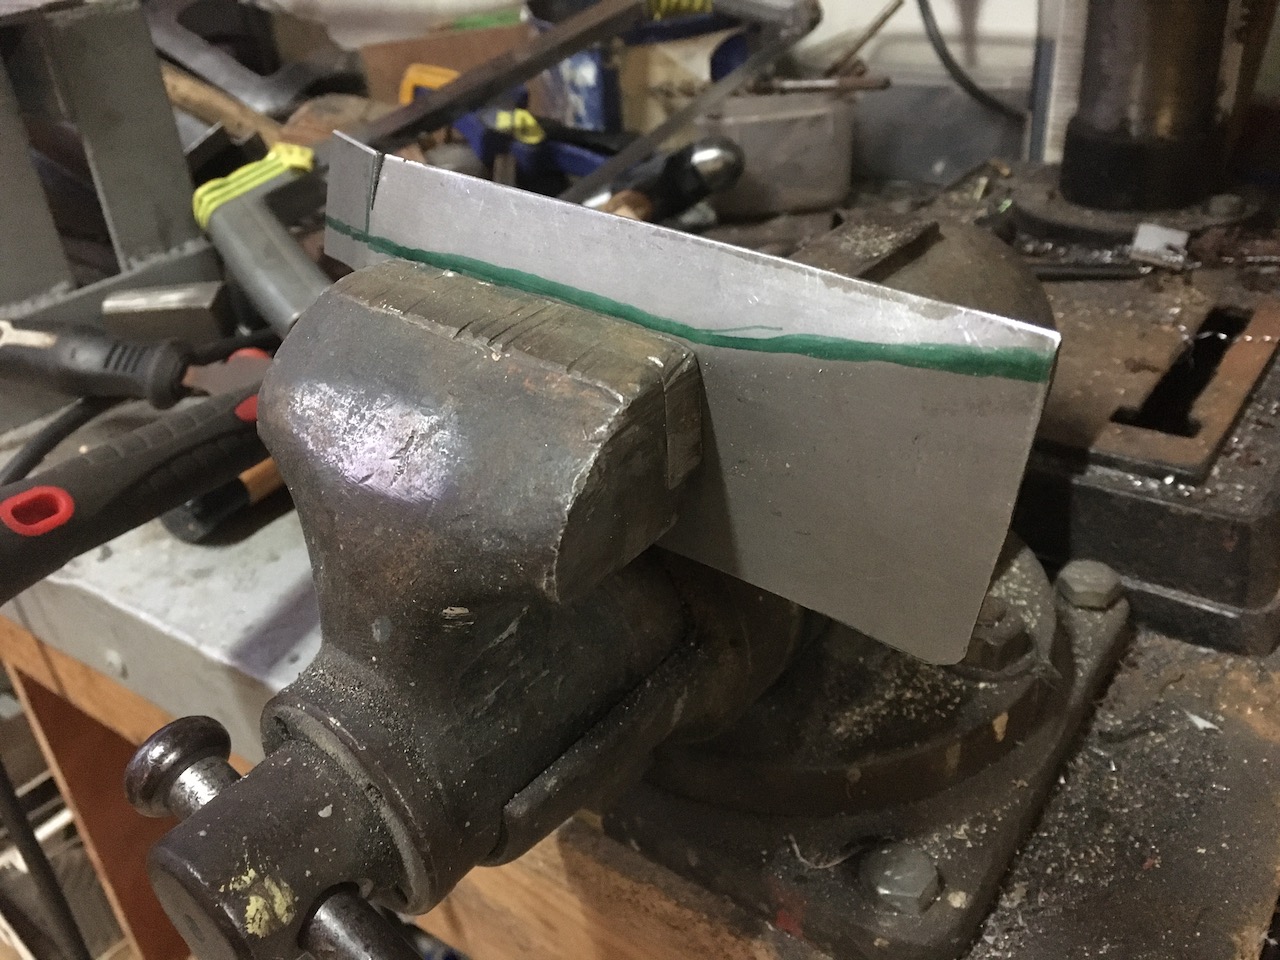
- IMG_8323.JPG (333.64 KiB) Viewed 914 times
Lots of little tweaks later I have this.
- IMG_8331.JPG (296.22 KiB) Viewed 914 times
Drilled a couple holes to plug weld the new piece to the thick plate inside the existing bracket. The rest is butt welded. Also welded up the existing patch to the inner sill. Think my welding is getting better, only a few spots where I missed
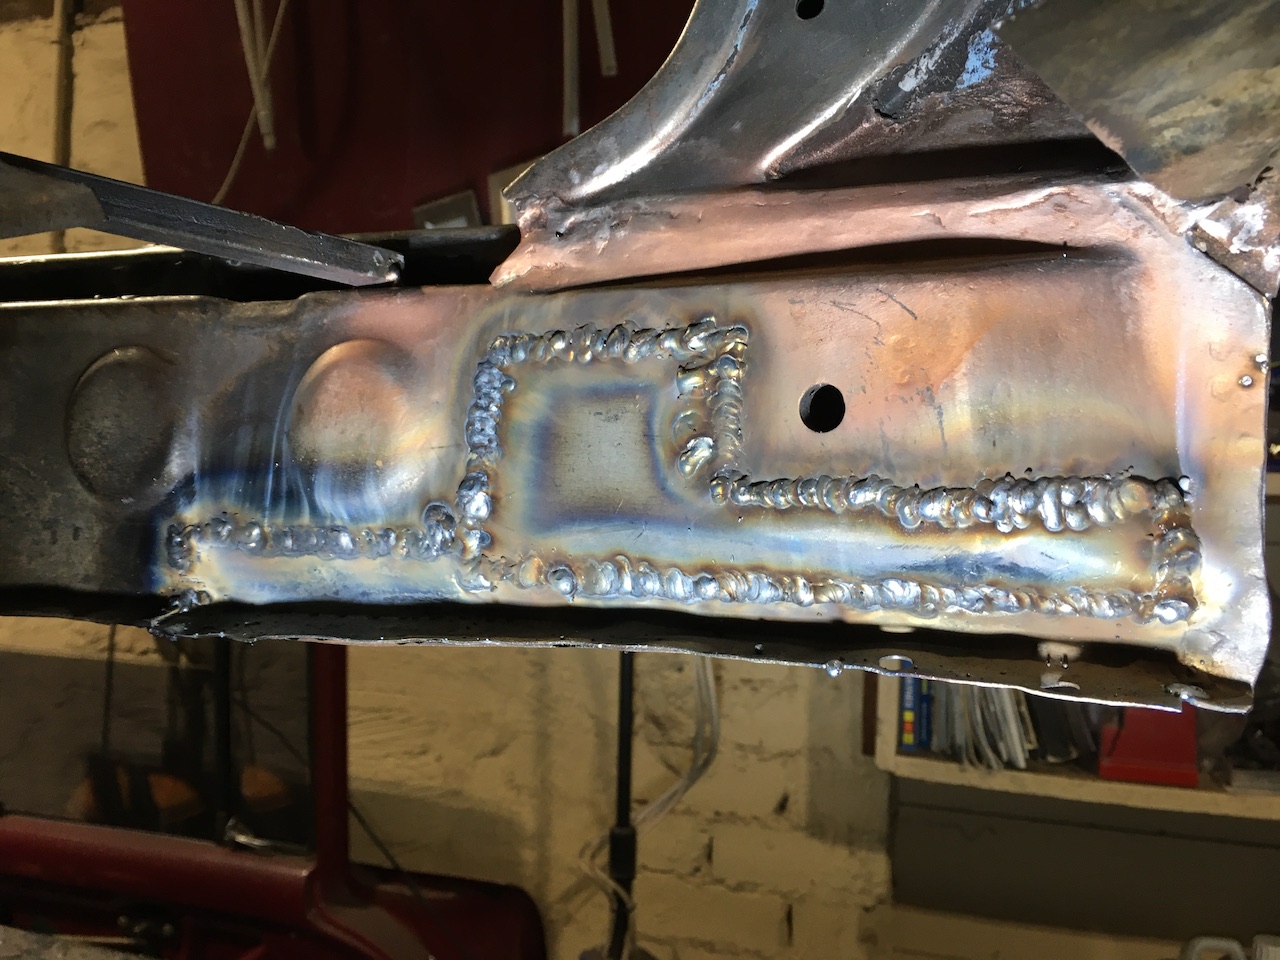
- IMG_8332.JPG (317.78 KiB) Viewed 914 times
Gave it a grind over the area where the chassis joins on to the inner sill.
- IMG_8333.JPG (321.74 KiB) Viewed 914 times
Re: Ol' Rusty - FB/EK Sedan
Posted: Sat May 29, 2021 8:02 pm
by funkyscooter
Bit of time travel. Did this before the sill but forgot to post.
So when I cut out the floor realised that the chassis was rotten where it joins the sill. Welded a bit of square rod to hold everything in place and to use as a reference point. Took loads of measurements.
- IMG_8230.jpg (768.6 KiB) Viewed 905 times
Weapon of choice.
- IMG_8232.jpg (689.73 KiB) Viewed 905 times
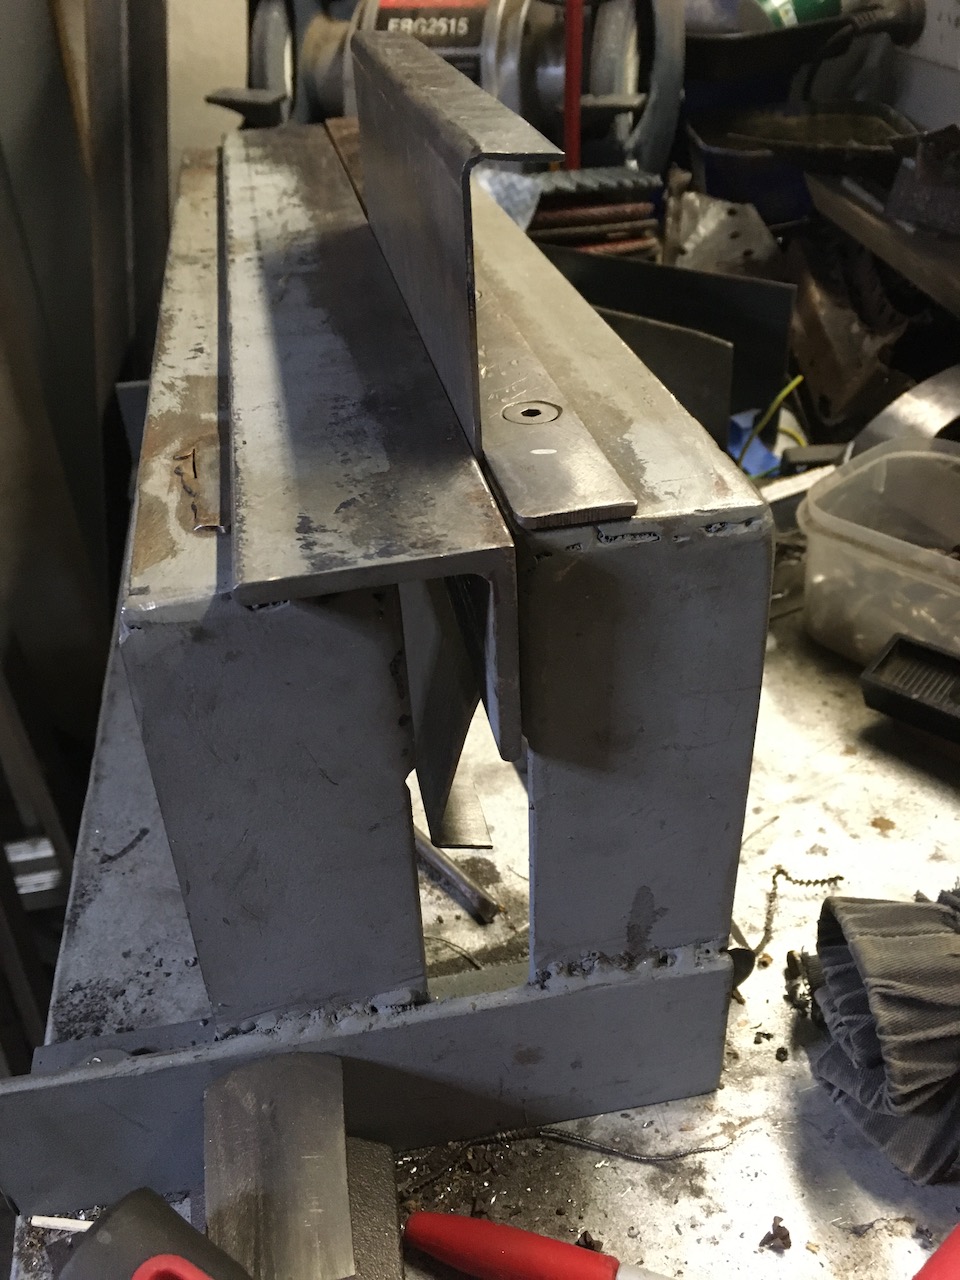
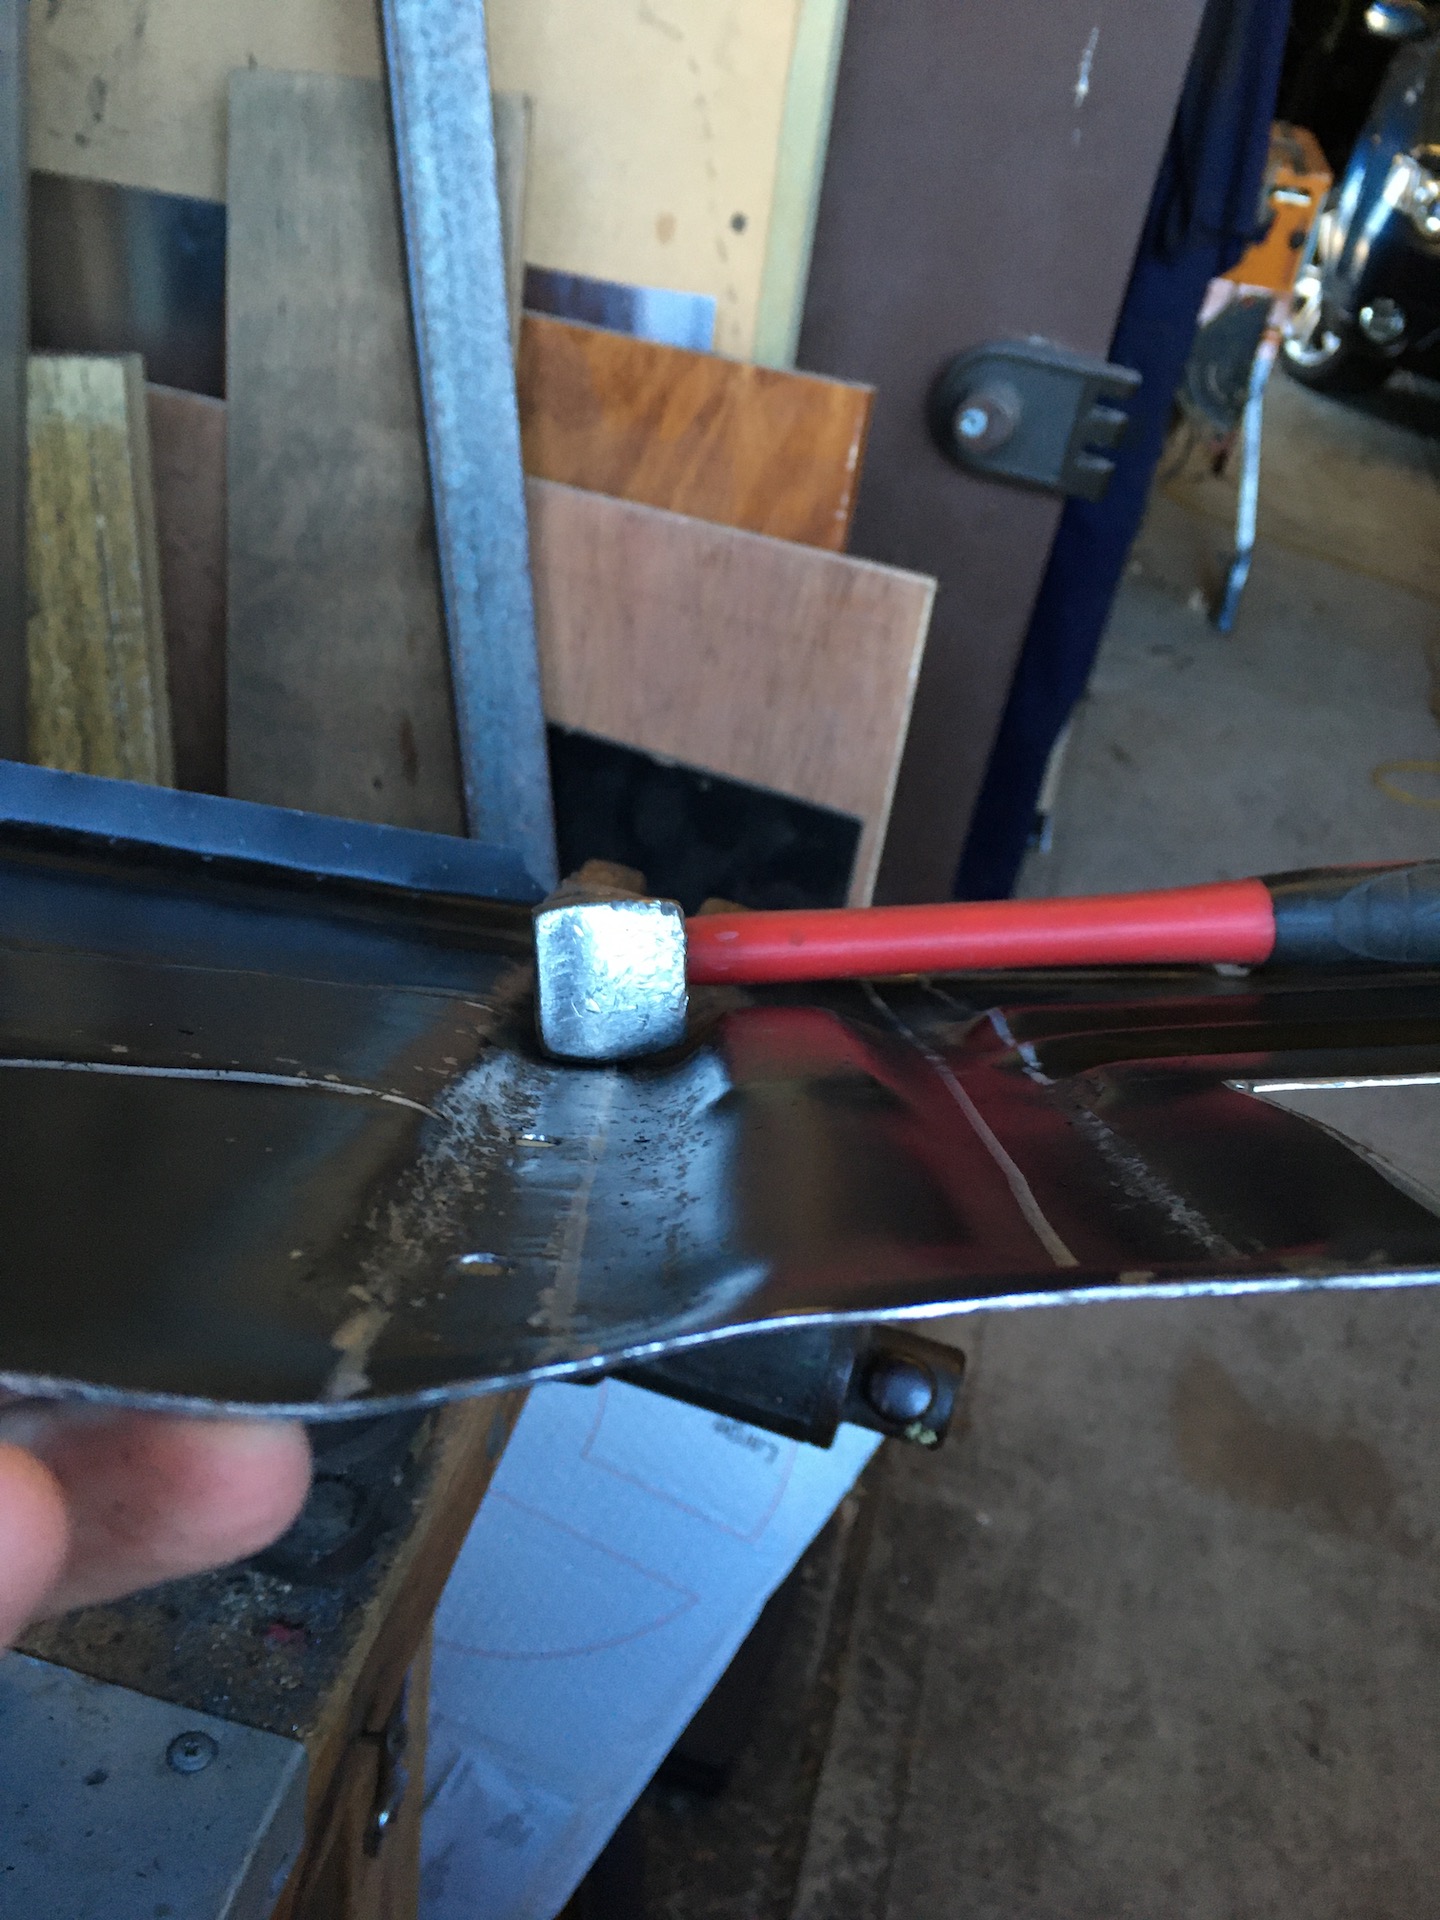
So used my sheet metal bender to fold some 90 degrees. 1.5mm requires a bit of force.
- IMG_8307.JPG (288.1 KiB) Viewed 905 times
Hardwood and big hammer does the job.
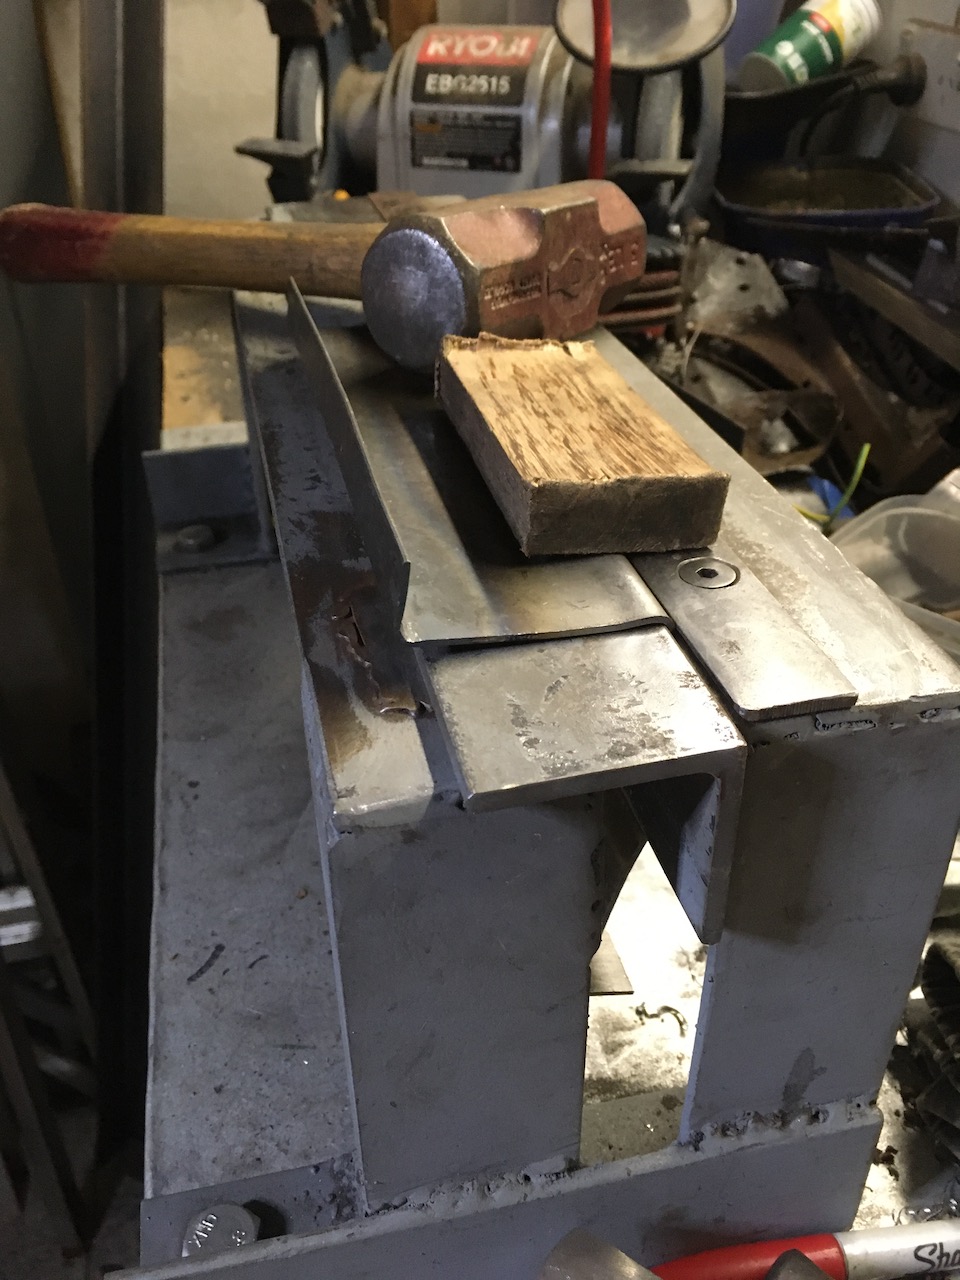
- IMG_8308.JPG (268.23 KiB) Viewed 905 times
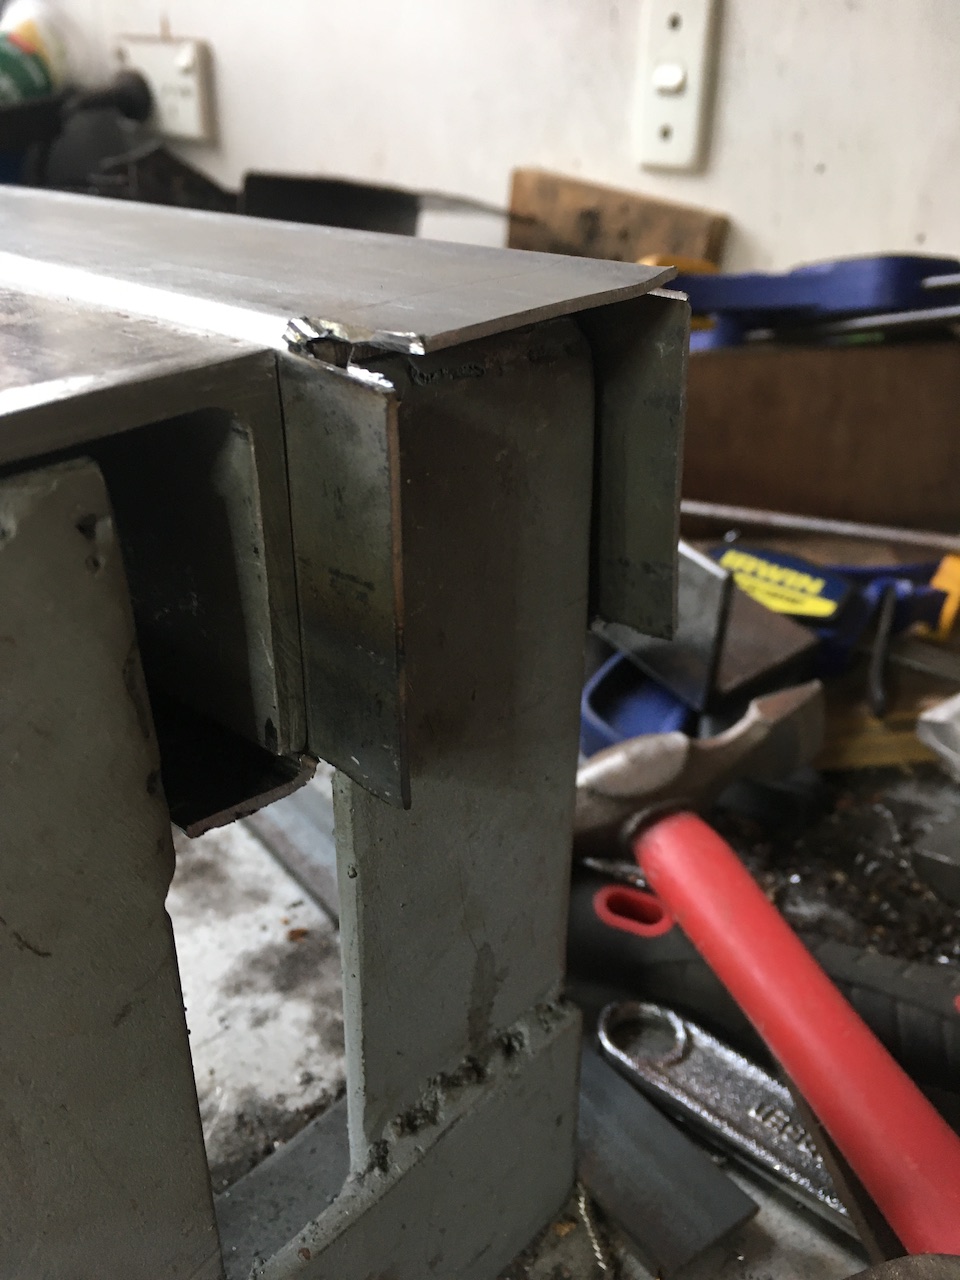
Final fold. Lucky for me the sheet bender is made up of 50mm angle. Inner size of the piece - 50mm. Makes life easier.
- IMG_8312.JPG (231.3 KiB) Viewed 905 times
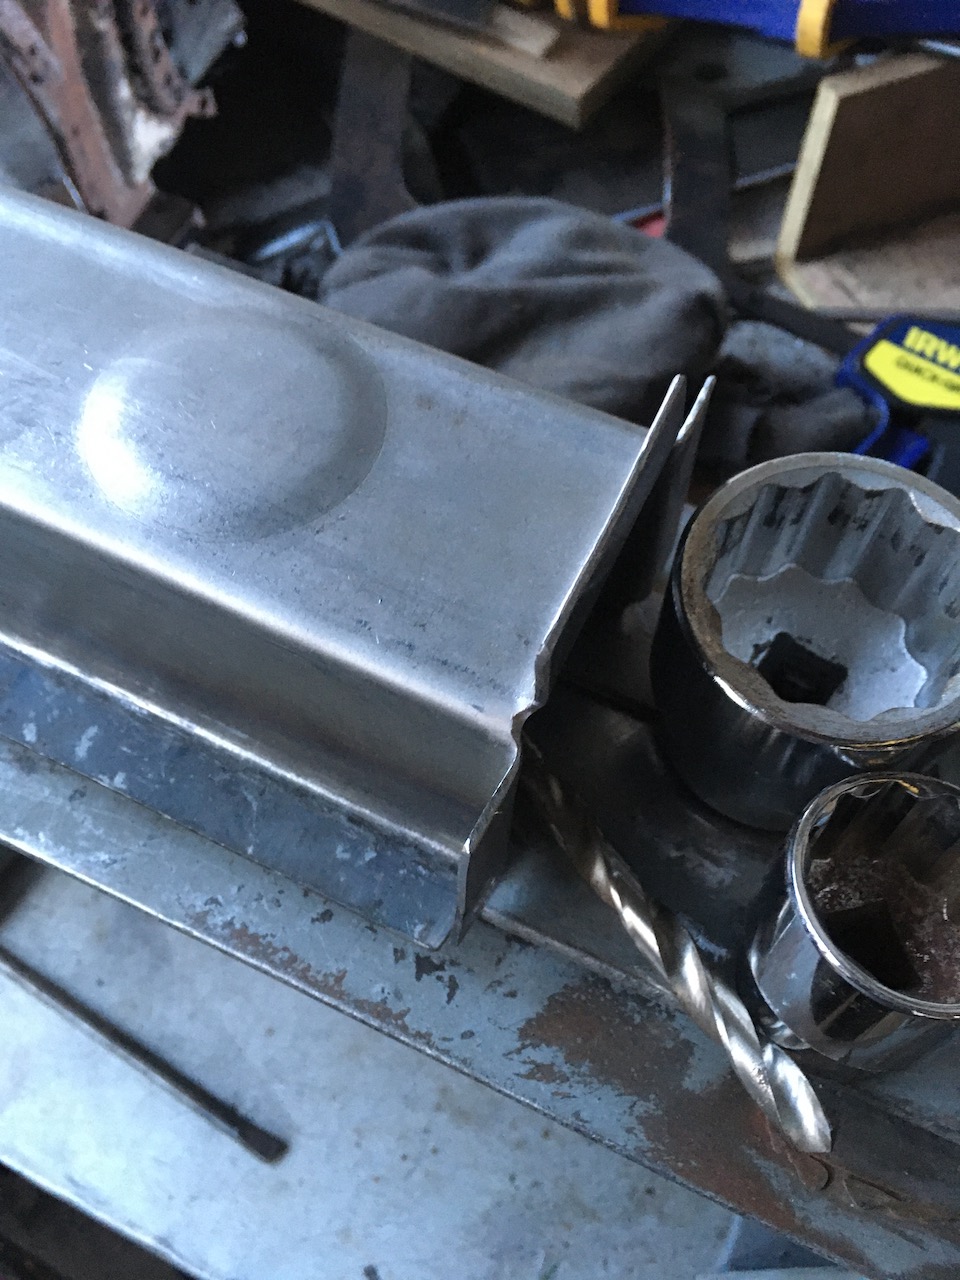
Decided on a bit of bling for the drain hole. Got out my 36mmand 27mm sockets. Wound up the vice whilst tapping on the end of it.

- IMG_8313.JPG (323.31 KiB) Viewed 905 times
Looks the part
- IMG_8314.JPG (300.94 KiB) Viewed 905 times
Here's the final piece. With drain hole. Ready to weld in next week.
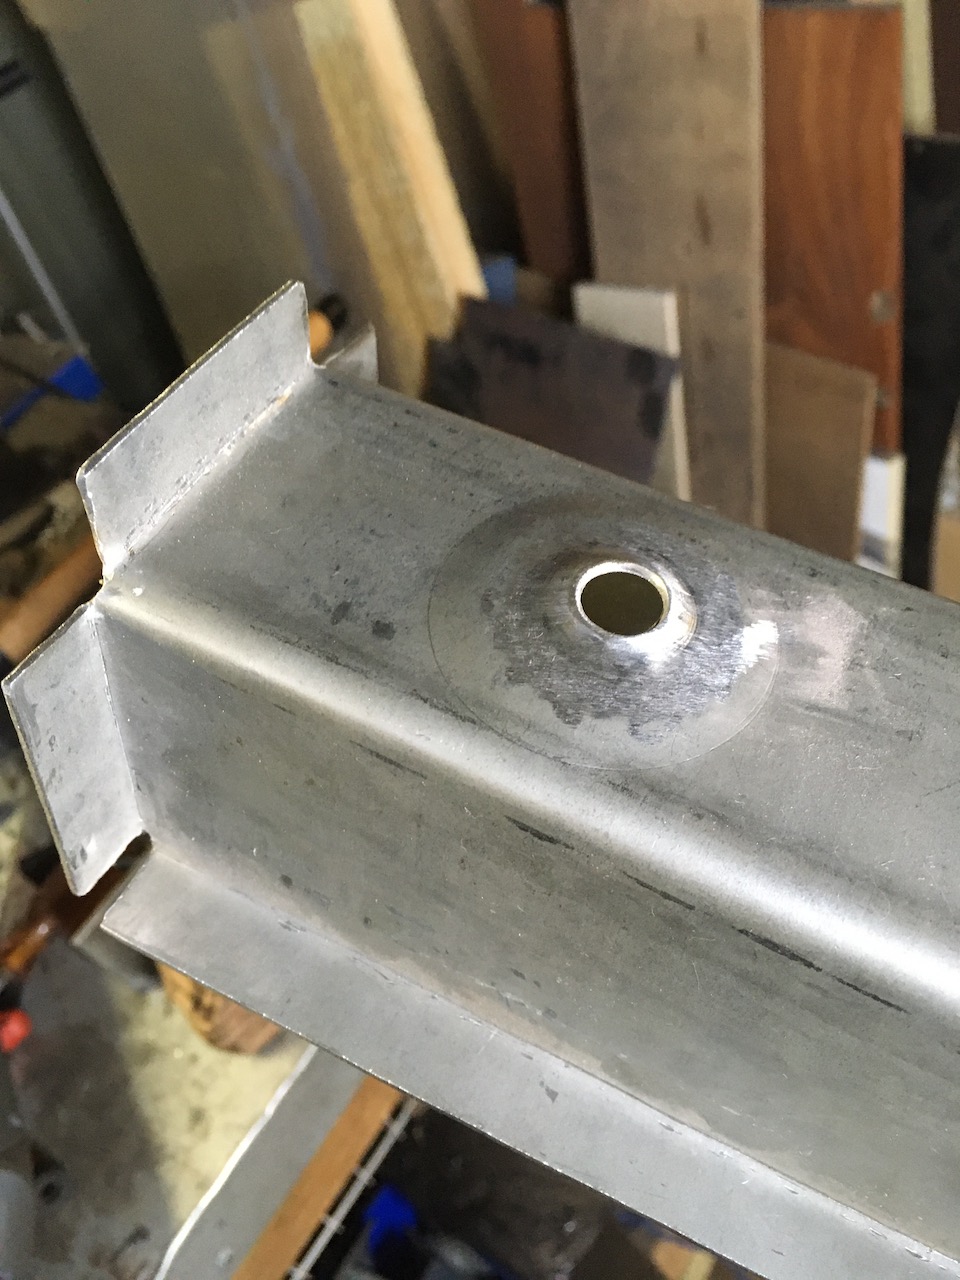
- IMG_8315.JPG (280.3 KiB) Viewed 905 times
Re: Ol' Rusty - FB/EK Sedan
Posted: Sat May 29, 2021 8:42 pm
by In the Shed
Great Job Scott,
Love seeing your approach to the metal work with what appear to be some basic shop tools but plenty of thought & preparation. Thanks mate.

regards
Stephen
Re: Ol' Rusty - FB/EK Sedan
Posted: Sat May 29, 2021 8:44 pm
by Errol62
Nice work. Ripper vice.
FB ute fixer upper, EK van on rotisserie
Re: Ol' Rusty - FB/EK Sedan
Posted: Sat May 29, 2021 9:14 pm
by Fex
Love the socket job. Great result.
Cheers, Andrew
Re: Ol' Rusty - FB/EK Sedan
Posted: Sun May 30, 2021 7:53 am
by funkyscooter
Errol62 wrote: Sat May 29, 2021 8:44 pm
Nice work. Ripper vice.
That vice has some history. My grandfather made it when he was training to be a fitter and turner back in Glasgow. He must have been happy enough with it to ship it when he moved to Australia. It rotates 360 degrees on the table and 180 at the jaws. He did a good job - it has stood up to a fair bit of abuse.
Re: Ol' Rusty - FB/EK Sedan
Posted: Tue Jun 22, 2021 8:34 pm
by funkyscooter
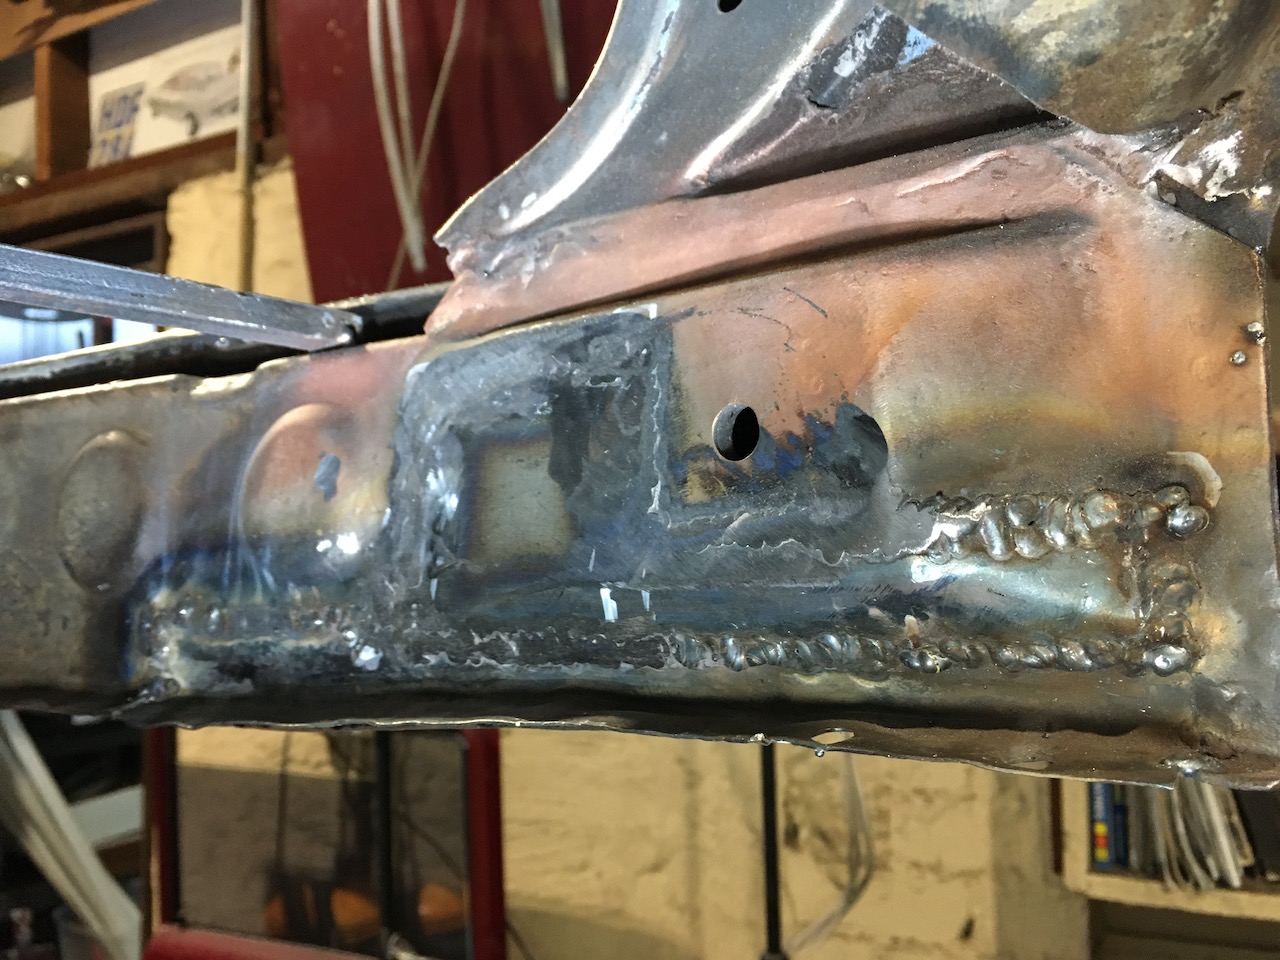
So the chicken/egg moment. Can't test fit the piece unless I cut it to fit. If I cut it too short I'm going to have A/. fill it with weld or B/. make another piece to fill the gap. Much measuring later I got this.
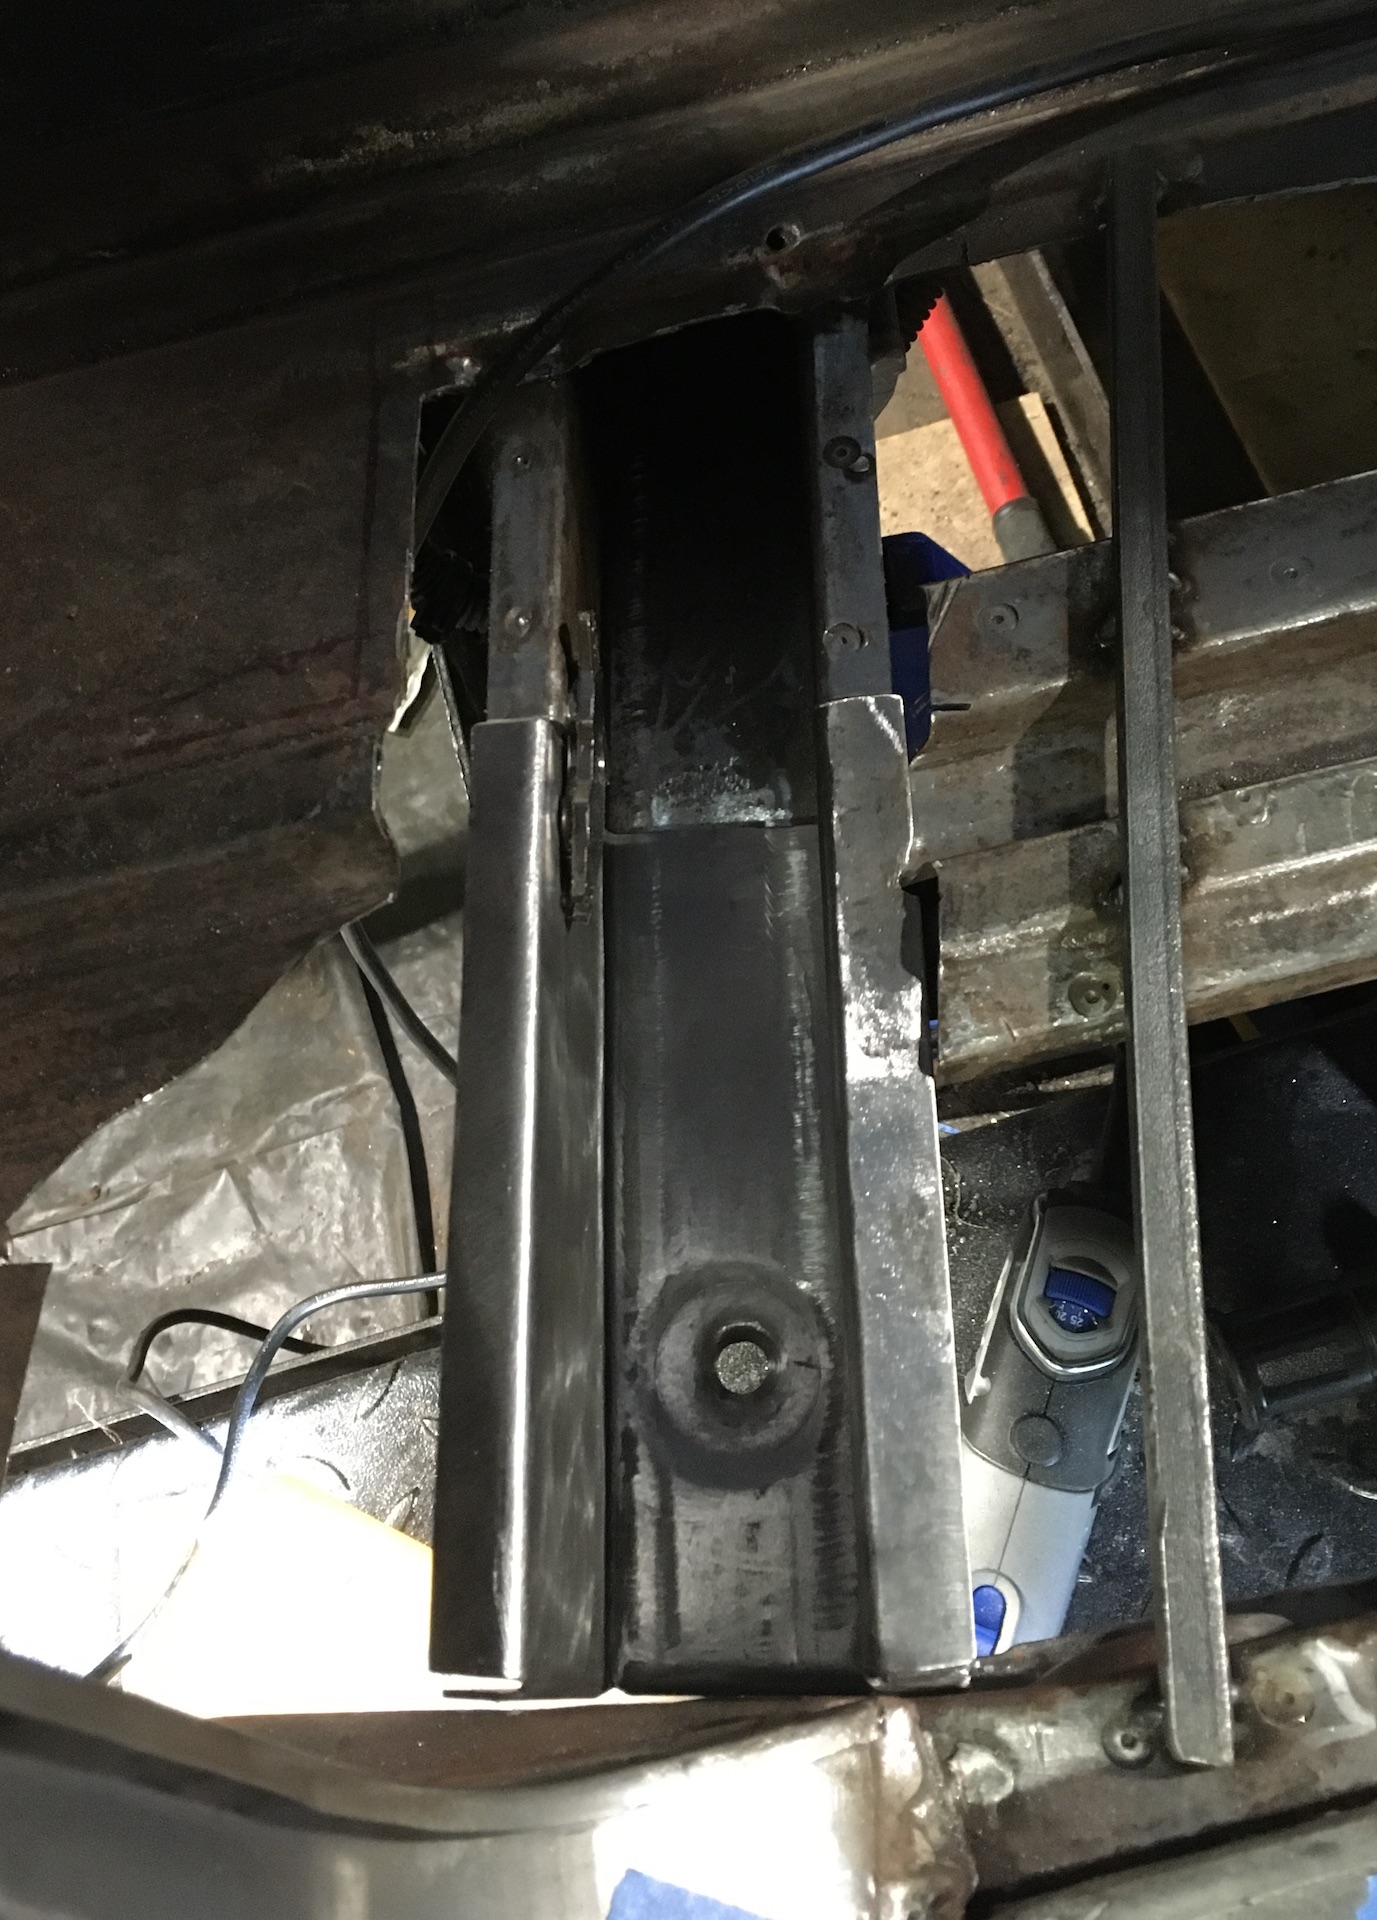
- test_fit.jpg (609.38 KiB) Viewed 971 times
Bit of a gap on the left side so I went with plan C/. and re-bent the 90 degree tab on the left so it is a couple mm smaller. Still had plenty of meat to drill the holes for the plug welds so all good. At this point the battery in the phone died so no pics of welding it in.
Here's one of the job done, once I ran over everything with the powerfile and wire brushed a bit of the inner sill, looking for rust.
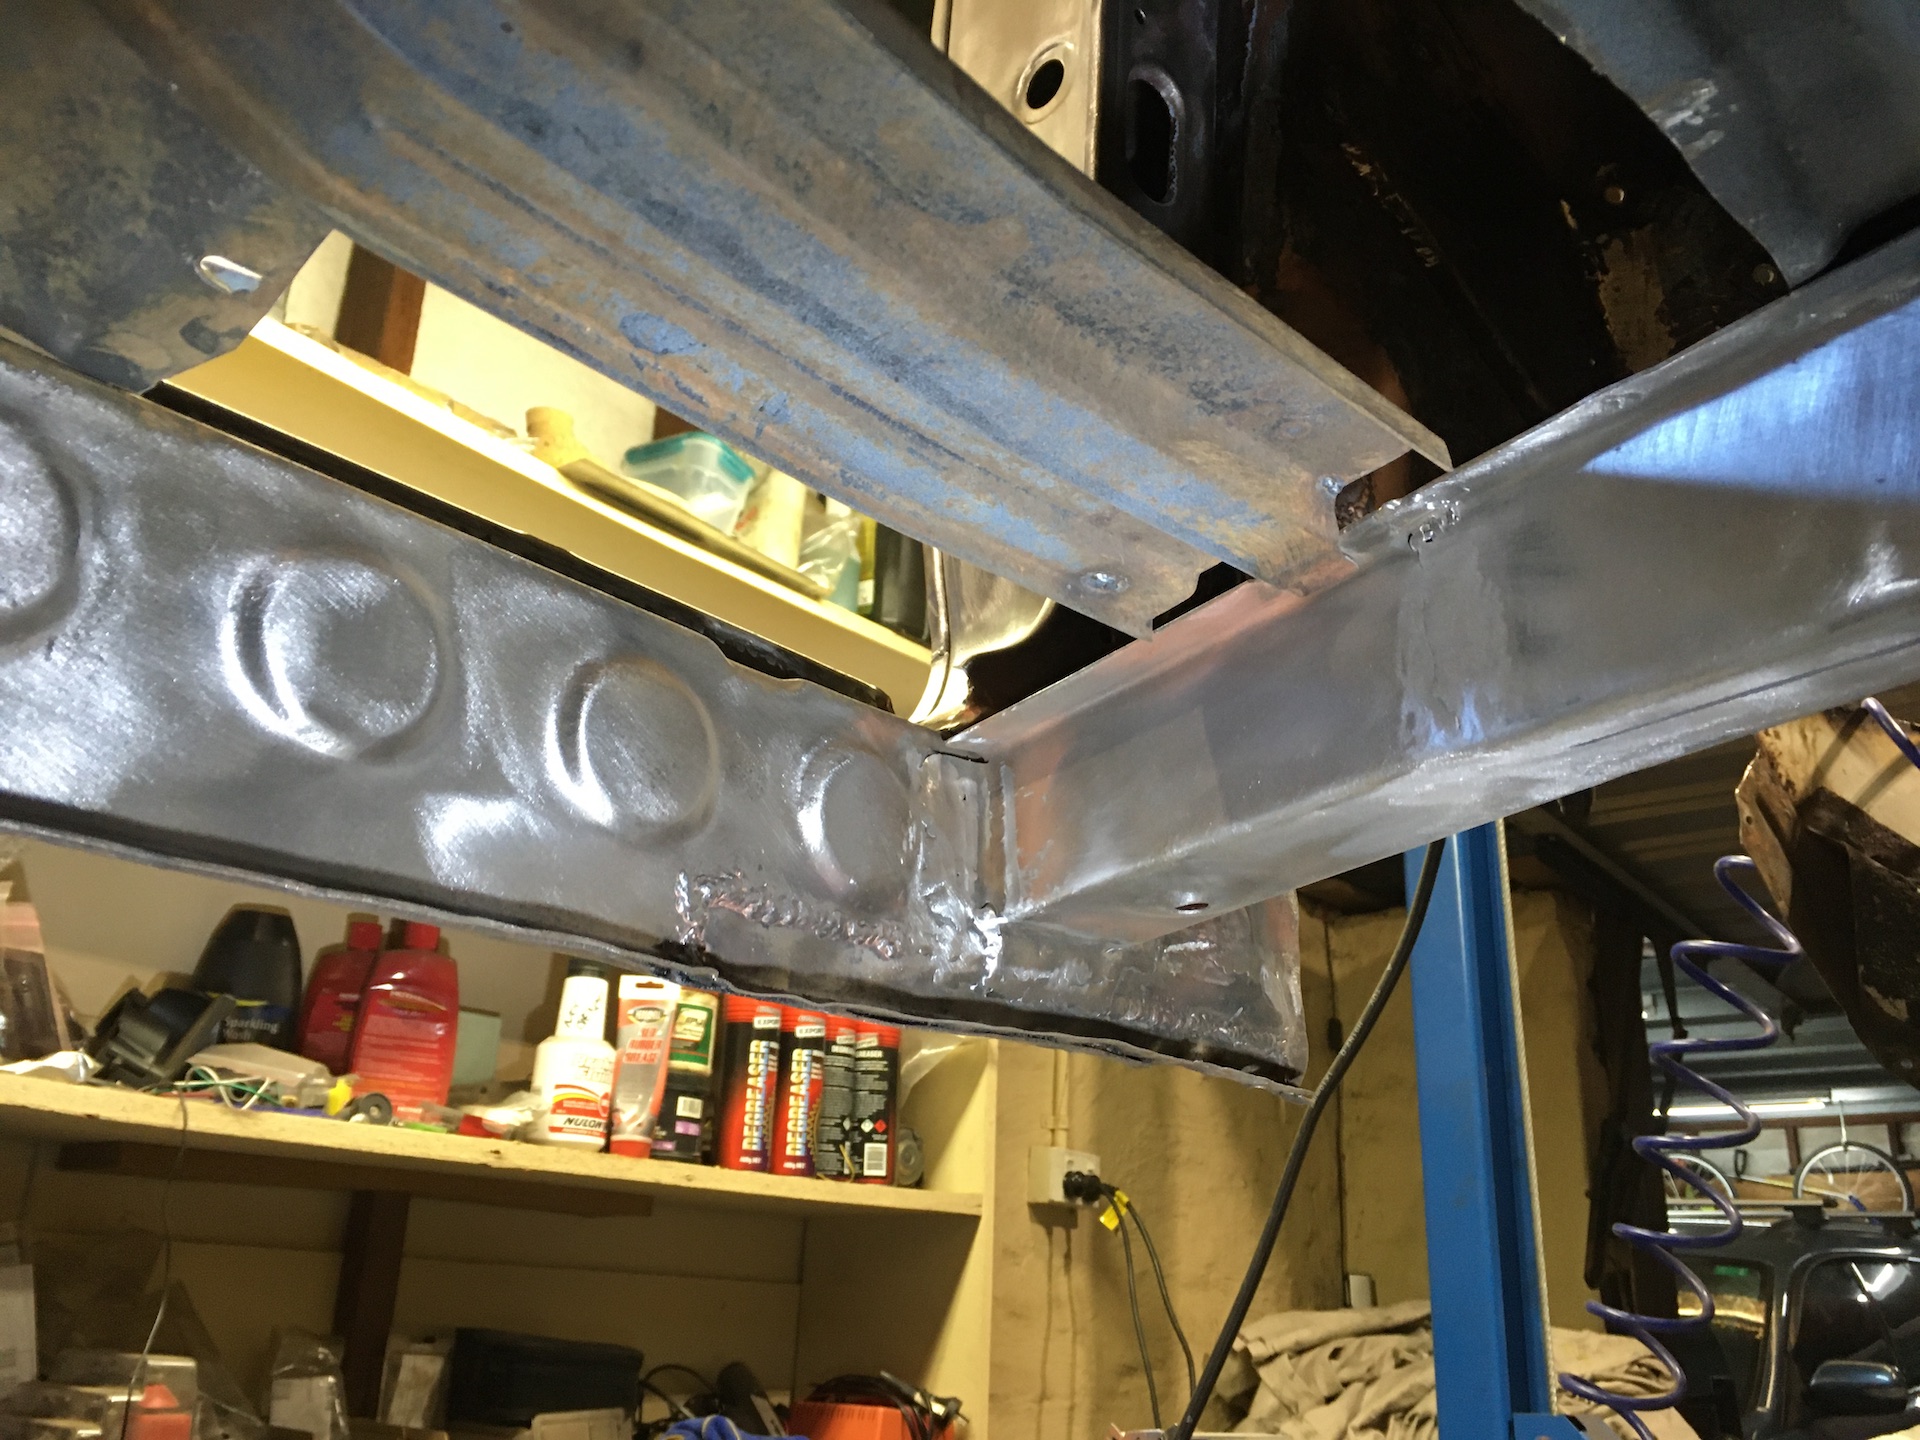
- welded_in.JPG (688.58 KiB) Viewed 971 times
Re: Ol' Rusty - FB/EK Sedan
Posted: Tue Jun 22, 2021 8:48 pm
by funkyscooter
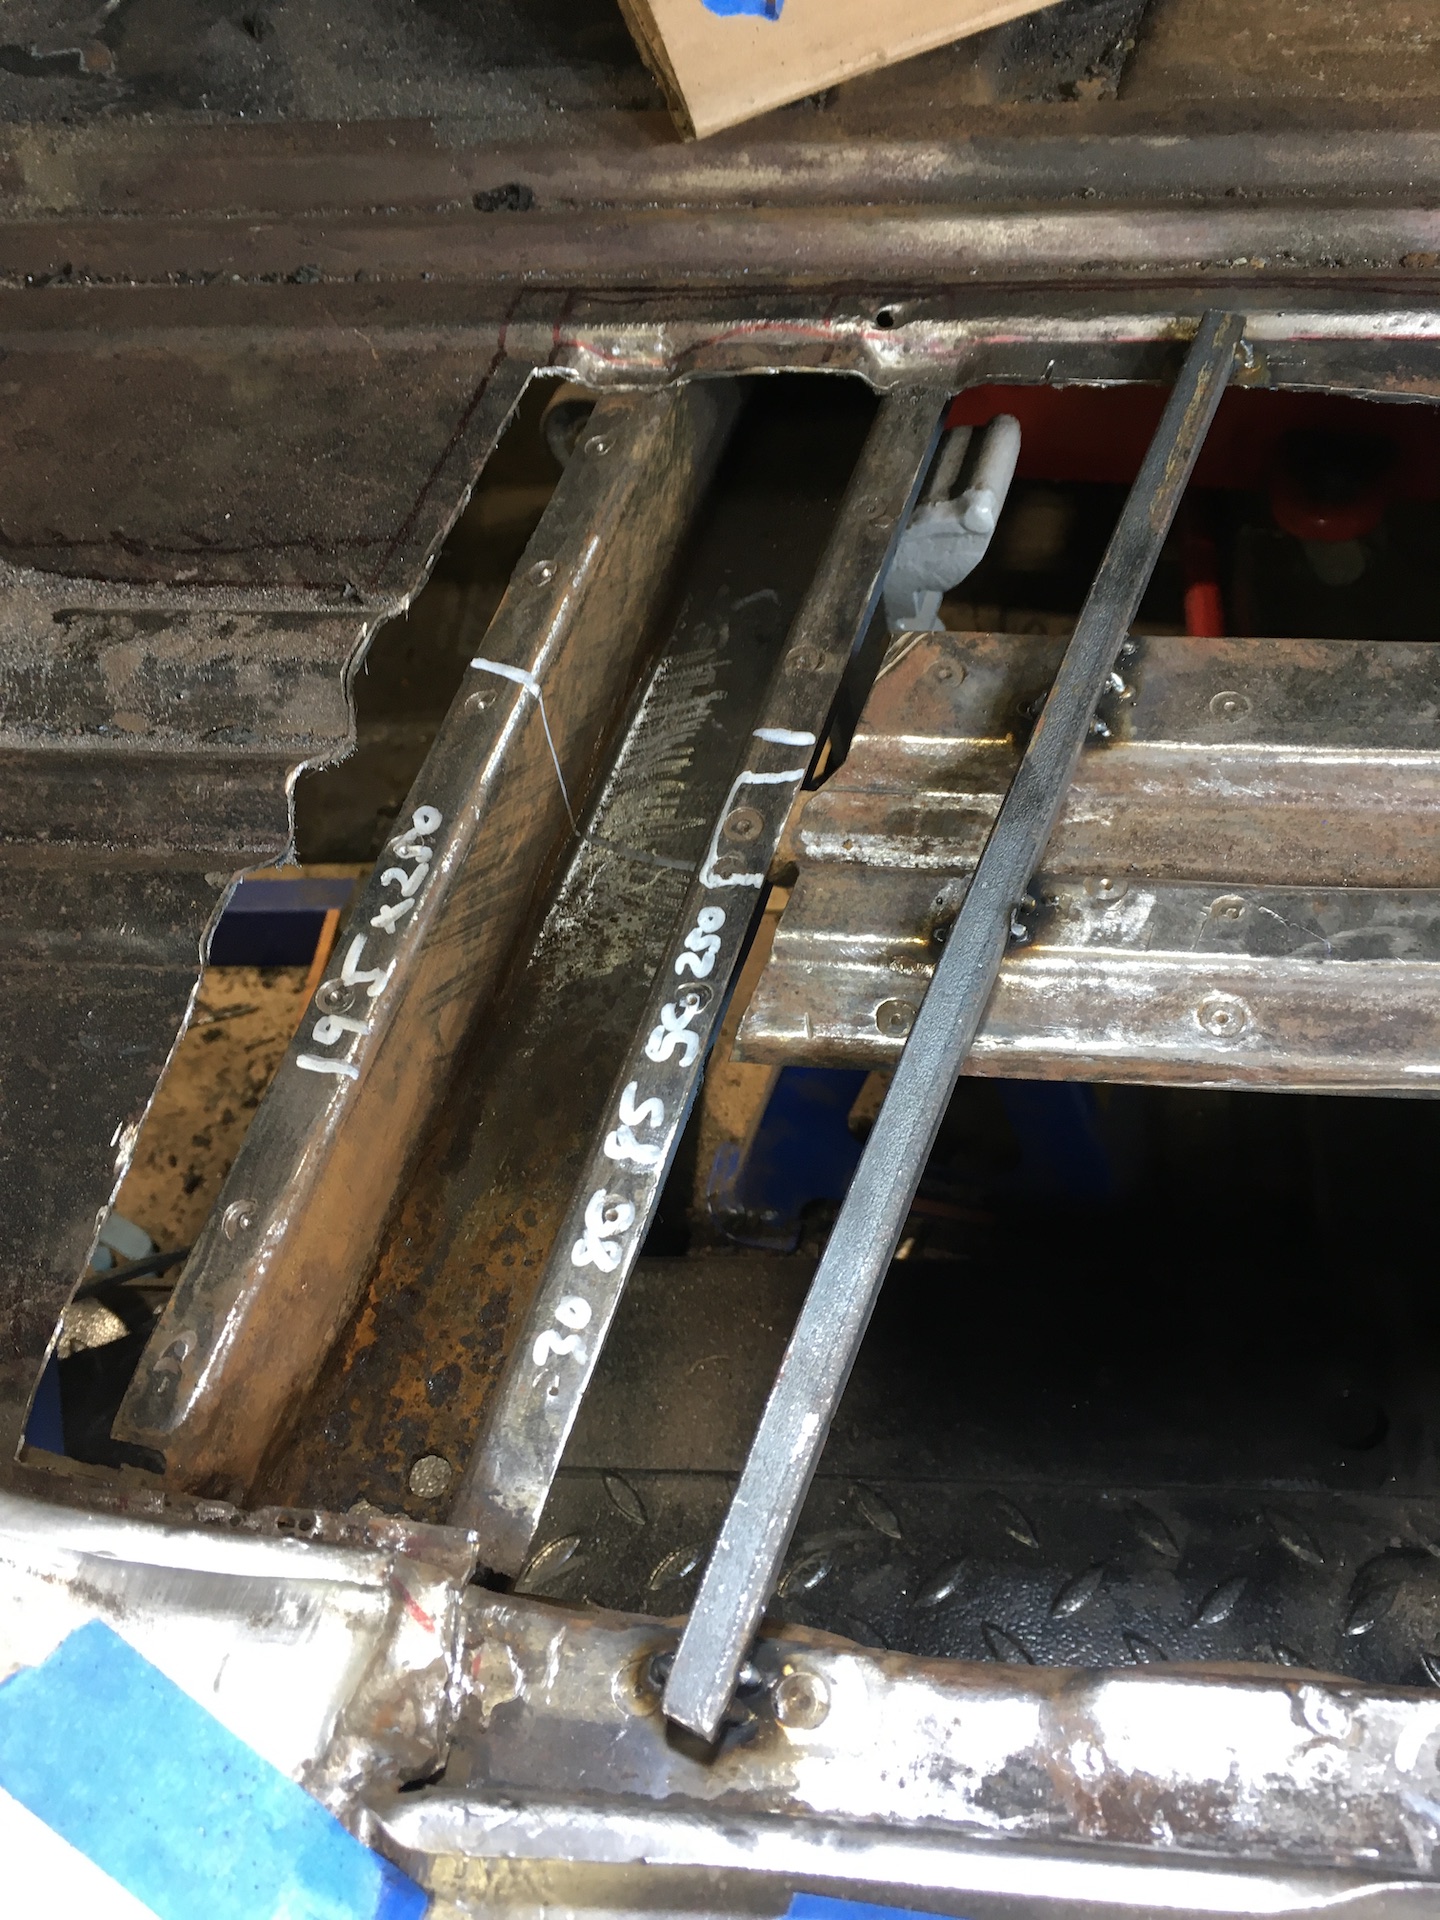
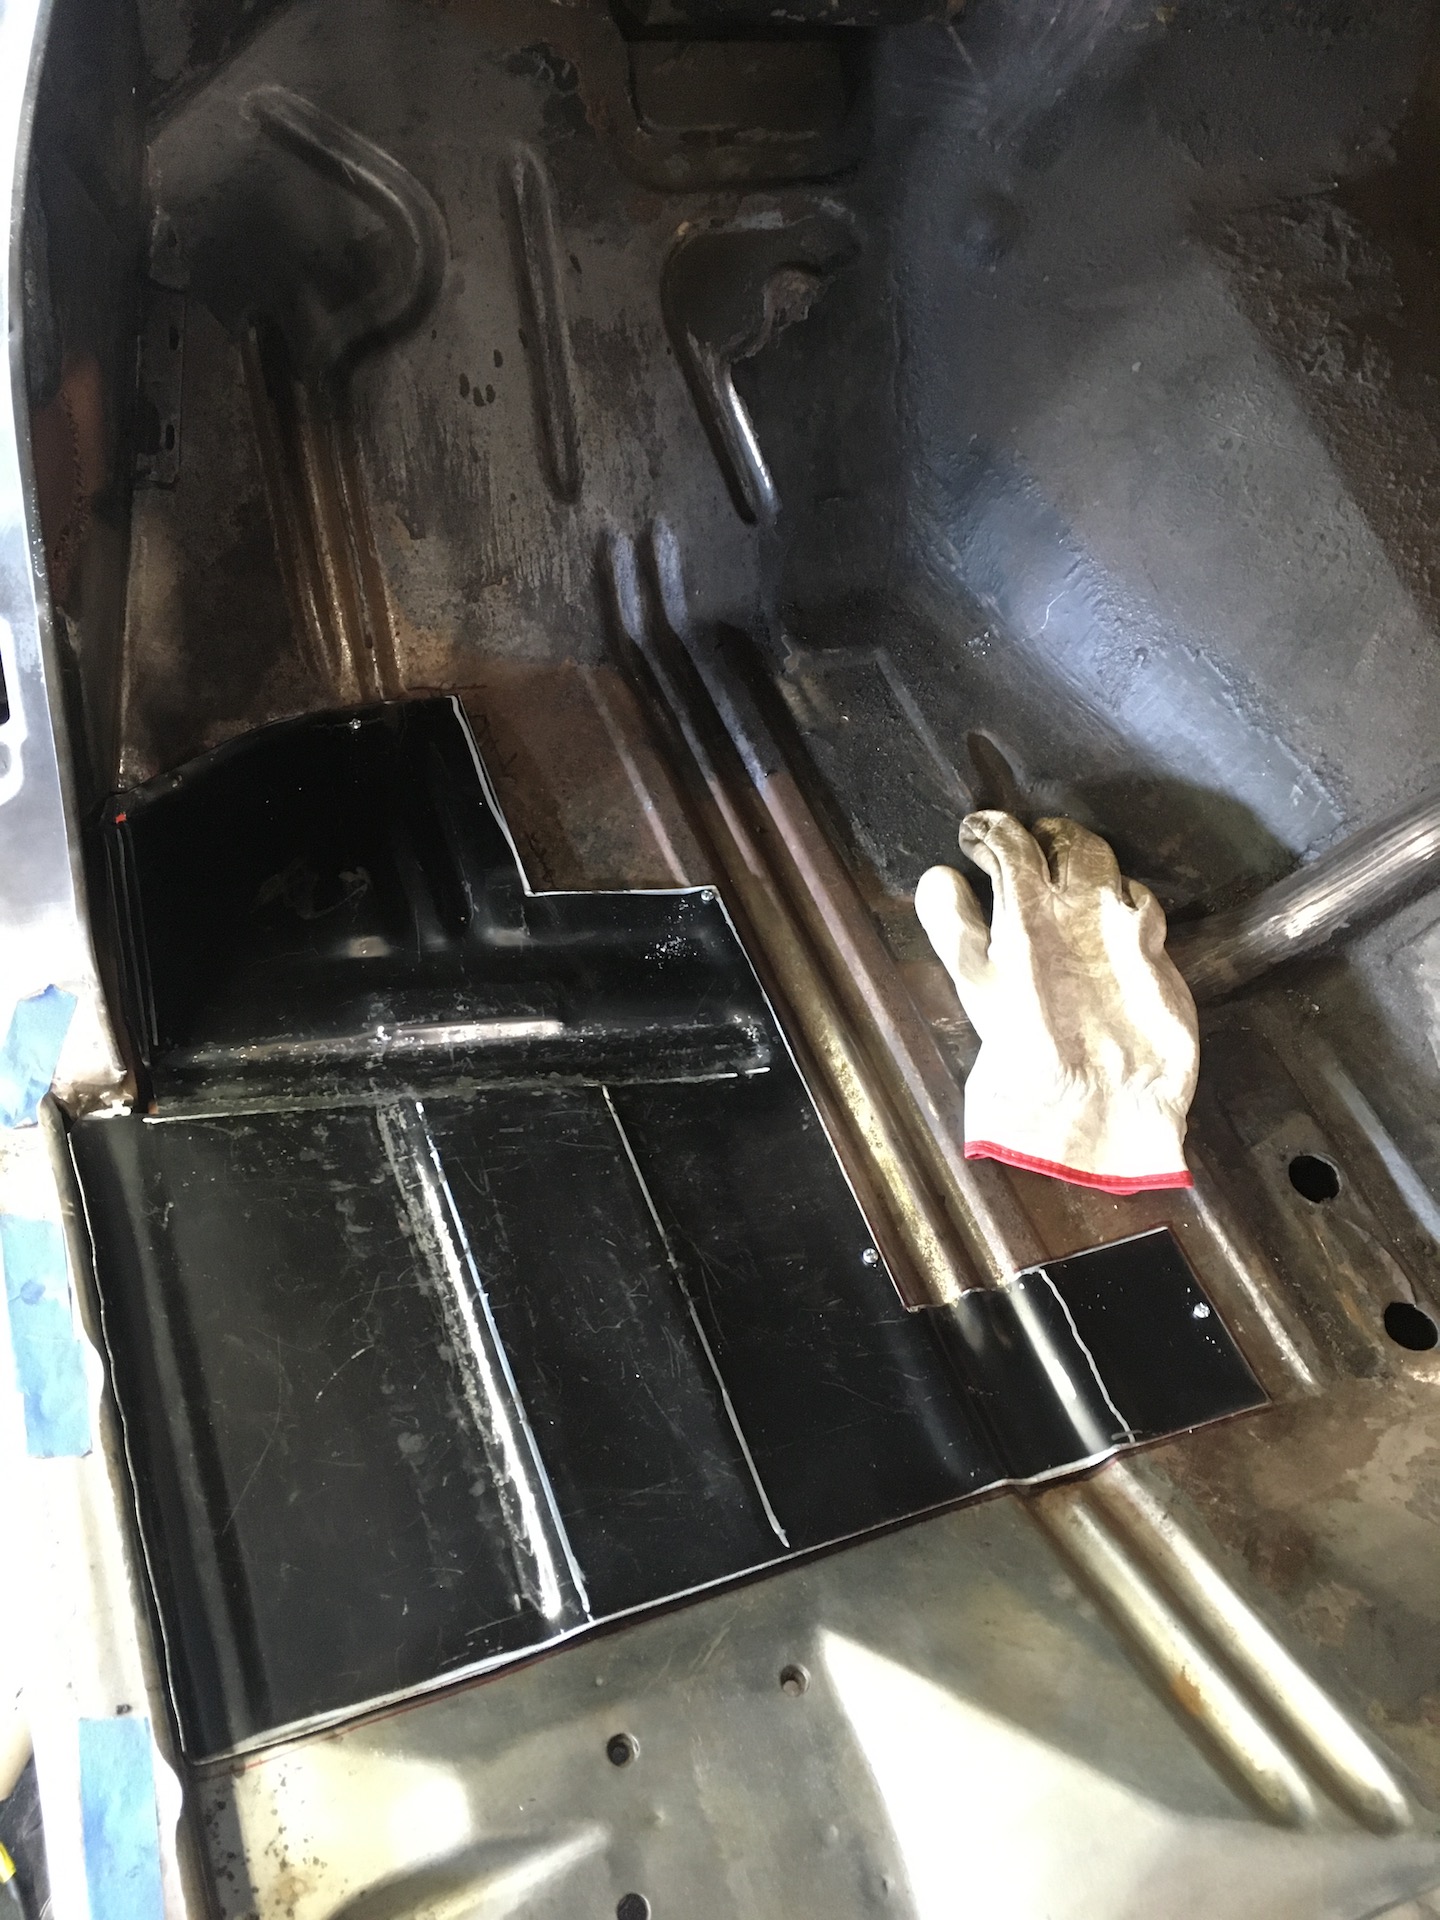
On to the floor.
Got a pair of front floor repair panels. They look like someone put a sheet of metal over an existing floor pan and hit it repeatedly with a hammer. All the edges are soft and the channels don't go as deep as the original.
So out with the tools for a bit of reshaping.

- Ribs.JPG (566.49 KiB) Viewed 967 times
- Deep_Ridge.JPG (658.01 KiB) Viewed 967 times
- Deep_Ridge2.JPG (554.42 KiB) Viewed 967 times
Before I can fit it - need to straighten out this a bit.
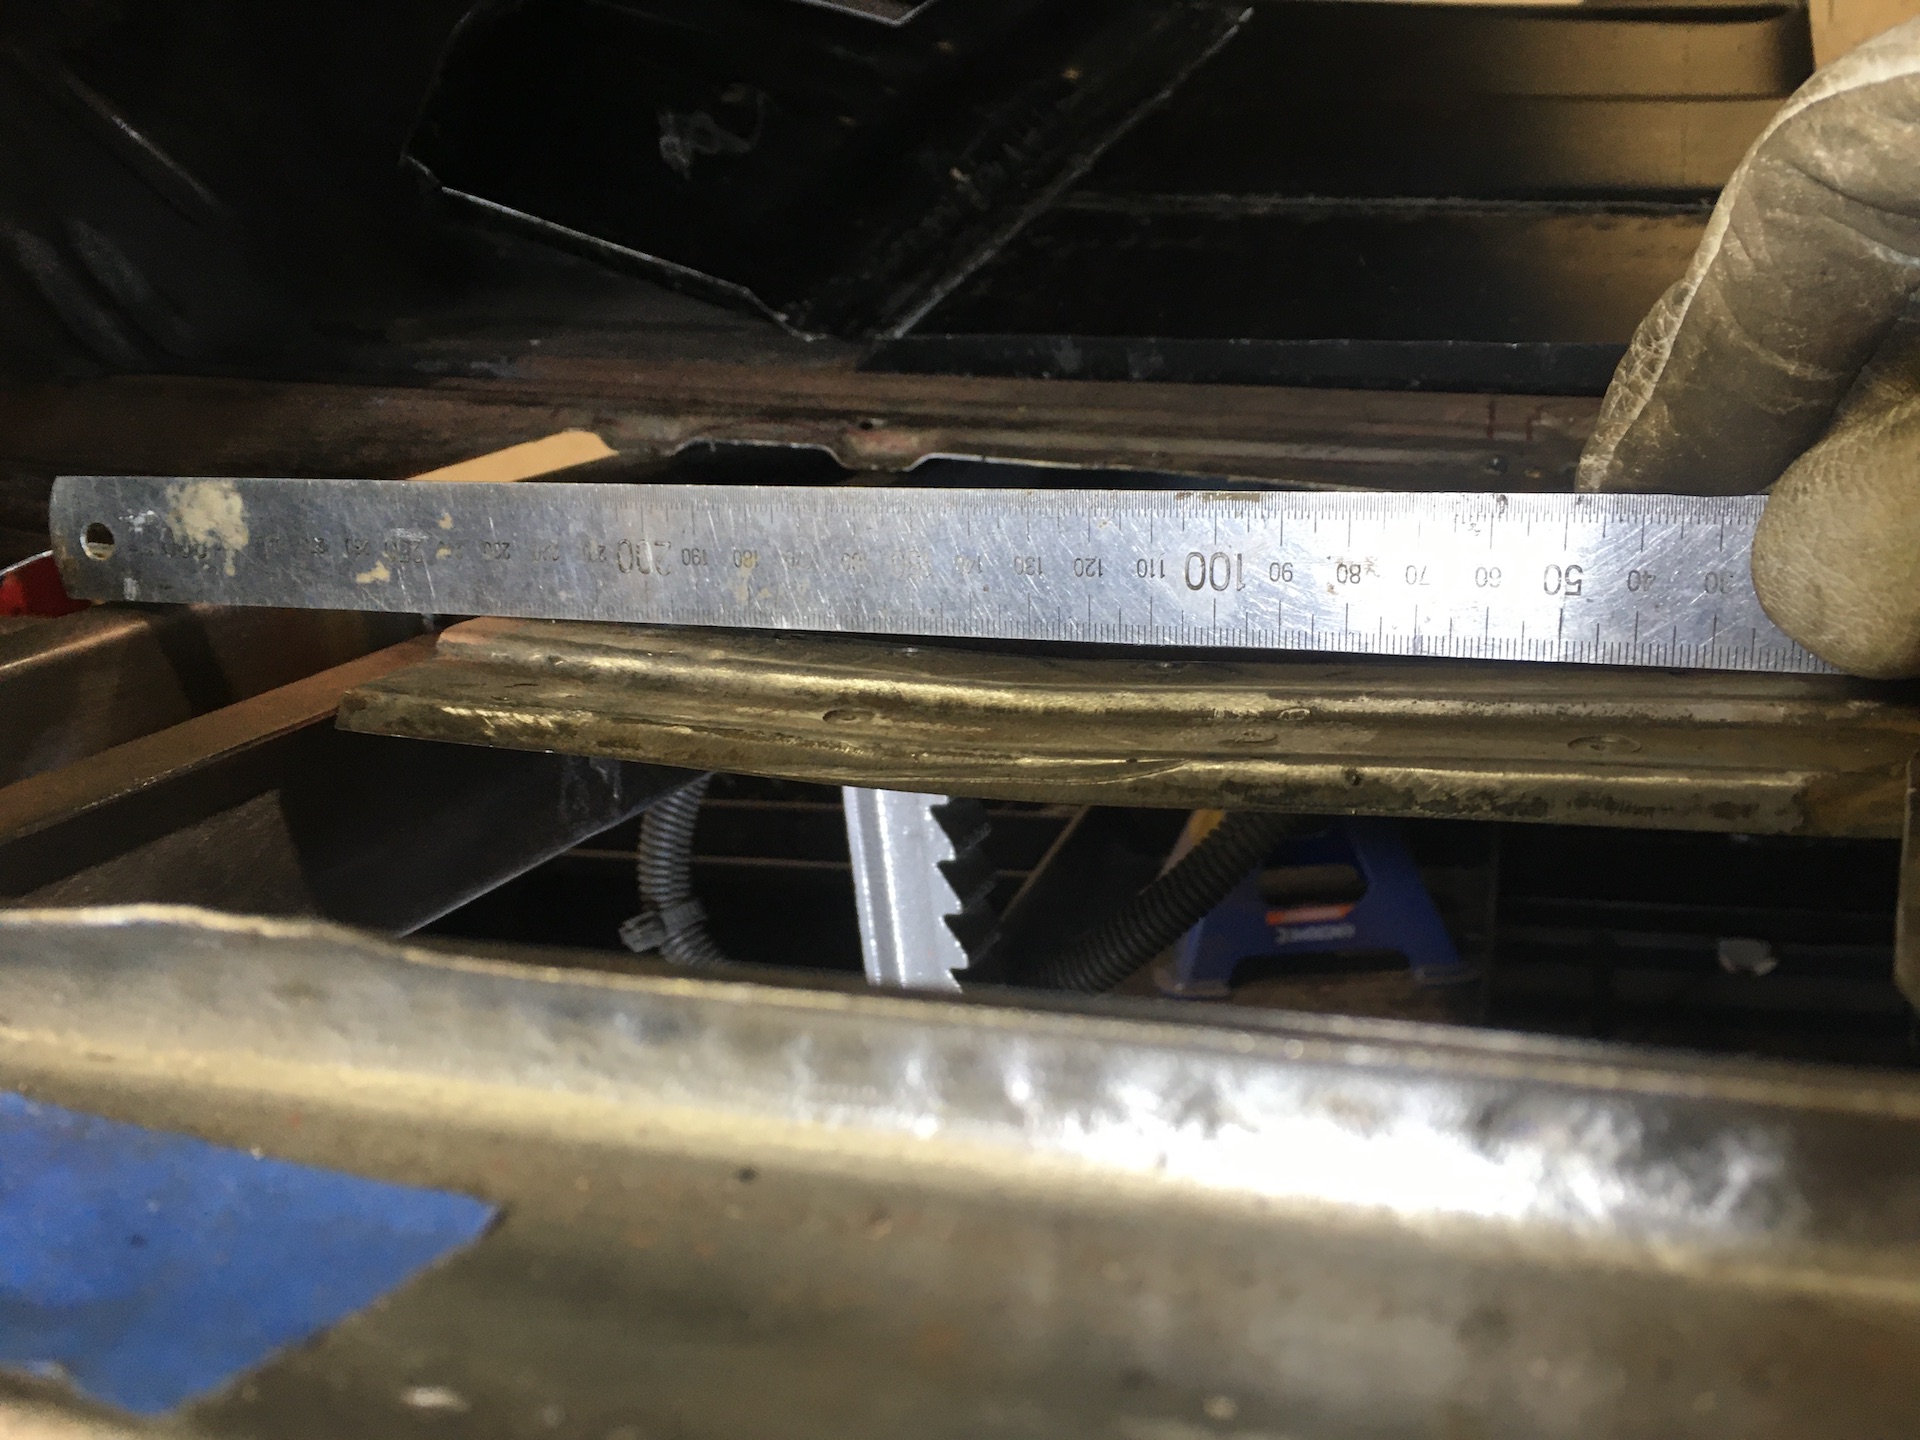
- Bent.JPG (574.86 KiB) Viewed 967 times
So jacked under it and hit it with a mallet. Not much weight left with the doors off so in the end I sat in the car and bounced it as I hit it with a hammer.
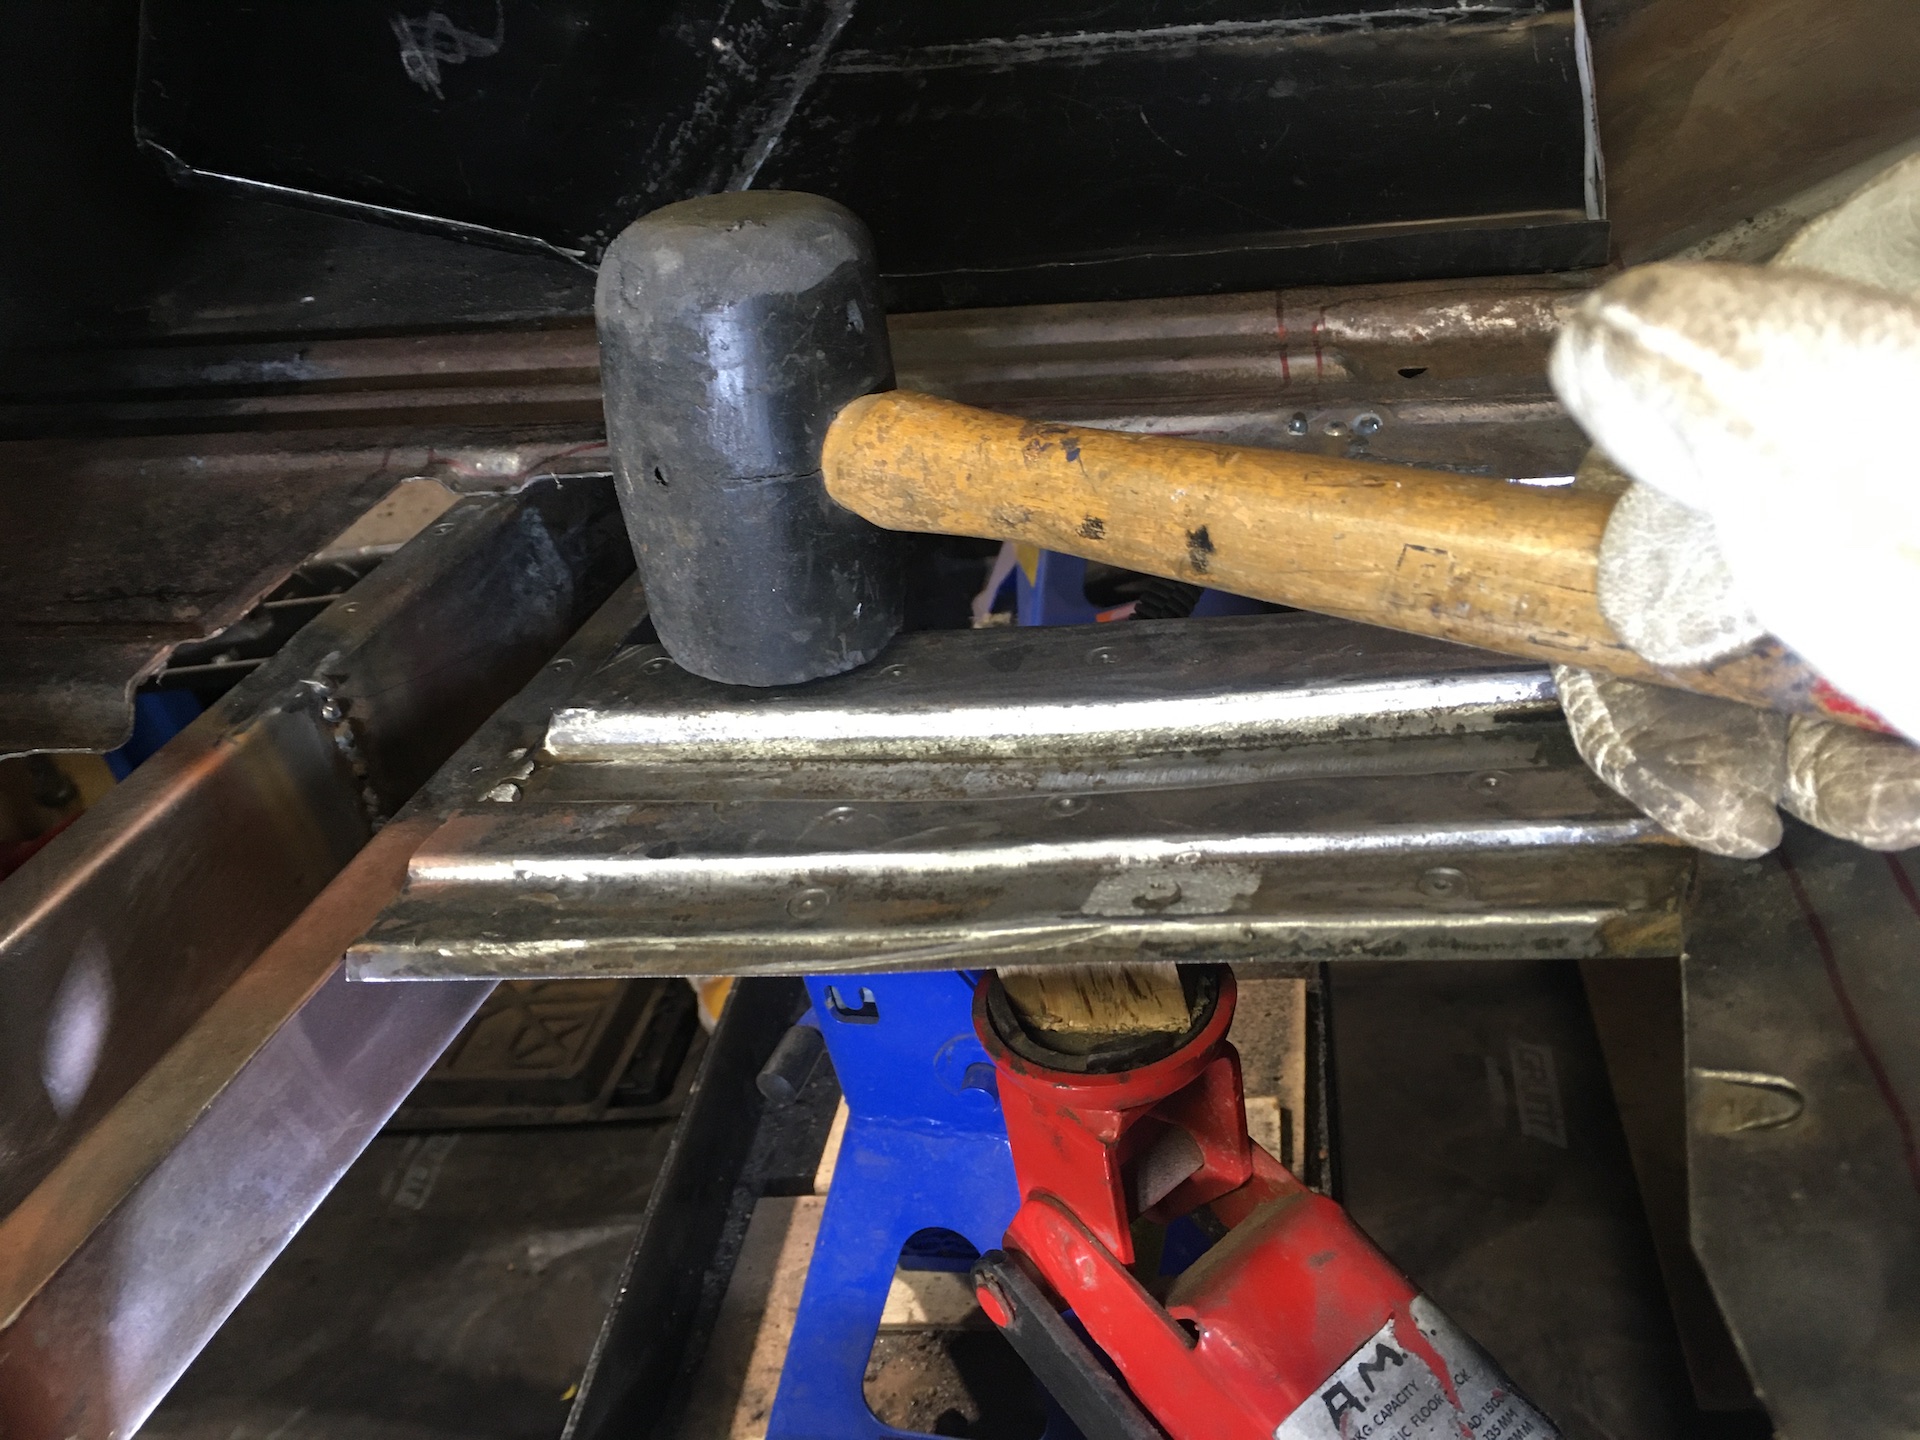
- Jacked.JPG (636.17 KiB) Viewed 967 times
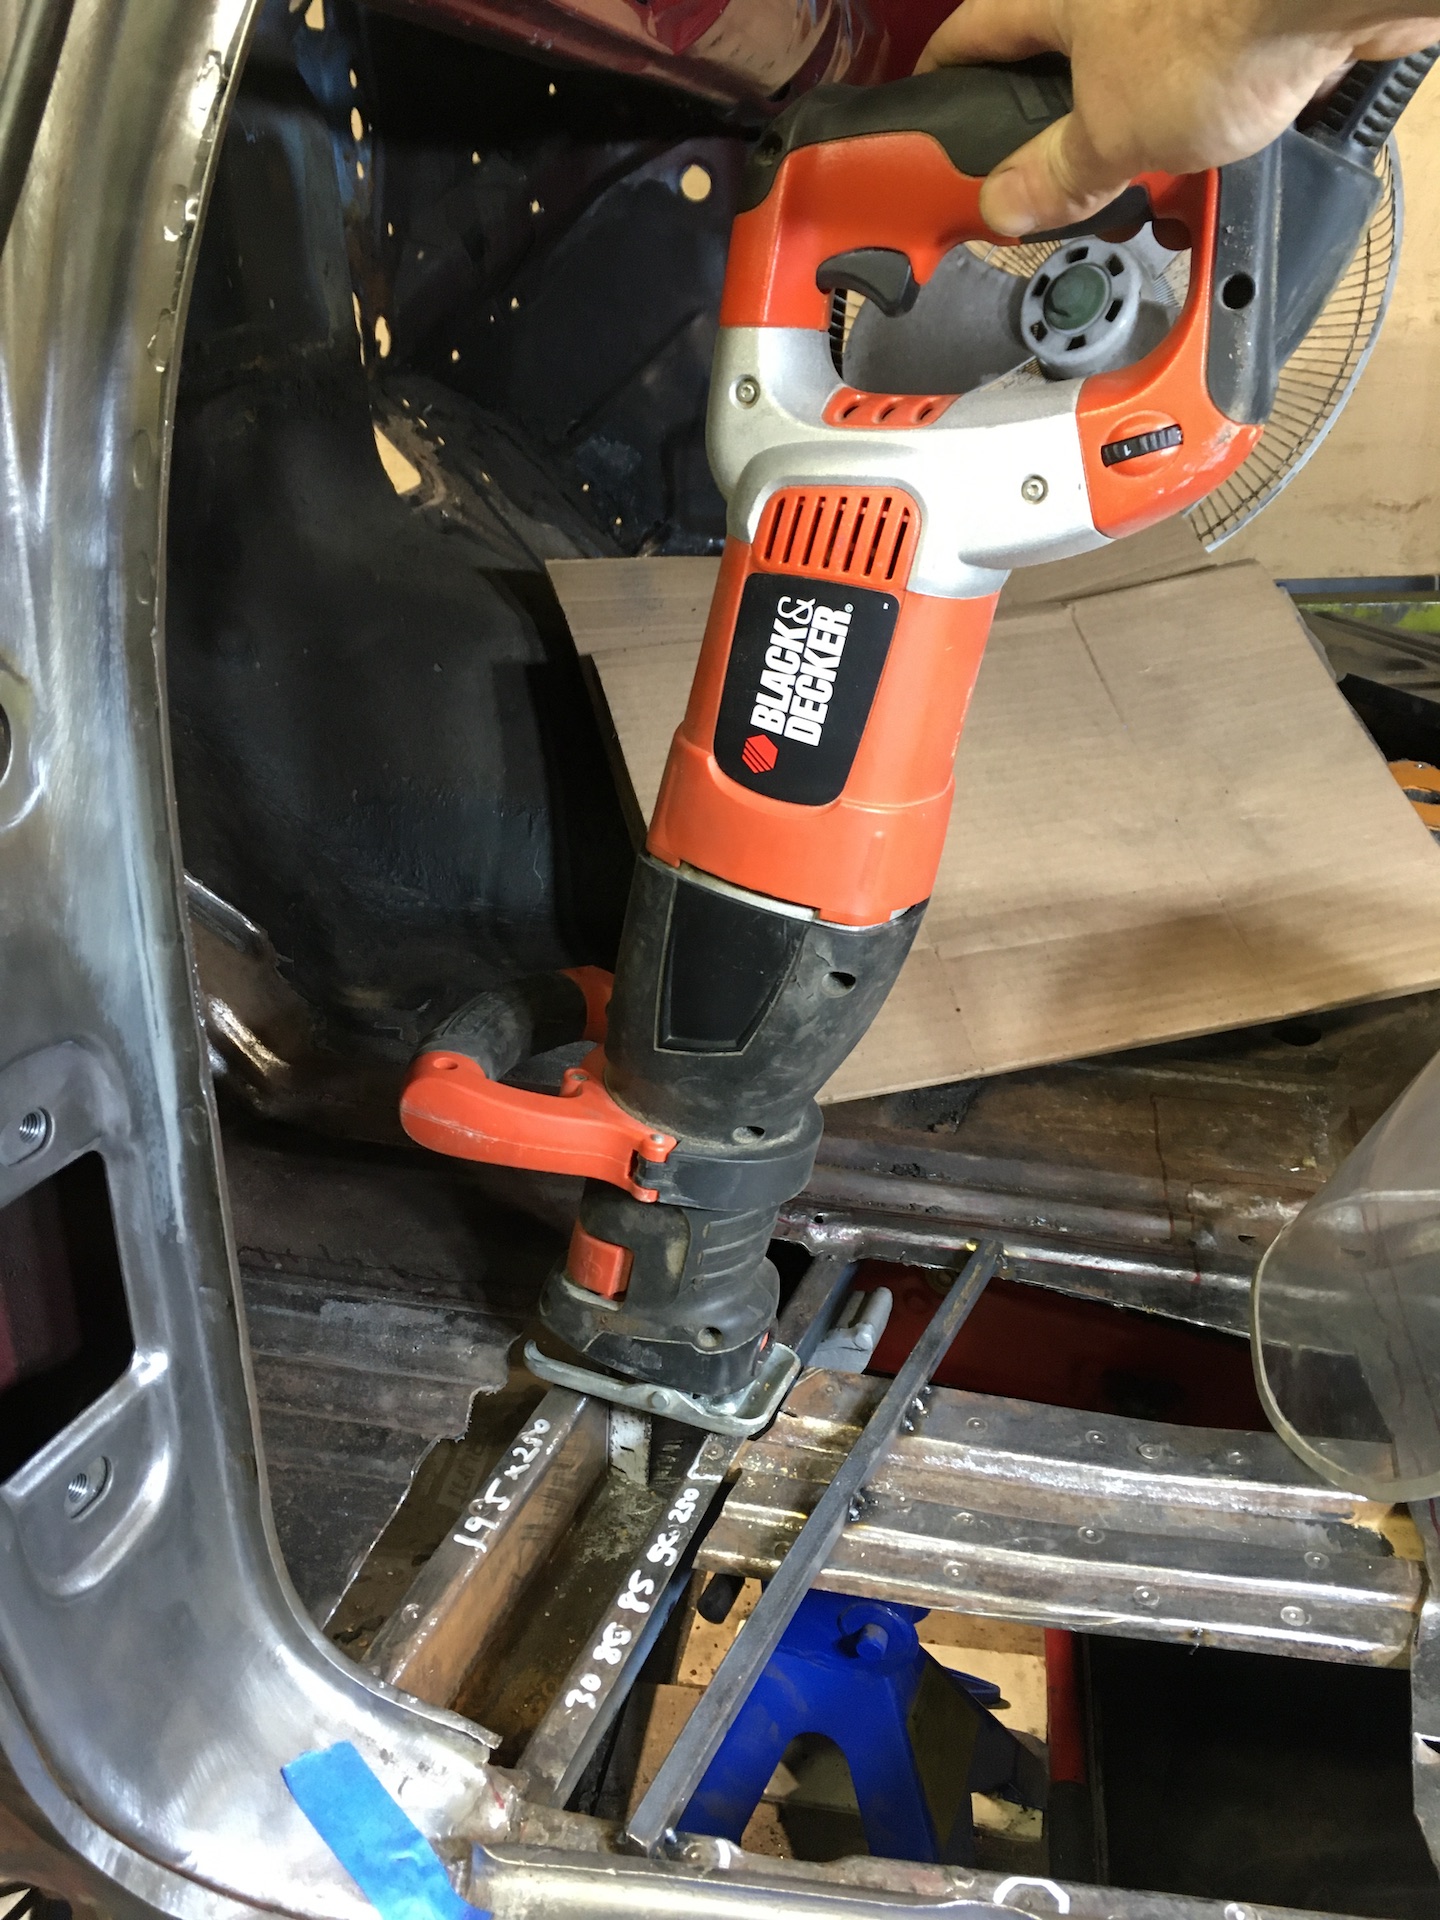
New floor screwed down over old floor and cut with a 1mm cut off wheel, and a dremel in the tight places.
- Floor_Cut.JPG (623.05 KiB) Viewed 967 times


