My new Fb
Re: My new Fb
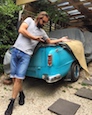
Geez John , you are well overdue for a good feed 

I started with nothing and still have most of it left.
Foundation member #61 of FB/EK Holden club of W.A.
Foundation member #61 of FB/EK Holden club of W.A.
-
thebrotherj
- Posts: 692
- Joined: Wed Aug 21, 2013 4:09 pm
- State: NSW
- Location: Sydney
Re: My new Fb
Mine went on well, ordered from Rare’s online.59wagon wrote:Gotta say I was pretty surprised, Billy, as the differences were quite significant.BILLY BLACKARROW wrote:When you buy a part made for the job you don't want to have to modify it do you

Billy
I’ll mention it to the Rares guys next time I speak to them.
Anyone else have this issue? Maybe the wrong product was put in the package?
Sent from my iPhone using Tapatalk
I think I had to split them myself?... I certainly didn’t have to ream them for correct roll bar diameter. I suspect the wrong bush wound up in the packaging for you. How annoying!
Here’s a pic of it at the time, tensioned down:

Sent from my iPhone using Tapatalk
Re: My new Fb
Thanks Joe. I see your brackets are a grey / silver colour. Do you know if that’s how they were originally? Probably cad or nickel plated I guess.thebrotherj wrote:Mine went on well, ordered from Rare’s online.59wagon wrote:Gotta say I was pretty surprised, Billy, as the differences were quite significant.BILLY BLACKARROW wrote:When you buy a part made for the job you don't want to have to modify it do you
Billy
I’ll mention it to the Rares guys next time I speak to them.
Anyone else have this issue? Maybe the wrong product was put in the package?
Sent from my iPhone using Tapatalk
I think I had to split them myself?... I certainly didn’t have to ream them for correct roll bar diameter. I suspect the wrong bush wound up in the packaging for you. How annoying!
Here’s a pic of it at the time, tensioned down:
Sent from my iPhone using Tapatalk
Cheers,
John
Sent from my iPhone using Tapatalk
My new Fb
Just had another look Joe. Your brackets look modified? There’s a bolt each side instead of just one side, and a bit of welding going on?“59wagon” wrote:Thanks Joe. I see your brackets are a grey / silver colour. Do you know if that’s how they were originally? Probably cad or nickel plated I guess.
Cheers,
John
Sent from my iPhone using Tapatalk
Sent from my iPhone using Tapatalk

Re: My new Fb
Later HK on brackets methinks. Never needed to replace the rubber myself. Maybe I don’t do enough hard cornering.
Sent from my iPhone using Tapatalk
Sent from my iPhone using Tapatalk
getting my FB ute on the road
EK van on rotisserie
EK van on rotisserie
-
thebrotherj
- Posts: 692
- Joined: Wed Aug 21, 2013 4:09 pm
- State: NSW
- Location: Sydney
Re: My new Fb
Nah mate I had to modify the original D Bush bracket. Have a scroll back near the start of my Leroy thread and you can witness the shitness of a previous repair I sorted out with some left of normal problem solving.59wagon wrote:Just had another look Joe. Your brackets look modified? There’s a bolt each side instead of just one side, and a bit of welding going on?“59wagon” wrote:Thanks Joe. I see your brackets are a grey / silver colour. Do you know if that’s how they were originally? Probably cad or nickel plated I guess.
Cheers,
John
Sent from my iPhone using Tapatalk
Sent from my iPhone using Tapatalk
But the original sway bar is used and the D bush I order from Rares was correct.
Cheers (from Singapore), Joe
Sent from my iPhone using Tapatalk
Re: My new Fb
Just had a look Joe. Good job you did there as well as the other panel repairs.thebrotherj wrote:Have a scroll back near the start of my Leroy thread and you can witness the shitness of a previous repair I sorted out with some left of normal problem solving.
Enjoy Singers

Sent from my iPhone using Tapatalk
-
thebrotherj
- Posts: 692
- Joined: Wed Aug 21, 2013 4:09 pm
- State: NSW
- Location: Sydney
Re: My new Fb
59wagon wrote:Just had a look Joe. Good job you did there as well as the other panel repairs.thebrotherj wrote:Have a scroll back near the start of my Leroy thread and you can witness the shitness of a previous repair I sorted out with some left of normal problem solving.
Enjoy Singers
Sent from my iPhone using Tapatalk
Haha thanks, I think - the panel repairs are actually borderline woeful now I get to see it out of the shed, in natural light. But they fit in with the rest of the rubbish repairs on the Ute haha. Pretty happy with the sway bar and other structural repairs I’ve done though.
Good to see you’re back into the FB. I’ll be following, though only in Sing for a stopover. Visiting my oldest mate in Hamburg next.
Cheers J
Sent from my iPhone using Tapatalk
My new Fb
Next job on my way to disassembling the front end was a refurb of the indicators.

The rubber boots had gone hard and one had a chunk missing.

Unable to get replacements, I had a crack at making some out of rubber door stops. I glued two different types together, with the larger one having a handy recess which could later be bored out.


Made a sheet steel template

With a bolt and nut through the piece, it was chucked in the drill press and roughly shaped with the angle grinder

Being a messy job with fine rubber dust flying around, I used a dust mask and safety glasses

When closer to shape, I switched to an air tool with small disc for better control

When almost there, switched to using files and sandpaper


With the outside done, the piece was chucked in the electric drill mounted in the vice, and a hand held lathe tool used to get the internal diameter correct to fit over the indicator unit socket.

Then a spade bit to drill clearance for the bulb holder

Happy with the result, assembly started after putting bits of heat shrink along the cables length to keep it together to make tape wrapping easier later


With a small gap between the cables and boot, heat shrink was used to increase water/dirt resistance. I thought about using a Silastic type sealant instead, but wasn’t sure it would hold up or work as well due to the cable having to move back and forth when removing or replacing the bulb.


Now for tape wrapping

I found that increasing the wrap by about 5/32” as I wound it on produced the best looking result. Much more and the tape would bunch up and any less would use more tape. The indicator was mounted in the vice to allow tension to be kept on the cables as they were wrapped.


The lens gaskets were still nice and supple but had a fair bit of the brown dirt on them, as did the lenses. I’d found this stuff stains quite bad and is hard to remove until I tried some CLR (Calcium Lime Rust remover) when I did the bumpers previously. It works great - just spray on and wipe off. If I couldn’t wipe it off due to being inaccessible, I used a water hose or air gun. I ran out of CLR and found this Glitz which was cheaper but looks to be similar and works well.

Before and after


All the bits ready to go

Hard to see maybe, but the gaskets have “HOLDEN” written on them

I flipped the gaskets to maybe improve the seal and noticed the two lugs to help position the gasket - handy touch.


All ready to go

That was fun and and some handy tips I learnt or had refreshed along the way:
1. Use a spade bit to drill rubber as it cuts better, and normal twist drill bits tend to drill undersize by pushing the rubber outwards
2. Supa-glue works great for bonding rubber
3. CLR, or equivalent, easily removes the brown crud you often get on these old girls and
4. When sculpting, carving, or turning something from both inside and out, make sure you measure correctly to avoid the outside meeting the inside

Cheers,
John
Sent from my iPhone using Tapatalk
Last edited by 59wagon on Sun Jul 22, 2018 3:46 am, edited 2 times in total.
Re: My new Fb
Forgot to add the indicator unit cleaning and painting done a while back when I was doing the bumpers. In the first photo in the previous post, you can see one of the three studs has snapped off. A lube soaking, drill bit and ezi-out removed most of it, then a 10-24 tap was used to clean and re-thread. I didn’t have any 10-24 bolts so cut up a 3/16” instead. It’s the same threads per inch but about 0.005” smaller diameter and worked fine.


I also blasted and silver painted the insides

Sent from my iPhone using Tapatalk


I also blasted and silver painted the insides

Sent from my iPhone using Tapatalk

Re: My new Fb
Very neat process for making the rubbers. Glad I'm not the only one who uses the drill press as a lathe  .
.
Cheers,
Harv
Cheers,
Harv
327 Chev EK wagon, original EK ute for Number 1 Daughter, an FB sedan meth monster project and a BB/MD grey motored FED.
Re: My new Fb
A truely amazing job with those rubbers John.
I have never seen anything like it before.
Thanks for the fantastic pics and descriptions along the way.
I’ve been educated today, so thank you
Ric.
I have never seen anything like it before.
Thanks for the fantastic pics and descriptions along the way.
I’ve been educated today, so thank you
Ric.
Re: My new Fb
Genius, with an insane level of patience. I just used Nitto tape and silicone and I’m never driving in the rain, or washing it lol. I don’t think I’ve ever seen one of those boots that wasn’t cooked.
Sent from my iPad using Tapatalk
Sent from my iPad using Tapatalk
getting my FB ute on the road
EK van on rotisserie
EK van on rotisserie
Re: My new Fb
I m blown away by the rubber boot you made!! That's freakin' awesome. Great work.
Speed and Style........... One day I'll get the speed bit.
-
In the Shed
- Posts: 2236
- Joined: Wed May 16, 2012 10:18 pm
- State: SA
- Location: South Australia
Re: My new Fb
Good stuff John, looks like a genuine factory part 
Regards
Stephen
Regards
Stephen
A day in the shed beats a day at work!