Page 9 of 51
Re: Ol' Rusty - FB/EK Sedan
Posted: Tue Dec 01, 2020 8:00 pm
by Brett027
Looks good Scott. Should be happy with that work.
Re: Ol' Rusty - FB/EK Sedan
Posted: Wed Dec 02, 2020 10:22 pm
by Blacky
come up well mate

Re: Ol' Rusty - FB/EK Sedan
Posted: Sat Dec 05, 2020 5:52 pm
by funkyscooter
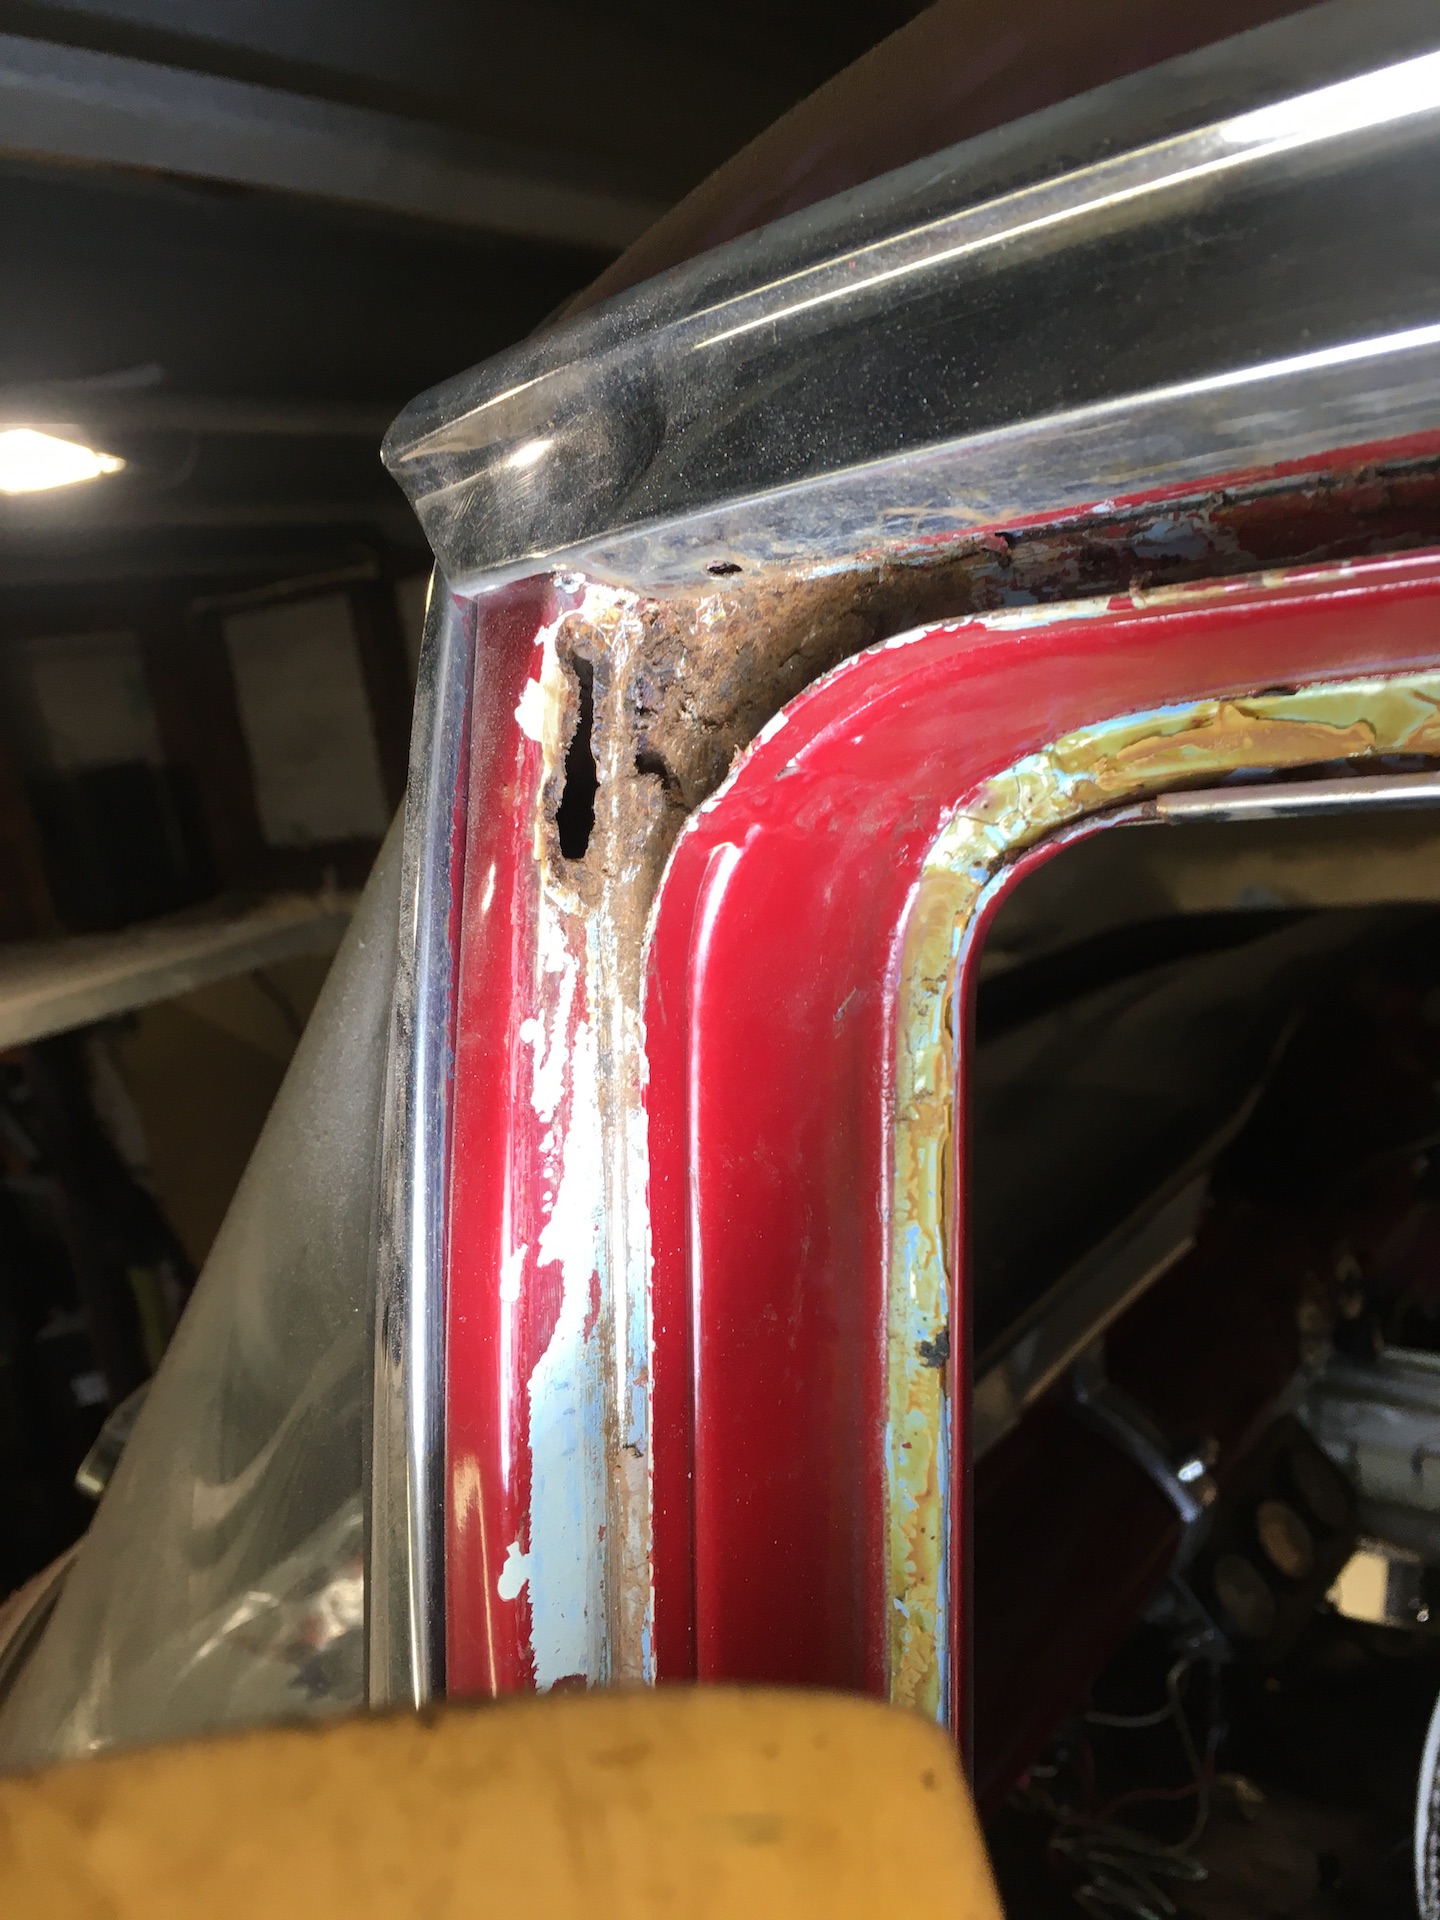
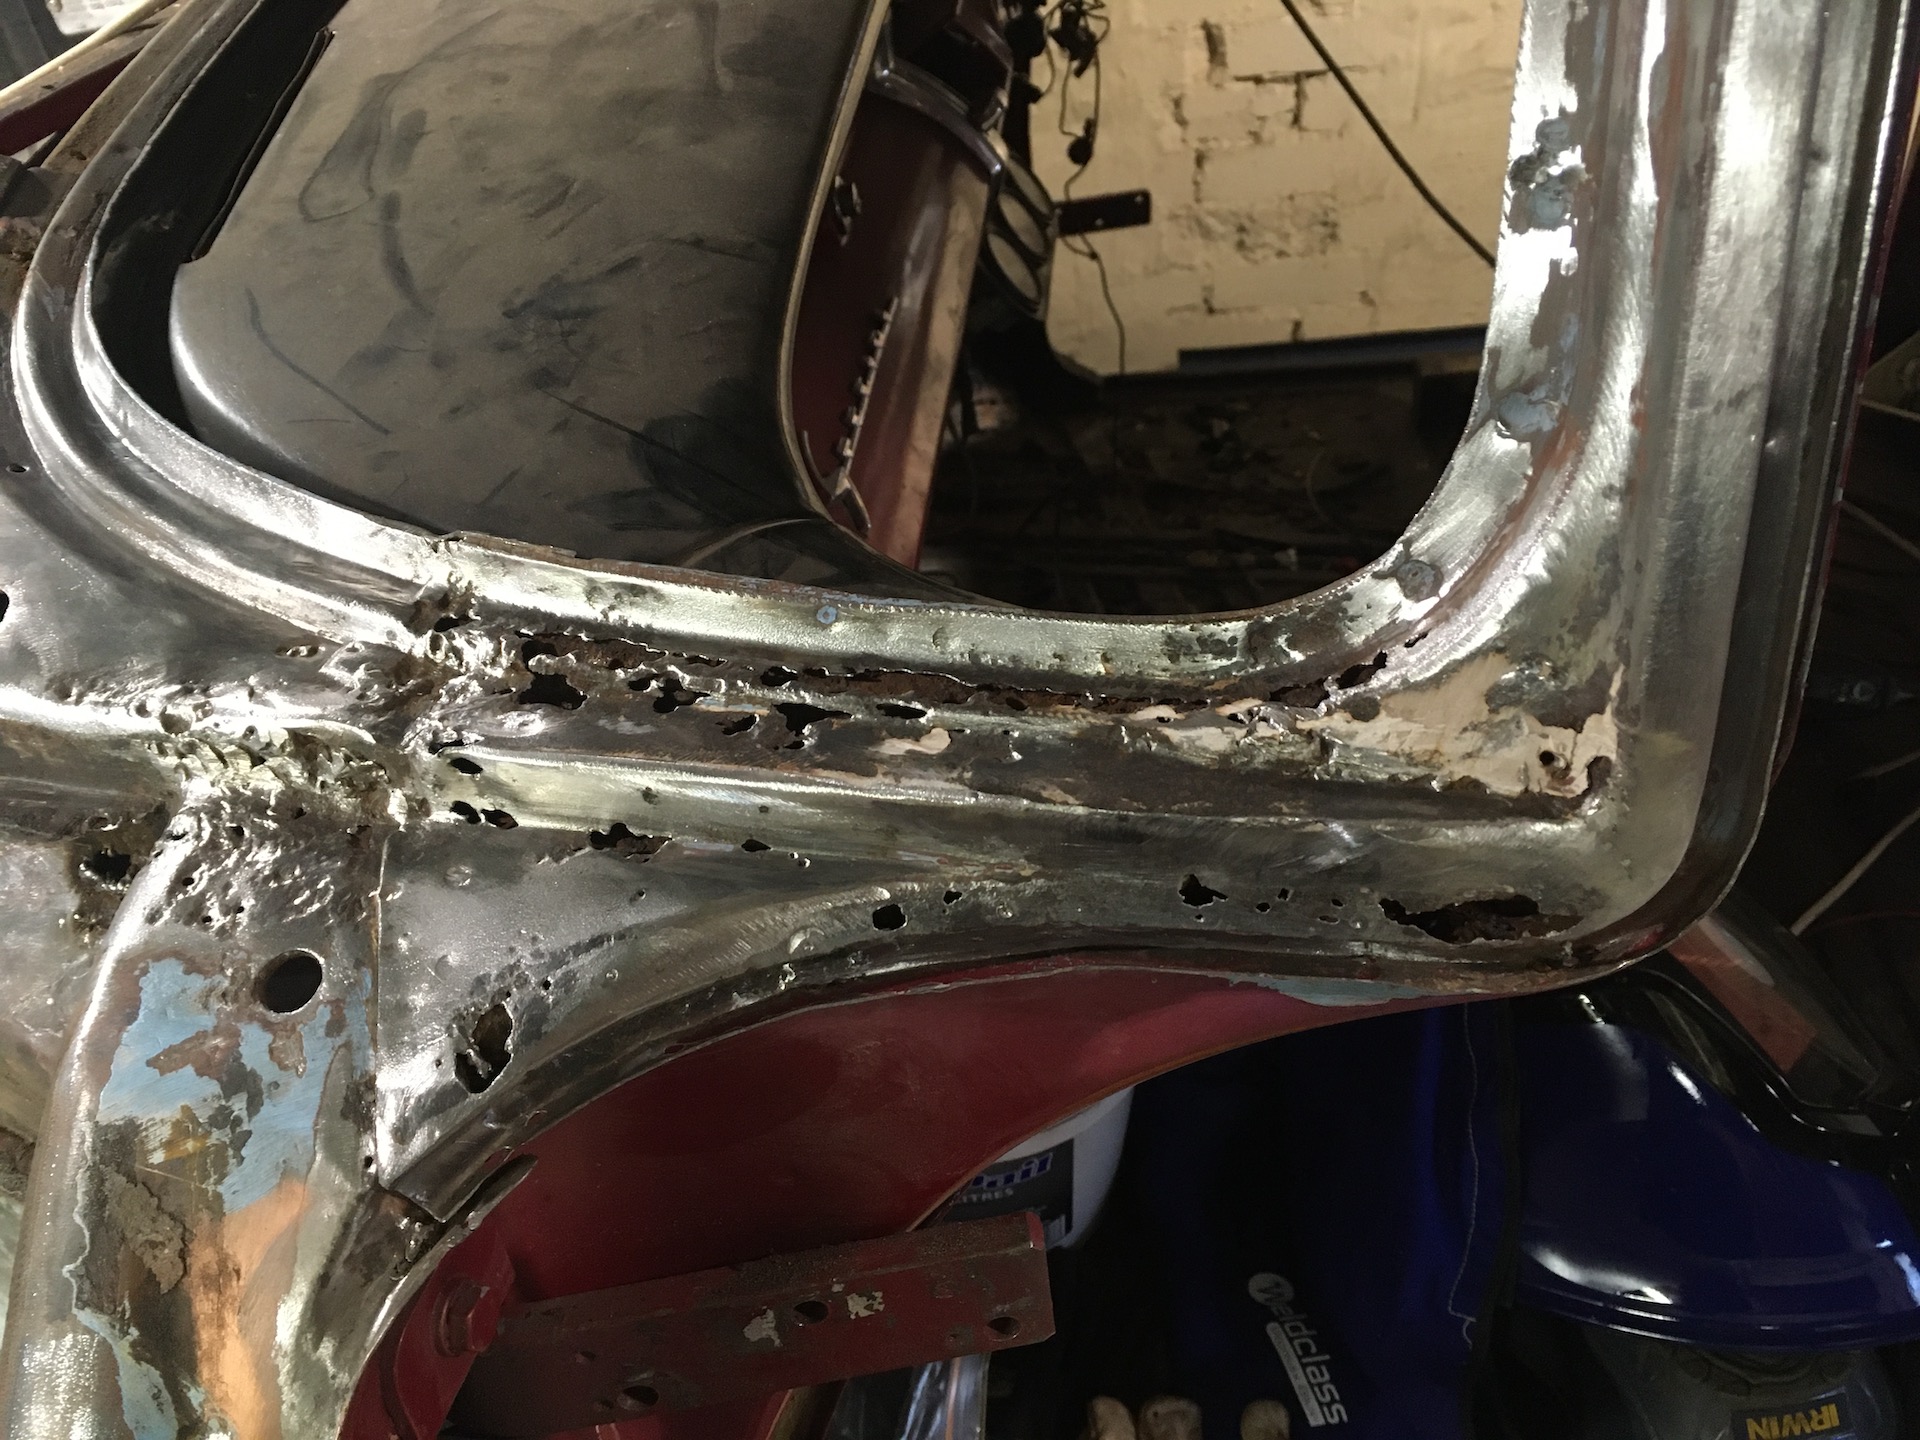
Got the wire brush out and went on a rust hunt.
Top of the passenger door. Think I can make up a patch for this.
- IMG_7126.JPG (606.92 KiB) Viewed 1162 times
Not so sure on this one.
- IMG_7143.JPG (665.74 KiB) Viewed 1162 times
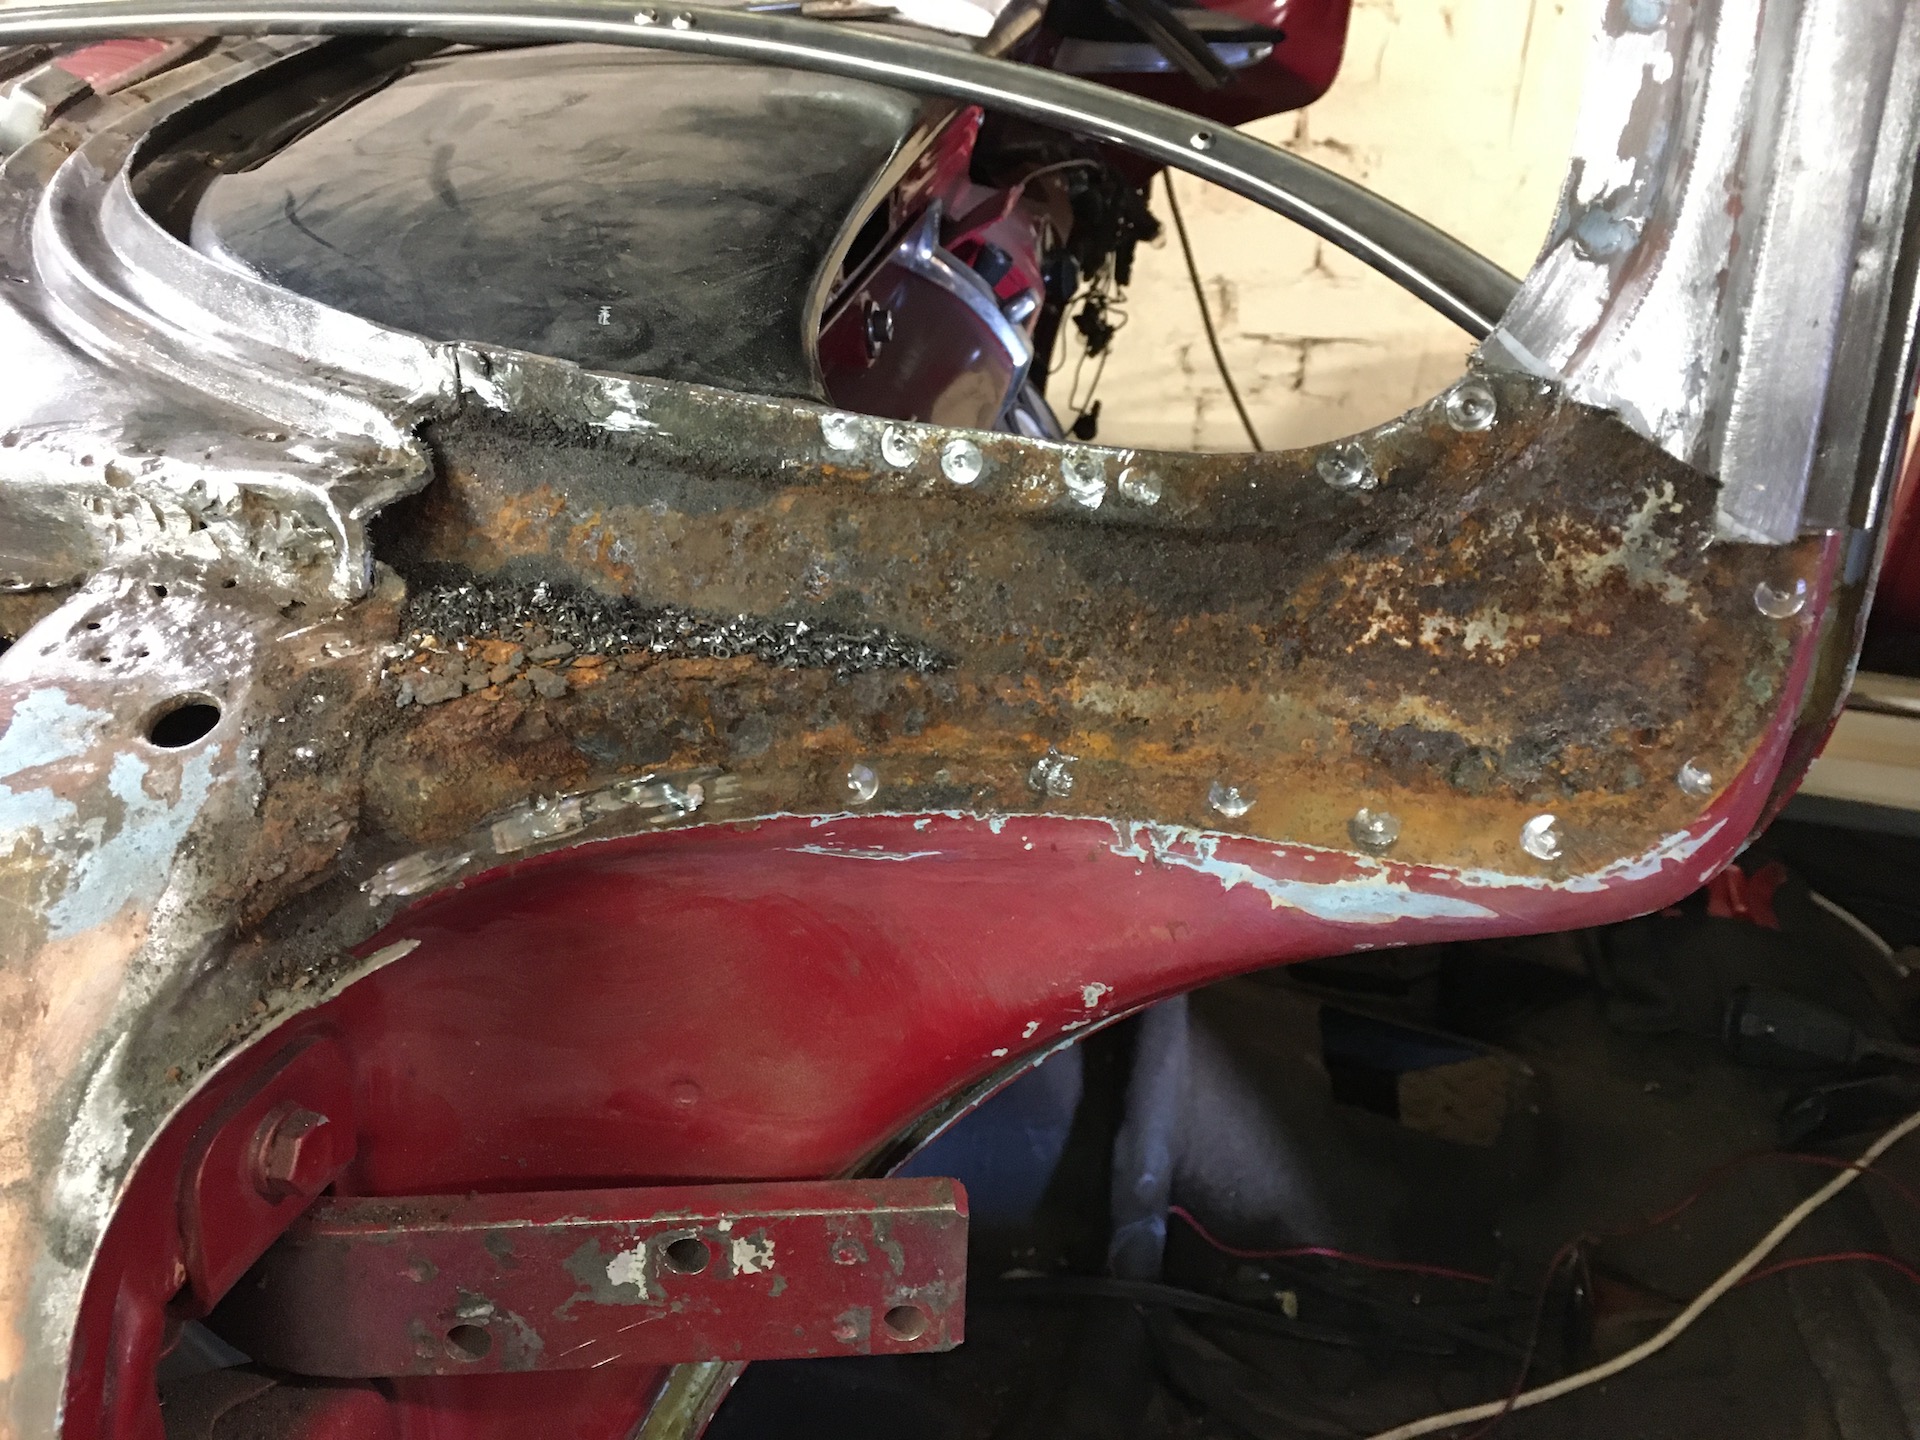
Removed this to better assess the damage
- IMG_7162.JPG (617.22 KiB) Viewed 1162 times
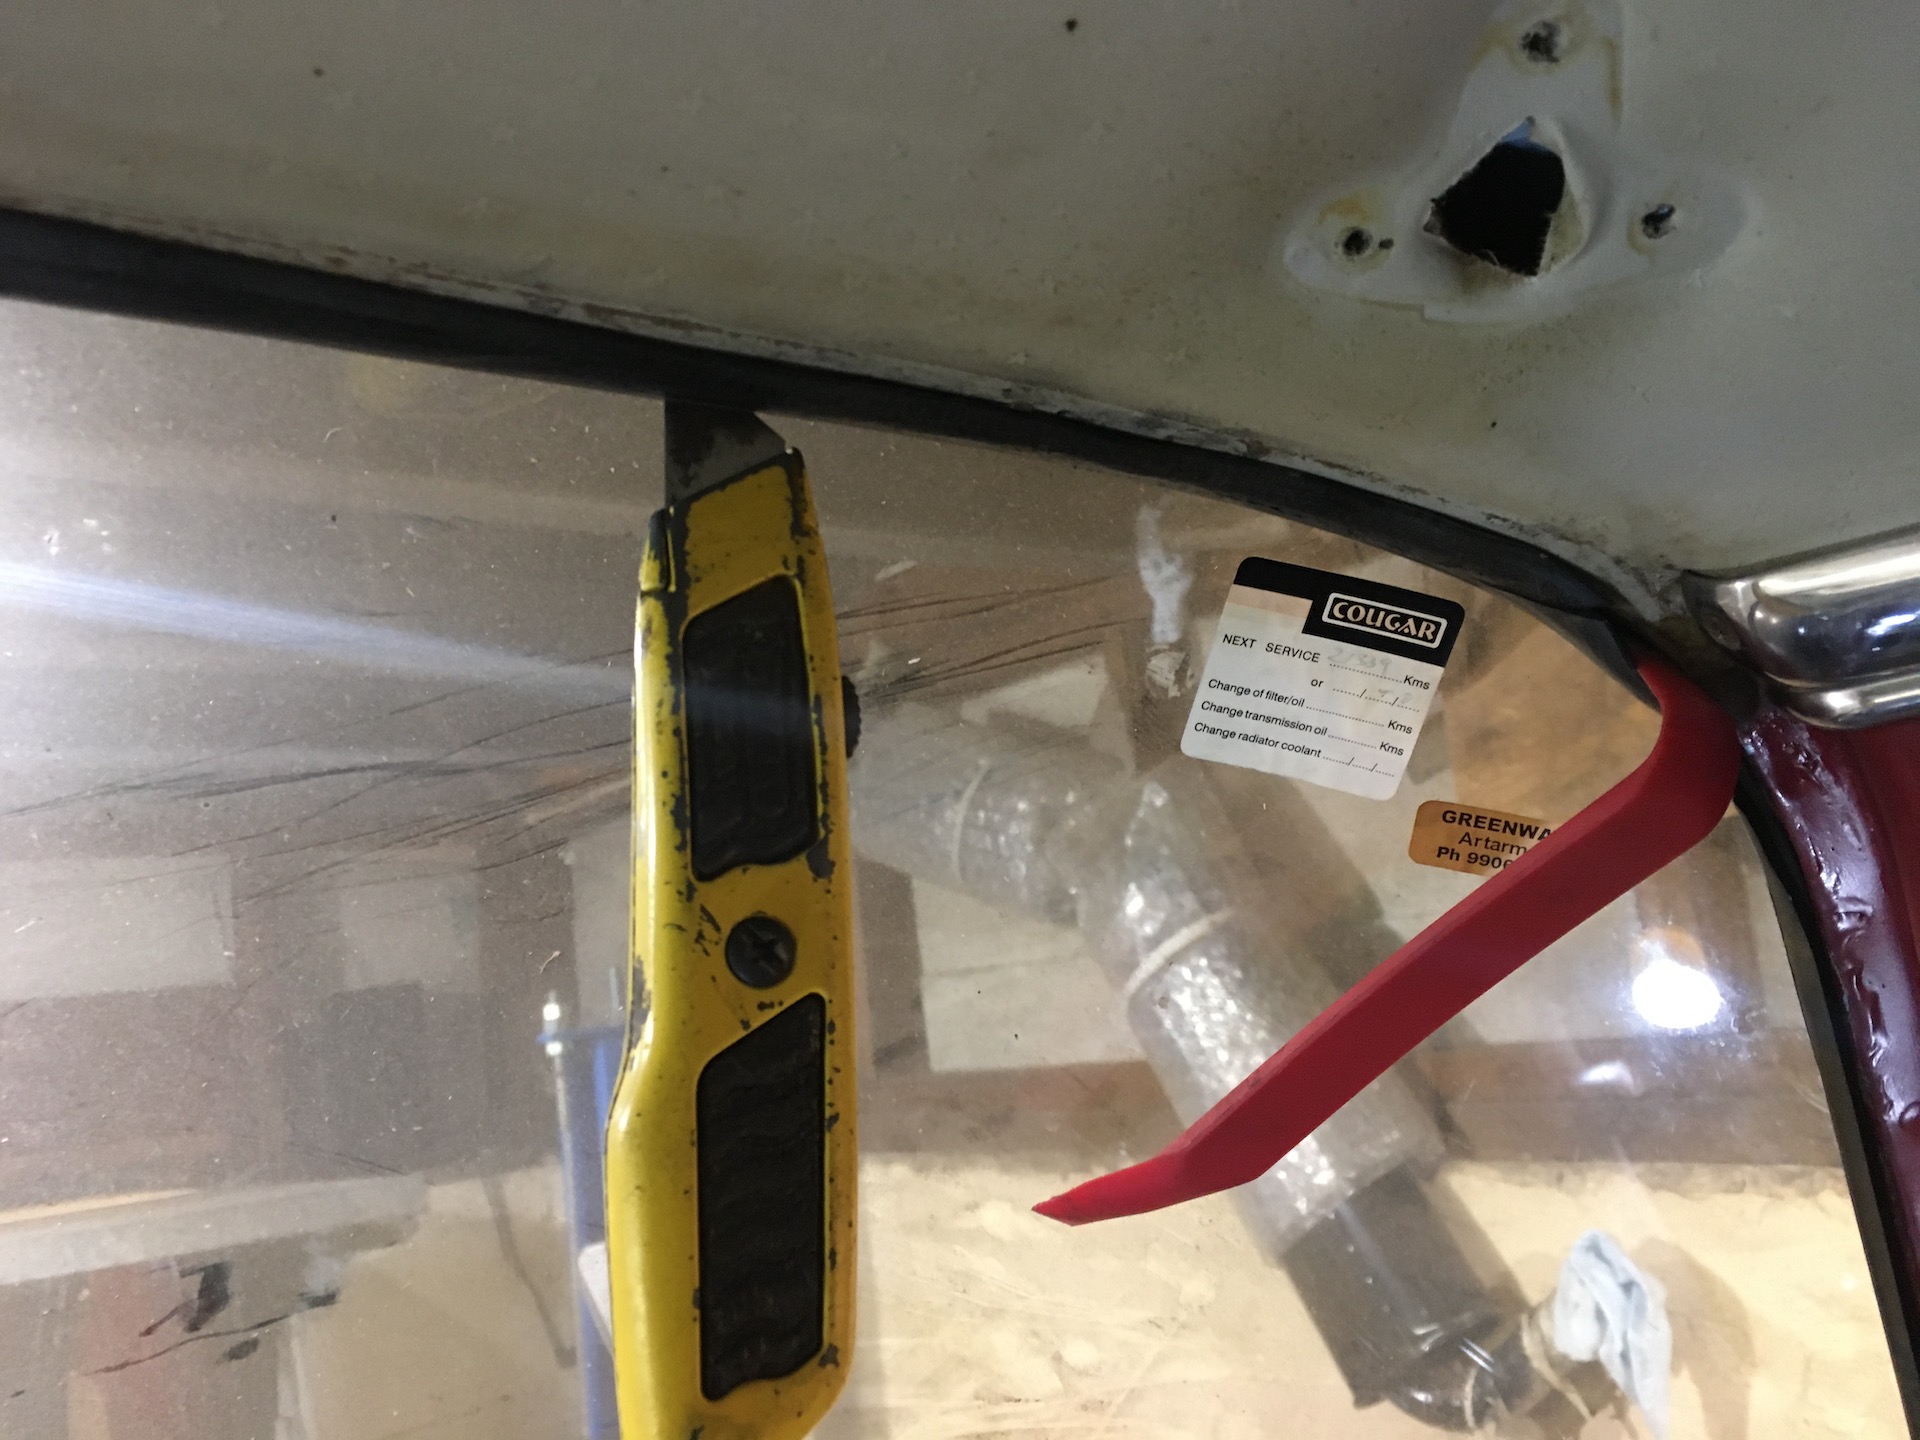
Time to pop the windscreen out. Would have been easier if the seats were still in the car.
- IMG_7169.JPG (649.76 KiB) Viewed 1162 times
- IMG_7168.JPG (469.67 KiB) Viewed 1162 times
Followed the guide in my
FB service manual for removing the windscreen. Would not come out. Then I found this in the top center of the windscreen.

- IMG_7171.JPG (1.09 MiB) Viewed 1162 times
Is that an EK addition? Anyway screen out. More scraping and brushing.
- IMG_7179.JPG (649.7 KiB) Viewed 1162 times
Off with the plenum grill.
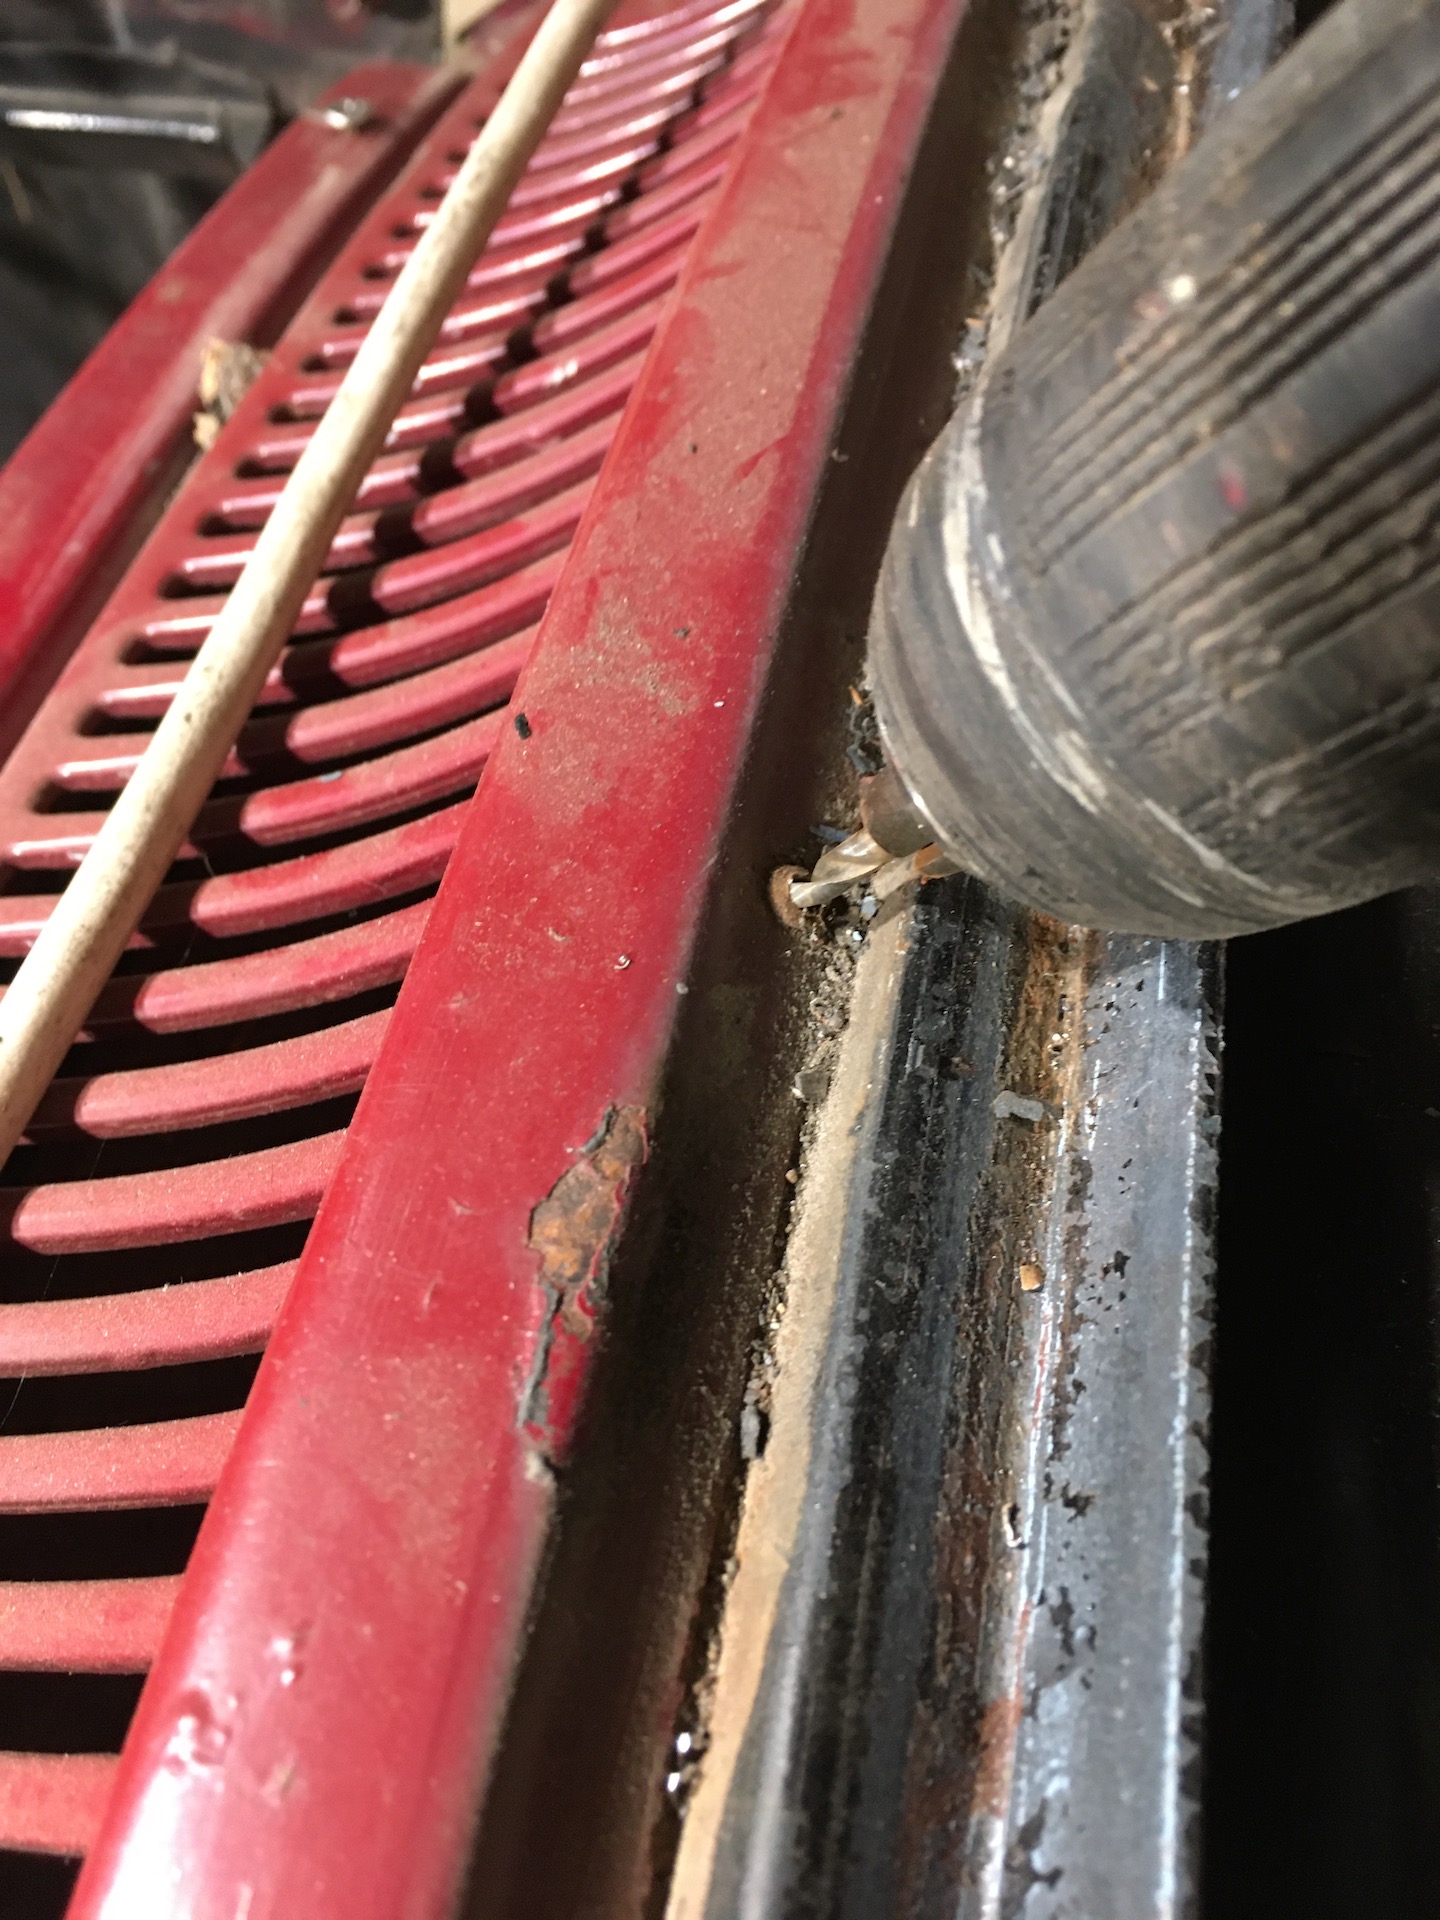
- IMG_7180.JPG (581.36 KiB) Viewed 1162 times
Re: Ol' Rusty - FB/EK Sedan
Posted: Sat Dec 05, 2020 6:07 pm
by funkyscooter
Stuck down pretty good. Needed a little assistance.
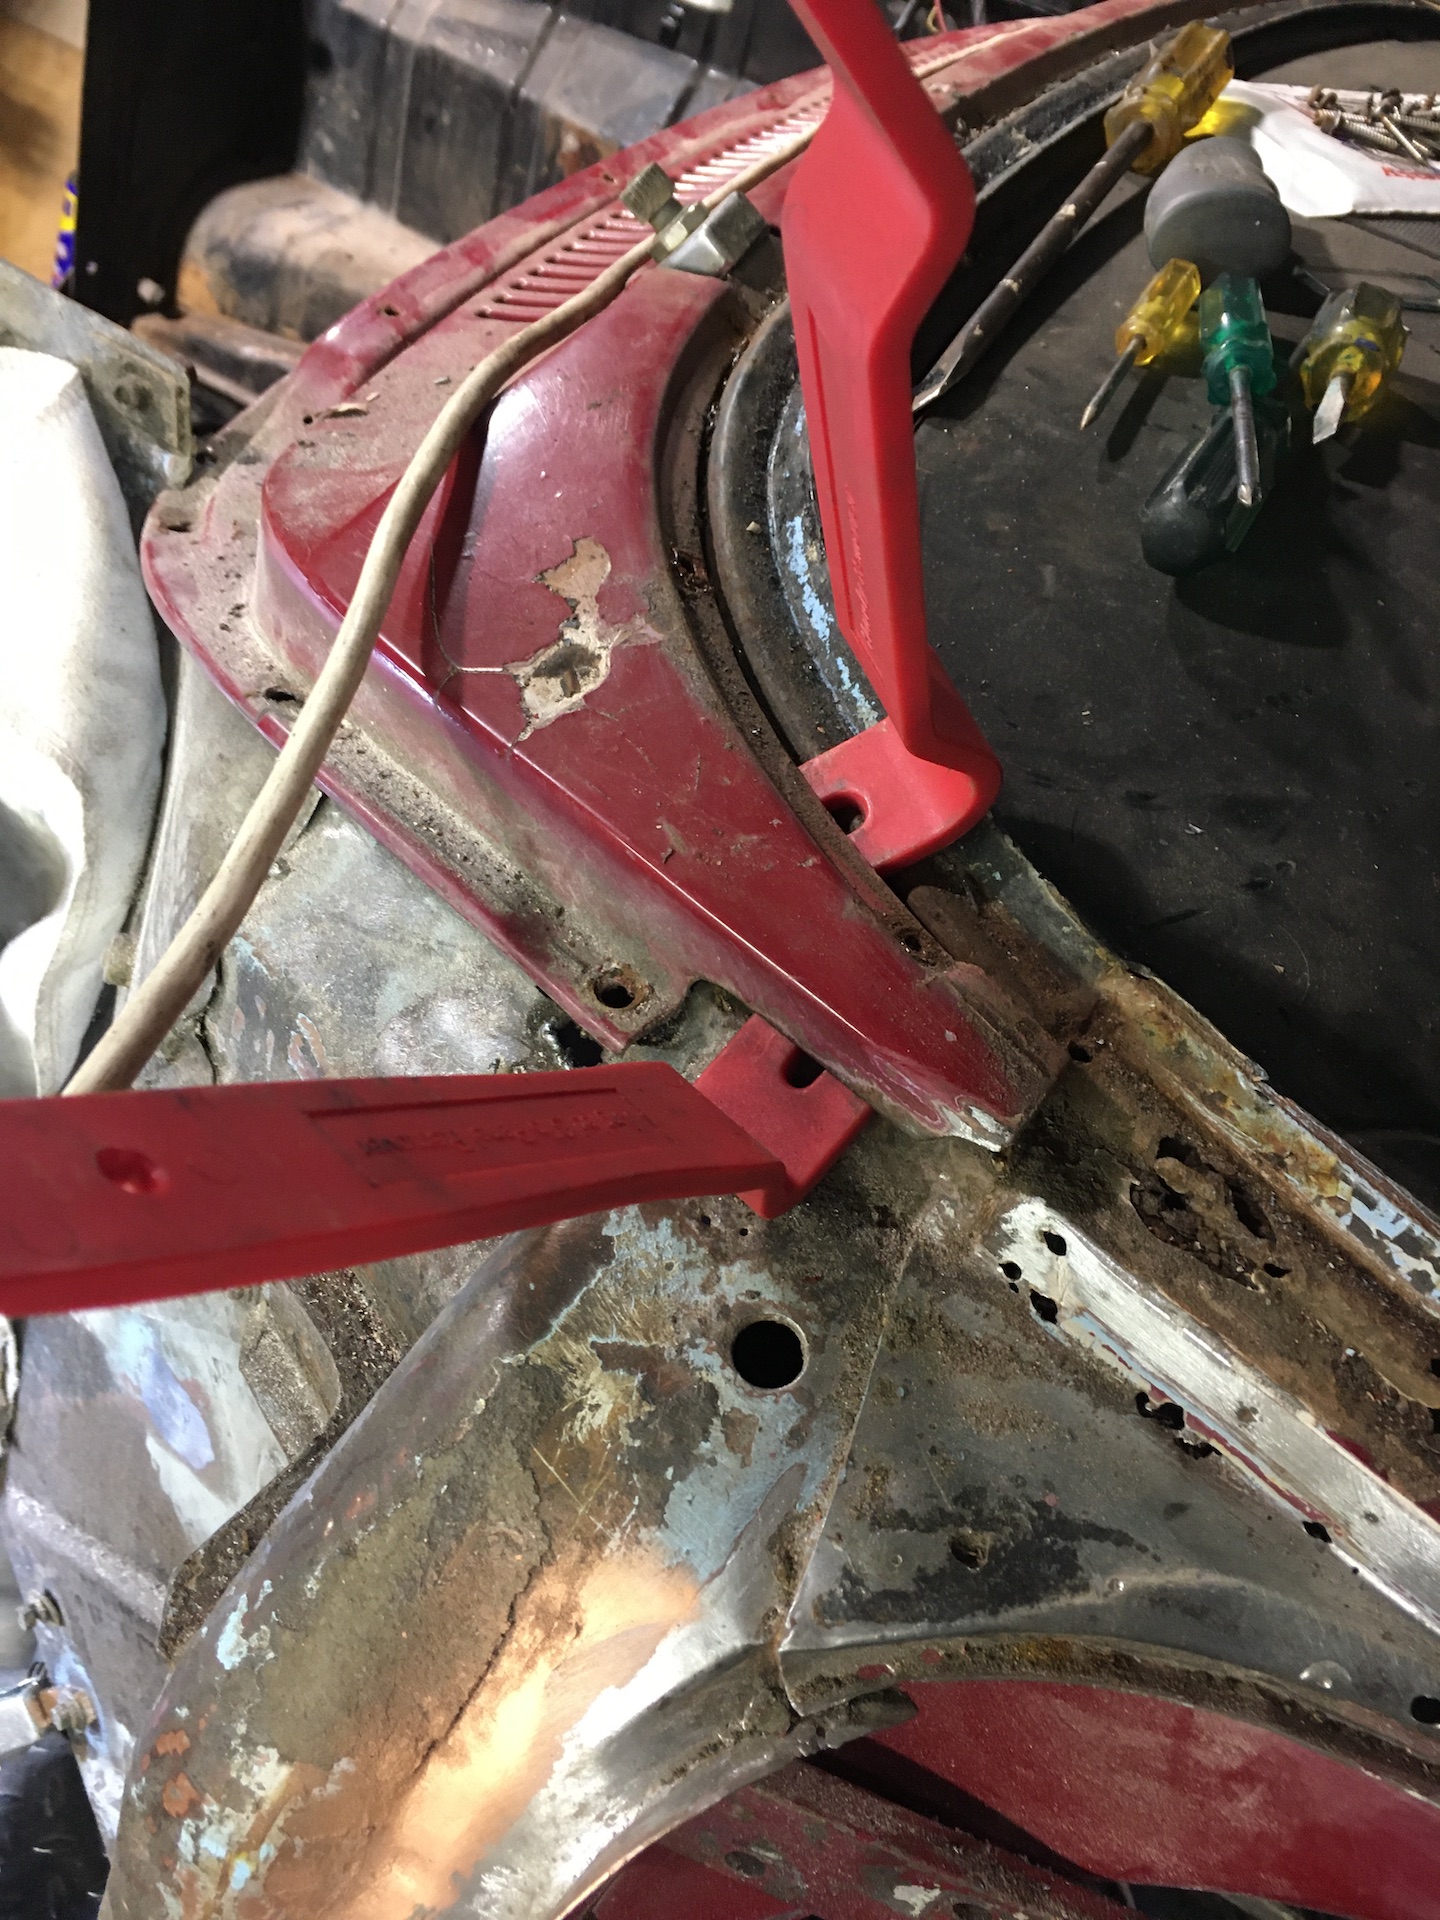
- IMG_7182.JPG (800.26 KiB) Viewed 1158 times
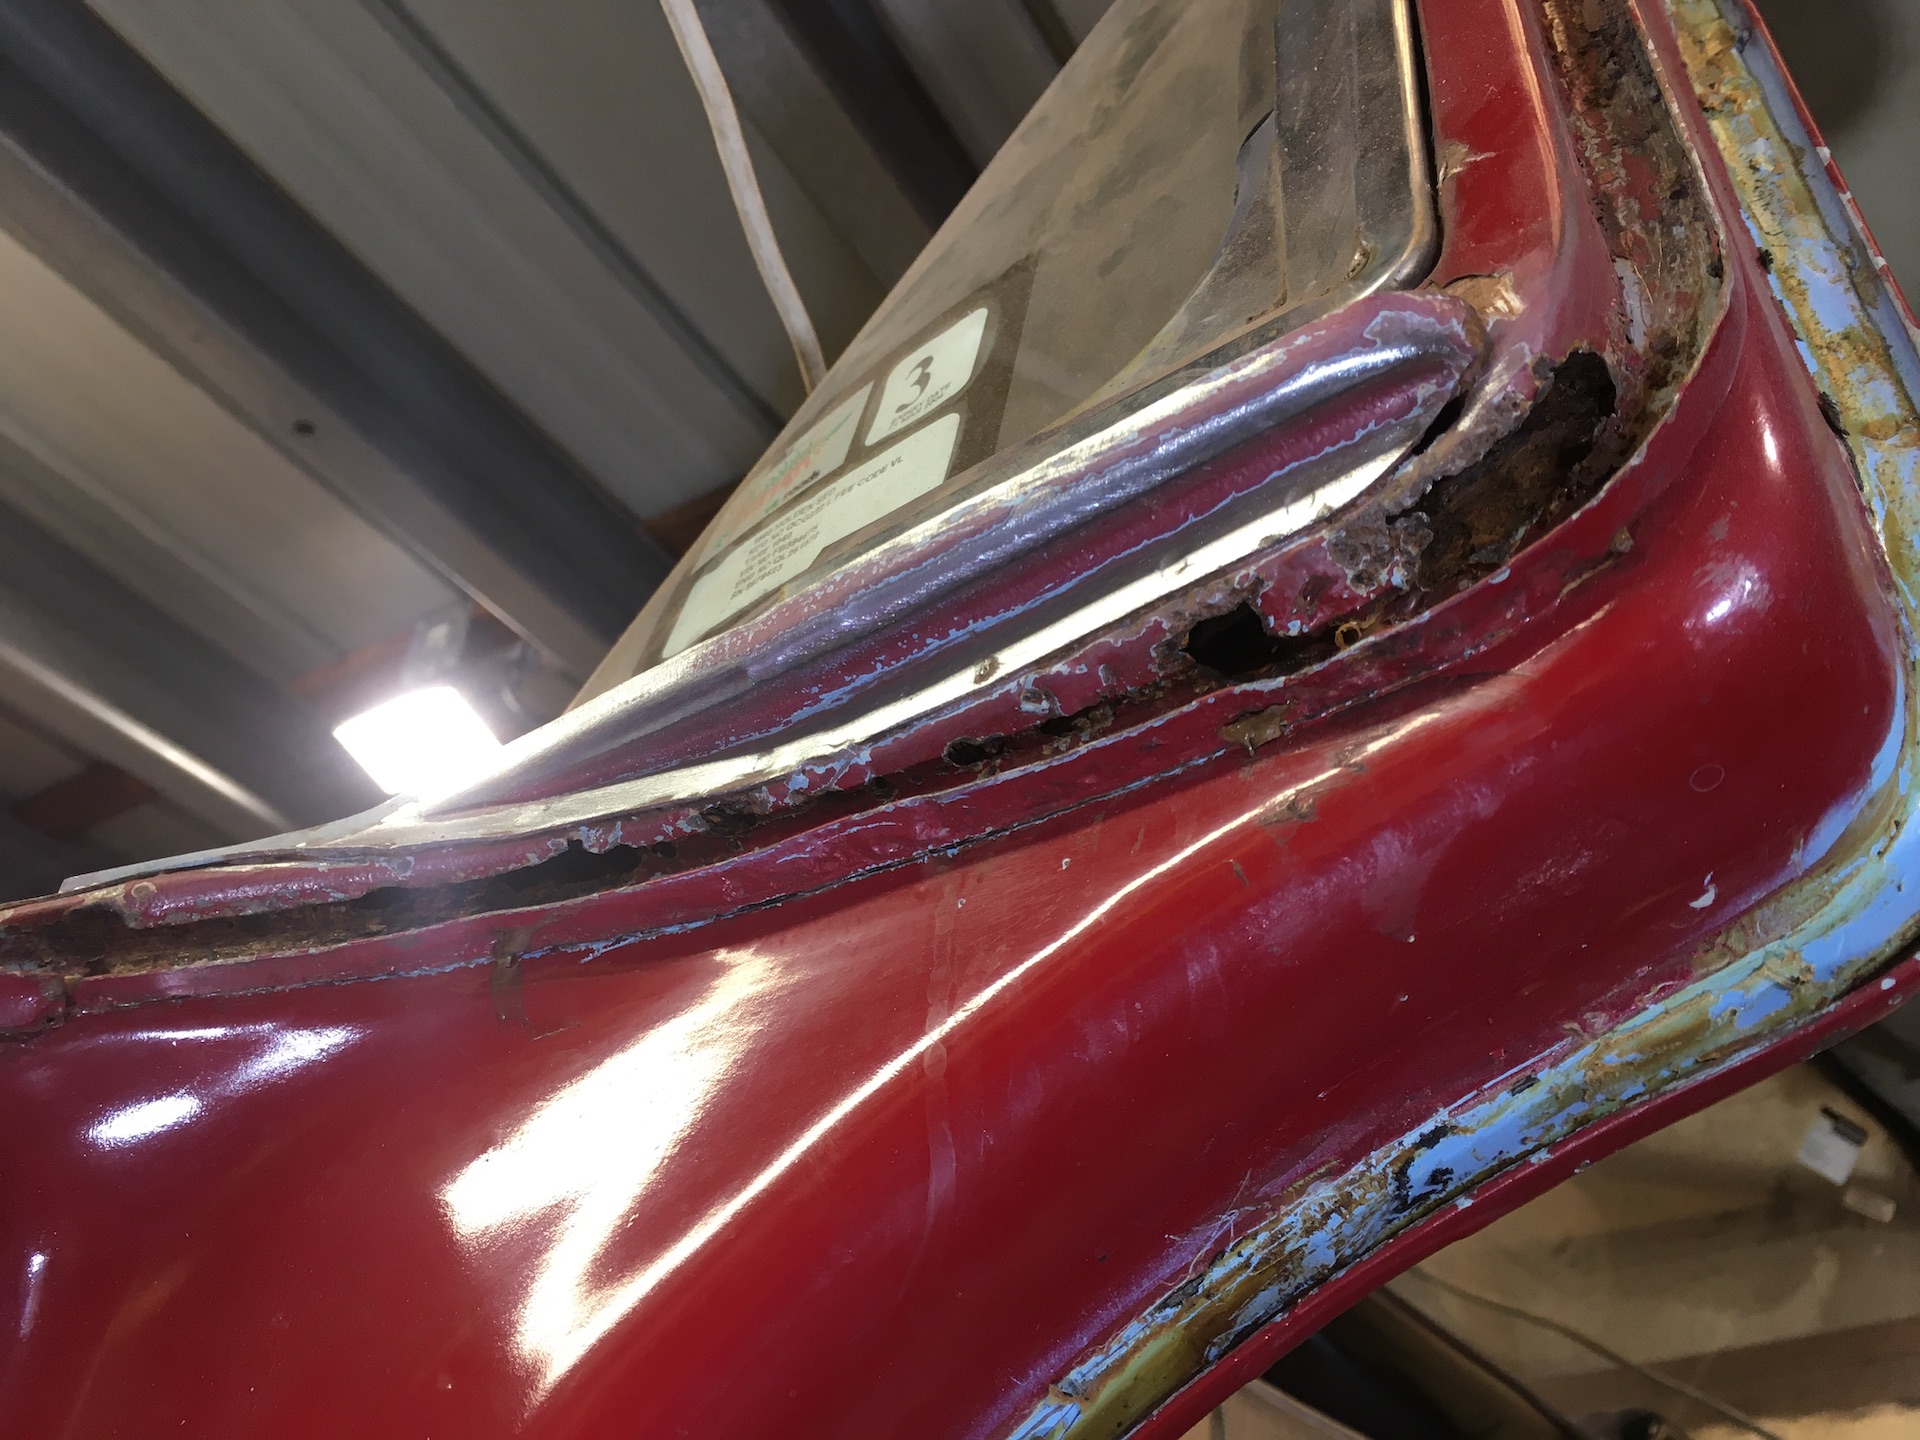
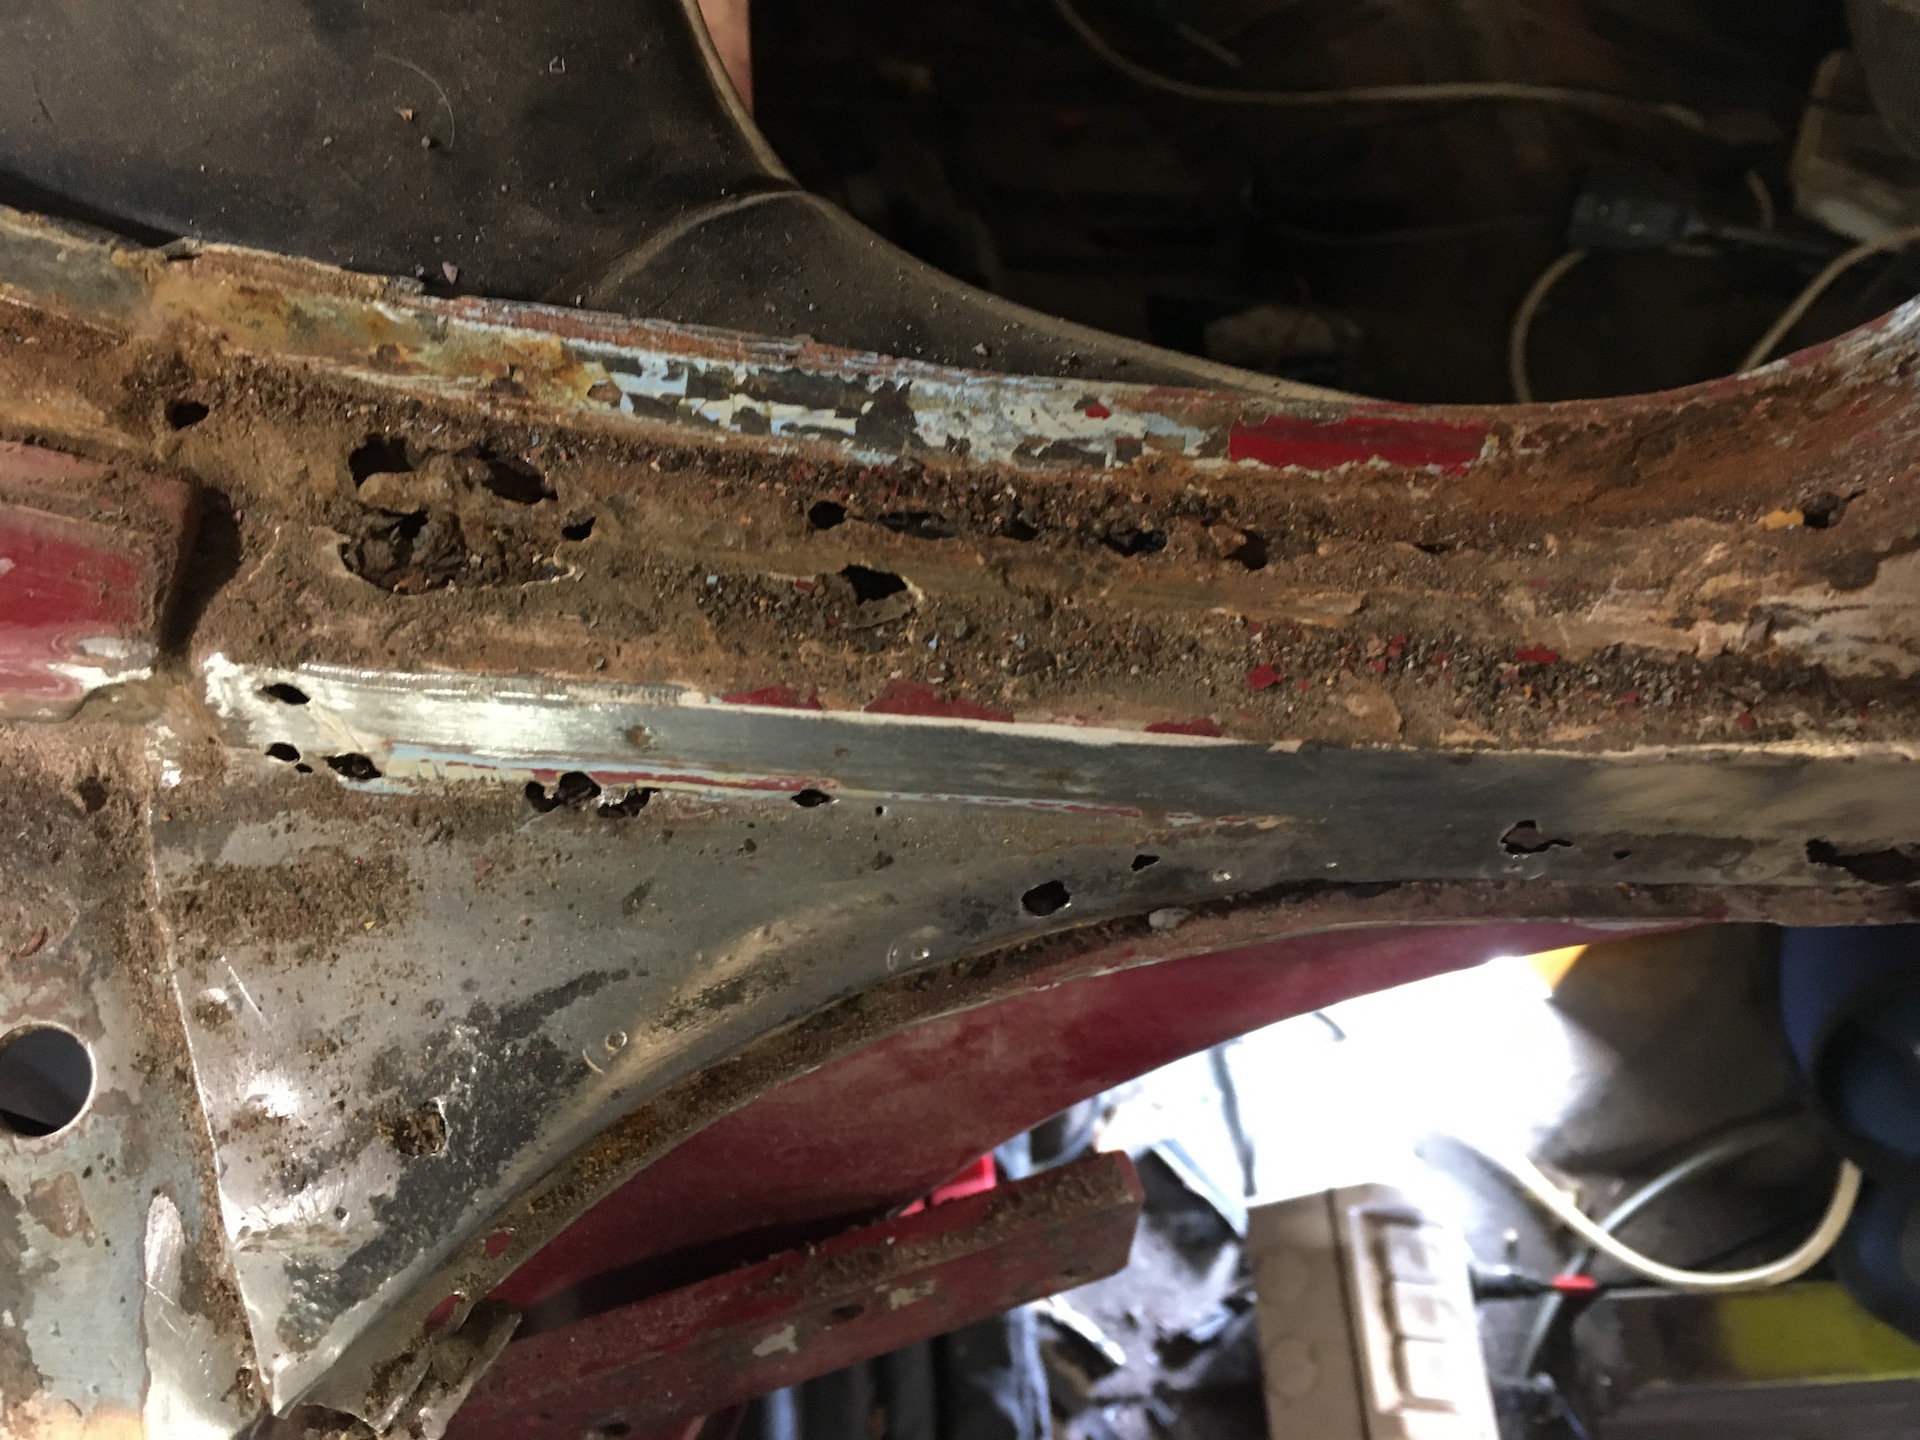
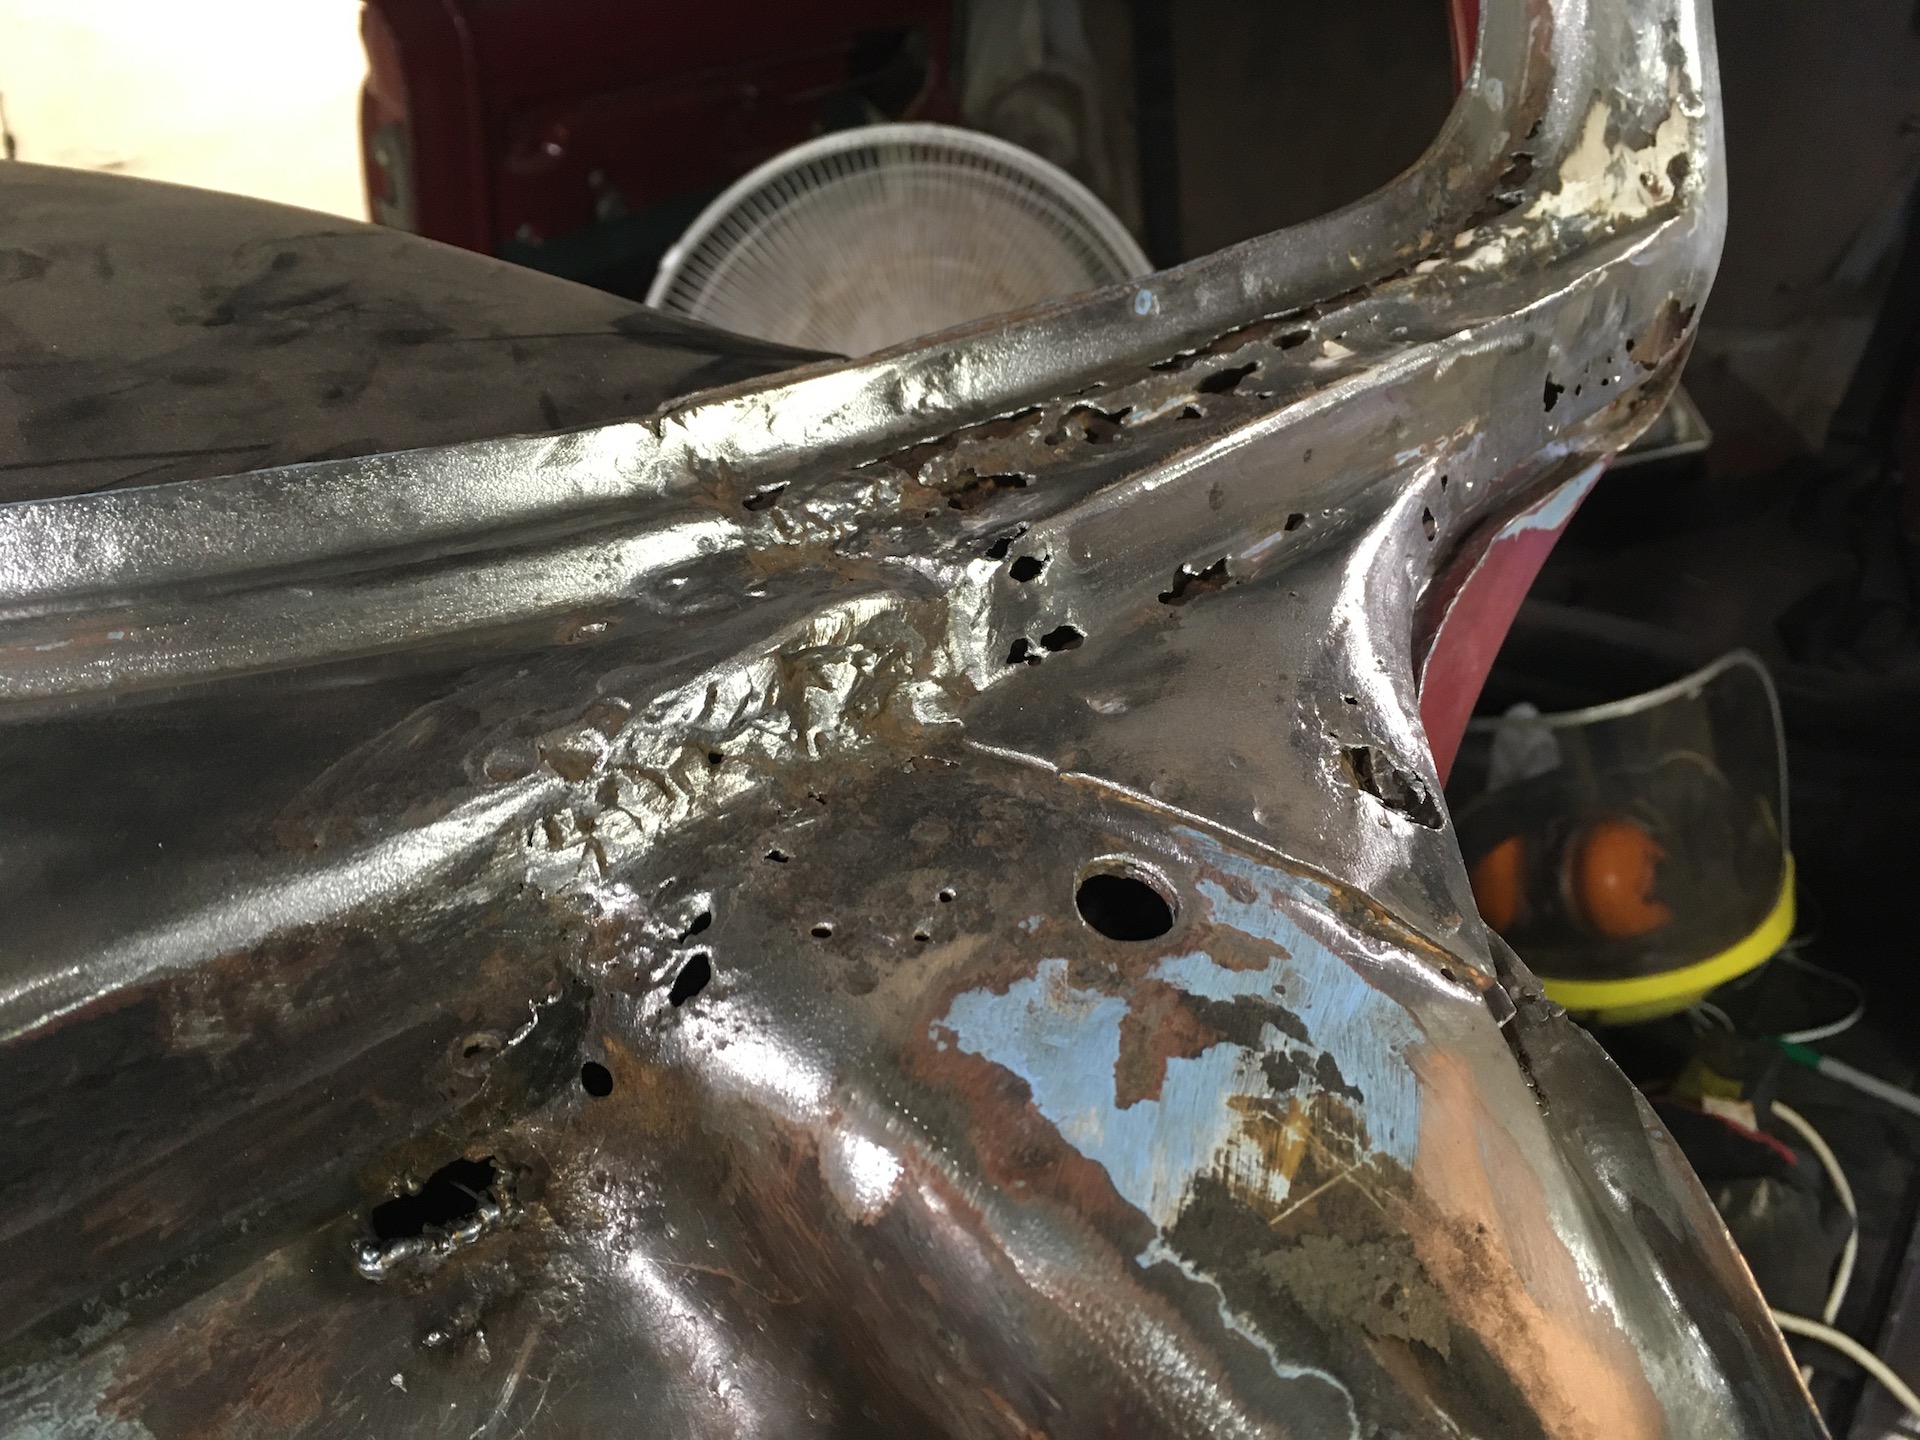
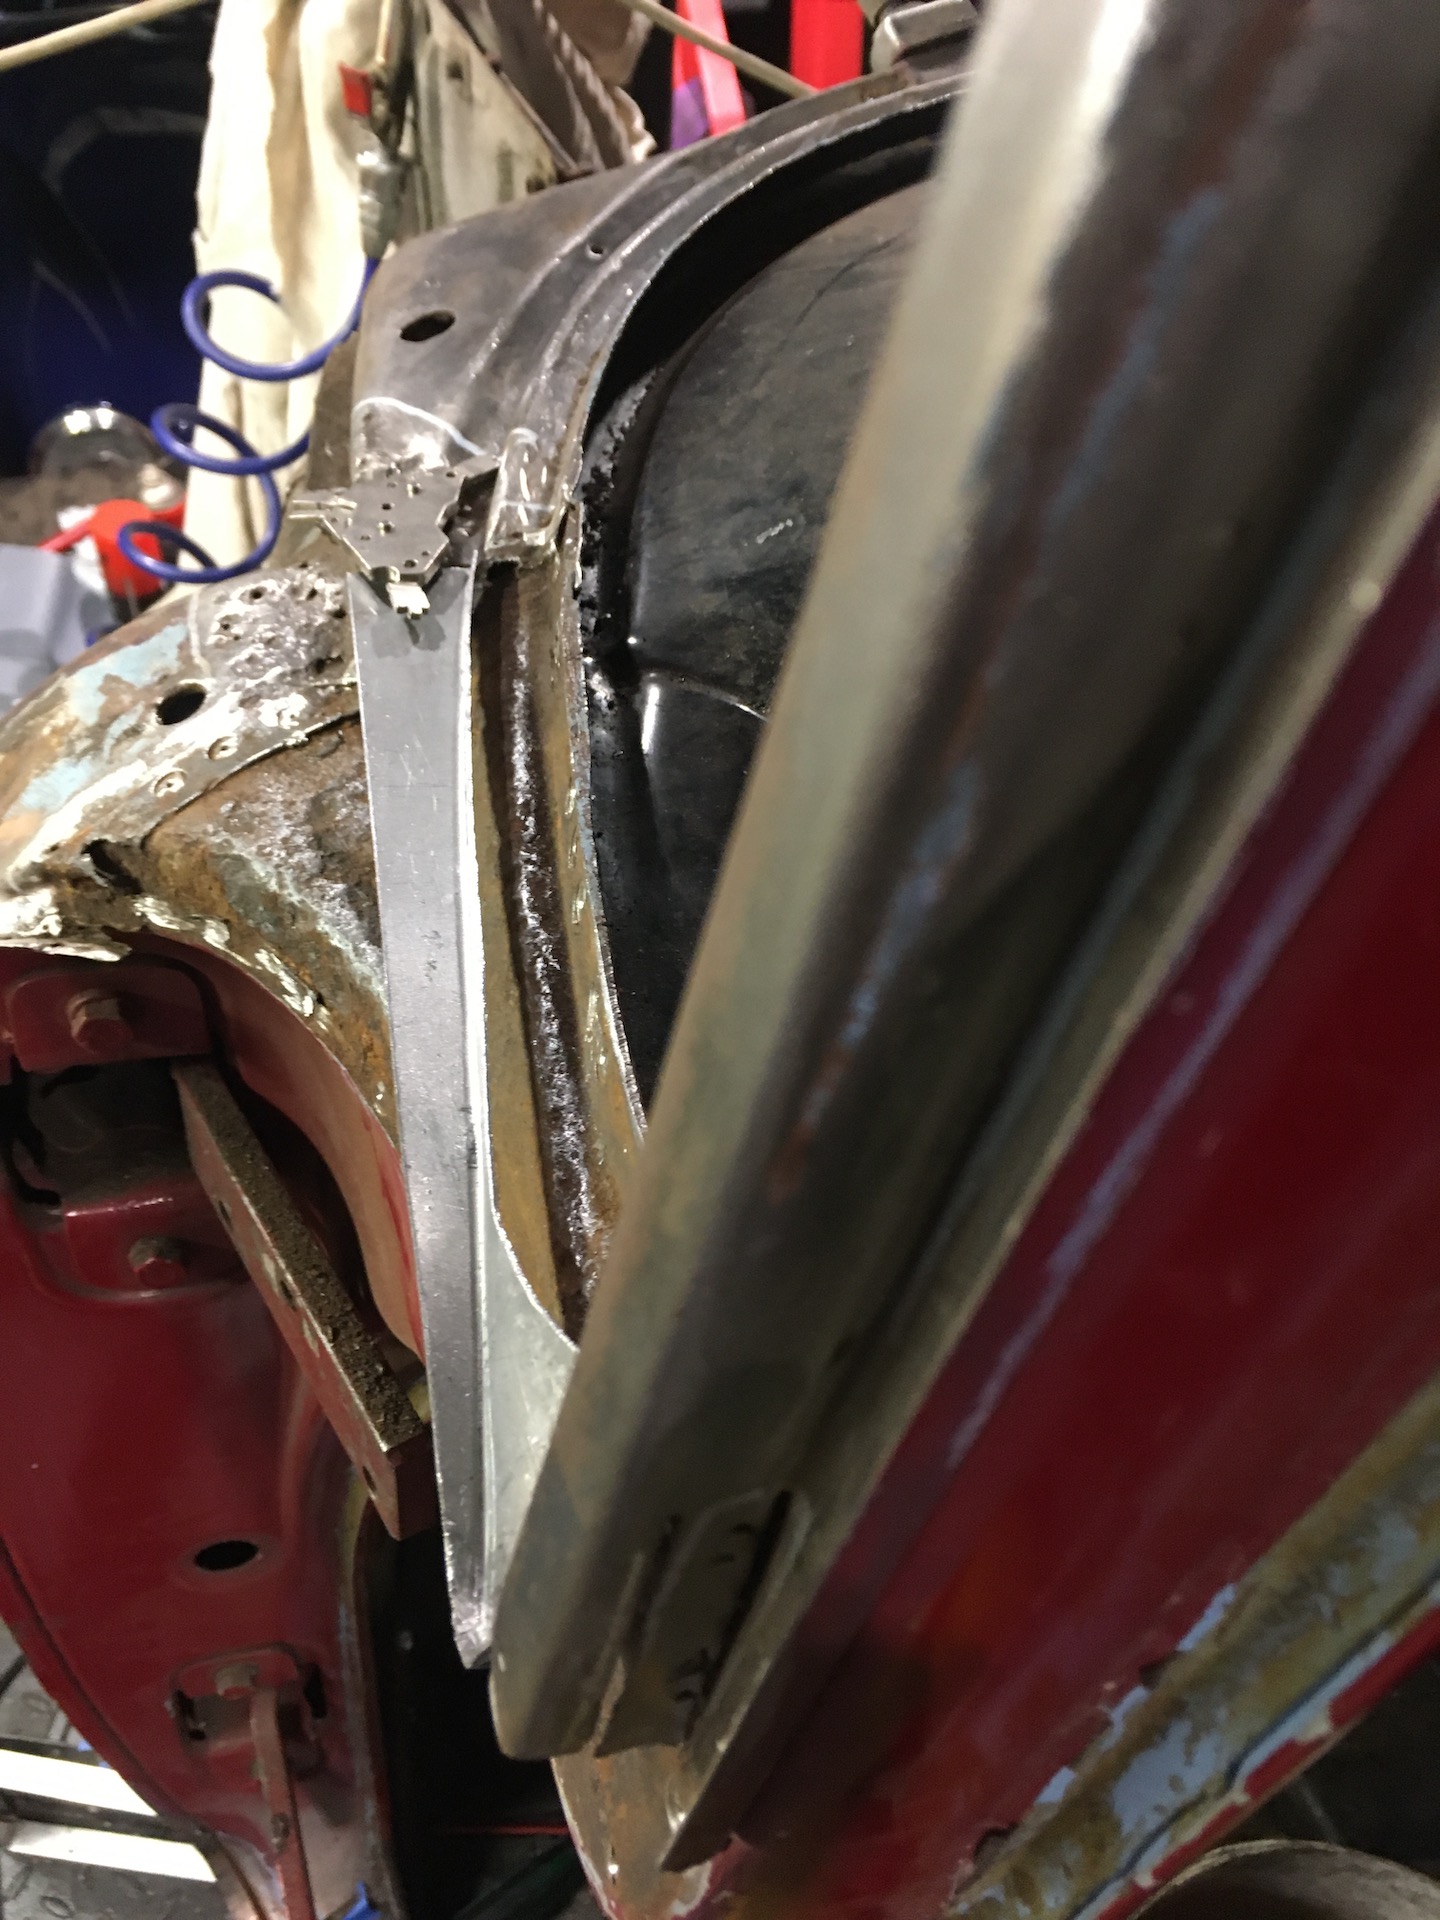
Looks like an accident repair just in the corner under the grill. Rust seems very localised to this area. Was full of bog. Looks like its toast. Not sure my panel making skills are up for this repair yet. A fair bit would be hidden behind the windscreen, passenger guard and door so might give it a go. Not much point leaving it as is.
- IMG_7347.JPG (675.78 KiB) Viewed 1158 times
- IMG_7348.JPG (679.61 KiB) Viewed 1158 times
Re: Ol' Rusty - FB/EK Sedan
Posted: Sat Dec 05, 2020 6:18 pm
by ardiesse
Scott,
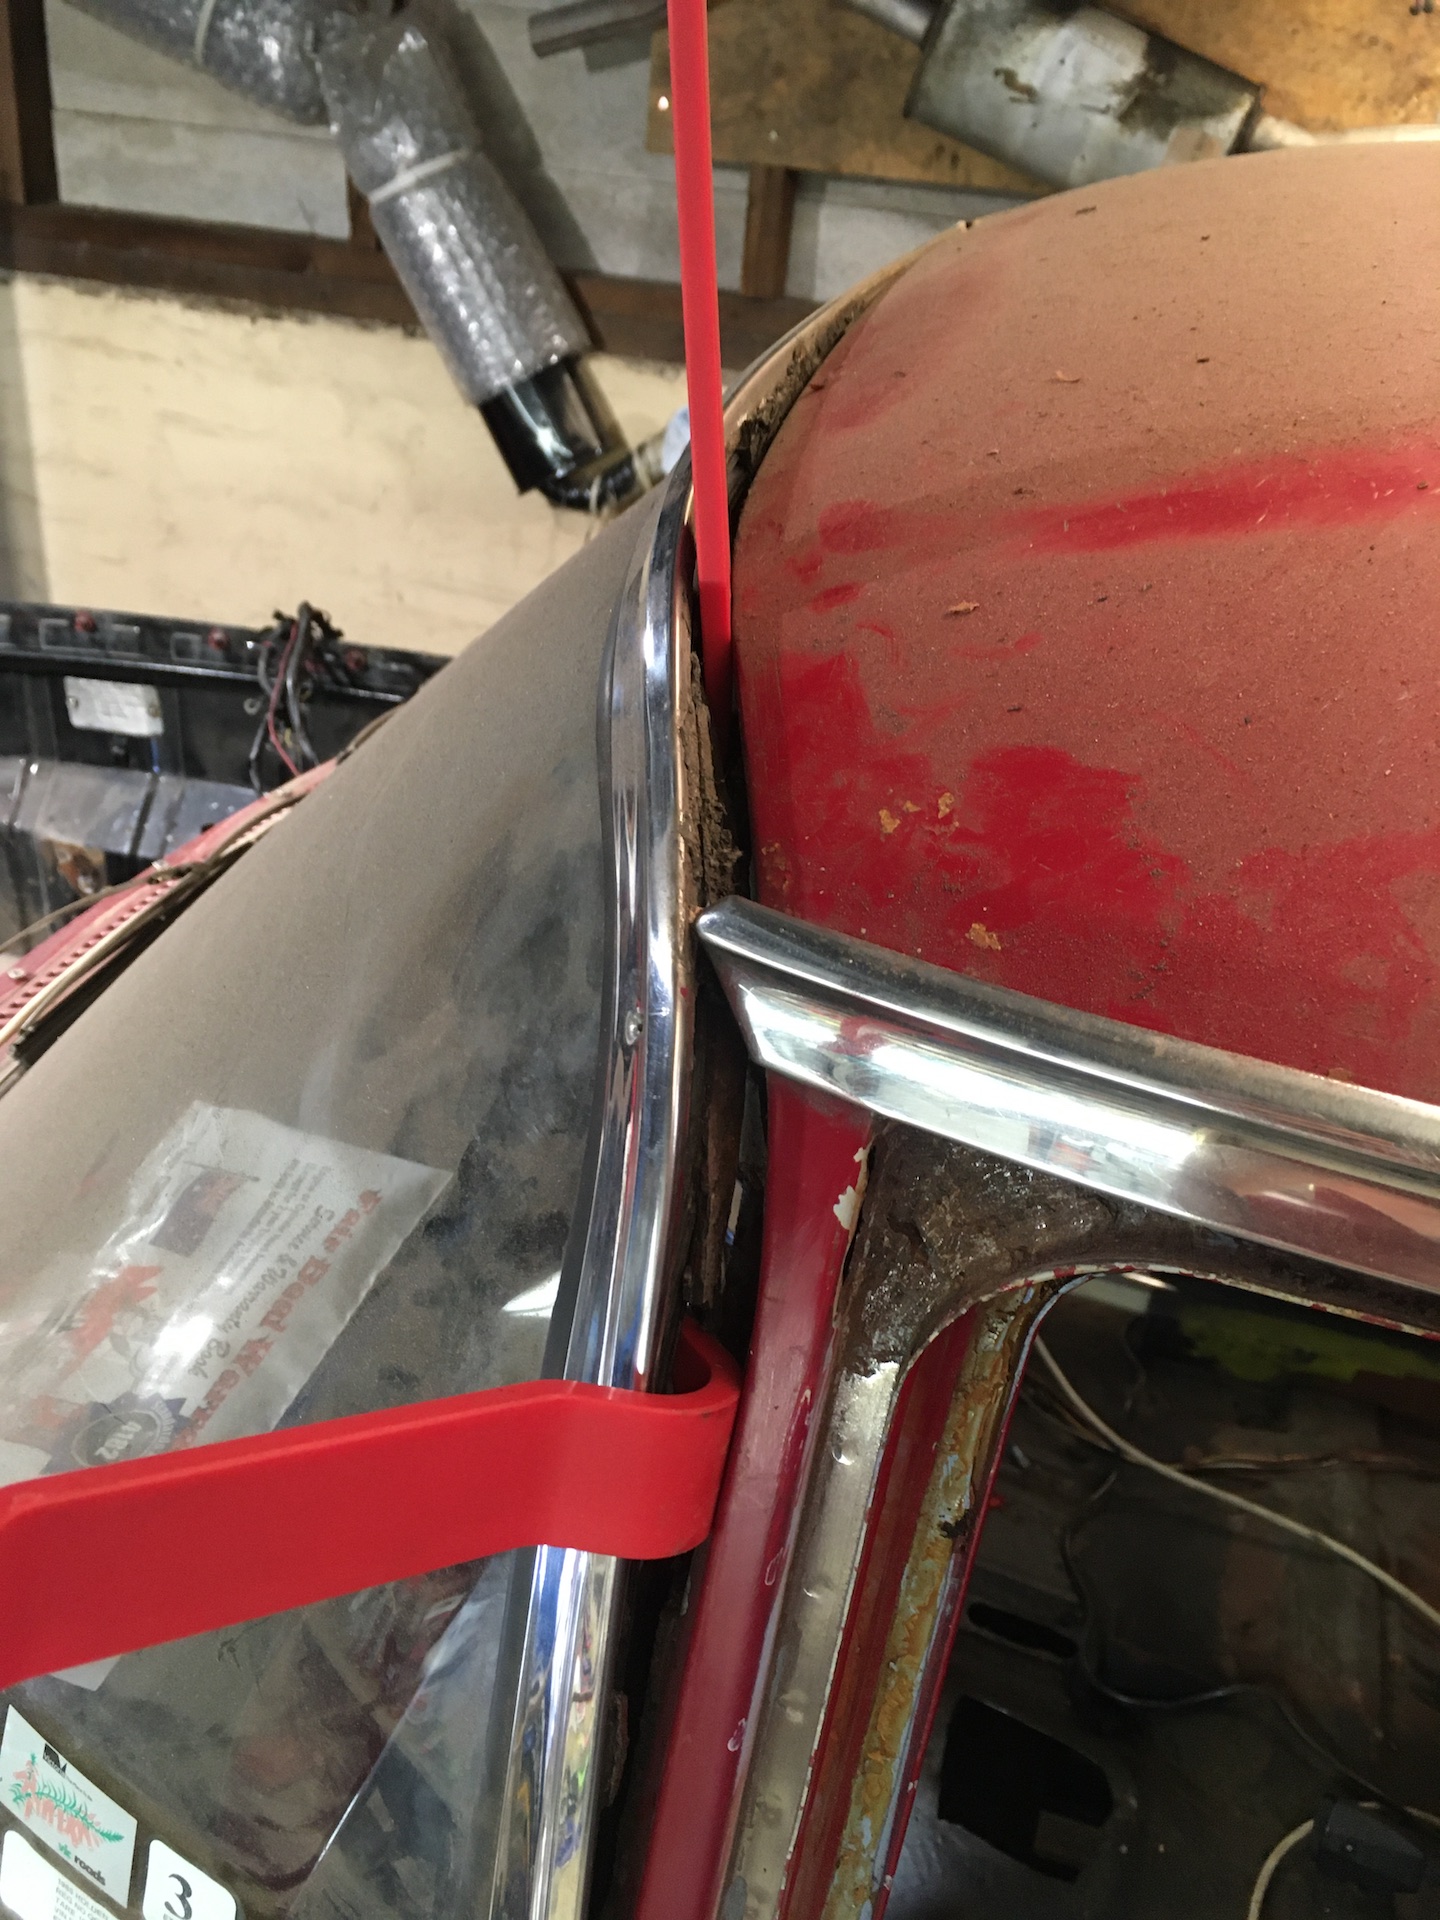
Serious, serious deja vu. It's the mid '80s, and I've just discovered some rust bubbles under the windscreen trim on the driver's side A-pillar of the ex-family EK. The car had a sunvisor fitted, and it was the kind where the retaining nuts were in a rubber moulding which pushed into holes drilled into the roof and A-pillars . . . Needless to say, after 20 or so years the rubber perished and the water got in. The entire "step" of the A-pillar between door, windscreen and plenum grille was rust, with Opal Green holding it all together.
(I did an incredibly dodgy repair with copper shim and bog after some character on the Central Coast shot my windscreen out with an air-rifle).
The bitter voice of experience tells me that you're going to find rust holes in the floor of the plenum chamber once you've cleaned all the leaves and mud out.
But the retaining clip and self-tapping screw are standard features. You should find one at the bottom centre of the windscreen opening too. You'll need them when replacing the windscreen. Without them, the trims just don't pull down into place correctly.
Rob
Re: Ol' Rusty - FB/EK Sedan
Posted: Sat Dec 05, 2020 7:00 pm
by 62ekute
Hi Scott ... just don't try to make it out of one piece (unless you are really keen) and you'll be fine. Patrick
Re: Ol' Rusty - FB/EK Sedan
Posted: Sat Dec 05, 2020 7:03 pm
by Harv
ardiesse wrote: Sat Dec 05, 2020 6:18 pm
But the retaining clip and self-tapping screw are standard features. You should find one at the bottom centre of the windscreen opening too. You'll need them when replacing the windscreen. Without them, the trims just don't pull down into place correctly.
Top center yes, but have not seen one bottom centre on either the wagon or Graces ute.
That slug-gun/windscreen story needs telling.
Cheers,
Harv
Re: Ol' Rusty - FB/EK Sedan
Posted: Sat Dec 05, 2020 8:13 pm
by Errol62
You prolly thinking of fe fc with the bottom screw maybe rob
Looks like water got in and ran down in to the a pillars for sure.
FB ute fixer upper, EK van on rotisserie
Re: Ol' Rusty - FB/EK Sedan
Posted: Sat Dec 05, 2020 9:02 pm
by ardiesse
Gentlemen,
The years since I last mucked around with FB/EKs are obviously telling. So the lower windscreen trim is one piece, then?
OK. For some reason, I offered to take one on of the lads from Scouts or youth group up to the Central Coast on a Saturday evening. The road I was driving on had a cutting on the side of a hill, and some locals (probably) were driving the other way in a Mini. I heard a sharp "crack", and in the same instant the windscreen shattered. Having grown up at a time when every town had windscreen replacement places on all the major roads, I knew what a rock sounded like. This wasn't a rock. The pattern of the broken glass suggested a point impact on the driver's side . . . consistent, strangely enough, with the source being on top of the cutting. My passenger said it sounded like an air-rifle shot.
EKs didn't have zone-toughened windscreens, and the expansion as the windscreen shattered made the glass fall out of the sharp bends in the screen. It wasn't going to last the drive back home, so I pushed the glass out, and then drove my newly Clear-Vision (R) EK home at about 25 mph on the Old Pacific Highway, chilled to the bone.
I was not overly impressed by the whole adventure.
Scott,
I reckon that you'll be able to weld the craters up (on the cowl at least), since you've now cleaned the metal up so well. Holes up to a couple of mm are easy: aim the MIG wire at the edge of the crater rim, strike the arc, and draw a circle. Let cool and dress off. If you blow a hole, stop, grind the metal down flush, and go again. For larger craters, strike the arc and lay a bead of weld all the way around the rim. Let solidify while still breathing gas over the weld (only a couple of seconds), and colour the middle in. A quenching block underneath is helpful.
Rob
Re: Ol' Rusty - FB/EK Sedan
Posted: Sun Dec 06, 2020 1:21 pm
by Brett027
Feeling your pain Scott

. This was one of the first repair areas tackled on Wilma, and also I think on Dave's 'Orange Betty'. In my case there was rust in the pillar behind the hinge support brackets too. Look forward to seeing your fixes.


Sent from my SM-G975F using Tapatalk
Re: Ol' Rusty - FB/EK Sedan
Posted: Sun Dec 06, 2020 3:49 pm
by funkyscooter
Thanks Brett, your pictures make me feel a little better!
Clay I reckon you are right - its come in through the hole in the top and got trapped. Floors arn't too bad - though I haven't stripped them yet.
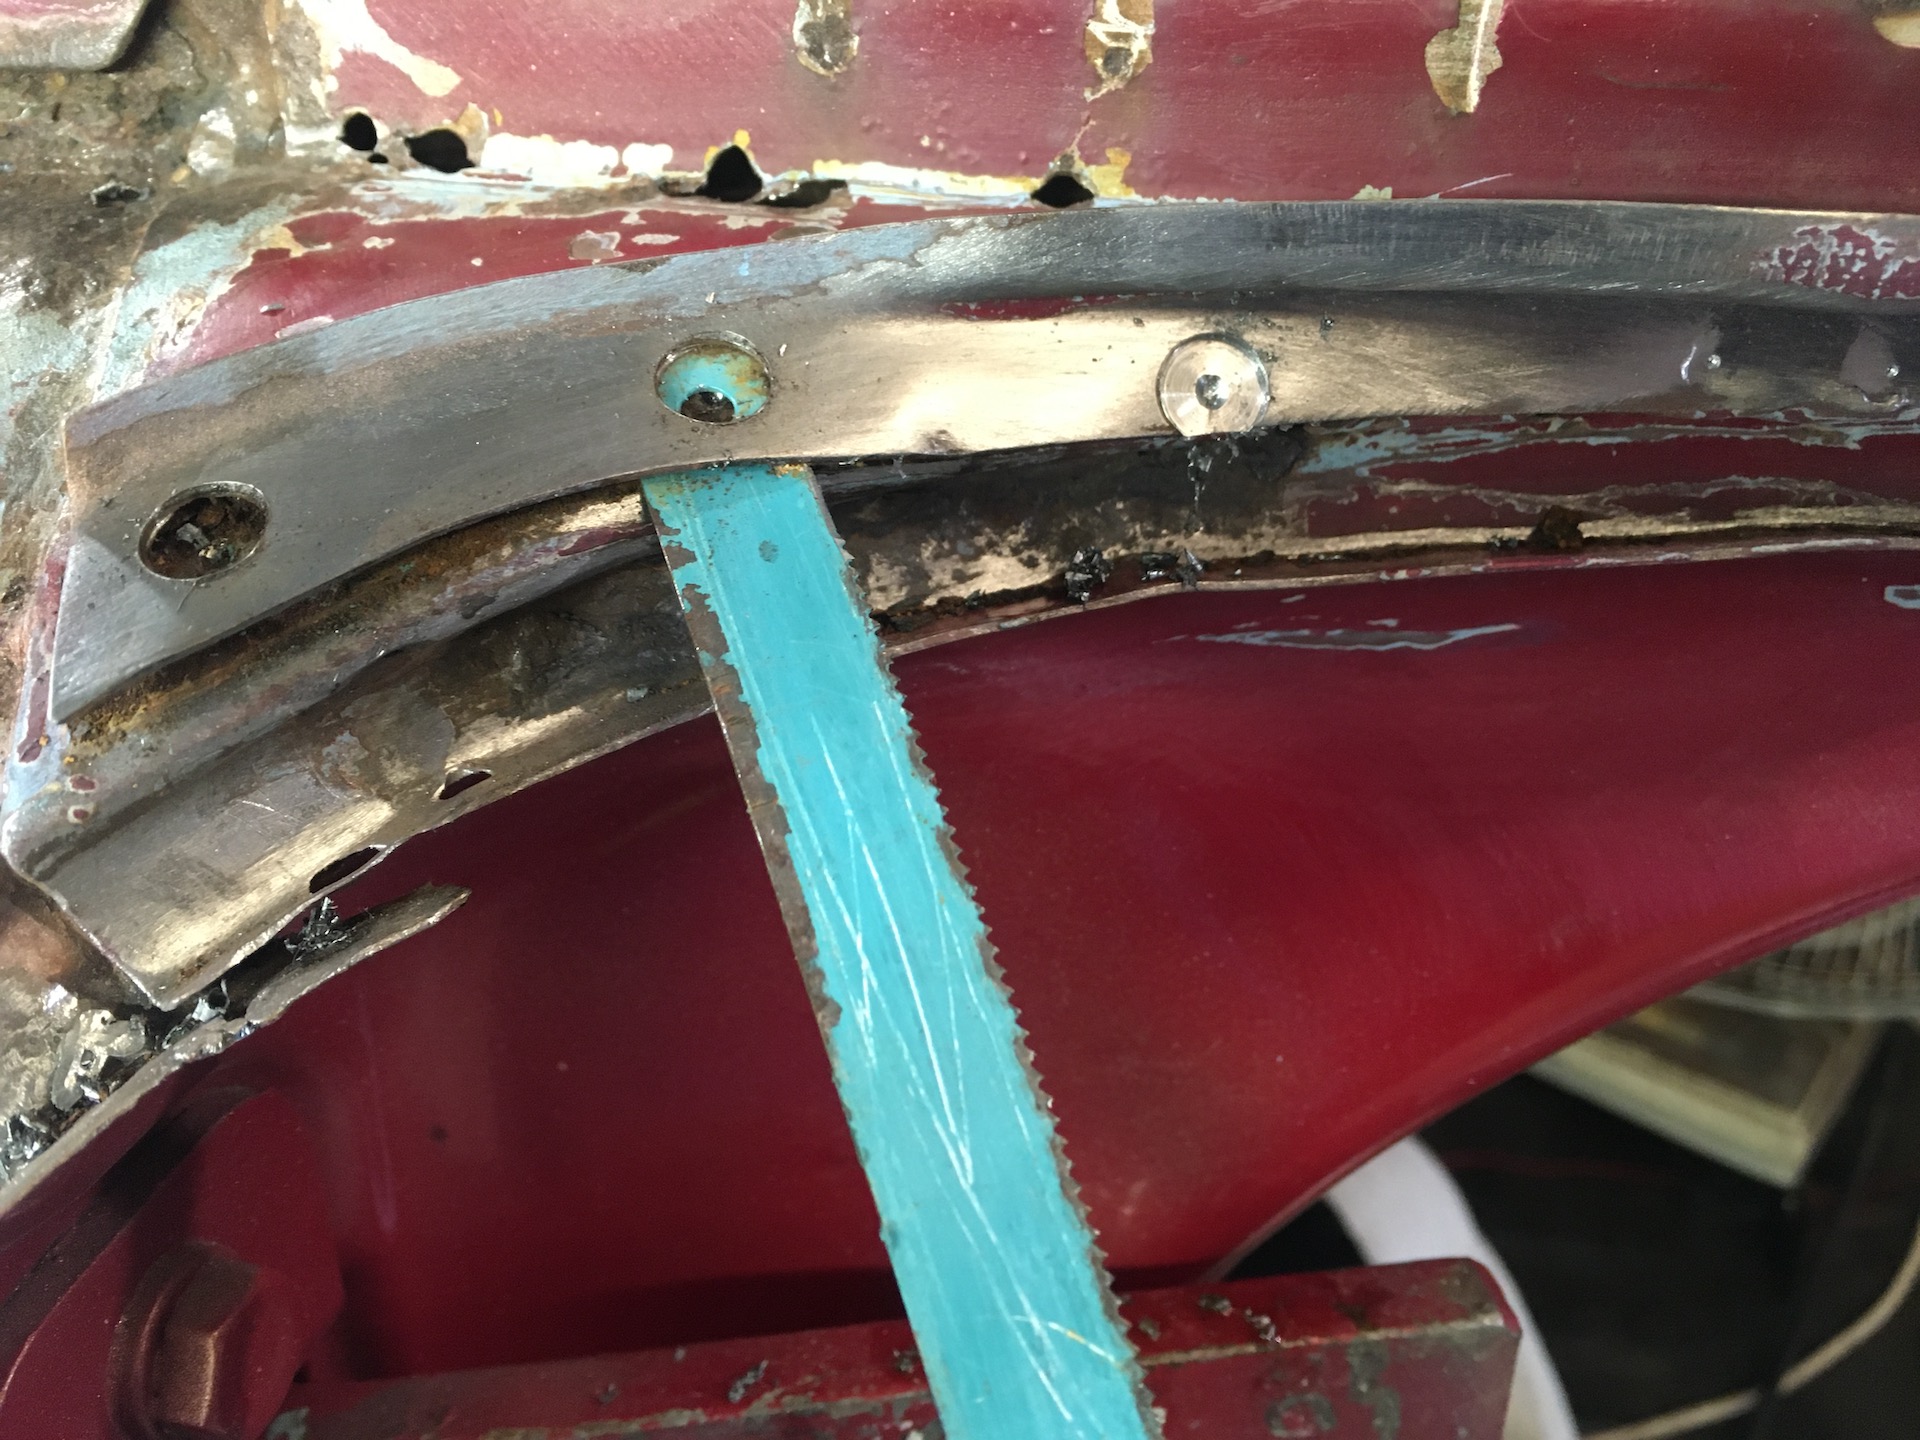
Rob, I am digging your optimism on welding it! I think I can get away with some but if you look back at the pic above the one with the hacksaw blade, the whole top side of the channel is gone. Going to have to make a new piece for that.
Re: Ol' Rusty - FB/EK Sedan
Posted: Mon Dec 14, 2020 9:17 am
by funkyscooter
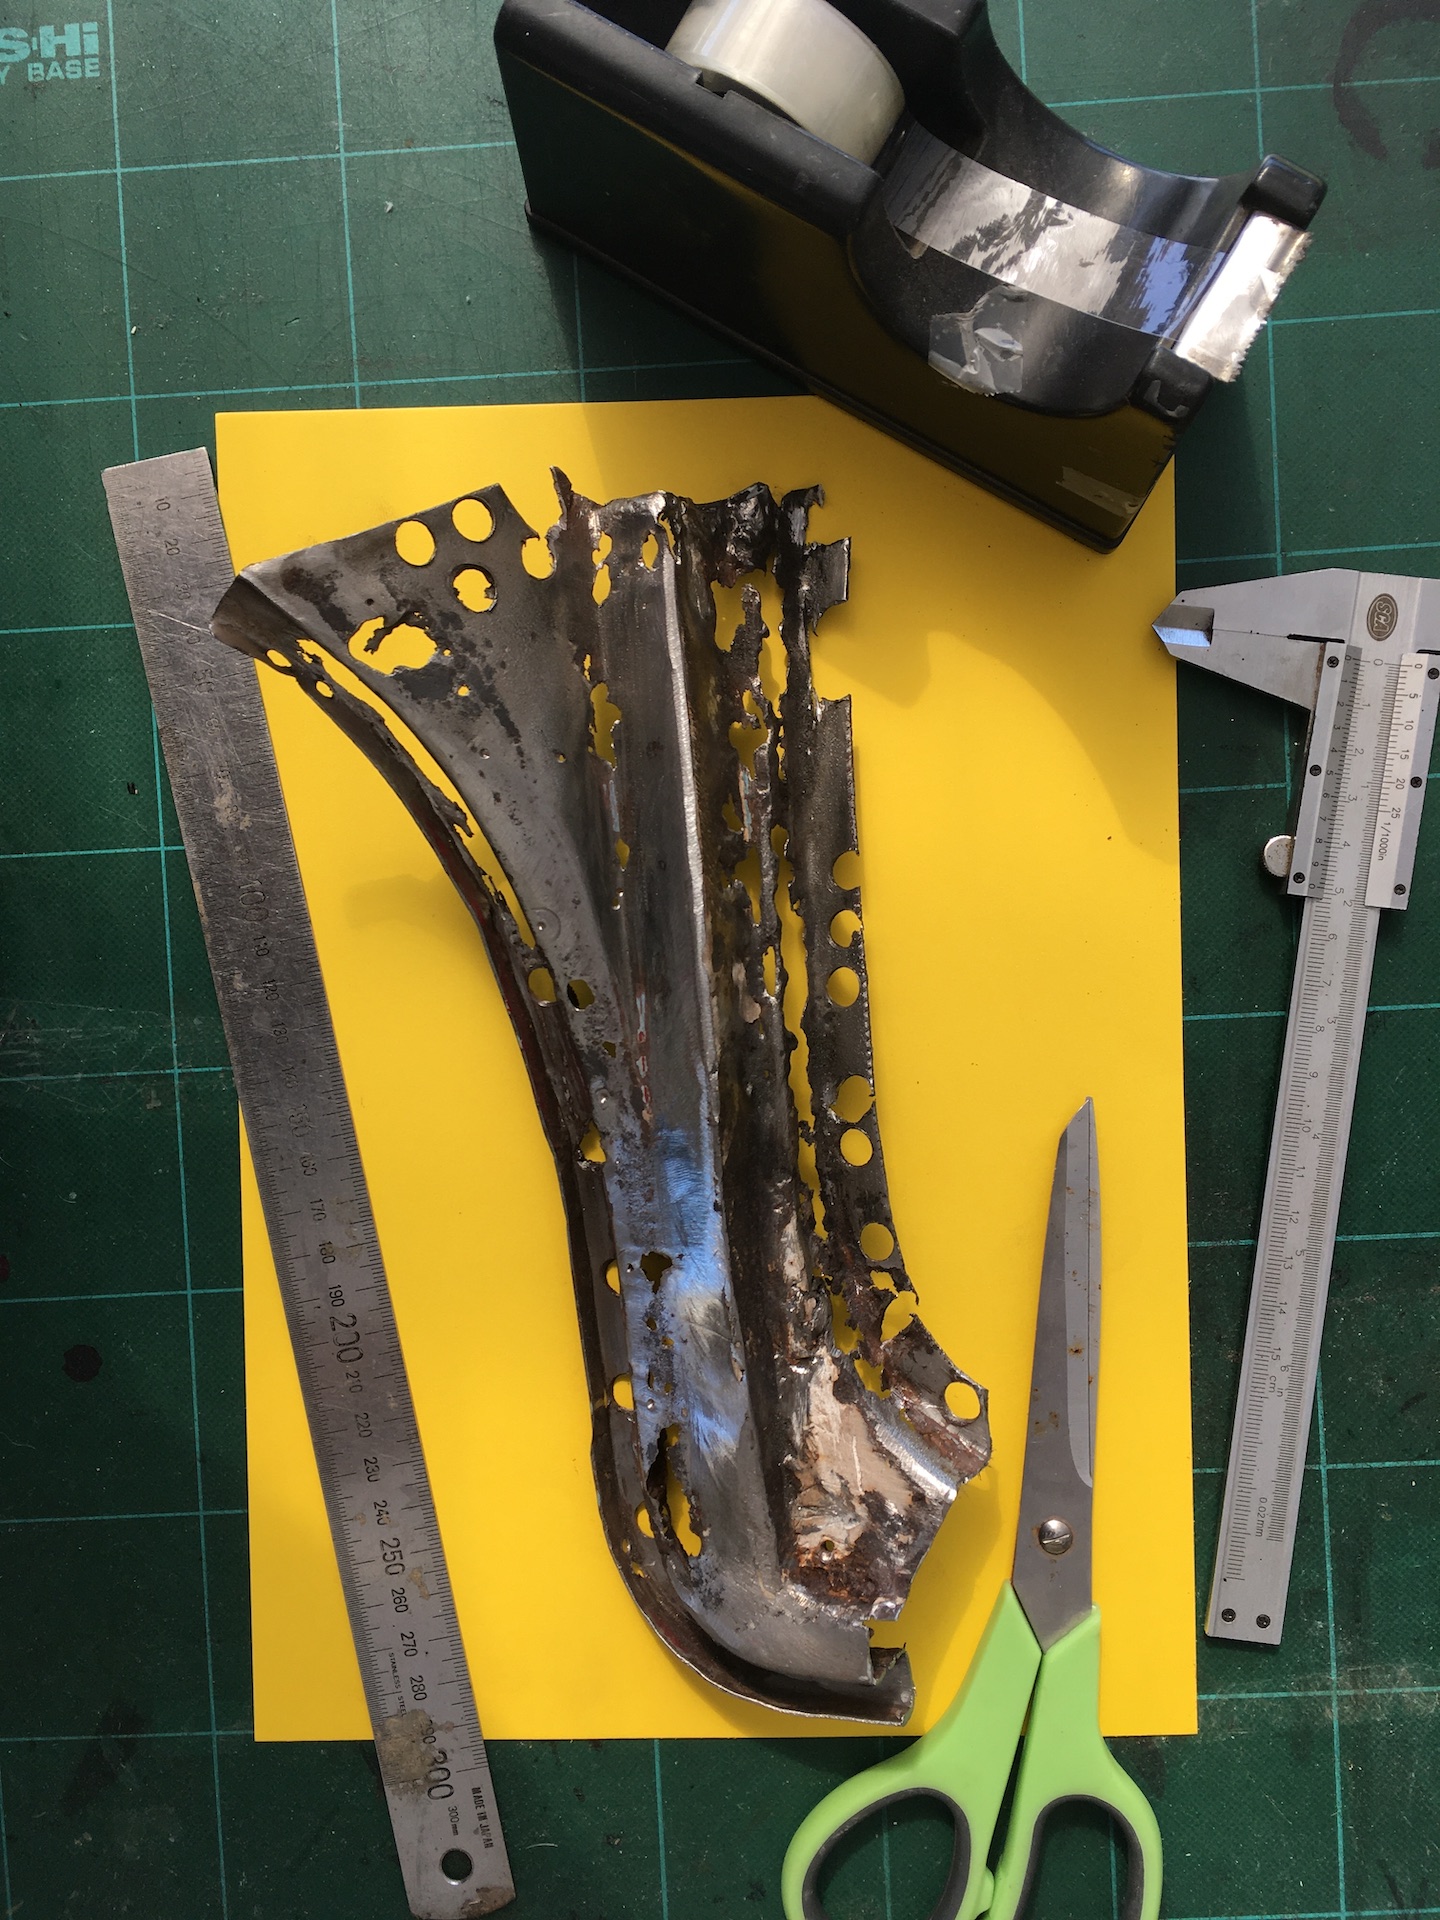
Good advice SunnyTim, drilled and cut it out as you described - got to get rid of that rust.
- IMG_7387.JPG (723.19 KiB) Viewed 1077 times
Rather than go the donor path (which I may have to still explore if this fails), I have decided to expand on my panel making skills.
- IMG_7396.JPG (755.24 KiB) Viewed 1077 times
5 sheets of thick card and a roll of sticky tape later I got this.
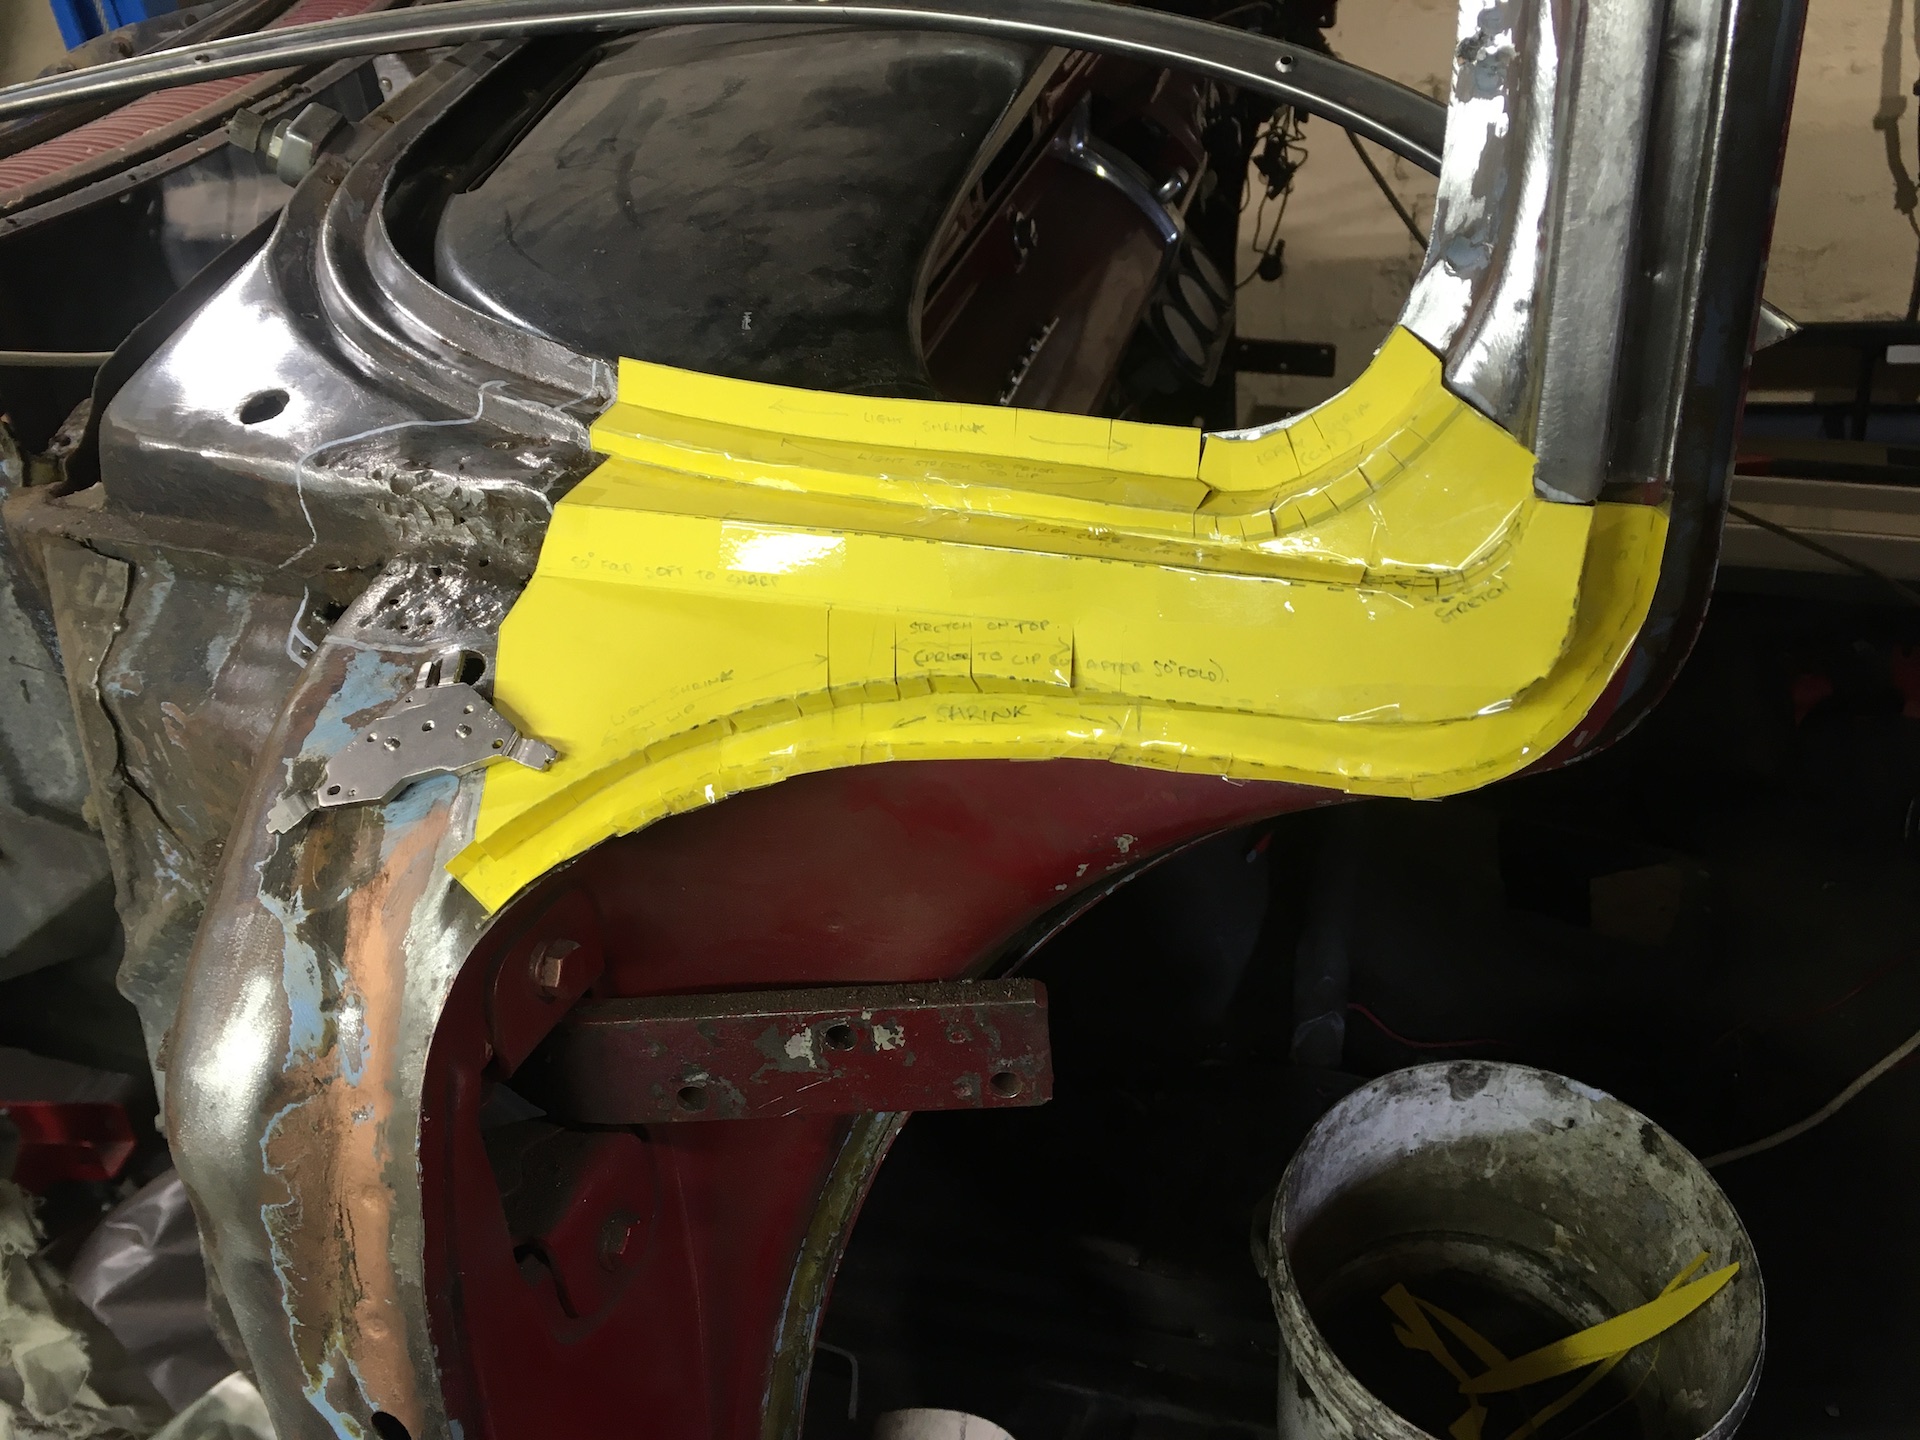
- IMG_7444.JPG (608.46 KiB) Viewed 1077 times
Here are the 4 pieces used to form this panel ready to trace out on some 1mm cold rolled sheet.
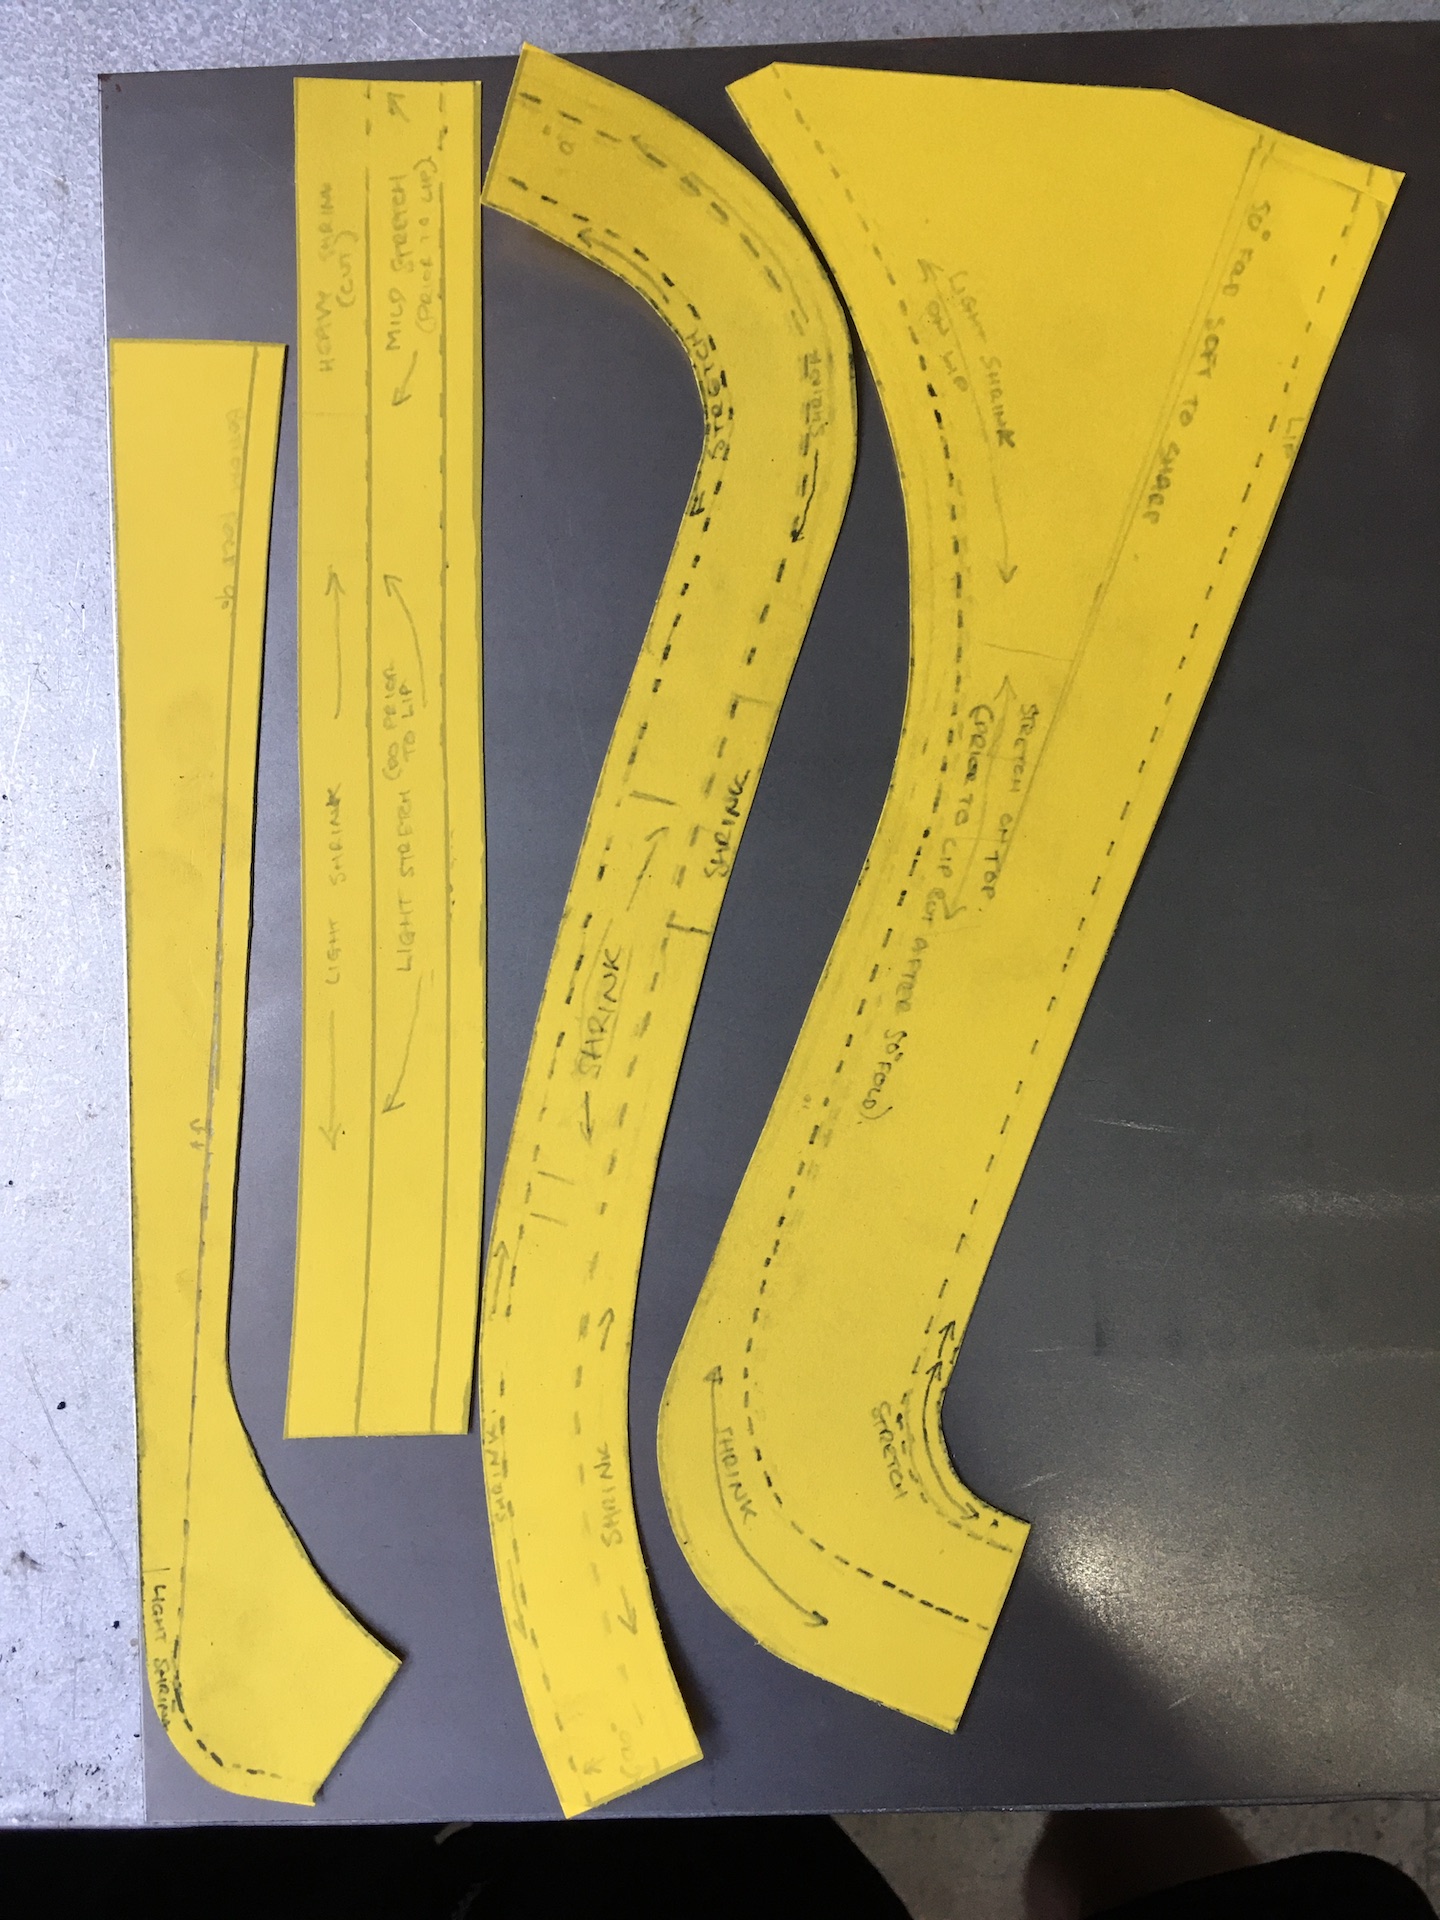
- IMG_7446.JPG (635.85 KiB) Viewed 1077 times
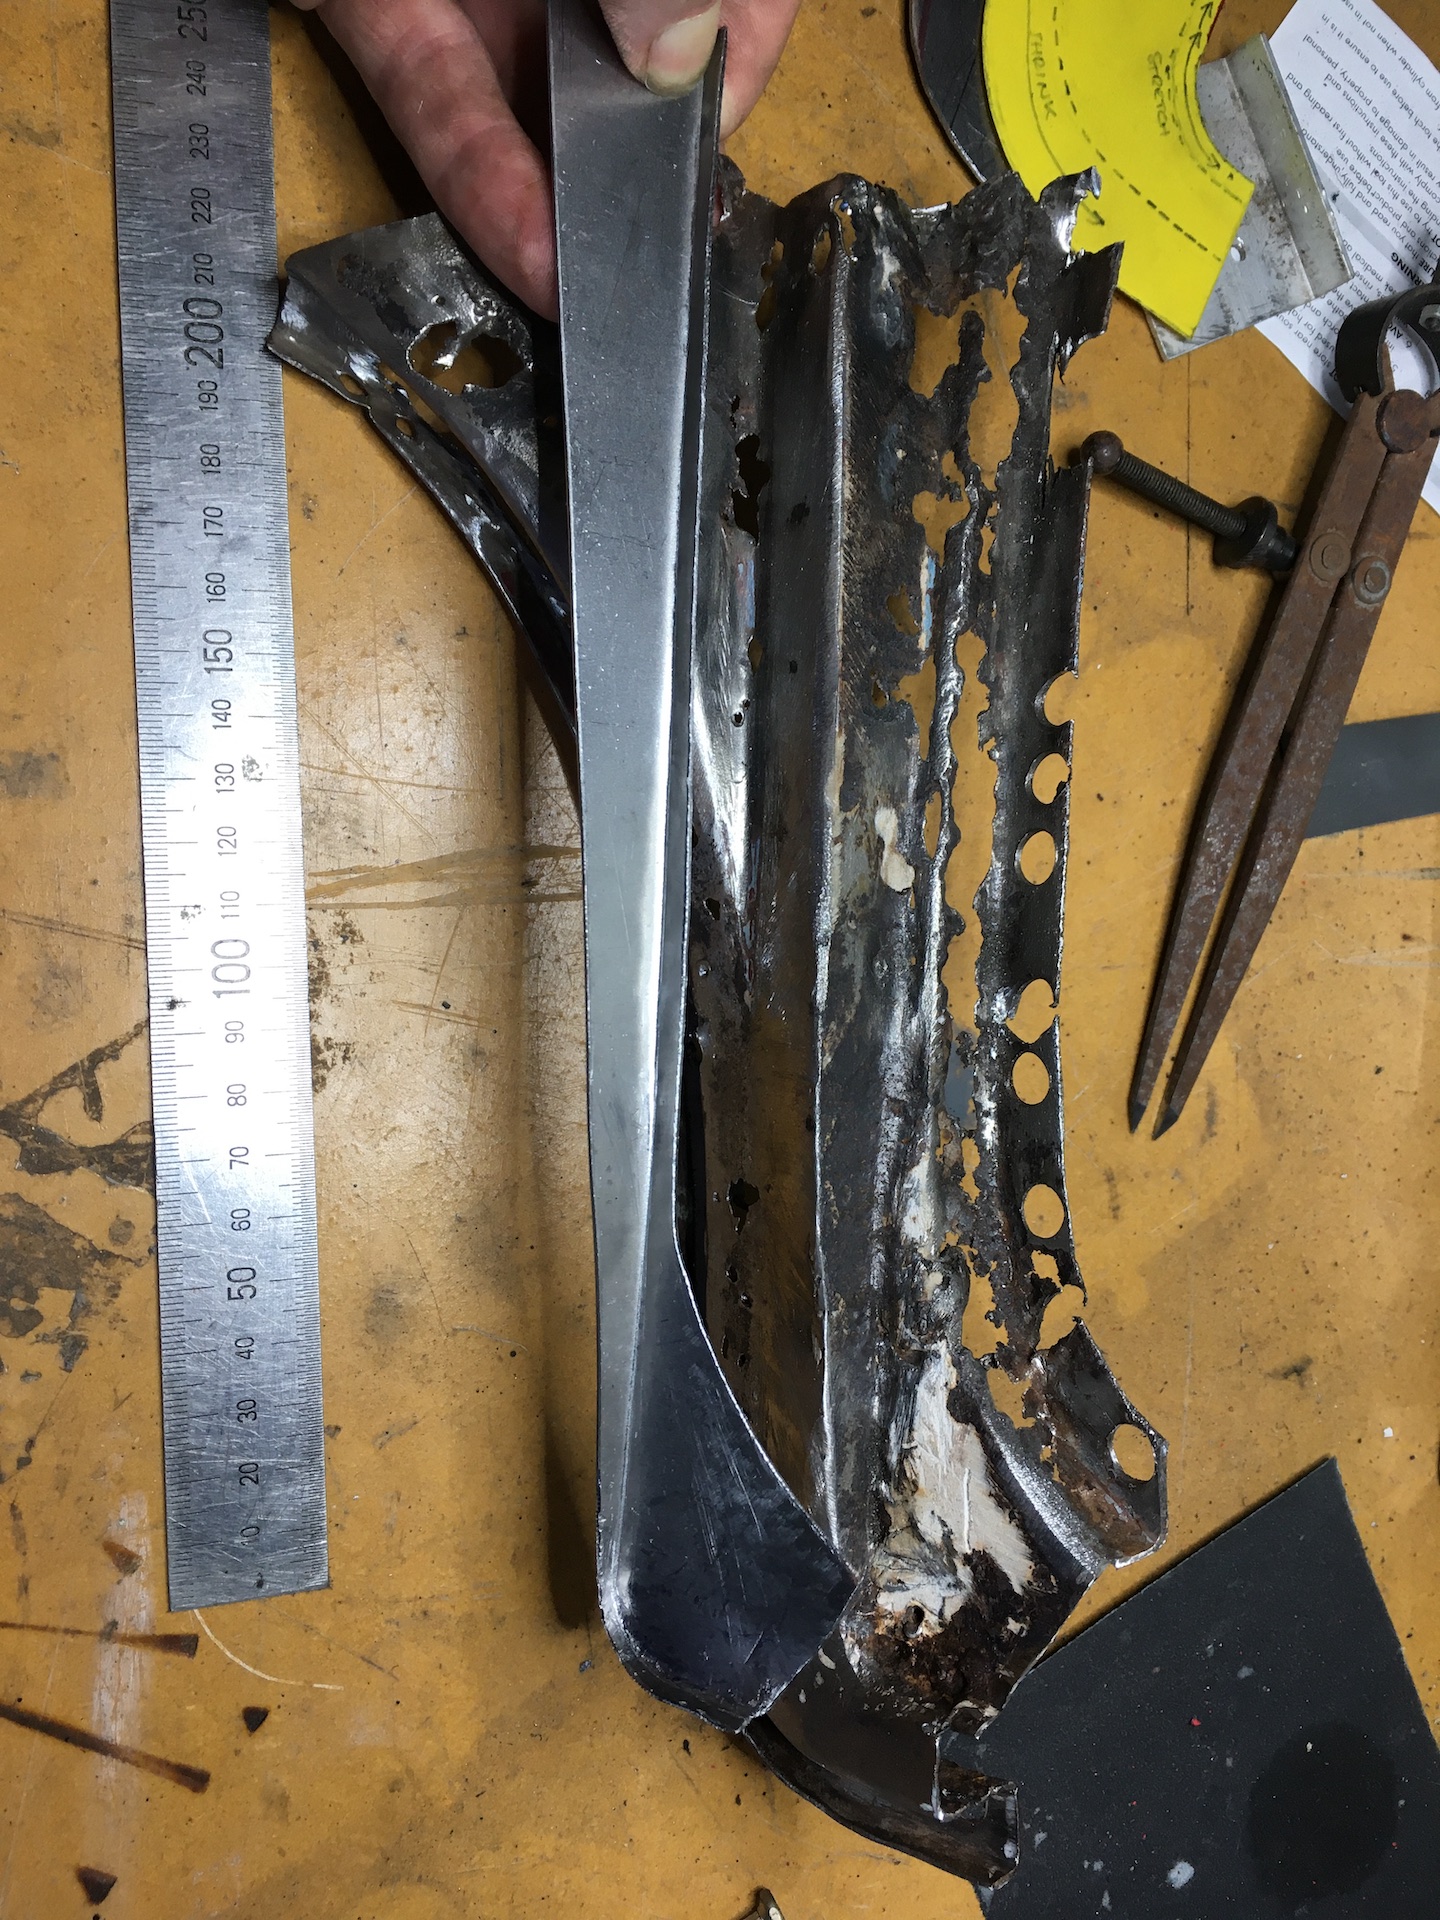
The first piece cut out with aviation snips. Rookie error. Was trying to keep the sheet straight, so this piece ended up badly warped. When I straightened it out in the vice the bottom straight end had a pronounced curve in it. The rest of the pieces were cut with a jigsaw.
- IMG_7447.JPG (878.8 KiB) Viewed 1077 times
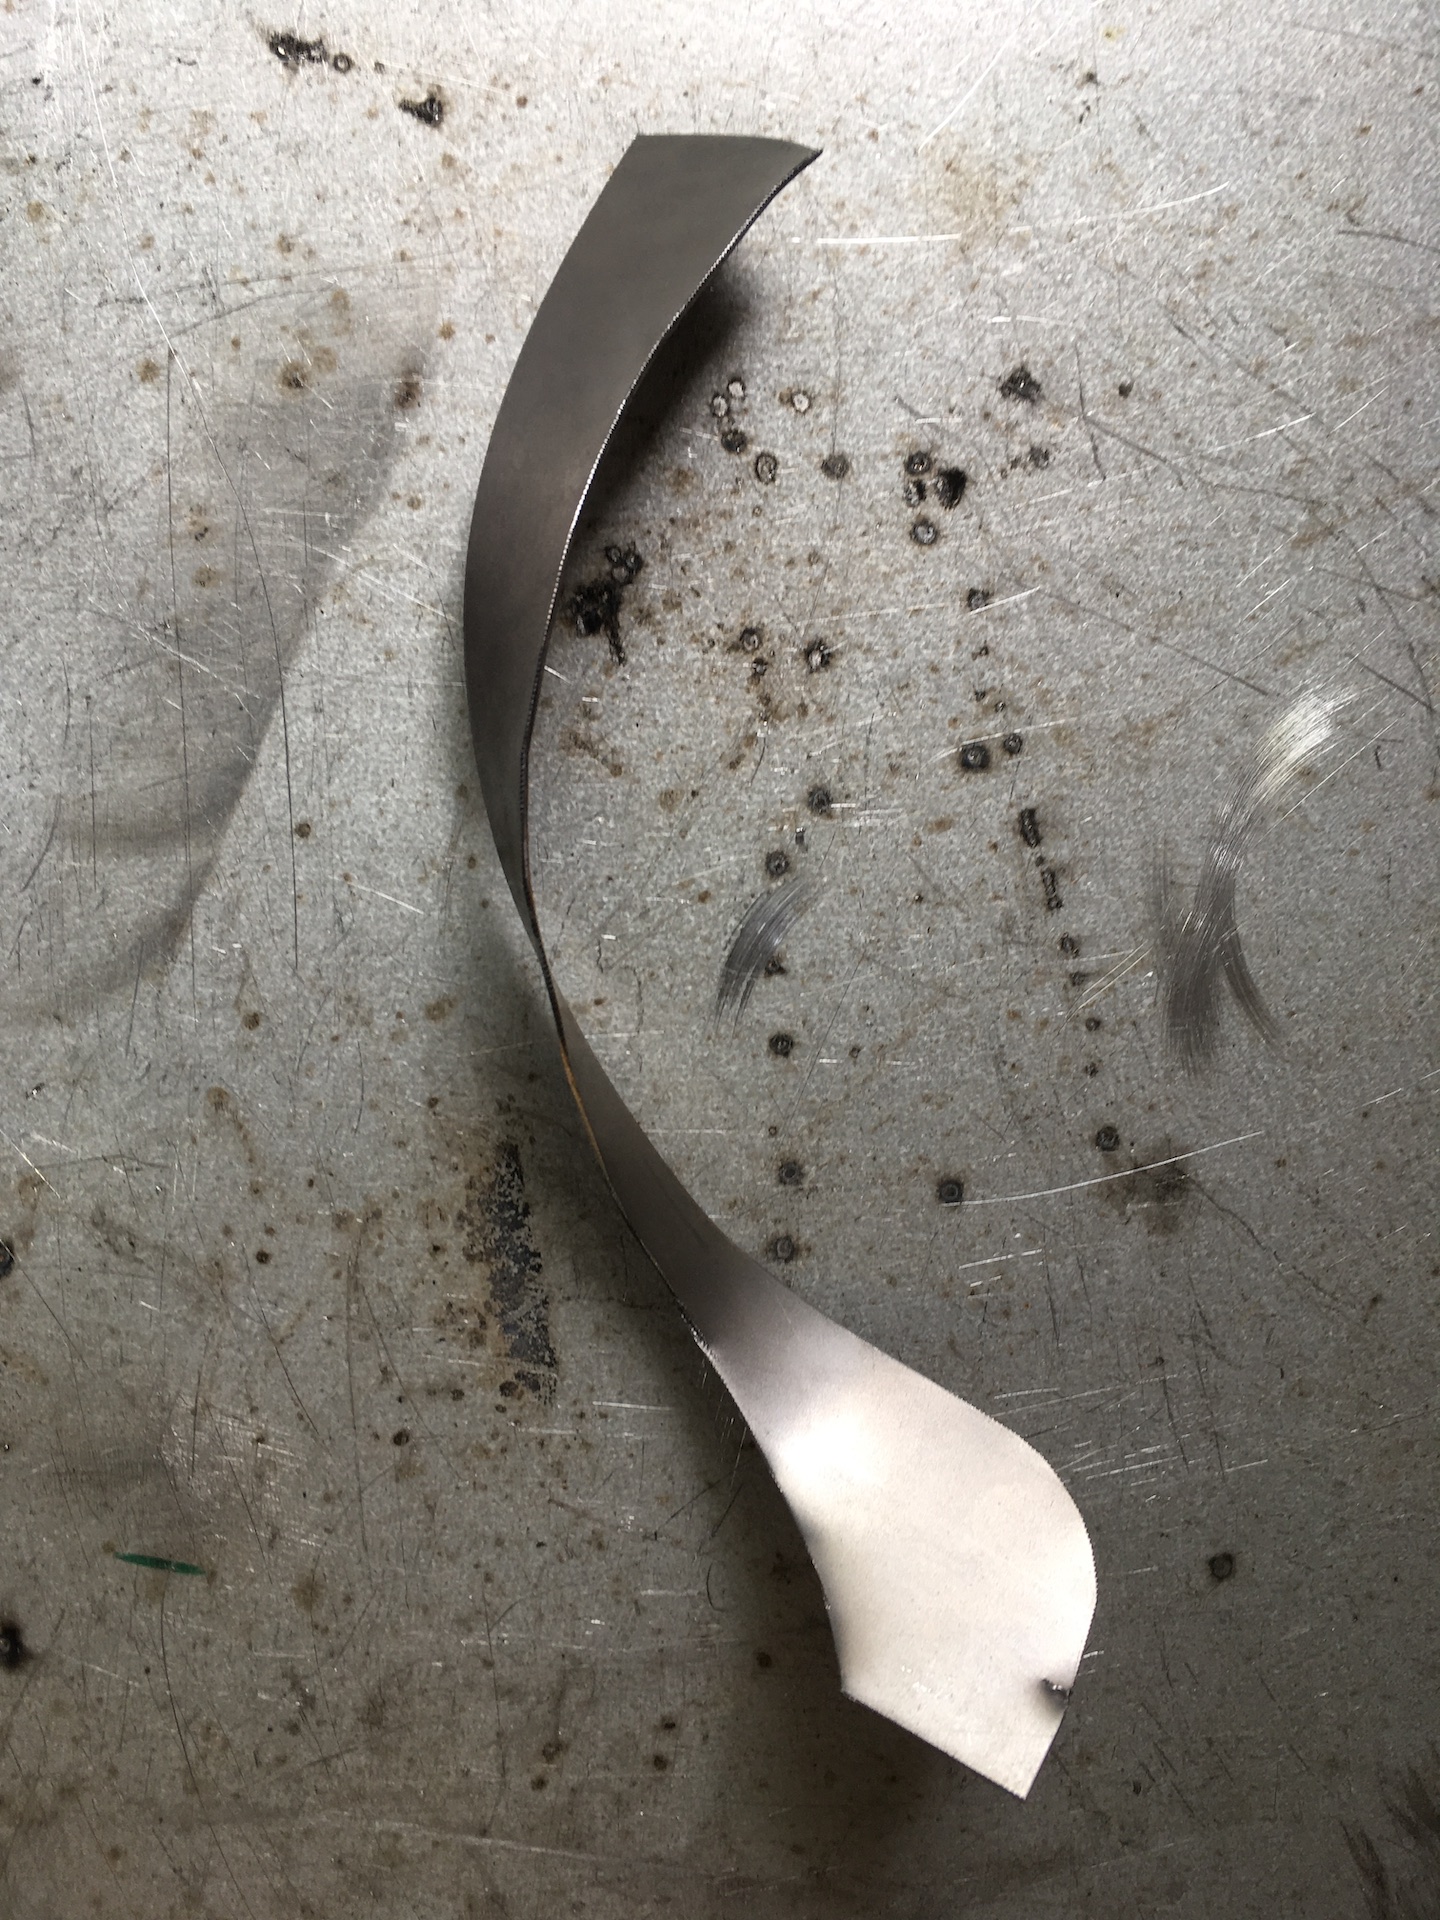
Much hammering later I have ended the day with this. It is one of the easiest pieces.
- IMG_7450.JPG (927.75 KiB) Viewed 1077 times
And on the car. Got a long way to go but its a fun challange.
- IMG_7448.JPG (543.37 KiB) Viewed 1077 times

- IMG_7449.JPG (618.25 KiB) Viewed 1077 times
Now that I think I can do this, plan of attack is to form the other 3 parts, re-hang door and guard to check fit of the paper mockup, adjust and weld the bits together.
Any advice on MIG welding into tight corners? The MIG nozzle is too big to get into small spaces like the rubber channels to plug weld it back onto the car.
Re: Ol' Rusty - FB/EK Sedan
Posted: Mon Dec 14, 2020 10:31 am
by ardiesse
Scott,
You're concerned about getting the business end of the MIG down into the channel where the rubber sits in order to plug-weld . . . My advice is -
Don't form the return completely before welding the piece in. Go to about 30 degrees (say). If you can get yourself a short length of 10x25 flat bar, you can use it as a dolly inside the channel to form the return. Stretching (where the A-pillar curves downwards) is easier than puckering (where you bang your knee if you're tall). A pair of stumpy round-nose pliers is quite good as a tucking fork. Or you can just make a couple of hacksaw cuts and weld them up.
Rob
Re: Ol' Rusty - FB/EK Sedan
Posted: Mon Dec 14, 2020 4:55 pm
by Errol62
Wow you’ve got patience Scotty 8)8)
FB ute fixer upper, EK van on rotisserie
Re: Ol' Rusty - FB/EK Sedan
Posted: Mon Dec 14, 2020 6:06 pm
by funkyscooter
It's metal origami Clay.

