Hey ratbox,
Yes thats what I have on the front, P76.
I was only going with the &*#@ rear for the ventalited disc's. Having seen the Holden setup and how it works, I agree with you that they are better.
Progress
Progress
Hey guys,
Another quick update.
Started playing with the bonnet, fitting the Chev rockets, and 3 days later its finally finished. Also have finished setting up the handbrake and are now starting on finishing off the exhaust system. Due to lack of room around the 9inch I'm going to have to run the pipes under the diff. I may have an attempt at running the tailpipes to the bumper but I don't know how it will work as with the 9 inch and the &*#@ fuel tank there seems to be a lack of room.

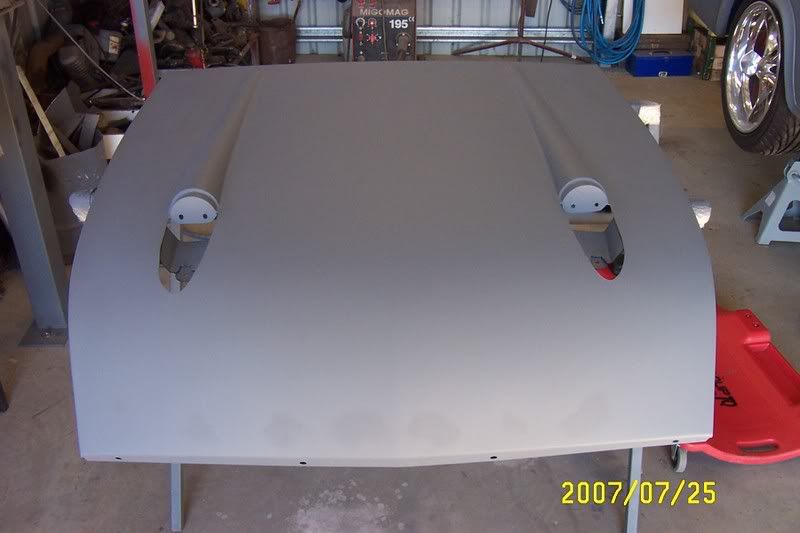
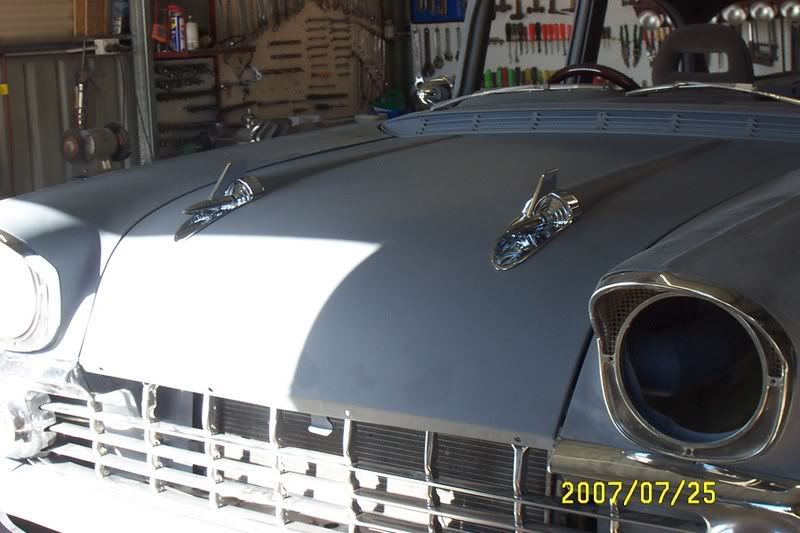
Finally getting to the end of all the setting up as only the air con, electric windows and tailshaft to go before I get serious about the body work.
Cheers
Mal
Another quick update.
Started playing with the bonnet, fitting the Chev rockets, and 3 days later its finally finished. Also have finished setting up the handbrake and are now starting on finishing off the exhaust system. Due to lack of room around the 9inch I'm going to have to run the pipes under the diff. I may have an attempt at running the tailpipes to the bumper but I don't know how it will work as with the 9 inch and the &*#@ fuel tank there seems to be a lack of room.
Finally getting to the end of all the setting up as only the air con, electric windows and tailshaft to go before I get serious about the body work.
Cheers
Mal
Malcolm W.

-
southcoastkustom
- Posts: 537
- Joined: Tue Nov 28, 2006 11:20 pm
- State: NOT ENTERED
- Location: Adelaide, SA
Progress
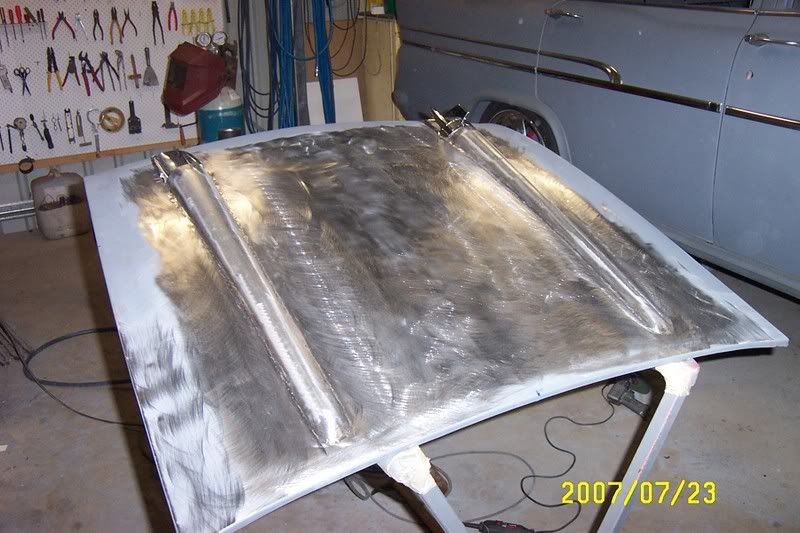
The raised sections in the bonnet from the rockets back aren't from an original 57 Chev, as everywhere I looked they wanted about $300 for a stuffed bonnet. So their made out of 3 inch exhaust tube (left over from the exhaust) cut length ways and shapped to the bonnet and stitched welded in sections until fully welded. With them being shaped to the bonnet with less than 1mm not touching in any one place meant very little destortion. The back edge of the raised sections is the only place that produced a bit of destortion. The center parts had none with only the weld needing some of that plastic stuff. Even the metal around the rockets themselves didn't need any reshaping, as I positioned them in the curve of the bonnet that suited the shape of the 57 rockets. I then cut out the under side of the FB bonnet to make it look real and at the back of the bonnet I cut the bonnet just forward of the cross brace, hammered it down into the raised section and welded it up. So it looks as though thats where the raised section finishes from the under side but in fact it goes back about another 4 inches on the outside. Quite happy with the way they turned out.
Malcolm W.