Scotty's home made Pearl Steering Wheels..
- Sputzwagon
- Posts: 2708
- Joined: Fri Dec 07, 2007 6:27 pm
- State: NOT ENTERED
- Location: Termeil, South Coast NSW
Scotty's home made Pearl Steering Wheels..
In the last 15 years or so I've made a few of these for myself & friends, so if you keep it a secret I'll show you folk how to make a Pearl Wheel for yourselves.
Firstly repair any cracks or damage & give the whole wheel a good rub down with 800 grit wet 'n' dry.
Next you'll need to prime the wheel and bits (horn buttons,gear & indicator knobs etc), these days I use plastic bumper primer as it gives better adhesion and will crack much less due to movement.
Once primed, you can paint the wheel with the first coat of a nice pearl white.
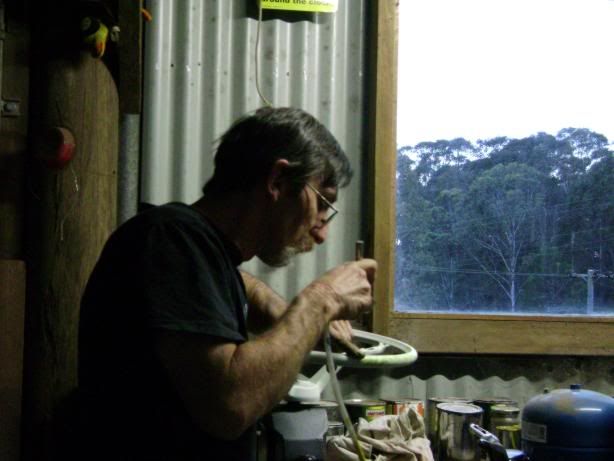
Next comes the fun part (if you own an airbrush this will be easier but you can do similar with a touch up gun on a very turned down fan and amount) I found over the years the best mask used for this look is the "common finger" (pictured) as it has the perfect shapes for he job.
Mix a nice colour similarly to the cars darkest colour. (if you have a white or light colour car paint it in the darker trim colour).
Once you've chased the entire design around and have it to where you like it shoot a coat of clear with a small amount of pearl in to around the whole wheel and then a few coats of clear to finish it off..then TAH-DAH, one cool owner made custom pearl wheel.
Scotty
Firstly repair any cracks or damage & give the whole wheel a good rub down with 800 grit wet 'n' dry.
Next you'll need to prime the wheel and bits (horn buttons,gear & indicator knobs etc), these days I use plastic bumper primer as it gives better adhesion and will crack much less due to movement.
Once primed, you can paint the wheel with the first coat of a nice pearl white.
Next comes the fun part (if you own an airbrush this will be easier but you can do similar with a touch up gun on a very turned down fan and amount) I found over the years the best mask used for this look is the "common finger" (pictured) as it has the perfect shapes for he job.
Mix a nice colour similarly to the cars darkest colour. (if you have a white or light colour car paint it in the darker trim colour).
Once you've chased the entire design around and have it to where you like it shoot a coat of clear with a small amount of pearl in to around the whole wheel and then a few coats of clear to finish it off..then TAH-DAH, one cool owner made custom pearl wheel.
Scotty
Last edited by Sputzwagon on Sat Dec 05, 2009 7:47 am, edited 1 time in total.
[img]http://i249.photobucket.com/albums/gg211/scottyharrod/WOOFTOsmall.jpg[/img]
Woofto Car Club Member No 2
- Sputzwagon
- Posts: 2708
- Joined: Fri Dec 07, 2007 6:27 pm
- State: NOT ENTERED
- Location: Termeil, South Coast NSW
-
- Posts: 3996
- Joined: Wed May 11, 2005 2:19 pm
- State: NSW
- Location: Sydney
- Contact:
great stuff - I'll keep it a secret for sure.
Feelin free in a '61 FB.
Member of FB-EK Holden Car Club Of NSW Inc.
Check out the Rebuild of Old Timer
Member of FB-EK Holden Car Club Of NSW Inc.
Check out the Rebuild of Old Timer
- Sputzwagon
- Posts: 2708
- Joined: Fri Dec 07, 2007 6:27 pm
- State: NOT ENTERED
- Location: Termeil, South Coast NSW
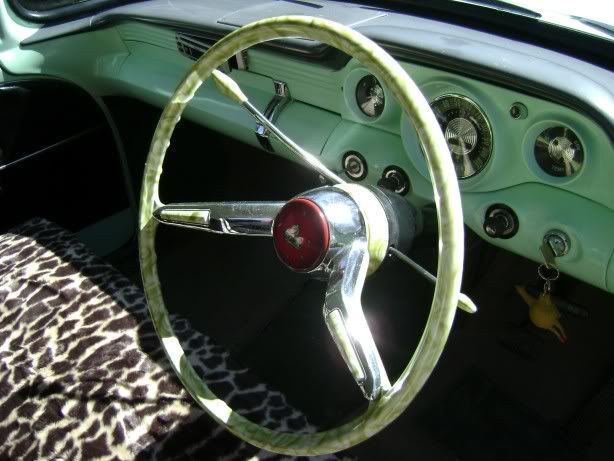
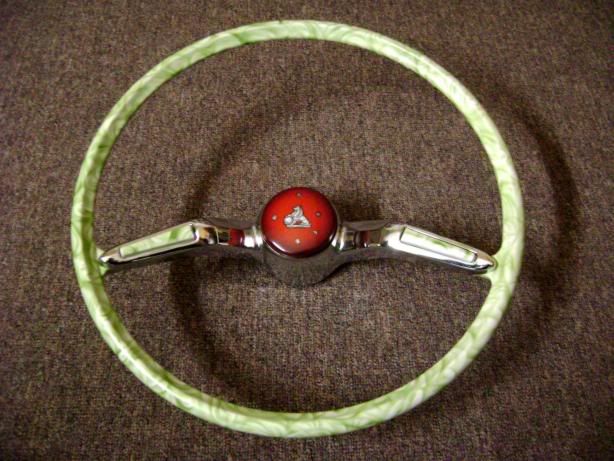
Here's the finished wheel & horn rim etc.
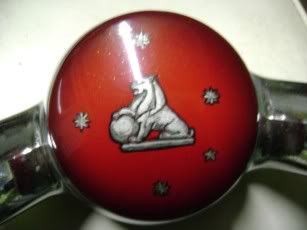
Only have to hand buff the wheel (I've already buffed 'n' polished the center button...note the small amount of flake in the center button..had to hand paint it as the original was very cracked and faded just shot some red, flake & faded some black around the edge).
Next fit it to the car
Scotty.
Only have to hand buff the wheel (I've already buffed 'n' polished the center button...note the small amount of flake in the center button..had to hand paint it as the original was very cracked and faded just shot some red, flake & faded some black around the edge).
Next fit it to the car
Scotty.
[img]http://i249.photobucket.com/albums/gg211/scottyharrod/WOOFTOsmall.jpg[/img]
Woofto Car Club Member No 2
- Sputzwagon
- Posts: 2708
- Joined: Fri Dec 07, 2007 6:27 pm
- State: NOT ENTERED
- Location: Termeil, South Coast NSW
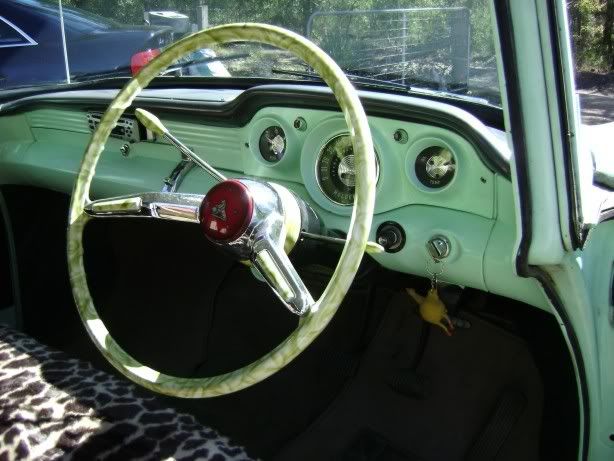
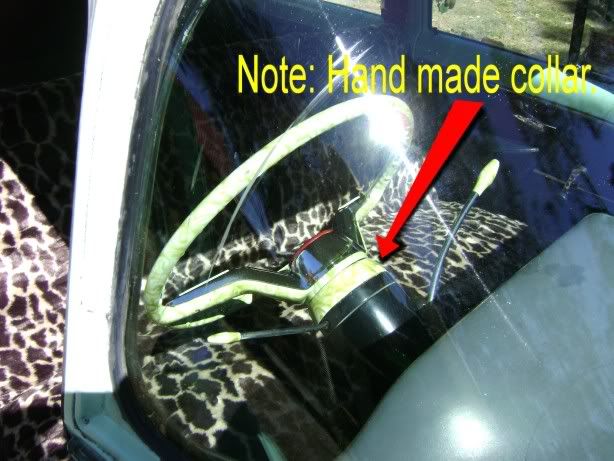
Finally in the car...
If any of you decide the EJ/EH wheel is for you, just remember that the wheel is totally different to an FB/EK one and there are a few things needed to do when fitting one..as follows:
(1): the indicator pins are too far out and need to be cut off and pins placed closer to the center (I used a drill and two screws for this).
(2): the FB/EK wheel has a large dish that wraps around the column as not to see the horn & indicator pieces, THE EJ/EH WHEEL DOES NOT! Therefore it is needed to make a collar that hides this (Picture 3), I made mine by firstly wrapping masking tape around the area and lightly spraying a release agent (cooking oil in a can) then fibreglassing a home made collar. For this I found my hardener has gone hard so I faced the problem from another angle and used 'Car Glass' ('Gorilla Hair' as popularly known) instead and when set removed it from the column and set about a lot of sanding grinding and filling!
(3): once all the parts are ready, paint them as you like (I stuck with the pearl green to match the wheel) but you can paint the collar the same as the column if you want.
(4): wash the car and go cruizin' in style!
Scotty.
[img]http://i249.photobucket.com/albums/gg211/scottyharrod/WOOFTOsmall.jpg[/img]
Woofto Car Club Member No 2