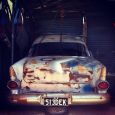
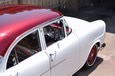
My 1961 EK Mild Kustom Buildup.

Post photos of your pride and joy, or updates on your rebuild!

Moderators: reidy, Blacky

Post Reply
mrs ratbox

Post by mrs ratbox »

first don't go to autobarn unless you absolutley have to
just get flattening agent/base whatever you want to call it added to yor colour, and get it mixed at about 5-10% works for me :wink:
User avatar
DeadSled
Posts: 501
Joined: Mon Mar 24, 2008 9:14 pm
State: QLD
Location: Brisbane, Australia

Post by DeadSled »

Ah ok awesome.

On the subject of Autobarn.. i'd be getting paint from there because Harts across the road is HEAPS expensive.. and well i can't afford it.

Only other parts will be like maintenence / rebuilding components sorta stuff. Unless they all of a sudden get an influx of Moon Eyes gauges, Smoothie wheels and cool old hubcaps and stuff :P :wink:
Nick.
mrs ratbox

Post by mrs ratbox »

mainly only talking about mixed colours re: autobarn, cause nine times out of ten yor dealing with someone who doesn't know any more than you or i do about paint
bexterity

Post by bexterity »

DeadSled wrote: He said that acrylic is naturally flattish / suede.. and it becomes glossy with clear coat and cut and buff.
LOL acrylic is shiney straight off the gun!

you can then wet/dry sand it with 1500/2000 and then cut and polish it to give it a mean shine and to remove any dust etc.


can't wait to see it painted, will look good 8)
User avatar
DeadSled
Posts: 501
Joined: Mon Mar 24, 2008 9:14 pm
State: QLD
Location: Brisbane, Australia

Post by DeadSled »

Hey Bec,

Haha.. i've never done this before you know :P

I'm keen to paint it myself though.. i think it'll be awesome fun. Its good to see somethin go from a shitter in a paddock to a wicked drivin car as well.. so we are tryin to do all the work ourselves.

Some of the panels are infact ready for paint though but i don't have the money for the paint :cry:

I hate first year apprentice wages..
Nick.
User avatar
DeadSled
Posts: 501
Joined: Mon Mar 24, 2008 9:14 pm
State: QLD
Location: Brisbane, Australia

Post by DeadSled »

Update again..

Windscreen area finished.

Image

Windscreen / Door Jam..

Image

Cowl.. middle bit..

Image

A Door sprayed.. you can see all the scuff marks from the sander.. maybe not enough primer. Will rub back and spray in the colour i want as i'm not using black anymore.

Image

Whole Car.. front side..

Image

Another.. sits so high with no weight in it..

Image

Ass end..

Image

Dash..

Image
Nick.
User avatar
Devilrod
Posts: 7394
Joined: Fri Apr 30, 2004 12:55 pm
State: VIC
Location: Beaconsfield, Vic

Post by Devilrod »

Nick I'd let your dad do all the rust repairs, seriously that is good work.

Plus the money you save you can put towards getting your paint from a decent supplier. :lol: :lol:

The door in black turned out fine, I think the car's going to look good when done. As for the height thats an easy fixed....
Speed and Style........... One day I'll get the speed bit.
User avatar
DeadSled
Posts: 501
Joined: Mon Mar 24, 2008 9:14 pm
State: QLD
Location: Brisbane, Australia

Post by DeadSled »

Hey DR,

Yeah.. i probably will. I do have a few other cars in mind that i will be getting after this is done.. (1960 Belair and a Charger..) and i will give them a go myself. Charger needs heaps although the Belair doesnt. So i will do them myself.

I'm thinkin colour wise.. a flattish real light blue.. same colour steelies and whitewalls.. top of dash and then having the lower dash white, steering wheel and column white and interior white with blue inserts. Then get some nice Moon gauges to set off the look and it'll be wicked.
Nick.
User avatar
Devilrod
Posts: 7394
Joined: Fri Apr 30, 2004 12:55 pm
State: VIC
Location: Beaconsfield, Vic

Post by Devilrod »

Sounds good. Just one question, does that mean all the insides of the doors will be white? Or blue? Doing the dash the way your suggesting may cause some grief in tying it all together. Unless of course every bit of steel bar the top of the dash is done white. Done right though it will look pretty trick.

Also maybe look into doing the gauges to suit, ie factory colour numbers (near enough to white and the black done in the light blue...
Speed and Style........... One day I'll get the speed bit.
User avatar
(AUST)Mod
Posts: 2272
Joined: Sun May 07, 2006 11:16 pm
State: WA
Location: Perth

Post by (AUST)Mod »

Is your Dad fixing it with metal or bog?
Craig wrote: Andrew you have a red so I wouldn't race it :wink:

Image
User avatar
DeadSled
Posts: 501
Joined: Mon Mar 24, 2008 9:14 pm
State: QLD
Location: Brisbane, Australia

Post by DeadSled »

DR,

Good point.. I didn't think of the door jams.. Bit of a predicament now.. I'll work it out :P

Aust,

Metal. Bog over the top to make it look fancy in the places where its less fancy on the metal work :P
Nick.
User avatar
DeadSled
Posts: 501
Joined: Mon Mar 24, 2008 9:14 pm
State: QLD
Location: Brisbane, Australia

Post by DeadSled »

So heres an update.

First off.. to answer what DR asked me earlier.. i've decided.. dash will be blue on the top and white on the bottom with the column / wheel. Door jams will be blue as well as they will flow in with the top of the dash.

Now onto the assload of pics..

Passenger side Windscreeen area.. bare metal and finished.

Image

With a bit of bog and primer..

Image

All smoothed out..

Image

Left side of cowl.. I actually missed the right hand side as Dad did it in a day and i never got pics of it. He had to peel out the top side to weld in the panel.. then flip it back down and reweld it in. He found welding from inside the car was too much of a pain in the ass.

Image

Inner gaurd / Windscreen / Dash of RHS. Once again.. primer = bare metal underneath. Except for the windscreen bit thats been shown before..

Image

Dash.

Image

Rear drip rail that was rusted out.

Image

Image

Drip Rail in primer.

Image

Other side Drip Rail. This side was previously cut off.

Image

Behind rear bumper panel..

Image

Right side..

Image

Left side..

Image

Front Left Door repair.. Not finished.

Image

Image

Floor bit we found..

Image

RH Rear Inner Sill..

Image

RH Front.. Yes that bit of the floor in-between what we are in progress repairing and the sill thats gone.. sorta dropped a little. Not to worry. We will fix it.

Image

Some sorta support bit.. under the RH Front Sill area..

Image

Panel to replace it..

Image

Thats it so far.[/img]
Last edited by DeadSled on Mon Apr 21, 2008 8:54 pm, edited 1 time in total.
Nick.
EKSPCL
Posts: 794
Joined: Sat Mar 15, 2008 11:36 pm
State: NOT ENTERED
Location: Langwarrin, Victoria

Post by EKSPCL »

Nice work deadsled. Plenty 'o' work on the rust hey :shock:

I'm in the process of doing the same parts on the under side and the floor.
As you may have seen in my post "My Special Toy".

You have a bit more rust to repair than I do as mine is all in the floor etc.

Doing well :) Keep us posted. I like pics :wink:
My 6yr old daughter said
"Dad your car's looking great! Which end is the front?"
User avatar
Devilrod
Posts: 7394
Joined: Fri Apr 30, 2004 12:55 pm
State: VIC
Location: Beaconsfield, Vic

Post by Devilrod »

Good to see you progressing, great work!!! 8) Should look really good.
Speed and Style........... One day I'll get the speed bit.
TAYZ 58
Posts: 297
Joined: Mon Jun 20, 2005 7:14 pm
State: NOT ENTERED

Post by TAYZ 58 »

Looks like its going along good. I sandblasted an EJ ute today.........yrs looks brand new!!! Keep up the good work and persist with it
Post Reply