Ol' Rusty - FB/EK Sedan

Post photos of your pride and joy, or updates on your rebuild!

Moderators: reidy, Blacky

User avatar
funkyscooter
Posts: 721
Joined: Wed Aug 16, 2017 8:12 am
State: NSW
Location: Sydney

Re: Ol' Rusty - FB/EK Sedan

Post by funkyscooter »

Thanks for the encouragment!
Took the bonnet camping yesterday as the weather was good.
IMG_9856.jpeg
IMG_9856.jpeg (795.19 KiB) Viewed 1296 times
It has been sitting in the shed for a few weeks now in bare steel (with a coat of easyphos to temporarily stop it from rusting). I finally got around to ordering some rattle cans of 2K epoxy primer.
IMG_9862.jpeg
IMG_9862.jpeg (595.48 KiB) Viewed 1296 times
These SprayMax cans are those 2 part ones where you pierce an inner chamber in the can to mix the paint and hardener. Pot life once mixed is 8 hours at 20C.
This took a can and a half of high fill just to paint the top (the underside is already coated in KBS black).
IMG_9860.jpeg
IMG_9860.jpeg (815.62 KiB) Viewed 1296 times
So what to do with a half can - find more things I have stored and put some paint on them. This took a can.
IMG_9859.jpeg
IMG_9859.jpeg (832.32 KiB) Viewed 1296 times
Then I did the front passenger door outer and the bottom and top frame of the drivers door that I just repaired. 4 cans in total. Last can stopped spraying paint with at least 50 mls in the can (I weighed it) which was annoying, but overall pretty happy with the results.
Scott
(Not so rusty) Ol' Rusty - FB/EK Sedan
Blacky
Posts: 14274
Joined: Tue Jul 20, 2004 8:58 am
State: WA
Location: up in the Perth hills

Re: Ol' Rusty - FB/EK Sedan

Post by Blacky »

an expensive but convenient way to do it - I need to paint the rims for my ute this weekend, bought a litre of primer the other week then put it somewhere safe, do you think I could find it ??????? :econfused: :econfused: Found it on Thursday night, figured I would buy more yesterday if I couldn't find it so I had ANOTHER look through the shed and there it was - right where I had left it :roll:

I have used a few of them in the past they are super handy for touch ups and little jobs - got some when I rebuilt the car trailer and they still worked for 3 or 4 days - admittedly in winter.
I started with nothing and still have most of it left.


Foundation member #61 of FB/EK Holden club of W.A.
EK283
Posts: 2709
Joined: Thu Mar 16, 2006 9:51 pm
State: NSW
Location: SYDNEY NSW

Re: Ol' Rusty - FB/EK Sedan

Post by EK283 »

Look how good the finish is with a can !!

Epoxy paint is a great invention !

Greg
So many cars so little time!
User avatar
funkyscooter
Posts: 721
Joined: Wed Aug 16, 2017 8:12 am
State: NSW
Location: Sydney

Re: Ol' Rusty - FB/EK Sedan

Post by funkyscooter »

Just to keep the progress here up to date, I went a bit overboard with power window control. Look here https://www.fbekholden.com/forum/viewto ... 49#p278049 if you are interested.
Scott
(Not so rusty) Ol' Rusty - FB/EK Sedan
User avatar
funkyscooter
Posts: 721
Joined: Wed Aug 16, 2017 8:12 am
State: NSW
Location: Sydney

Re: Ol' Rusty - FB/EK Sedan

Post by funkyscooter »

After just over 7 months I have finally got my all my diecast and steel back from the chrome plater. Overall happy with the result, especially the die cast. 29 pieces in total. Here are a few.
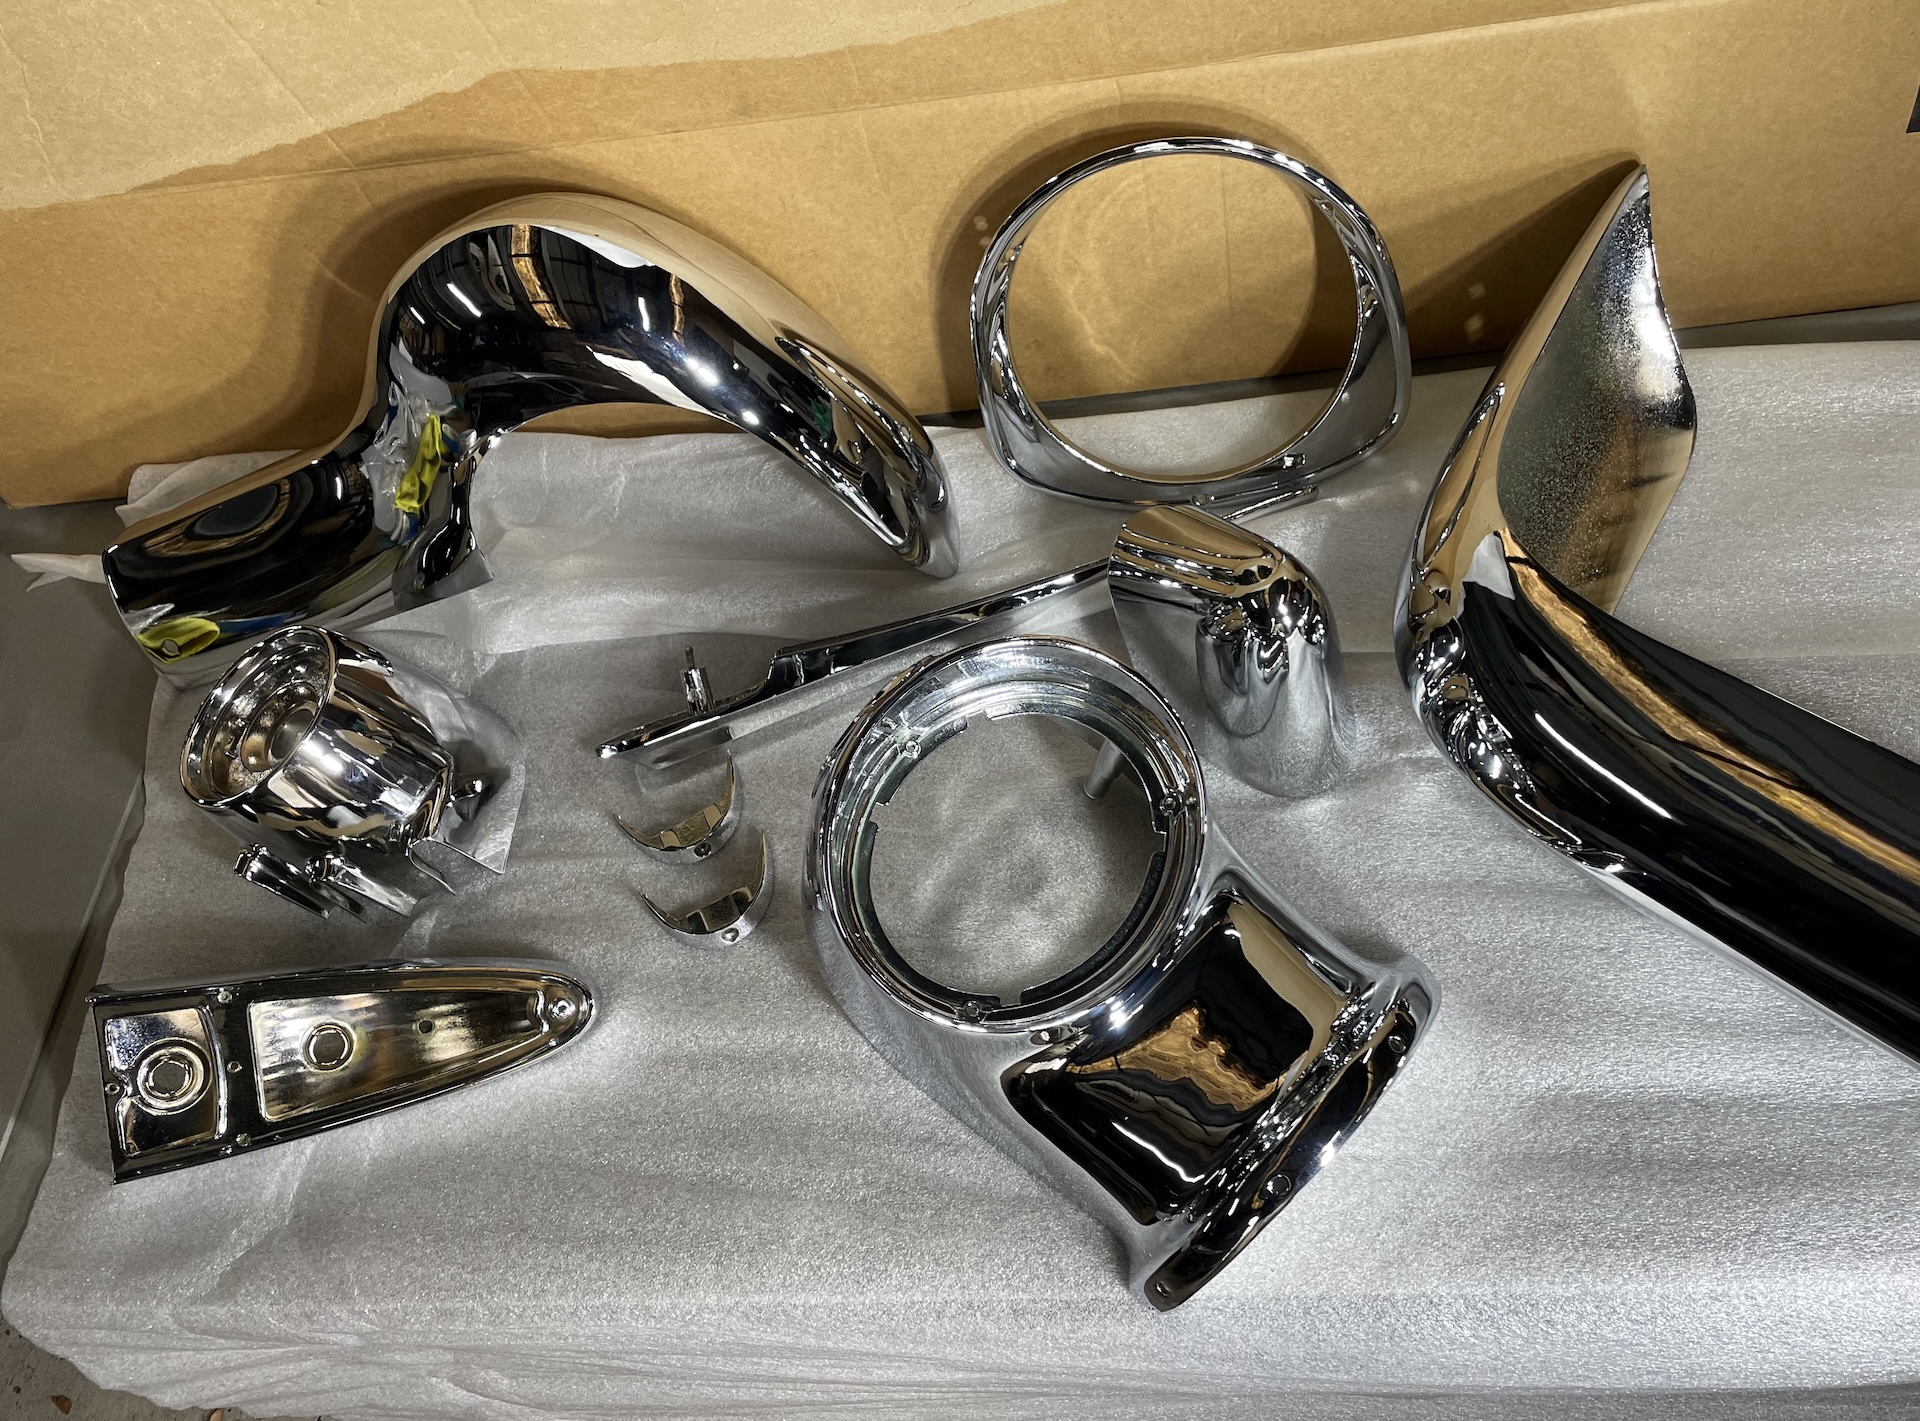
IMG_0019.jpeg
IMG_0019.jpeg (1.29 MiB) Viewed 640 times
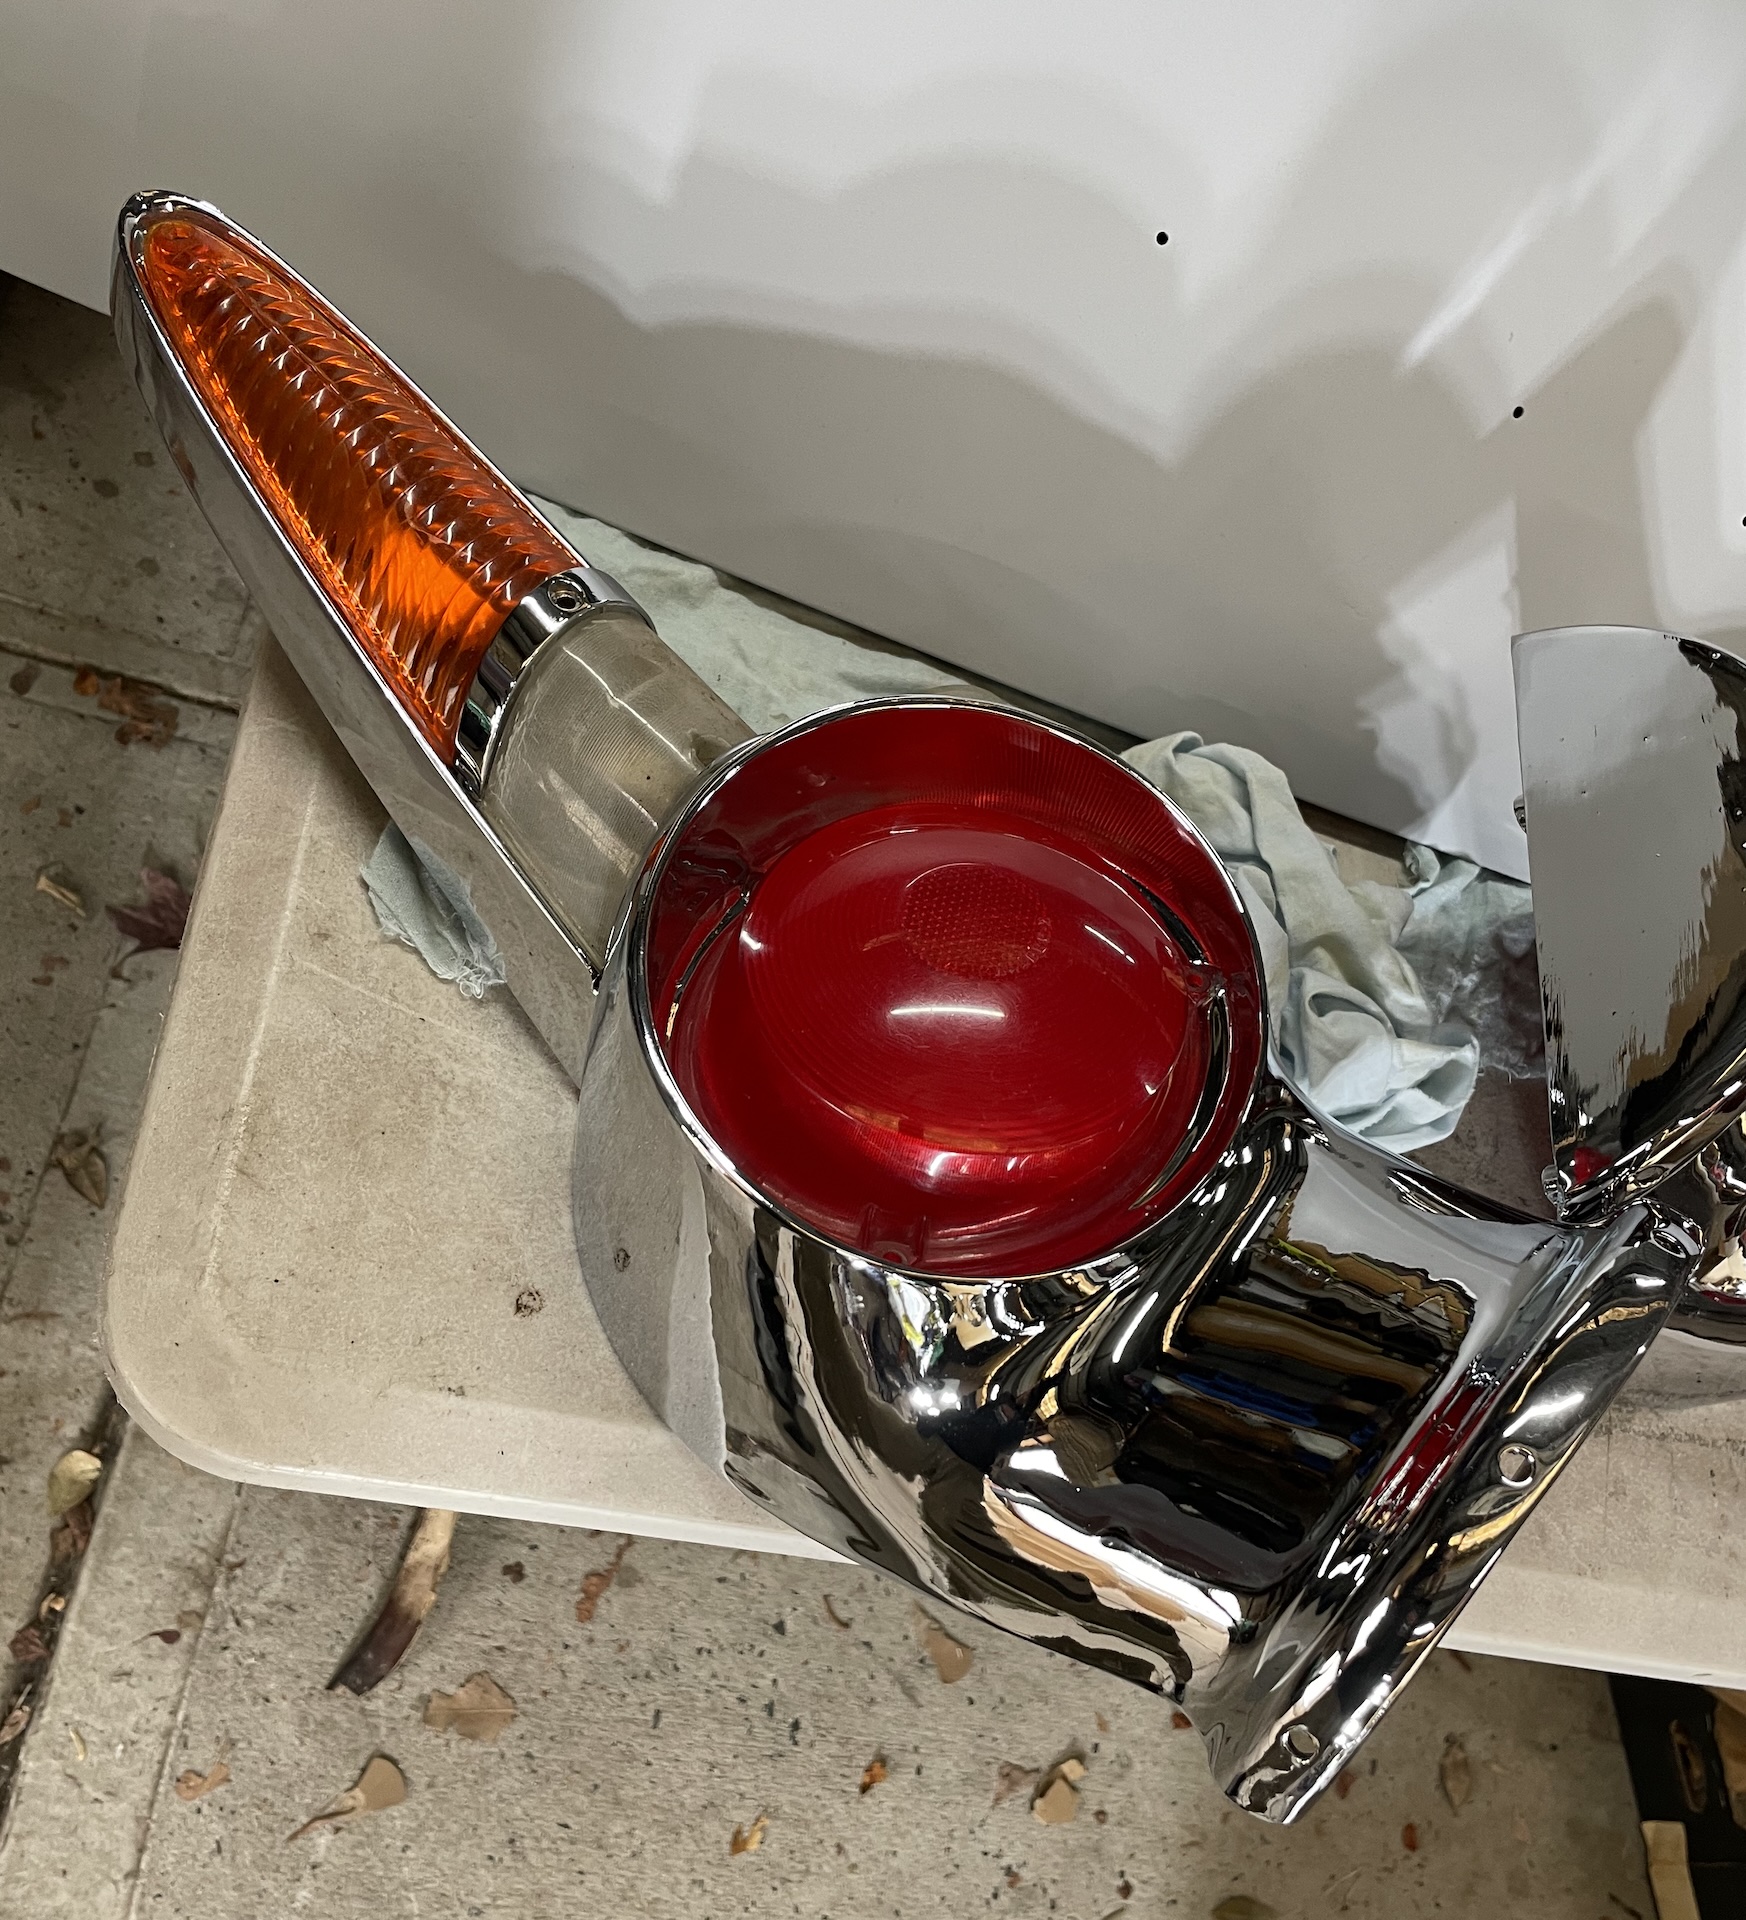
Took the opportunity to rebuild the tail lights. Instead of rivets, I just drilled the holes out to 4mm and fitted stainless steel bolts with a dab of thread lock.
IMG_0020.jpeg
IMG_0020.jpeg (920.61 KiB) Viewed 640 times
Need to replace the reverse lenses and the stop lights have ill fitting bullet lenses that I have to deal with, so for now, keeping it original.
IMG_0022.jpeg
IMG_0022.jpeg (1.2 MiB) Viewed 640 times
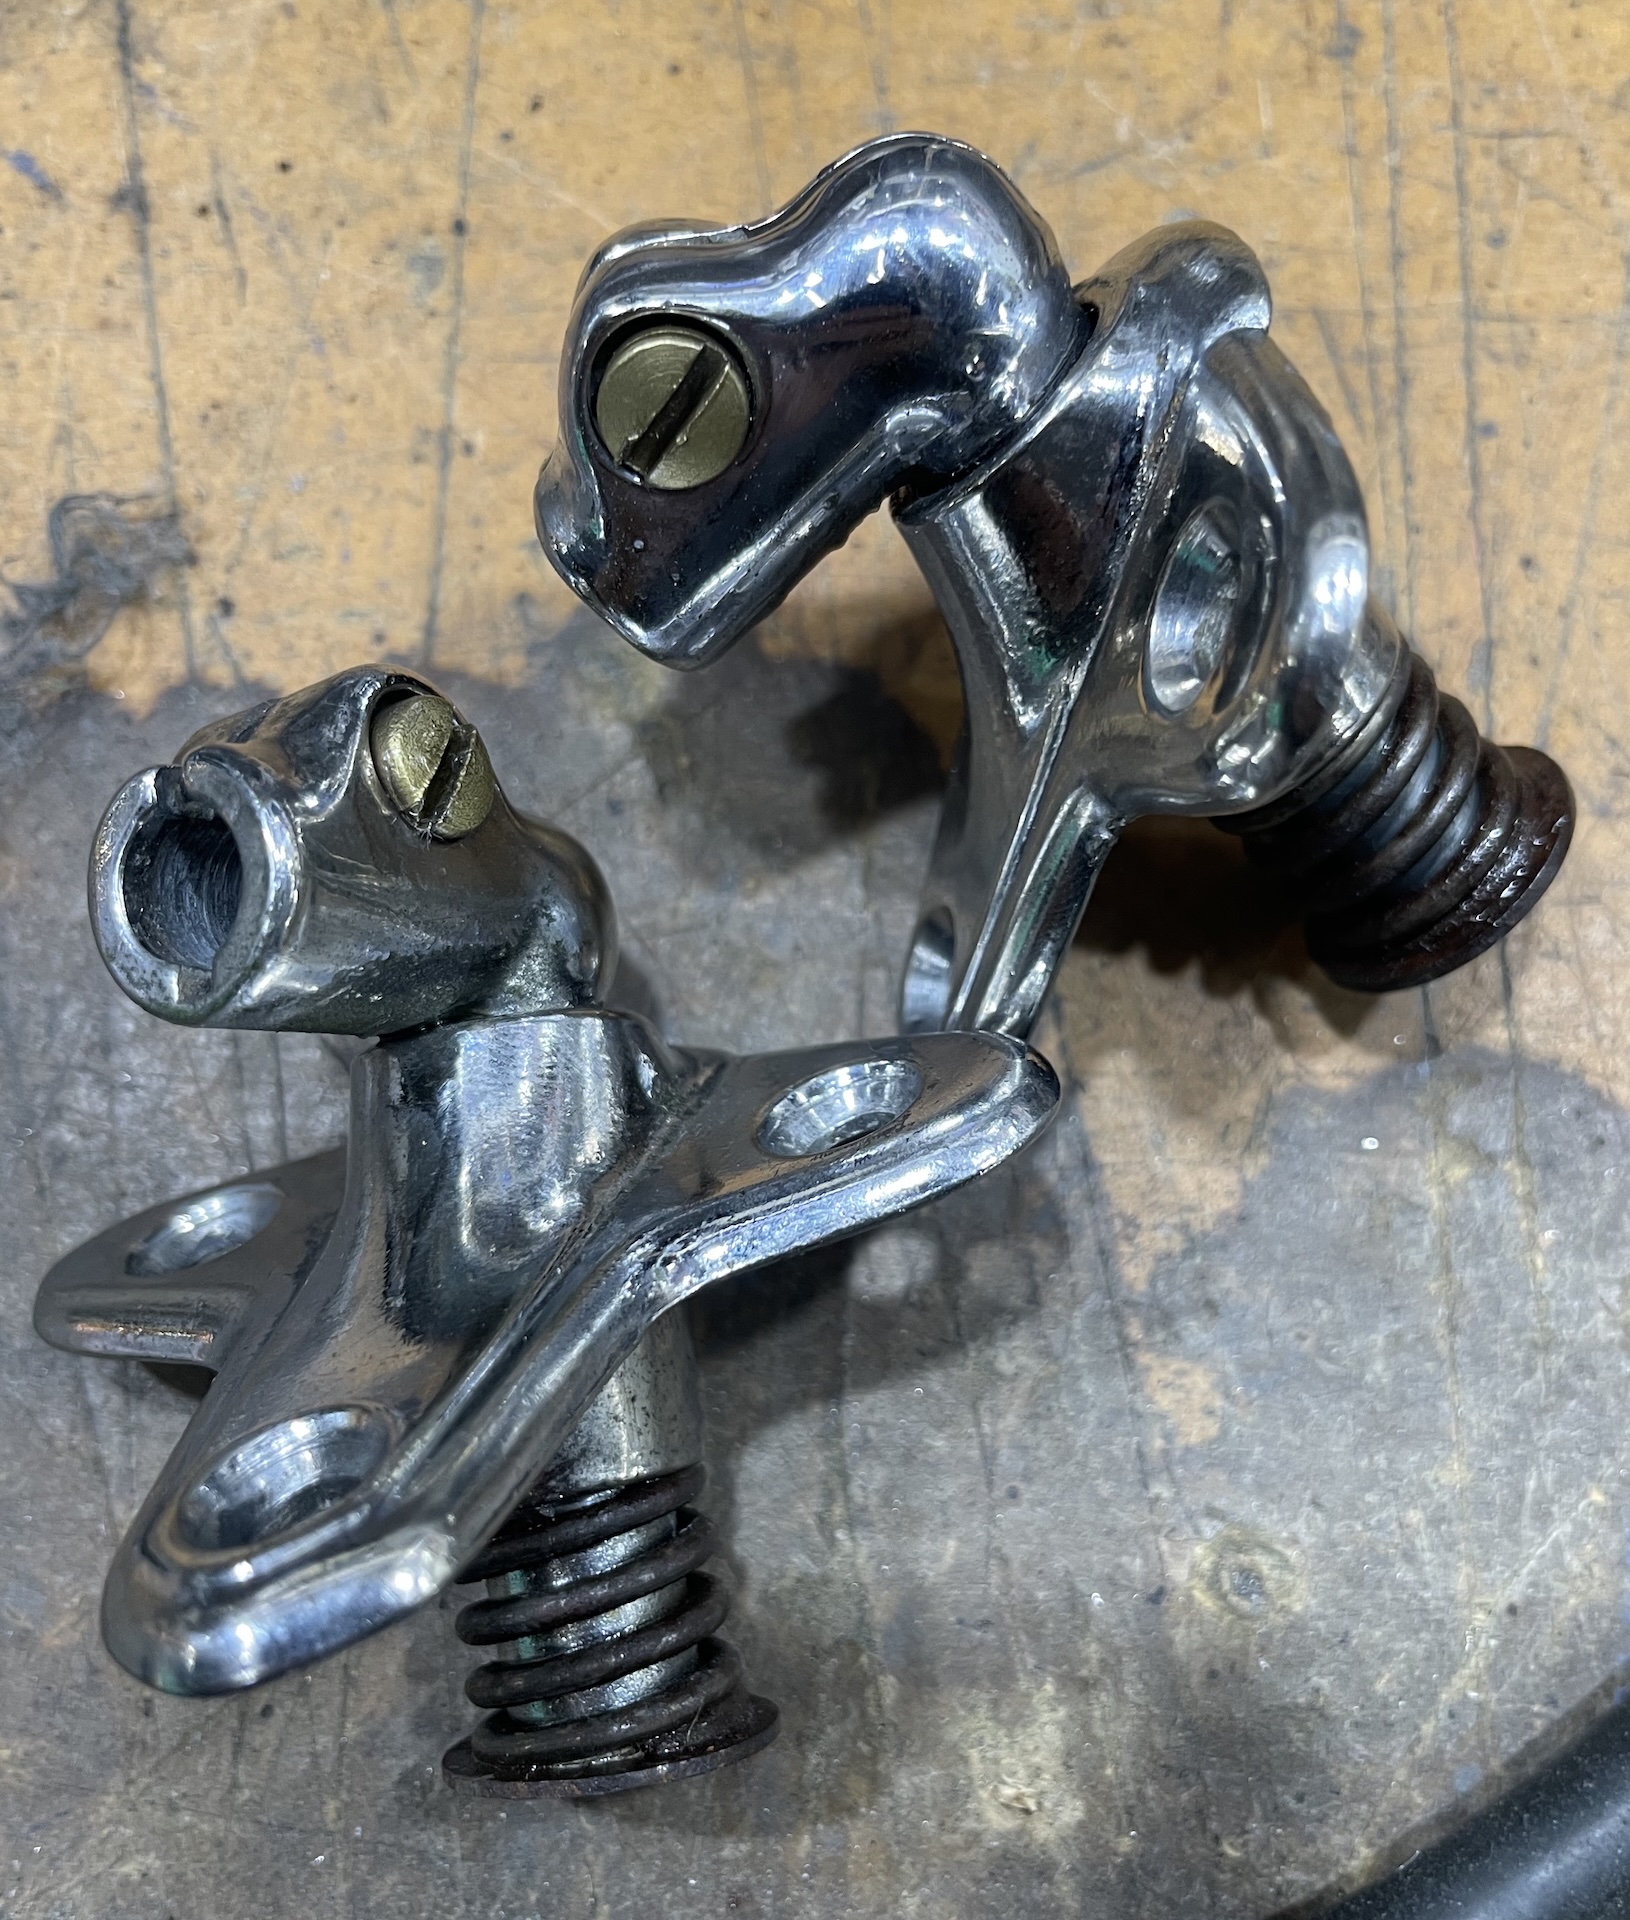
I found these which didn't get a new shiny coat of chrome. So I gave them a quick buff and brassed the nuts which were looking a little rusty and tired.
IMG_0041.jpeg
IMG_0041.jpeg (1.09 MiB) Viewed 640 times
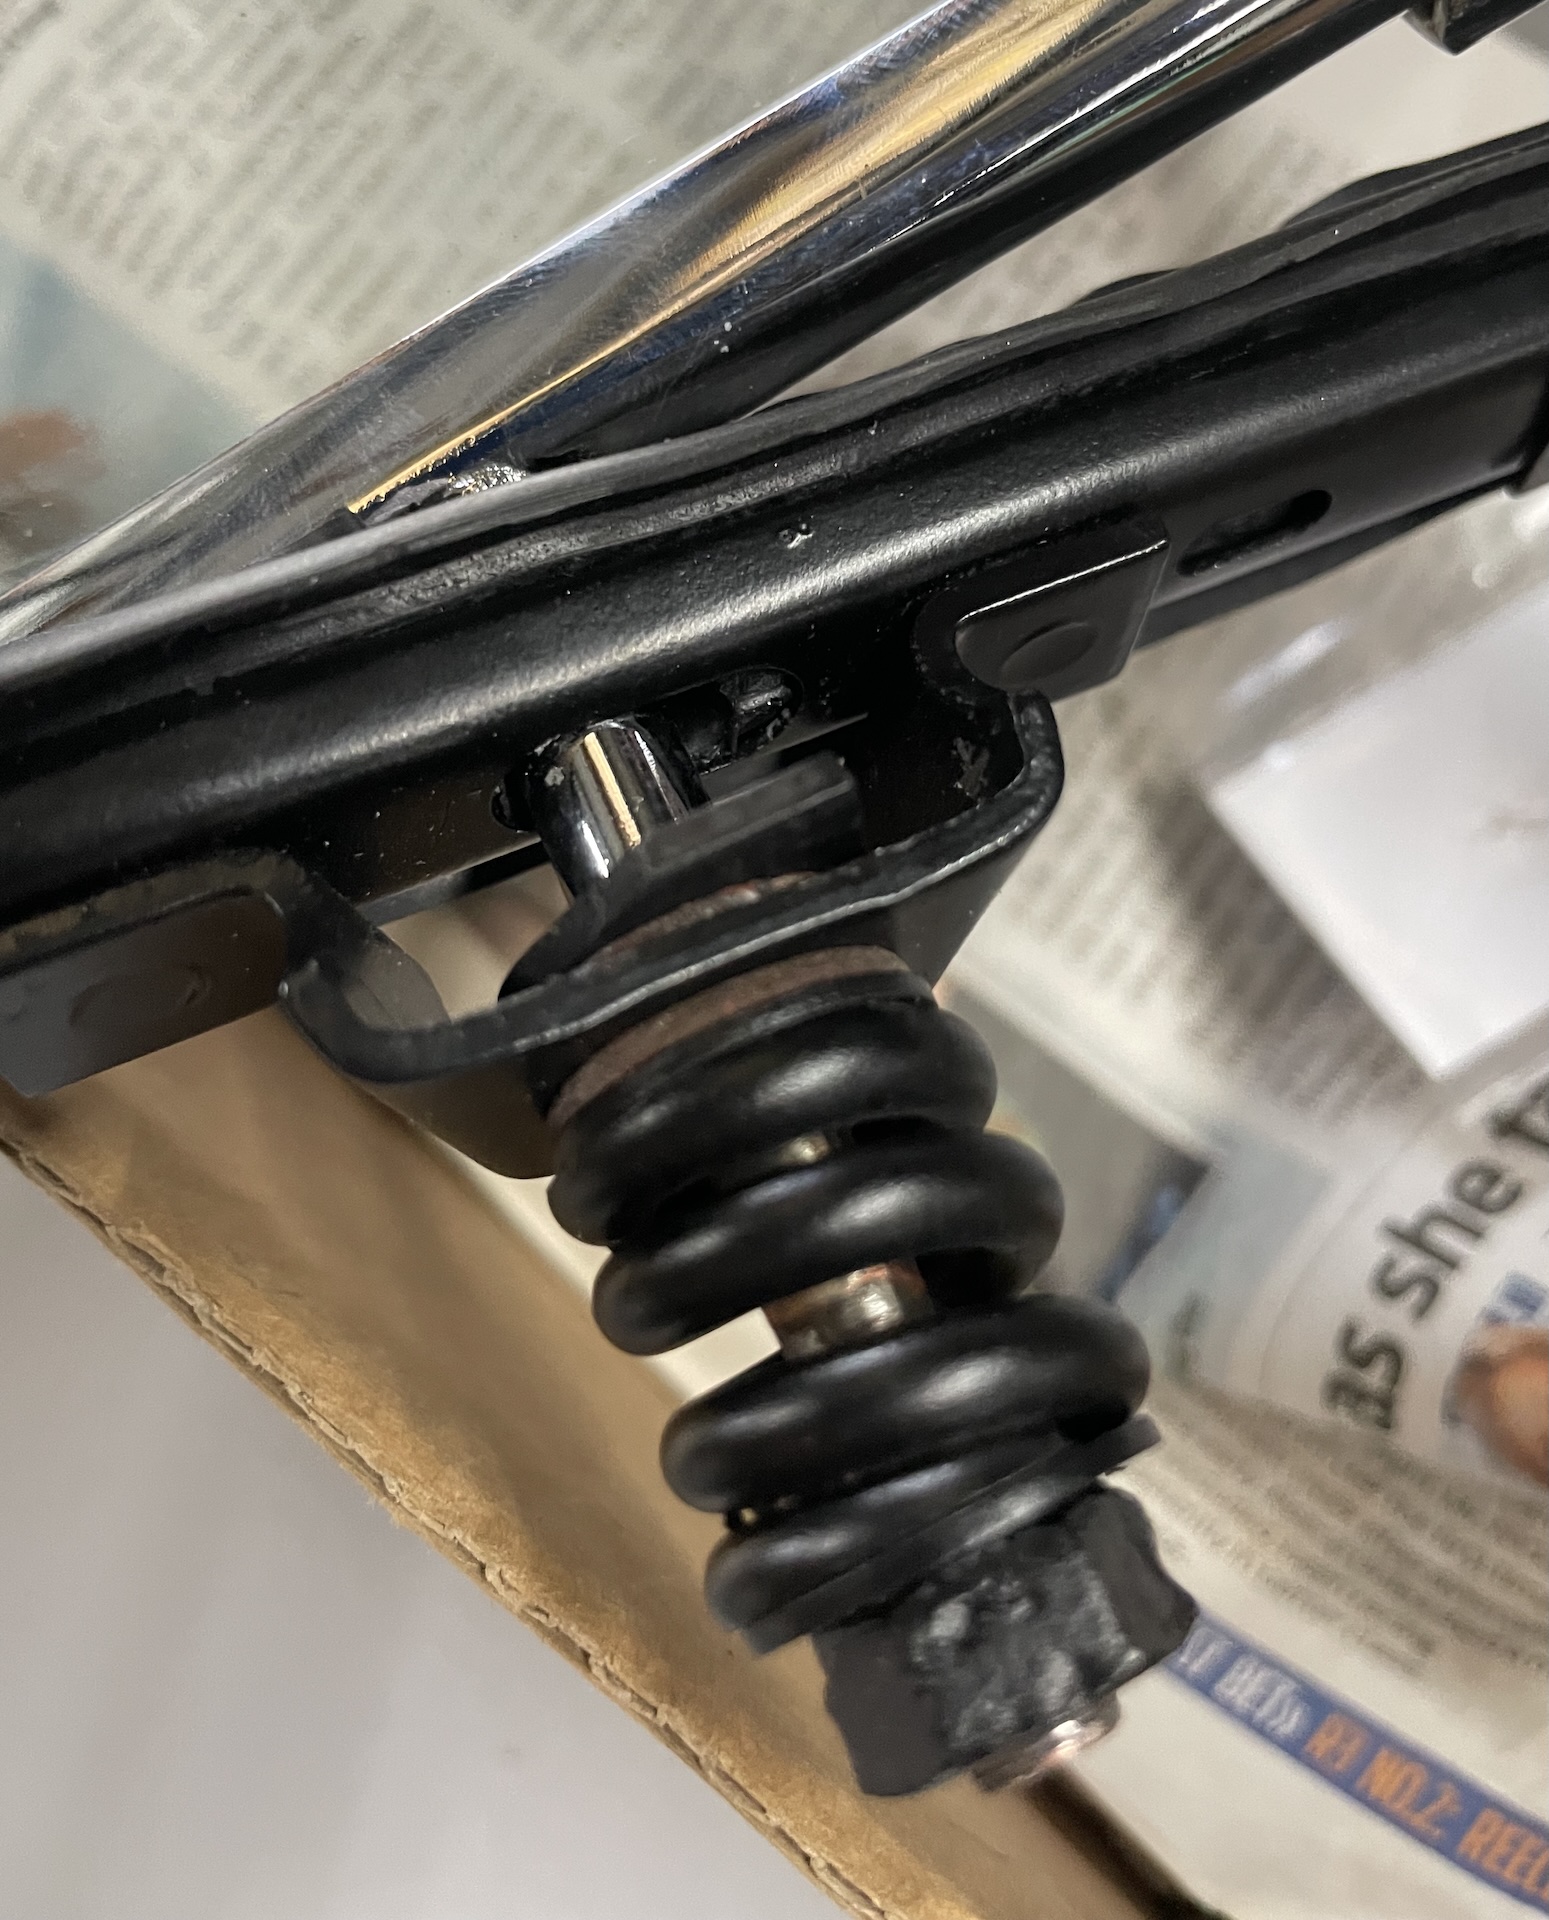
Time to start reassembling. First up - 1/4 vents. Spent probably half a day searching through the last 5 years of photos looking for images of how I disassembled them. Used the pictures as reference and rebuilt the drivers side. Then I rebuilt the passenger side, mirroring the drivers. And totally messed it up. Not only did I fit the end stop washer the wrong way round, I managed to have the glass swinging on the wrong side as well.
IMG_0039.jpeg
IMG_0039.jpeg (874.73 KiB) Viewed 640 times
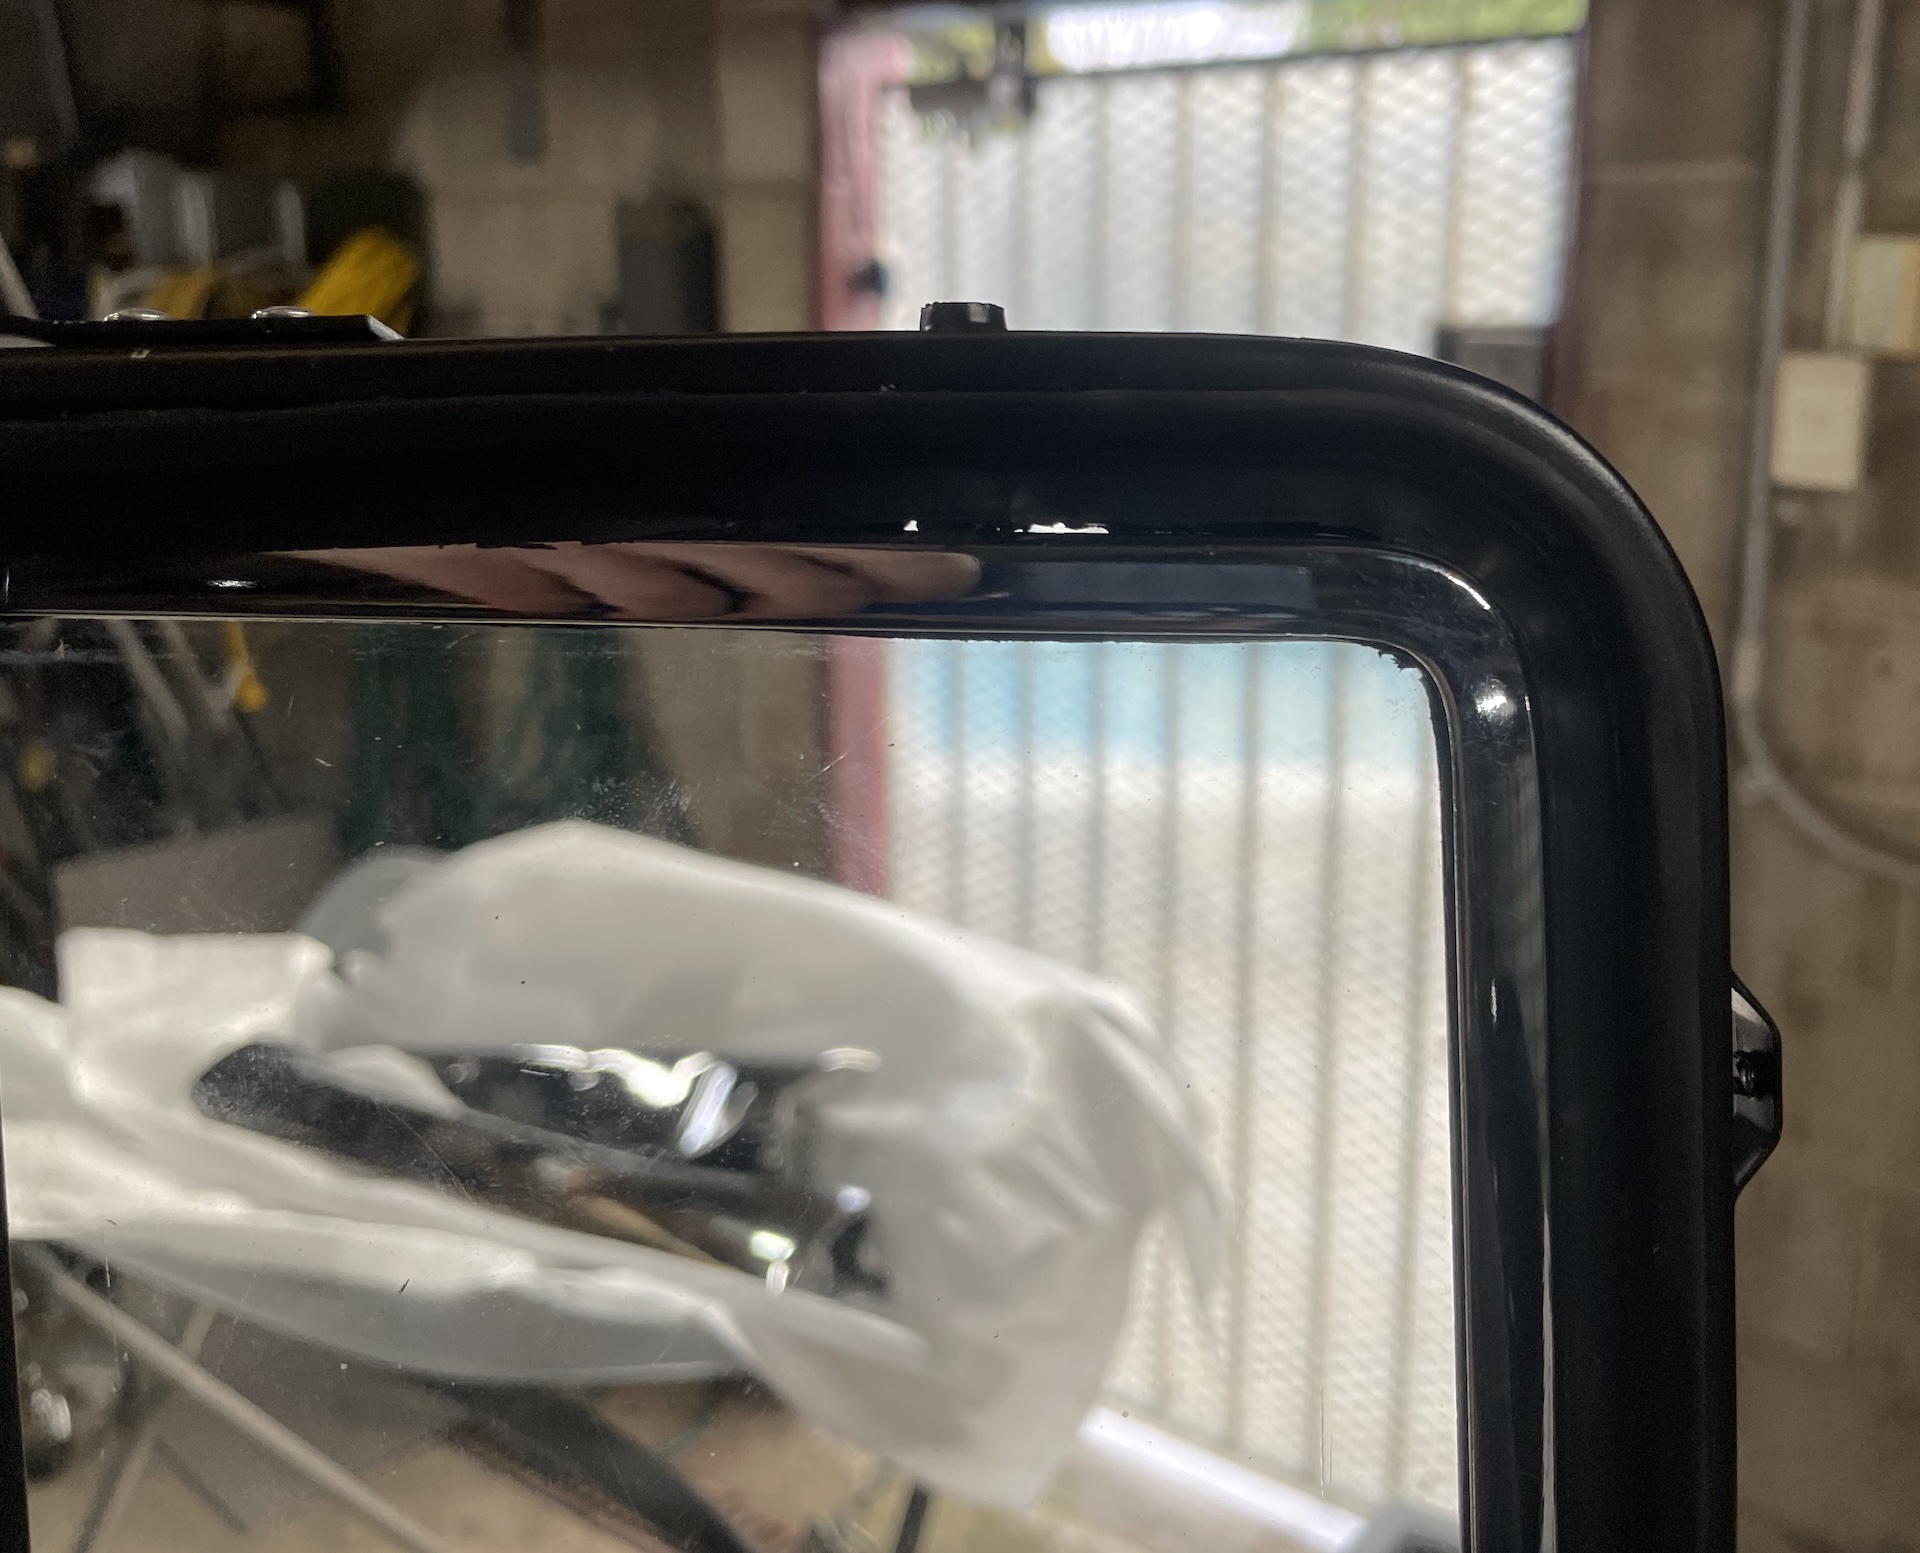
I also fitted these with Better Auto Rubber seals. Not happy with the quality of these, really thin and tore in a couple spots whenI cut to the holes to push the shafts through. In hind site, I should have just looked at the internet images to see that the quality is pretty average. And there is a gap at the top. Not blaming the rubbers for this, probably wear on the fibre washer which is holding the glass frame up.
IMG_0038.jpeg
IMG_0038.jpeg (743.35 KiB) Viewed 640 times
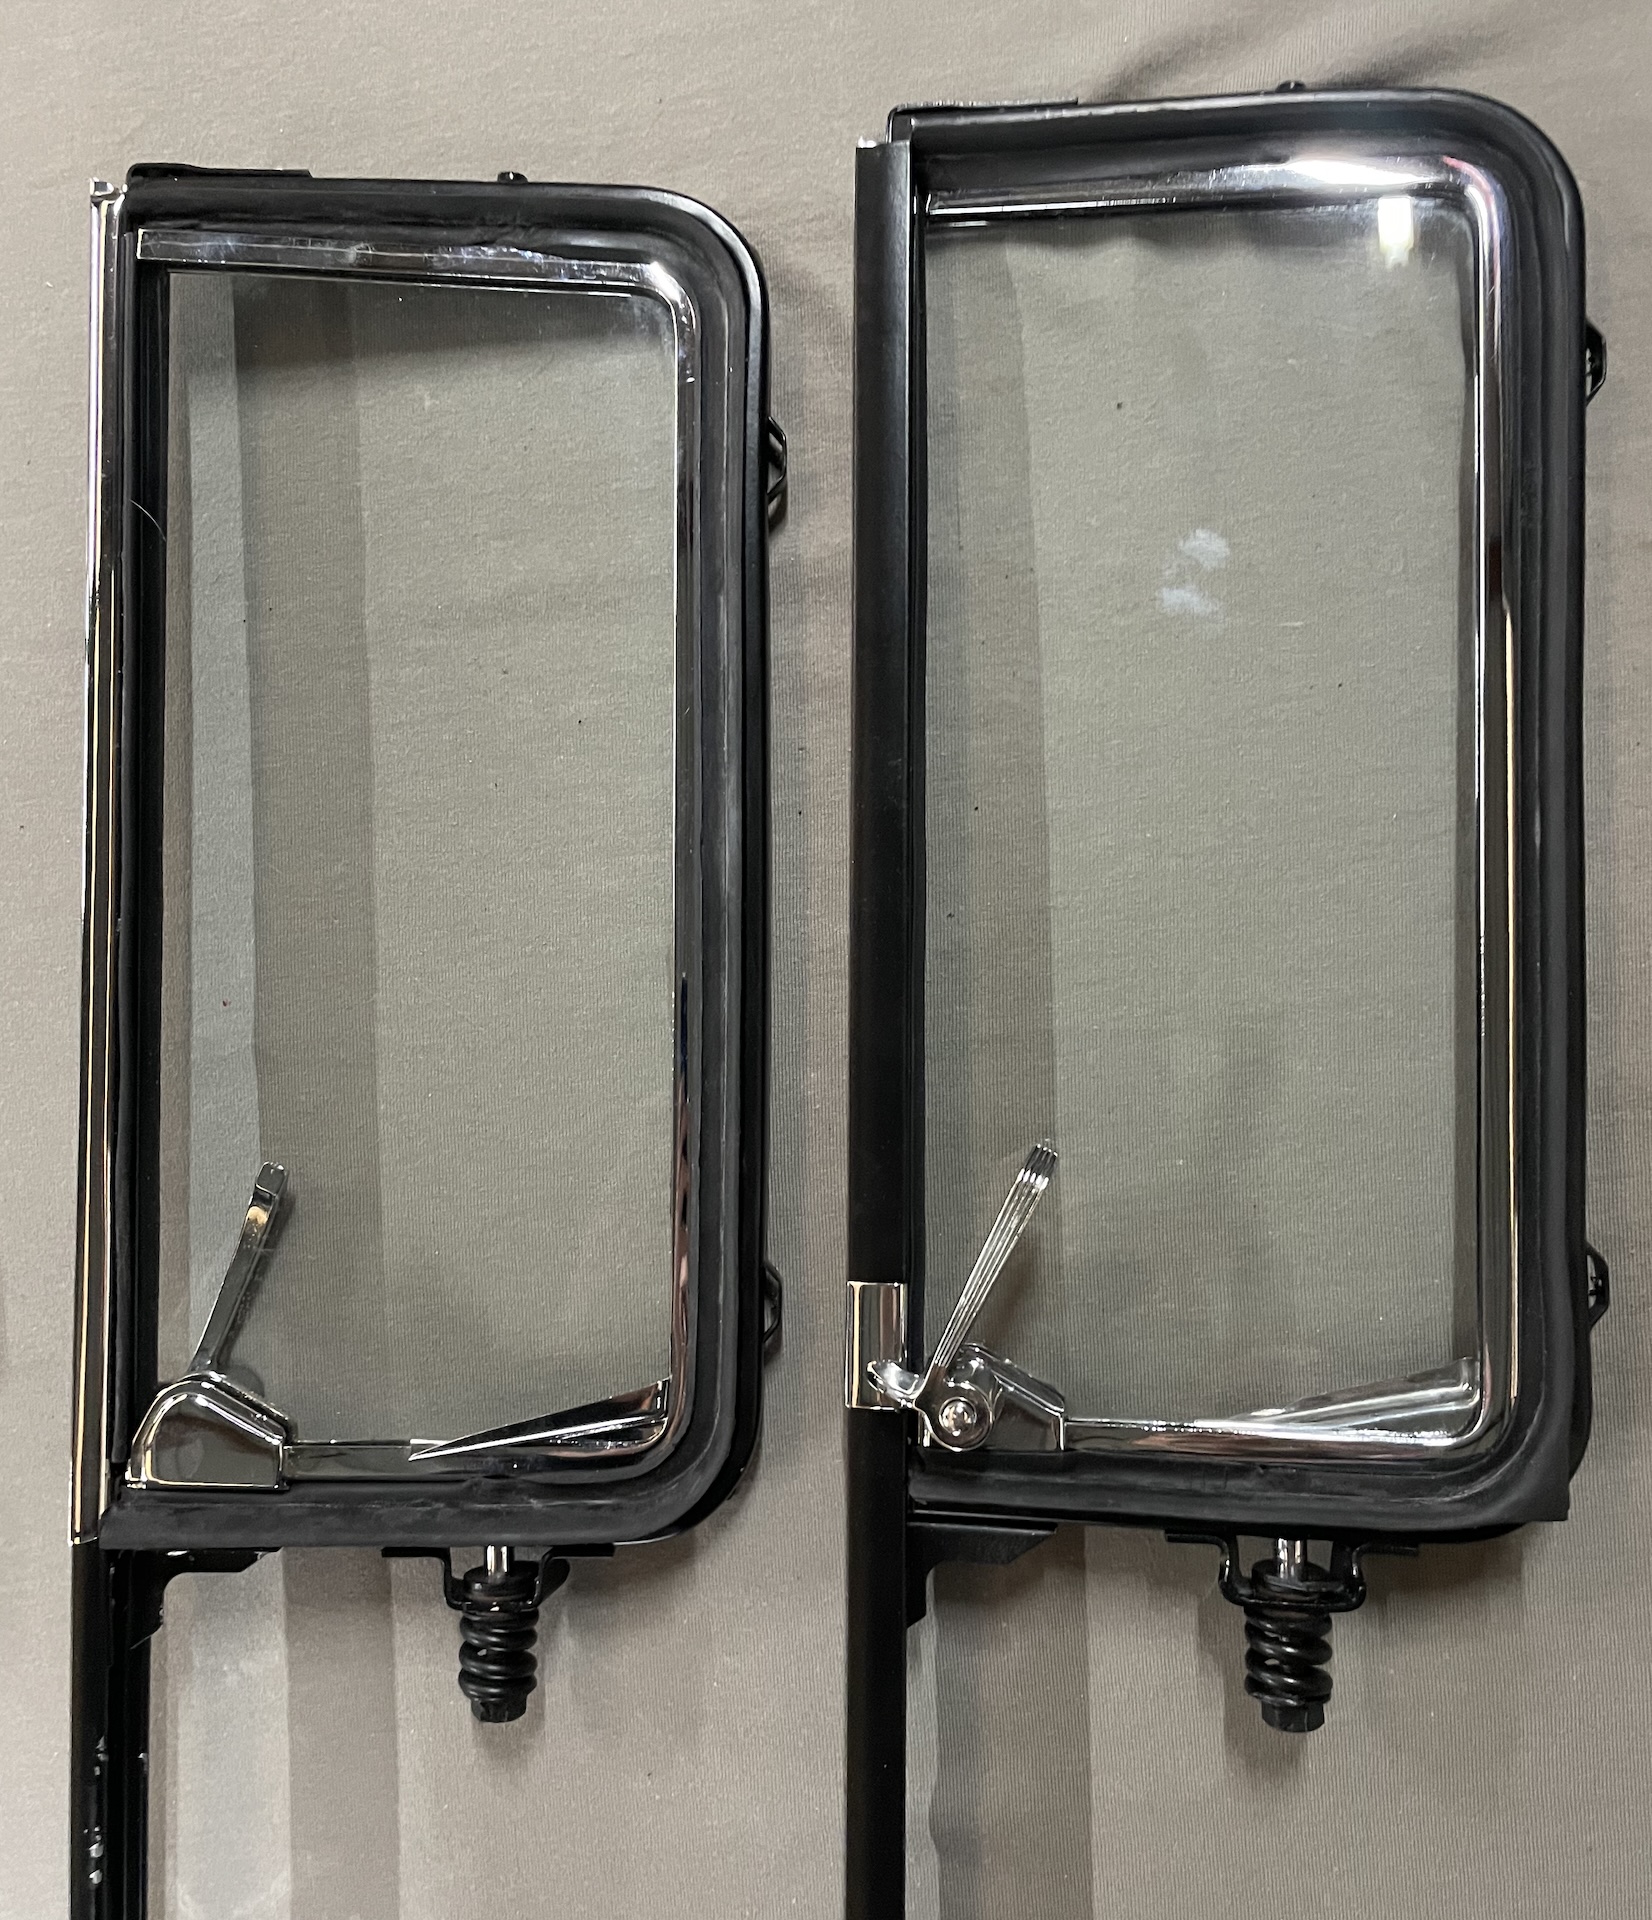
So bit the ($214) bullet and ordered Rares seals. These are much better. To get around the low frame issue I just added an extra washer as a spacer. Much better result, and (as much as I can expect these things to) these are now sealing all round.
IMG_0082.jpeg
IMG_0082.jpeg (1.16 MiB) Viewed 640 times
After my ringing endorsement, if anyone is still interested in the better auto seals for a cheap fix, let me know and they are yours for the cost of postage.
Scott
(Not so rusty) Ol' Rusty - FB/EK Sedan
In the Shed
Posts: 2284
Joined: Wed May 16, 2012 10:18 pm
State: SA
Location: South Australia

Re: Ol' Rusty - FB/EK Sedan

Post by In the Shed »

Good work Scott, you gotta love refurbished chrome pieces.

When I did my quarter windows (using Rare Spares seals) I also had a gap at the top, between window & seal. I ended up placing a small washer between frame and metal bracket to close the gap. They seal pretty good now.

Regards
Stephen
A day in the shed beats a day at work!
User avatar
Errol62
Posts: 11666
Joined: Sat Dec 06, 2014 2:44 pm
State: SA
Location: Adelaide

Re: Ol' Rusty - FB/EK Sedan

Post by Errol62 »

That is great Scotty. Now you just have to make sure you don’t need to break in. I tore my new seals this way.


Sent from my iPhone using Tapatalk
getting my FB ute on the road
EK van on rotisserie
User avatar
Brett027
Posts: 2536
Joined: Thu Apr 18, 2019 4:14 am
State: NSW

Re: Ol' Rusty - FB/EK Sedan

Post by Brett027 »

Hi Scott. Exactly the same experiences with the quarter vent windows. I used Better Auto rubber kit on the ute and ended up ditching the vent rubbers and getting Rares. I also ditched the door window felt strip's as they just wouldn't snap in the door holes. Rares worked there as well.
Would be scared to know what the chrome work cost. I did my sedan and some of the ute about 7 years ago now and it was about 6k🙄.
Sucker for a rusty bomb
User avatar
funkyscooter
Posts: 721
Joined: Wed Aug 16, 2017 8:12 am
State: NSW
Location: Sydney

Re: Ol' Rusty - FB/EK Sedan

Post by funkyscooter »

The stupid thing is - those Better Auto Rubbers look awful in the internet pictures. They clearly aren't hiding the fact that they are sub par. Guess I must have been feeling a little gun shy after my last rares experience.

As for the chrome, quoted $8400 (+GST), and came in at that price in the timeframe. The job looks pretty good, but it's not show car. The plating is pretty thick to help reduce signs of ageing!

Was pretty hard to find anyone who would even quote the diecast, so I'll take it as a win.

The parts list was.....
3 piece front bumper
2 x front overriders
2 x custom overriders
3 piece rear bumper
2 x rear overriders
1 x bonnet bar
2 x brows
2 x headlight surrounds
2 piece bonnet bird
2 x front indicator housing
2 x 3 piece tail light housings
2 x 1/4 vent glass frames.

One major expense ticked off the list at least.
Scott
(Not so rusty) Ol' Rusty - FB/EK Sedan
User avatar
Errol62
Posts: 11666
Joined: Sat Dec 06, 2014 2:44 pm
State: SA
Location: Adelaide

Re: Ol' Rusty - FB/EK Sedan

Post by Errol62 »

Good to know. Jack Saint at the Nats this year showed me his one piece rear bar that had a very thick chrome on it. I wouldn’t have picked it but it must increase the weight. That coin actually sounds justifiable for the outcome when you compare it to other costs these days. Well done.


Sent from my iPhone using Tapatalk
getting my FB ute on the road
EK van on rotisserie
User avatar
Harv
Posts: 5741
Joined: Mon Oct 08, 2007 2:00 pm
State: NSW
Location: Sydney, Australia

Re: Ol' Rusty - FB/EK Sedan

Post by Harv »

funkyscooter wrote: Mon Jul 13, 2026 7:32 pm As for the chrome, quoted $8400 (+GST), and came in at that price in the timeframe. The job looks pretty good, but it's not show car. The plating is pretty thick to help reduce signs of ageing!
Can you remind us please who did the chromework? I've still got some more to do on the FED, and looking for performance better than I got from the last vendor.

Cheers,
Harv
327 Chev EK wagon, original EK ute for Number 1 Daughter, an FB sedan meth monster project and a BB/MD grey motored FED.
User avatar
funkyscooter
Posts: 721
Joined: Wed Aug 16, 2017 8:12 am
State: NSW
Location: Sydney

Re: Ol' Rusty - FB/EK Sedan

Post by funkyscooter »

Harv wrote: Mon Jul 13, 2026 11:44 pm
Can you remind us please who did the chromework? I've still got some more to do on the FED, and looking for performance better than I got from the last vendor.
Hey Harv, it was Pioneer Plating out at Moorebank.
Scott
(Not so rusty) Ol' Rusty - FB/EK Sedan
User avatar
Harv
Posts: 5741
Joined: Mon Oct 08, 2007 2:00 pm
State: NSW
Location: Sydney, Australia

Re: Ol' Rusty - FB/EK Sedan

Post by Harv »

Many thanks.

Cheers,
Harv
327 Chev EK wagon, original EK ute for Number 1 Daughter, an FB sedan meth monster project and a BB/MD grey motored FED.
User avatar
funkyscooter
Posts: 721
Joined: Wed Aug 16, 2017 8:12 am
State: NSW
Location: Sydney

Re: Ol' Rusty - FB/EK Sedan

Post by funkyscooter »

Side tracked by anything that means I don't have to start work on the rusted out drivers side inner and outer sills.

Pigtails for reverse lights
IMG_0171.jpeg
IMG_0171.jpeg (1008.07 KiB) Viewed 7 times
IMG_0176.jpeg
IMG_0176.jpeg (1002.06 KiB) Viewed 7 times

Posted more detail at https://www.fbekholden.com/forum/viewto ... 13#p278513

As the days have been cool but dry finally got around to getting some 2K on the insides of the front door, along with acrylic primer on a few of the never ending pile of things to be painted
IMG_0172.jpg
IMG_0172.jpg (1.38 MiB) Viewed 7 times
Scott
(Not so rusty) Ol' Rusty - FB/EK Sedan
User avatar
funkyscooter
Posts: 721
Joined: Wed Aug 16, 2017 8:12 am
State: NSW
Location: Sydney

Re: Ol' Rusty - FB/EK Sedan

Post by funkyscooter »

Then there has been the struggles of my bullet taillights - but the solution was worth the effort. Not sure who I got these off (Facebook/here?), but a bit of investigation and they are cast from a modified 1959 Buick Tail Light Lens (Glo-Brite 996. GM #5949897). The casting is okay but I needed to sand and polish them to get them nice and shiny (after is on the left!).
IMG_0098.jpeg
IMG_0098.jpeg (1.04 MiB) Viewed 7 times
The fit is not great (flex in the mould?) and they are sanded at the bottom to help them fit as you can see in the picture above. One almost fits, the other not so much. So out with the powerfile to reprofile and I bit off too much of the edge and now it doesn't quite fit and have a frayed edge. First solution was to 3D print a red translucent ring to cover the dirty edge. Looks okay but the reds don't match.
IMG_0122.jpeg
IMG_0122.jpeg (1.28 MiB) Viewed 7 times
So as the 3D modelling was now done, decided to print up a mould to press out a ring in 0.5mm stainless steel off an old range hood as a test.
The result of pressing in the vice and then tapping the edge over with a hammer.
IMG_0129.jpeg
IMG_0129.jpeg (1.06 MiB) Viewed 7 times
Size was slightly off so made some new moulds and guides to cut and decided that the range hood stainless was good enough.

Some time later, with lots of filing and test fitting.....
IMG_0149.jpeg
IMG_0149.jpeg (1.49 MiB) Viewed 7 times
IMG_0150.jpeg
IMG_0150.jpeg (959.83 KiB) Viewed 7 times
With a bit of tweaking, I could make dress rings to tart up regular lenses using the same method, but it is a bit of effort. Really like the look of the bullets now with the extra trim. Feels almost factory.
IMG_0175.jpeg
IMG_0175.jpeg (949.64 KiB) Viewed 7 times
Scott
(Not so rusty) Ol' Rusty - FB/EK Sedan
Post Reply