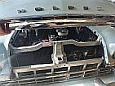
I have recently discovered that the bushes I had replaced by a renowned local mechanic 12 months ago were not installed correctly and I need to pull them out and redo them to get the bushes sitting properly and the spaces even.
Does anyone know what the dimension is for both top and bottom HR wishbones, so I can wip up a set of tools?
I can do it with a vernier, but I'm thinking the tool would make it a better job when tightening the bushes.
I have everything crossed that the holes are still OK, or that will be another degree of difficulty altogether.
Many thanks,
Brett
If there's equal spacing between the lower arms and the crossmember front and rear, then the arms are in the right position. If the bushes haven't been screwed all the way into the arms (hex hard up against the arms), then "just" screw them in until they're home. If you have to start all over again, then -
For the lower control arms, equal spacing between control arm and crossmember at the front and rear is what you want. It equates to equal protrusion of the shaft through the control arm at front and rear (about 1 mm from memory).
The spacers are only needed if installing a new control arm. Yours have already been in service, so the bushes have already cut the obtuse threads in the control arm.
The trick here is to line up the arm on the shaft, as above. Dip the bush in gear oil and start it on the shaft at the front. Hold the arm against the bump stop to begin with. The bush should "pick up" the thread in the control arm almost immediately. If you notice that the control arm is being pushed back as you turn the bush, unscrew the bush, let the arm hang vertically, and try again until the bush starts in the control arm. Now do the same for the bush at the rear. If you can't make the threads index in the control arm, lever the end of the arm outwards a little until the threads pick up.
The manual says tighten the bushes to 35 lb-ft.
If you're installing replacement bushes to control arms that have only had the genuine article, be prepared for the fight of your life. The Rares bushes are oversize on the outer threads.
The upper control arm bushes are installed similarly, but access can be a bit tight on the vehicle. The alternative is to use a vice with suitable spacers.
Many thanks for your reply Rob.
I understand the equal distance measure method and used that on the sedan front end. On the ute though, I am a little worried that the arms might have been spread out and I was thinking that if I had the tool it would sort that issue out. If nothing comes up, I will used the verniers and cross my fingers.
While I have you, I was also thinking that there will be no need to do a wheel alignment after this job because I am not changing any of the angles. What do you think?
If the fore-and-aft position of any of the control arms changes, then your caster will change as a result and you'll have to tweak it back. Camber and toe-in should be relatively unchanged.
Do the work and take the car for a drive. If the car pulls to one side (thinks . . . HR front suspension) take away one thick shim from the forward shim stack on the side to which the car pulls.
a) Austaloy 3A4-1 (also Litchfield E1883) control arm remover/installer EH-HR.
b) Litchfield E1894 (=3A11) lower control arm spacer HD-HK.
c) Austaloy 3A12 (=Litchfield E1895) upper control arm spacer HD-HR.
Happy to loan them to you (or measure them for you) if it helps, though I don't get home from work until next weekend.
Cheers,
Harv
327 Chev EK wagon, original EK ute for Number 1 Daughter, an FB sedan meth monster project and a BB/MD grey motored FED.
If there's equal spacing between the lower arms and the crossmember front and rear, then the arms are in the right position. If the bushes haven't been screwed all the way into the arms (hex hard up against the arms), then "just" screw them in until they're home. If you have to start all over again, then -
For the lower control arms, equal spacing between control arm and crossmember at the front and rear is what you want. It equates to equal protrusion of the shaft through the control arm at front and rear (about 1 mm from memory).
The spacers are only needed if installing a new control arm. Yours have already been in service, so the bushes have already cut the obtuse threads in the control arm.
The trick here is to line up the arm on the shaft, as above. Dip the bush in gear oil and start it on the shaft at the front. Hold the arm against the bump stop to begin with. The bush should "pick up" the thread in the control arm almost immediately. If you notice that the control arm is being pushed back as you turn the bush, unscrew the bush, let the arm hang vertically, and try again until the bush starts in the control arm. Now do the same for the bush at the rear. If you can't make the threads index in the control arm, lever the end of the arm outwards a little until the threads pick up.
The manual says tighten the bushes to 35 lb-ft.
If you're installing replacement bushes to control arms that have only had the genuine article, be prepared for the fight of your life. The Rares bushes are oversize on the outer threads.
The upper control arm bushes are installed similarly, but access can be a bit tight on the vehicle. The alternative is to use a vice with suitable spacers.
Best of luck.
Rob
that's good to read i've never used a tool never even knew one existed till i had seen them advertised but done pretty much what you described never had an issue
sometimes yor just better off shitting in yor hands and clapping
If you end up with mor caster that can’t be bad on the HR front. If less then as rob says, but I would swap the shim front to back rather than just remove it SL together as this will maintain your camber setting.
FB ute fixer upper, EK van on rotisserie
getting my FB ute on the road
EK van on rotisserie
 .
. 
 but done pretty much what you described never had an issue