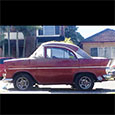
Drag the boot lid out of storage and checked the new section to it. It's close - well close enough and symmetrical.

- IMG_2305.jpeg (740.52 KiB) Viewed 4552 times
So previous repairs to the rear of the passenger side, plus me compounding that error with my new channel on that side, have pushed the rear inwards. Bit of hammer and dolly and shrinker on the rear skin, and a hammer to the passenger upright brace. Put boot lid on to use as a guide, then cut out the rest of the bottom lip, and use what ever is handy to re align the rear lip.

- IMG_2331.jpeg (641.74 KiB) Viewed 4552 times
Weld the remaining 2 sections of the lip on, Trim, check, trim, check, crawl under car, and with the lid closed mark were I have to cut off the excess at the front. Cut with grinder, final check fit. Balls.
Cut twice, check once. Cut it too short in places as it seems the grinder has a mind of its own at the end of the day when you just want to get things done. Got a bit of filling in to do.
Next day. This is my second attempt at tacking my compromised bit in. Those tacks just want to pull the metal in, even with a bit of hammer and dolly to stretch them out.

- IMG_2336.jpeg (616.42 KiB) Viewed 4552 times
Tacking in with big gaps is a pain. Copper behind each weld, tack, close boot to check, hammer/dolly to correct. Next. Do four, realise it is slowly pulling in all the places you can't get a dolly behind, cut welds and try again. This took 4 hours.

- IMG_2339.jpeg (831.45 KiB) Viewed 4552 times
Came back to it the next day, and spent another six hours filling it all in, dealing with the inevitable blow throughs, grinding as I went, and generally questioning why I did just remake the 3 sections that I messed up. But got there in the end. It's better, but still a bit wavy if you really look closely. At this point I choose not to.

- IMG_2350.jpeg (826.33 KiB) Viewed 4552 times

- IMG_2357.jpeg (867.92 KiB) Viewed 4552 times