Welding pans and outer sills - what do I need to know?
-
parisian62
- Posts: 3997
- Joined: Wed May 11, 2005 2:19 pm
- State: NSW
- Location: Sydney
- Contact:
Welding pans and outer sills - what do I need to know?
G'day all,
Time is approaching for the floors and outer sills on my EK wagon to be replaced. I'm doing all the hack work like cutting out the pans before trial fitting, drilling out spot welds, cleaning, derusting and painting inner sections. The actual fitting and welding work is being done by Loui who has his own welding business and has done a few older model cars but not a EK.
I've read through this article on the FE FC site... http://www.fefcholden.org.au/techinfo/tech001.html
question time...
Is the 'A' pillar behind the front wheels, the 'B' pillar the centre pillar and the 'C' pillar in front of the rear wheels?
What would the order of doing this work be? Floor pans first then outer sill or outer sill first then floor pans?...or doesn't it matter?
The FE FC article under section 2 states "Note: If the floor pans are to be replaced do not remove them from the car until after the new sills have been welded in as this will weaken the body structure and distortion may result."
Any traps for young players or any suggestions/advice that you have learnt from personal experience...
regards
Stewart
Feelin free in a '61 FB.
Member of FB-EK Holden Car Club Of NSW Inc.
Check out the Rebuild of Old Timer
Member of FB-EK Holden Car Club Of NSW Inc.
Check out the Rebuild of Old Timer
floor pans
Hi Stewart,
yes, I believe your understanding of the "pillars" to be correct.
With respect to welding sequence - I can see "value" in the way the FE?FC tech is suggesting - I expect they believe the new sills must be welded in prior to removing the pans on account of the pans holding the frame of the vehicle whilst the sills are being fitted - I would also suggest to do one pair of sills at a time - obviously, I would expect both inner and outer to be removed prior to re-fitting. I would also suggest to support the underside of the vehicle in a number of locations to "hold" it's shape - when the new sills are fitted, they should hold the frame together to permit the pans to be replaced.
I may further suggest you look at replacing the "top hats" which run laterally - I have not done any of this, fortunately I got to mine some twenty five years ago and saw the potential for damage - I love fishoilene...............
Another little "trick" I did with my underside was to seal all the gaps to keep dirt/crud/water etc out - I however did drill "drainage" holes to the lowest point of everything under there.
I used butyl-mastic to seal the gaps, primer then mutli top coat of hammered metal epoxy......................
Finishing off the job with aerosol fishoil sprayed in with a flexible dip tube fitted with a multi-jet fanner............. so far, so good.............
frats,
Rosco
-
parisian62
- Posts: 3997
- Joined: Wed May 11, 2005 2:19 pm
- State: NSW
- Location: Sydney
- Contact:
thanks Rosco,
Inside sills are OK and am not planning on touching them.
Not sure what you mean by a top hat?
Anyone else with some words of wisdom/advice...
Stewart
Inside sills are OK and am not planning on touching them.
Not sure what you mean by a top hat?
Anyone else with some words of wisdom/advice...
Stewart
Feelin free in a '61 FB.
Member of FB-EK Holden Car Club Of NSW Inc.
Check out the Rebuild of Old Timer
Member of FB-EK Holden Car Club Of NSW Inc.
Check out the Rebuild of Old Timer
top hats
Hi again,
just off to bed and saw a follow up...........
Top hats, as I know them, are the laterals - named because of their shape - they would look like a "top hat" if inverted................
If you are leaving your inner sills, this may not be applicable.............
frats,
Rosco
just off to bed and saw a follow up...........
Top hats, as I know them, are the laterals - named because of their shape - they would look like a "top hat" if inverted................
If you are leaving your inner sills, this may not be applicable.............
frats,
Rosco
if you cut around the b pillar and do a matching cut on the donor you'll save alot of headaches.
another suggestion would be to try finding either a nos pannel or contract someone to make one using the old one as a template as the rares ones are no good.
i just fitted one of those up and had to reconstruct most of it as the shape was all wrong another day waisted.
when you remove the outer panel you'll find a brace just under the b pillar it WILL be rotten so you'll need to reconstruct it.
to join this piece up to the outer sill after carefull mesuring you'll need to pull it outwards slightly (so that it's pushing against the outer sill when held in place) drill 3-4 holes in the outer sill panel clamp the sill in place and weld the brace through the holes drilled.
don't release clamps till the pannel is tacked in place.
the rest is pritty straight forward.
cheers tom
another suggestion would be to try finding either a nos pannel or contract someone to make one using the old one as a template as the rares ones are no good.
i just fitted one of those up and had to reconstruct most of it as the shape was all wrong
when you remove the outer panel you'll find a brace just under the b pillar it WILL be rotten so you'll need to reconstruct it.
to join this piece up to the outer sill after carefull mesuring you'll need to pull it outwards slightly (so that it's pushing against the outer sill when held in place) drill 3-4 holes in the outer sill panel clamp the sill in place and weld the brace through the holes drilled.
don't release clamps till the pannel is tacked in place.
the rest is pritty straight forward.
cheers tom
-
parisian62
- Posts: 3997
- Joined: Wed May 11, 2005 2:19 pm
- State: NSW
- Location: Sydney
- Contact:
Rosco - I've got it now. They are in good condition...a minor miracle amongst a very holy car thanks to the dreaded rust...
Tom - thanks for that advice. We will be using a rares panel as NOS ones are very hard to find and when they do pop up are lots of $$$...
Any thoughts on the order of things? pans first or sill first? or doesn't matter...
Stewart
Tom - thanks for that advice. We will be using a rares panel as NOS ones are very hard to find and when they do pop up are lots of $$$...
Any thoughts on the order of things? pans first or sill first? or doesn't matter...
Stewart
Feelin free in a '61 FB.
Member of FB-EK Holden Car Club Of NSW Inc.
Check out the Rebuild of Old Timer
Member of FB-EK Holden Car Club Of NSW Inc.
Check out the Rebuild of Old Timer
-
captainbill
- Posts: 264
- Joined: Tue Jul 03, 2007 10:44 pm
- State: NOT ENTERED
- Location: Adelaide.sa
Hey stewart wouldnt think it matters wether you do sills or pans first as long as you do one at a time,cut one then weld in the new one.You are correct with the pillars.A tip,When cutting the hole in the floor make it atleast 30mm smaller than the pan size.This will allow you to clamp the pan in the spot you need it and then you can finall mark and cut.Thats a good tip.
-
parisian62
- Posts: 3997
- Joined: Wed May 11, 2005 2:19 pm
- State: NSW
- Location: Sydney
- Contact:
thanks CaptainBill and Tom. The rear drivers floor pan is hopefully going in on Saturday. I will be taking a few pics so will report back.
regards
Stewart
regards
Stewart
Feelin free in a '61 FB.
Member of FB-EK Holden Car Club Of NSW Inc.
Check out the Rebuild of Old Timer
Member of FB-EK Holden Car Club Of NSW Inc.
Check out the Rebuild of Old Timer
Stewart, I'm no expert in doing major rust repairs but I remember a post on the FE/FC forum a while back that mentions cutting floor pans and sills.
Basically it would appear the best way is to do it one section at a time.
One bloke from memory cut all the floor pans out and found that the car body alignment moved and he had to go to the trouble of realigning it before he could weld the new floor pans in again.
I guess if you welded braces in you could cut all pans out then but it would mean extra work and the braces would be a pain in the arse to weld around.
Something to think about,
Terry.
I can't think what to write here so this will do.
gday stew
as already said, I dont think it matters what order you do your repairs in
the guy that did my repairs(legend) took it one side at a time
no pics of floors unfortunately, only had 2 small front sections made
heres some pics for inspiration
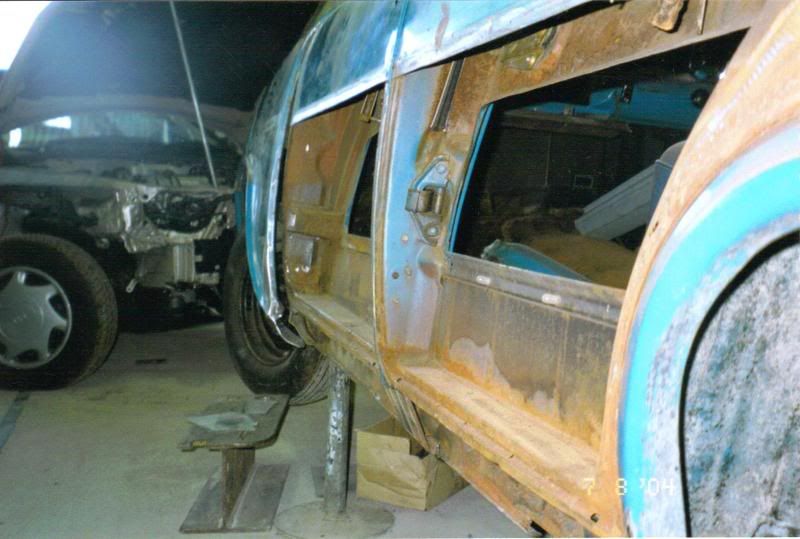
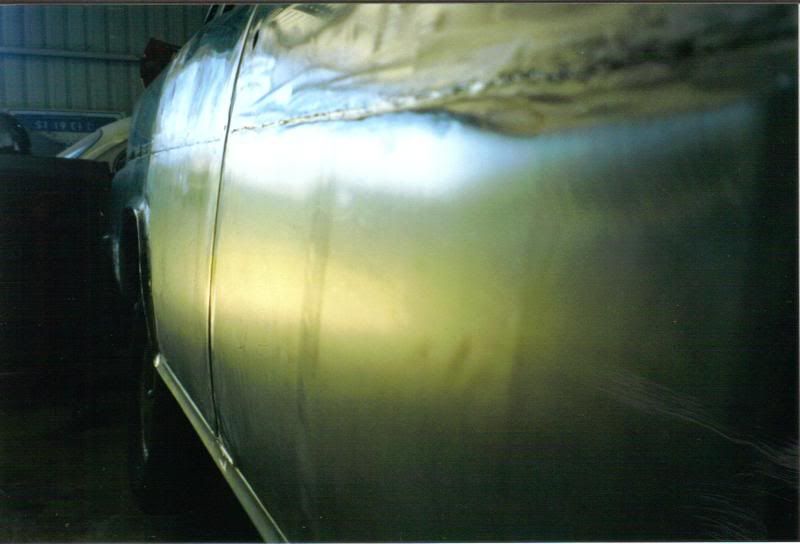
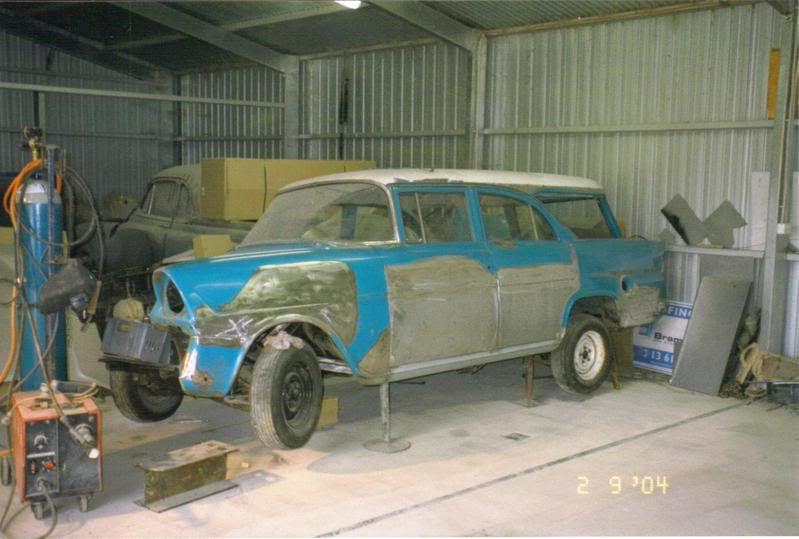
geez we've come a long way

regards ray
as already said, I dont think it matters what order you do your repairs in
the guy that did my repairs(legend) took it one side at a time
no pics of floors unfortunately, only had 2 small front sections made
heres some pics for inspiration


geez we've come a long way
regards ray
INVEST IN PRECIOUS METAL
pix
Nice pix Ray,
love the generous drain holes in the sills - my l/hs drains (4) were spot welded up by the production line - until I found them............... hope others take note....
When they're all painted and shined we'd never know what the jouney has involved. It's all part of the aura - yes you've come a long way............. as have many others - we love to see progress pix of..............
frats,
Rosco
-
parisian62
- Posts: 3997
- Joined: Wed May 11, 2005 2:19 pm
- State: NSW
- Location: Sydney
- Contact:
Hi Terry and Ray,
Yes we had planned to only do one pan at a time and one sill at a time in case of movement.
those pics must bring back a few memories for you Ray. That first pic is a good one of the inner section beneath the B pillar that Tom was referring to. Will be very careful cutting in that area.
regards
Stewart
Feelin free in a '61 FB.
Member of FB-EK Holden Car Club Of NSW Inc.
Check out the Rebuild of Old Timer
Member of FB-EK Holden Car Club Of NSW Inc.
Check out the Rebuild of Old Timer
-
parisian62
- Posts: 3997
- Joined: Wed May 11, 2005 2:19 pm
- State: NSW
- Location: Sydney
- Contact:
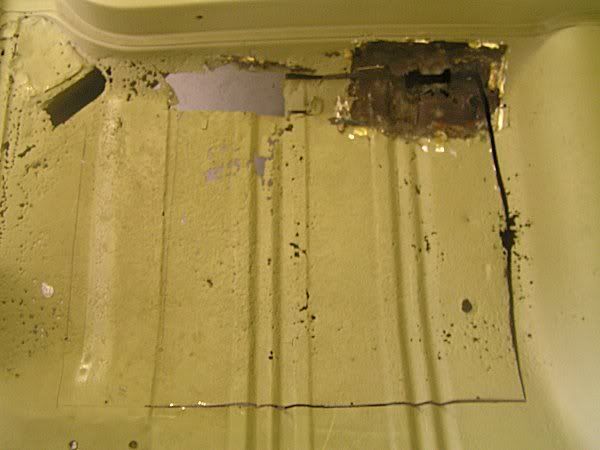
This is what we started with...notice the 'patch' on the top right corner...the other holes are 'patches' I cut out before it got blasted and primed...
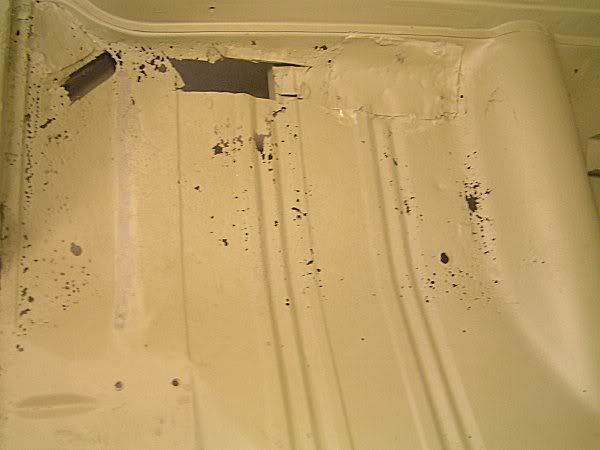
Cutting out...trial fit size...
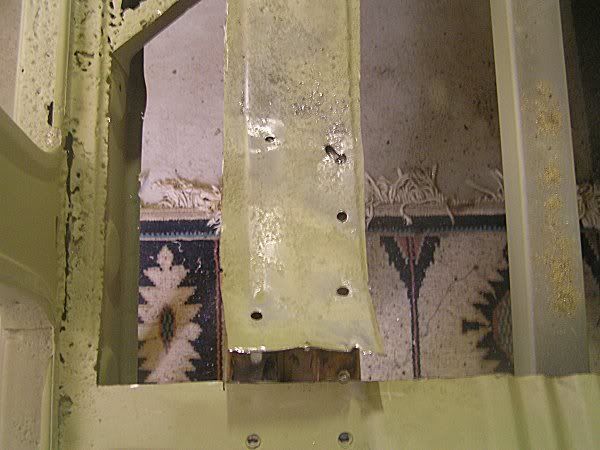
removing spot welds
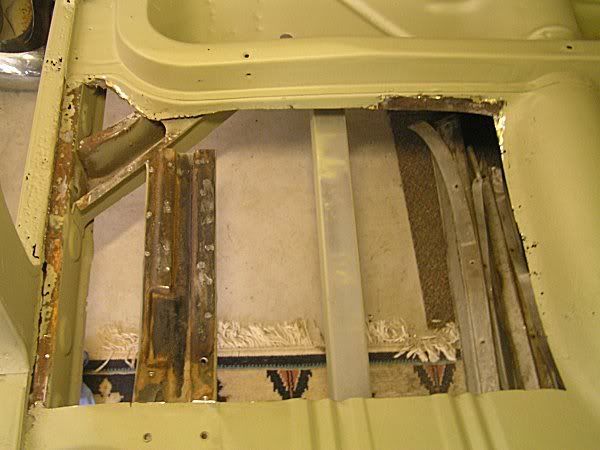
finished trial fit 'hole'...more metal still needs to come out before the final fit of the pan...
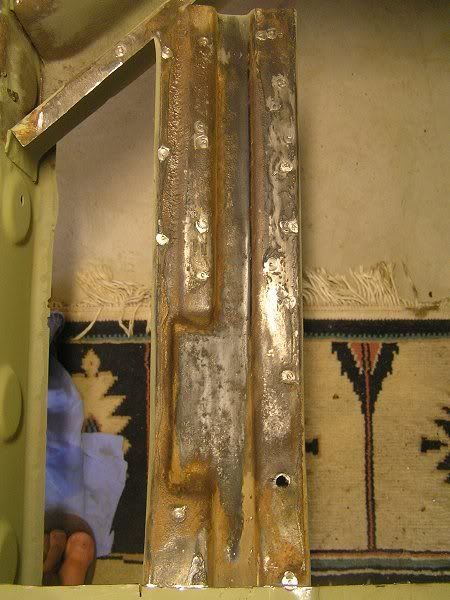
underfloor bracing...
...of course more questions...
 ...whats the best way to clean up the underfloor brace? Body sealer is still on the brace which I intend to replace. I've tried a wire wheel but am going to be there till the month of Sundays...
...is it OK to whizz it over with a grinding wheel on a grinder or will I be removing too much metal...?
...rust convertor on the rust areas...?
...any other options/suggestions?
regards
Stewart

Cutting out...trial fit size...

removing spot welds

finished trial fit 'hole'...more metal still needs to come out before the final fit of the pan...

underfloor bracing...

...of course more questions...
...is it OK to whizz it over with a grinding wheel on a grinder or will I be removing too much metal...?
...rust convertor on the rust areas...?
...any other options/suggestions?
regards
Stewart
Feelin free in a '61 FB.
Member of FB-EK Holden Car Club Of NSW Inc.
Check out the Rebuild of Old Timer
Member of FB-EK Holden Car Club Of NSW Inc.
Check out the Rebuild of Old Timer
gday stewart & rosco
yea some good memories there, glad I kept a bit of a photo record of it all....as they say 'a picture tells a thousand words'
also did a lot of rust proofing during these stages, good opportunity while its all exposed-I used cold galv (zinc rich spray) and a bit of spray on(odourless) fish oil
and rosco, theres nothing worse than hearing water spashing around in your sills/doors due to blocked drain holes.....or welded ones
its good to be able to ensure these things dont happen again
cheers ray
INVEST IN PRECIOUS METAL