Thanks guys,
The issue i have is there is no weight on my axle yet so i cant anticipate where the front traction rod bracket will end up.
I can however do some mathematical calculations and get a good indication of spring travel and bump stop clearance, i just need a height as a starting point. The spring retaining plate dosent move in relation to the diff so thats ok to work out, the frontspring hanger however moves up down to the road hence my brackets may be to low if the body is to low etc
Thanks in advance for a measurement that will help me out.
Regards greg
Chev EK
Re: Chev EK
So many cars so little time!
Re: Chev EK
Well another good weekend weatherwise for working in the shed !!
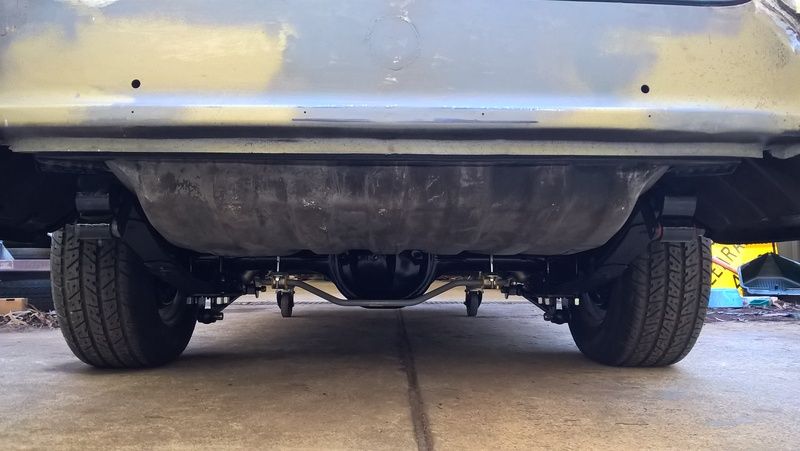
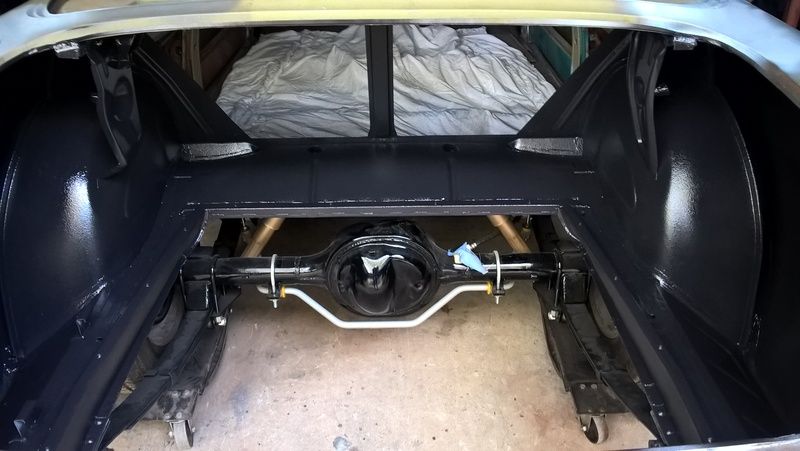
I had to relieve part of my fuel tank to fit the fraud 9 inch, when I first installed the tank it was with the original diff and I just didn't take into account the extra size of the crown wheel
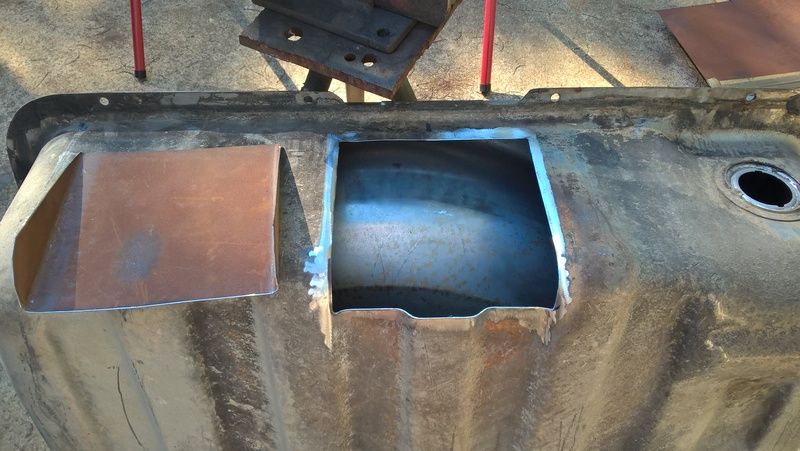
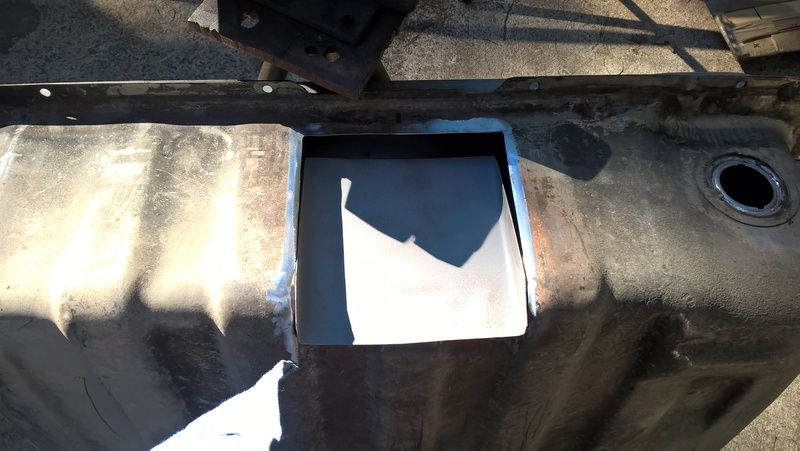
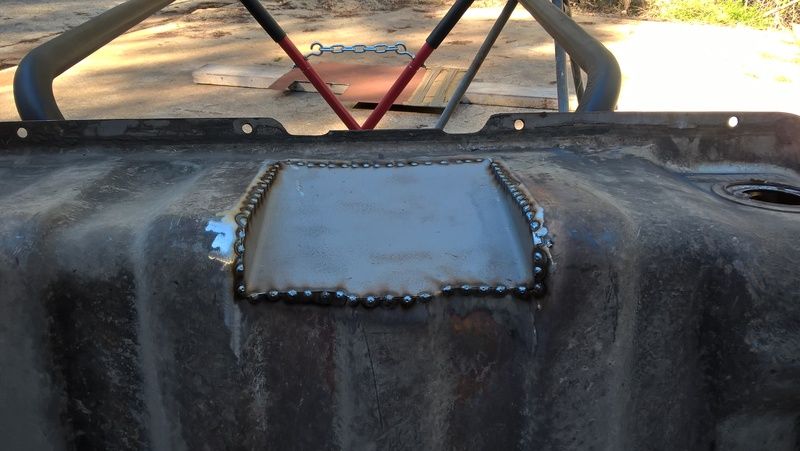
Tank fits and all the rear hardware is in, I have to do it this way so I can wheel it around to the paint shop. This still will be a couple of months away I reckon.
Guys DO NOT CONSIDER CUTTING OR WELDING ANY FUEL TANK UNLESS YOU KNOW WHAT YOU ARE DOING! THIS CAN BE FATAL !!!!
Sorry for the warning but it must be said.
Till next time Greg
I had to relieve part of my fuel tank to fit the fraud 9 inch, when I first installed the tank it was with the original diff and I just didn't take into account the extra size of the crown wheel


Tank fits and all the rear hardware is in, I have to do it this way so I can wheel it around to the paint shop. This still will be a couple of months away I reckon.
Guys DO NOT CONSIDER CUTTING OR WELDING ANY FUEL TANK UNLESS YOU KNOW WHAT YOU ARE DOING! THIS CAN BE FATAL !!!!
Sorry for the warning but it must be said.
Till next time Greg
So many cars so little time!
-
parisian62
- Posts: 3997
- Joined: Wed May 11, 2005 2:19 pm
- State: NSW
- Location: Sydney
- Contact:
Re: Chev EK
Great stuff Greg! 
I'm putting in an early 'bags going for a ride in it when you are finished'...

I'm putting in an early 'bags going for a ride in it when you are finished'...
Feelin free in a '61 FB.
Member of FB-EK Holden Car Club Of NSW Inc.
Check out the Rebuild of Old Timer
Member of FB-EK Holden Car Club Of NSW Inc.
Check out the Rebuild of Old Timer
Re: Chev EK
Well guys I must admit the weather is finally closing in ! I hope all you southerners are wrapped up and keeping warm !
Stuffed around as usual in the shed most of the weekend and although it doesn't look much I did achieve a fair bit.
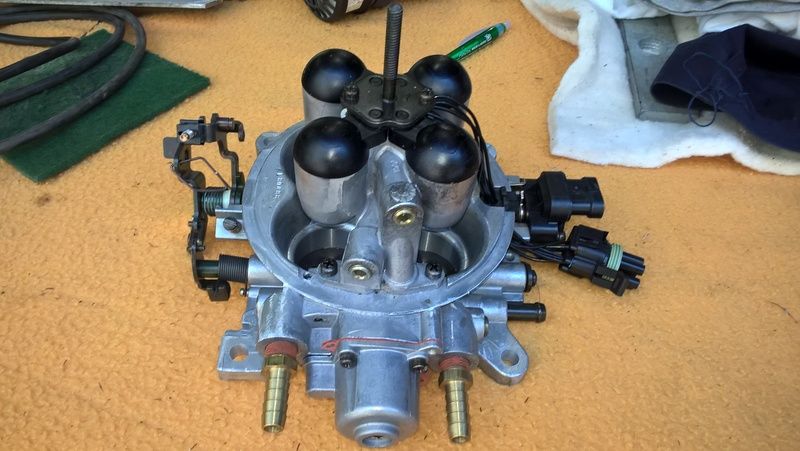
I'm running some holley pro-jection so I had to sort out the fuel line sizes, the breathing of the tank and all the necessary returns and splash restrictors. Actually now I'm typing I just remembered I need to earth the filer neck as it has 2 hoses one on the tank and one on the jag filler cap. Because its built this way and stands alone its susceptible to static and sparks !!! Whoops
The projection
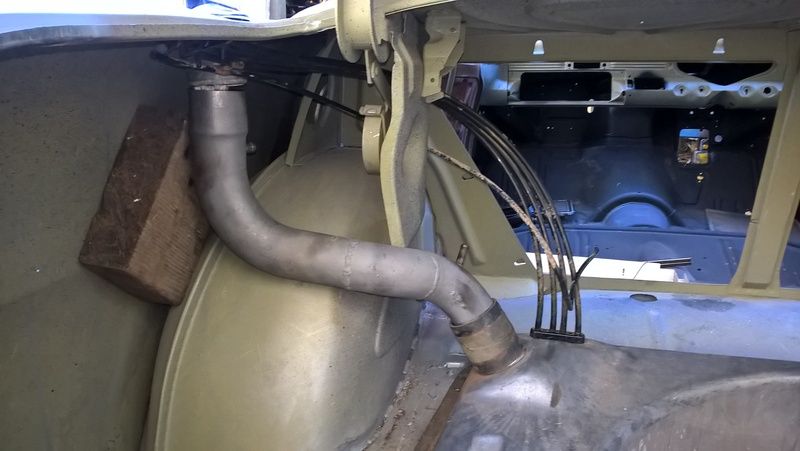
The fuel neck with 2 splash barbs and a return fuel line barb and also the pollution attachments that I will be using as a breather instead.
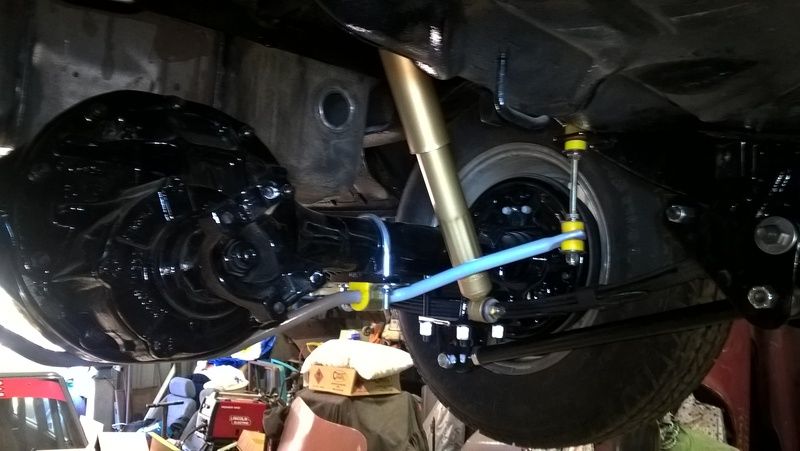
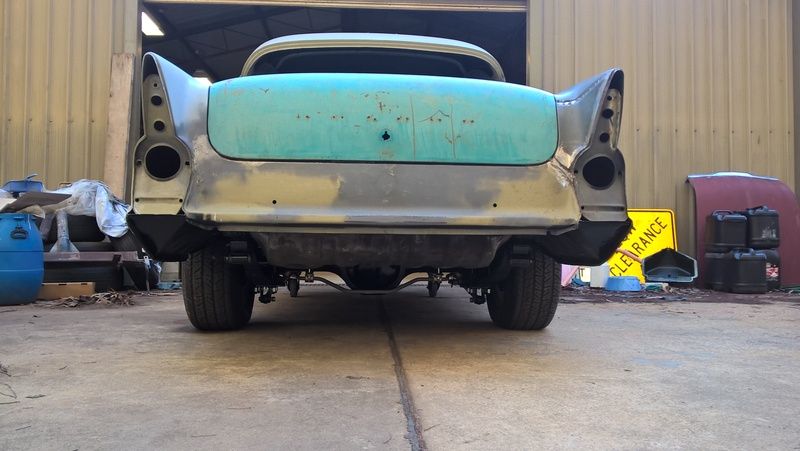
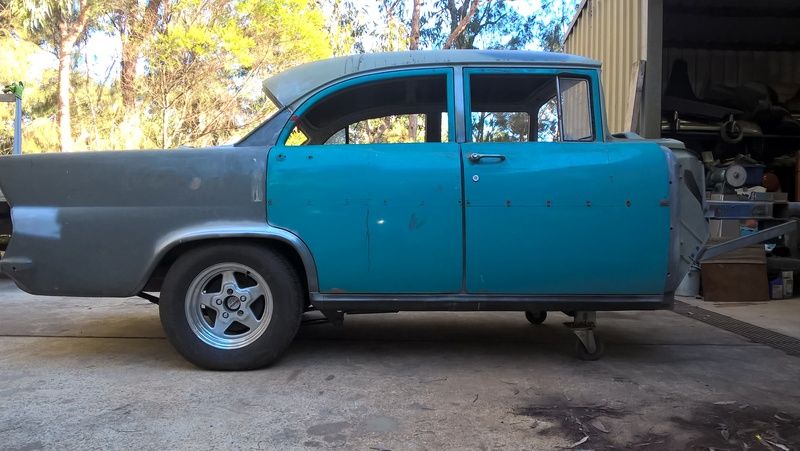
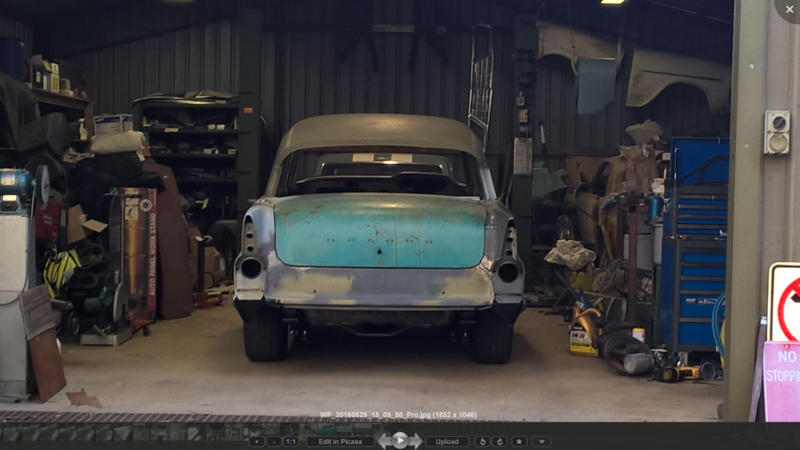
Some rear shots as well as a side shot just to keep the interest going !
Lastly a shed full of shit and a EK Holden
Regards Greg
Stuffed around as usual in the shed most of the weekend and although it doesn't look much I did achieve a fair bit.
I'm running some holley pro-jection so I had to sort out the fuel line sizes, the breathing of the tank and all the necessary returns and splash restrictors. Actually now I'm typing I just remembered I need to earth the filer neck as it has 2 hoses one on the tank and one on the jag filler cap. Because its built this way and stands alone its susceptible to static and sparks !!! Whoops
The projection

The fuel neck with 2 splash barbs and a return fuel line barb and also the pollution attachments that I will be using as a breather instead.

Some rear shots as well as a side shot just to keep the interest going !


Lastly a shed full of shit and a EK Holden

Regards Greg
Last edited by EK283 on Mon May 30, 2016 6:49 pm, edited 4 times in total.
So many cars so little time!
Re: Chev EK
Looking good mate, it's good to spend a day getting small things done.
Sent from my D5303 using Tapatalk
Sent from my D5303 using Tapatalk
[img]http://i47.photobucket.com/albums/f177/trevwood/WOOFTOsmall.jpg[/img]
Woofto Car Club Member No3
Woofto Car Club Member No3

Re: Chev EK
looking really good, be interesting to see how the pro-jection goes 
Re: Chev EK
This thing sure is badass
looking good mate
looking good mate
FB-Special
Big block 161
Holley sniper EFI.
Vintage air ducted heat and cool.
Ek auto column shift.
Lj diff and reverse lights.
WA FB~EK Car Club Member.
Big block 161
Holley sniper EFI.
Vintage air ducted heat and cool.
Ek auto column shift.
Lj diff and reverse lights.
WA FB~EK Car Club Member.
Re: Chev EK
Well guys,
There goes another year bloody hell !!
I am finally done with my house and holidays and have turned 50 as well !!!
I am honestly sick of looking at other peoples cars so I need to finish the EK this year, this is the goal anyway.
Dragged the car out blew some dust off and got stuck into the lead again, took my time this time and I have mastered it to the point of more lead on the car and less on the ground.
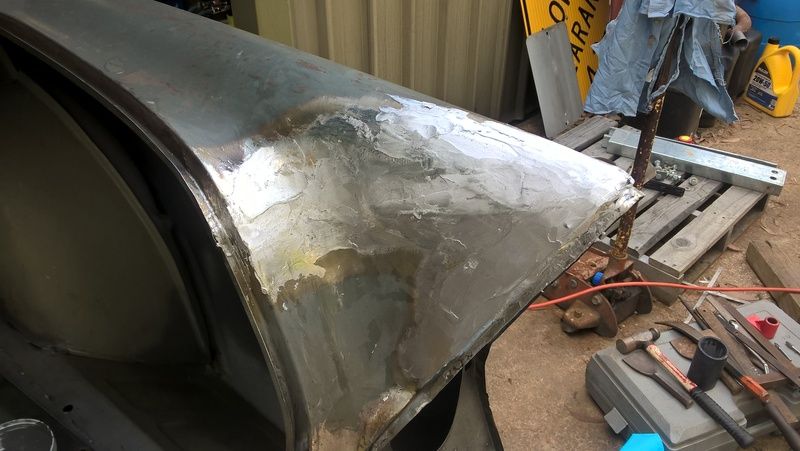
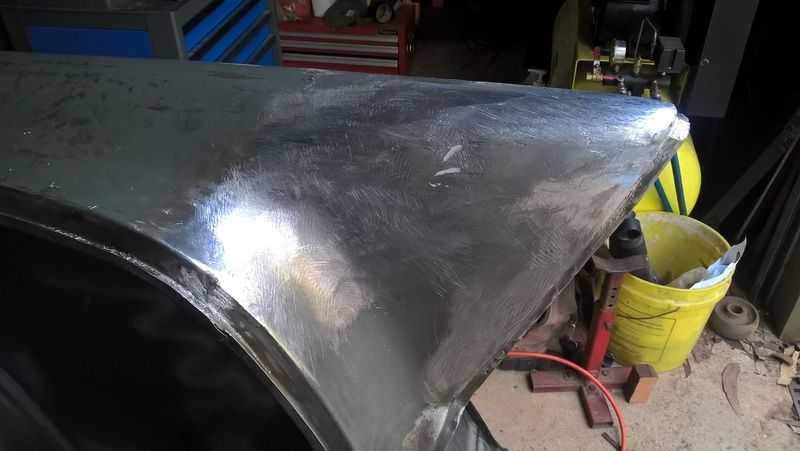
Filled up ok but I have a couple of shallow low spots, I could fill with putty or I might add some more lead, I have got a feel for it now in regards to the melting points and am getting more confident with it.
Any way chop chop I've got to do more so back to the shed I go.
Greg
So many cars so little time!
Re: Chev EK
Good stuff mate - keep at it !!
I started with nothing and still have most of it left.
Foundation member #61 of FB/EK Holden club of W.A.
Foundation member #61 of FB/EK Holden club of W.A.

Re: Chev EK
Looking Good Greg, good to see you back on it.
Cheers
Nathan
Cheers
Nathan
FB/EK Holden Car Club of W.A. Inc
Foundation Member
Foundation Member
Re: Chev EK
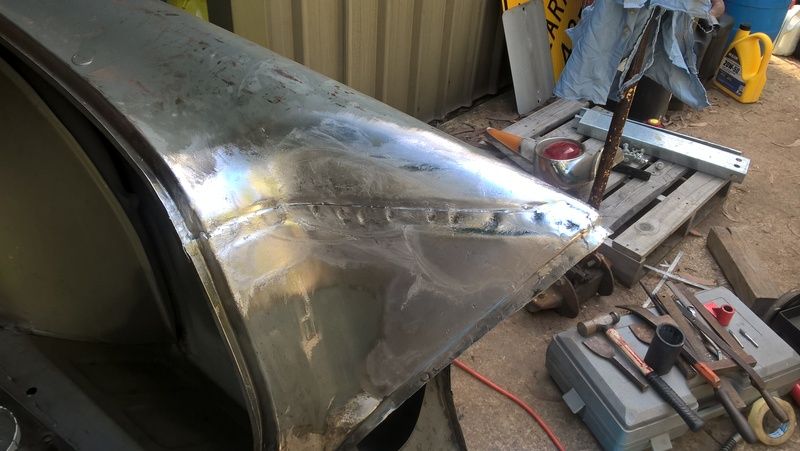
Thanks for the motivation guys, I do like how you have also stuck to your projects over the long time frames !!!
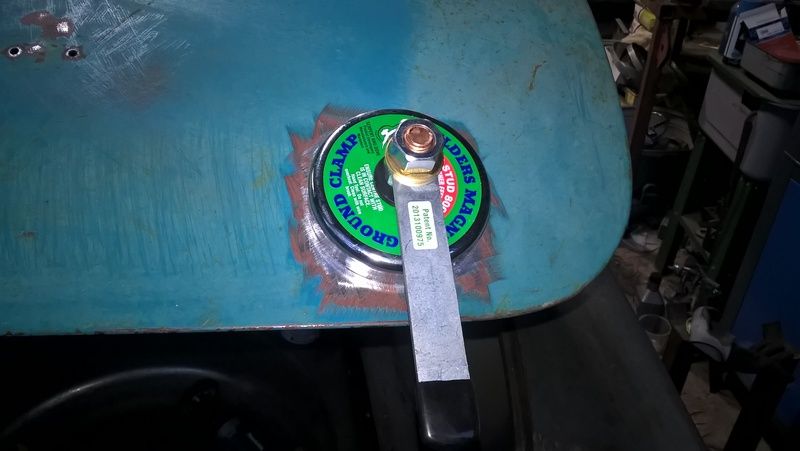
Got to the shed after work today, bought one of these magnetic earth for welding mate tops !!!!
Ground out about 4mm re welded so the gaps are right, bloody ek is just not consistent with the gaps anywhere !
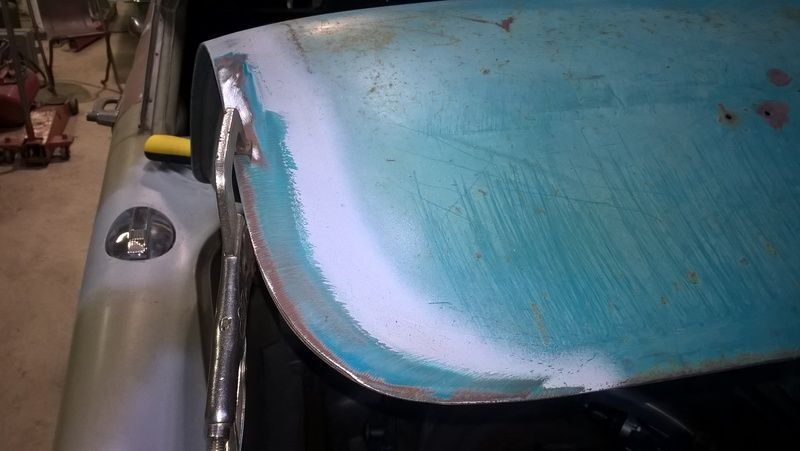
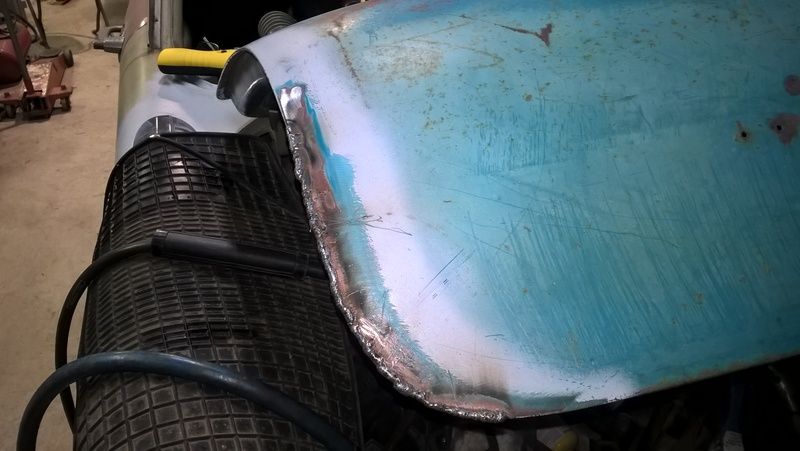

Tidy up tomorrow then next !!!!!!
Regards Greg
Got to the shed after work today, bought one of these magnetic earth for welding mate tops !!!!

Ground out about 4mm re welded so the gaps are right, bloody ek is just not consistent with the gaps anywhere !


Tidy up tomorrow then next !!!!!!
Regards Greg
So many cars so little time!
-
In the Shed
- Posts: 2265
- Joined: Wed May 16, 2012 10:18 pm
- State: SA
- Location: South Australia
Re: Chev EK
Good stuff Greg,
I'll never look at another FB or EK the same after seeing the level of detail you are going to with the panel gaps. It's probably fair to say that GMH had not set up a Quality Team in the early 60's!
Regards
Stephen
I'll never look at another FB or EK the same after seeing the level of detail you are going to with the panel gaps. It's probably fair to say that GMH had not set up a Quality Team in the early 60's!
Regards
Stephen
A day in the shed beats a day at work!
Re: Chev EK
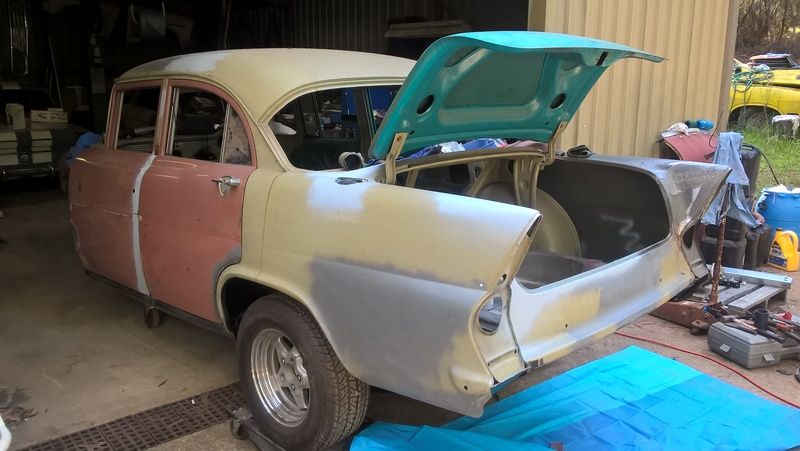
Finger hurting time, rubbed all the boot back including all the surface rust and old primer,

Seam sealed
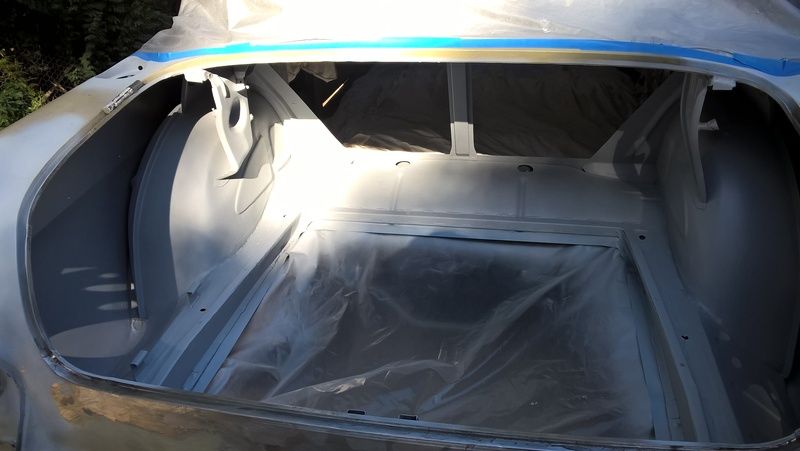
Primed with DP40 PPG
Stone guard and then a coat of Clinker grey, you can really tell the difference between the colours black etc.
I know some people hate stone guard but I like it, looks old and industrial just like the EK itself !!!!
Regards Greg

Seam sealed

Primed with DP40 PPG

Stone guard and then a coat of Clinker grey, you can really tell the difference between the colours black etc.
I know some people hate stone guard but I like it, looks old and industrial just like the EK itself !!!!
Regards Greg
So many cars so little time!
-
thebrotherj

- Posts: 695
- Joined: Wed Aug 21, 2013 4:09 pm
- State: NSW
- Location: Sydney
Re: Chev EK
Just catching up on this build now, it's looking great Greg! Kudos for having a go at lead wiping too. Looking froward to more updates